万字教程:Python Word 文档自动化
Posted Python学习与数据挖掘
tags:
篇首语:本文由小常识网(cha138.com)小编为大家整理,主要介绍了万字教程:Python Word 文档自动化相关的知识,希望对你有一定的参考价值。
来源:超级大洋葱806
欢迎关注 ,专注Python、数据分析、数据挖掘、好玩工具!
环境安装
使用Python操作word大部分情况都是写操作,也有少许情况会用到读操作,在本次教程中都会进行讲解,本次课程主要用到以下4个库,请大家提前安装。本文内容较长,文末有详细案例,欢迎收藏学习,喜欢点赞支持。
喜欢技术交流的可以看文末。
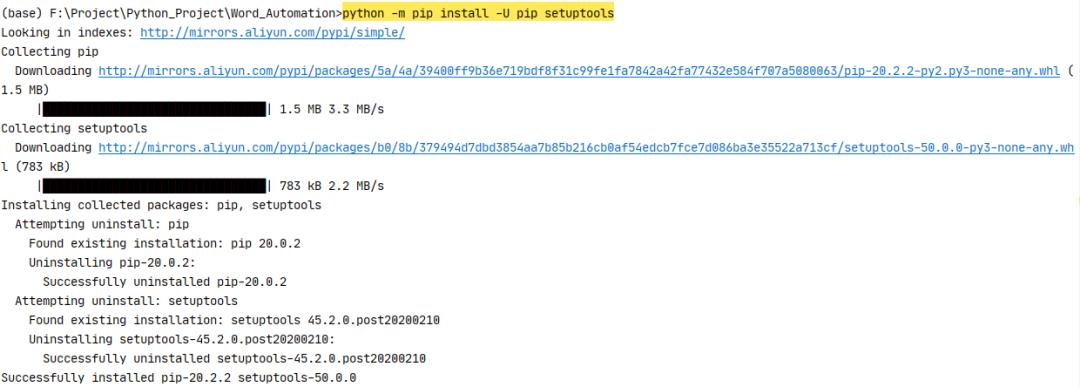
升级pip(便于安装最新库)
python -m pip install -U pip setuptools
python-docx(我们大部分操作都是使用此库)
安装方法:
pip install python-docx

使用方法:
from docx import Documentfrom docx.shared import Inches
官方文档:
https://python-docx.readthedocs.io/en/latest/index.html
win32com(主要用作doc转docx格式转换用)
安装方法:
pip install pypiwin32

使用方法:
import win32comfrom win32com.client import Dispatch, constants
官方文档:
https://docs.microsoft.com/en-us/dotnet/api/microsoft.office.interop.word?view=word-pia
mailmerge(用作按照模板生成大量同类型文档)
安装方法:
pip install docx-mailmerge

使用方法:
from mailmerge import MailMerge
官方文档:
https://pypi.org/project/docx-mailmerge/
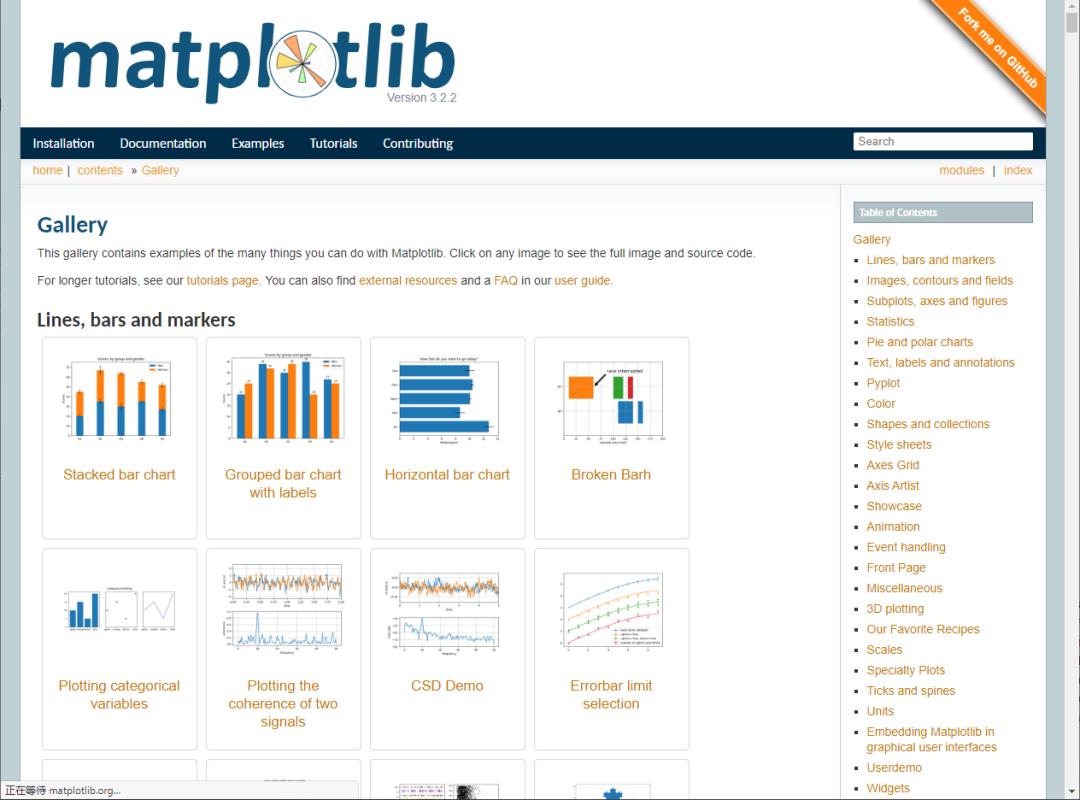
matplotlib(Python 的绘图库,本期简单讲解,后期会有专门的课程)
安装方法:
pip install matplotlib

使用方法:
import matplotlib.pyplot as plt
官方文档:
https://matplotlib.org/3.2.2/tutorials/introductory/sample_plots.html
Python-docx 新建文档
示例代码1:
from docx import Document
document = Document()
document.save('new.docx')
效果如下:

示例代码 0.1 Python-docx新建文档.py:
from docx import Document

def GenerateNewWord(filename):
    document = Document()
    document.save(filename)

if __name__ == "__main__":
    print("大家好!我们今天开始学习word文档自动化")
    print("我们先来直接生成一个名为‘new.docx’的文档")
    document = Document()
    document.save('new.docx')

    print("没错,里面什么都没有")

    # 我是华丽的分隔符

    print("我们使用函数生成一个word文档试试")
    newname = '使用函数生成的文档.docx'
    GenerateNewWord(newname)
效果如下:

Python-docx 编辑已存在文档
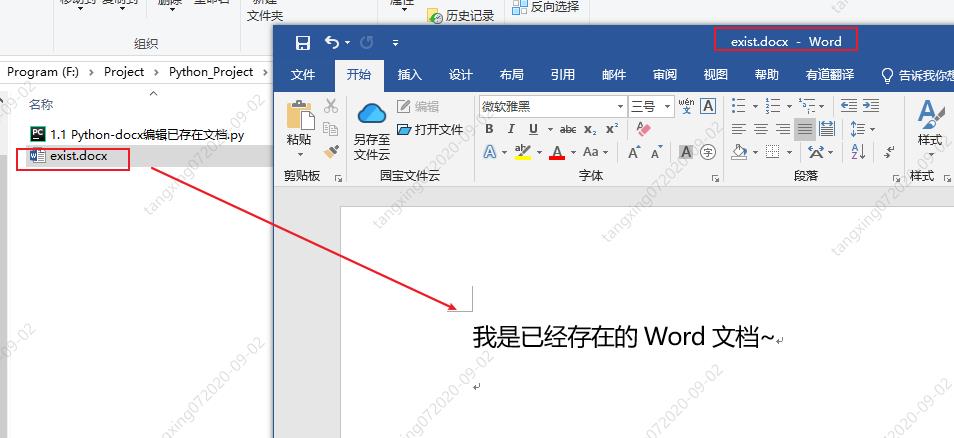
我们很多时候需要在已存在的word文档上添加自己的内容,那么我们赶紧看看应该怎样操作吧~
旧文档:
from docx import Document
document = Document('exist.docx')
document.save('new.docx')
也许你会说,没有没搞错,就这三句话?是的,就这三句,你就完成了旧文档的复制,如果你想修改,直接添加内容就行了呢!
效果如下:

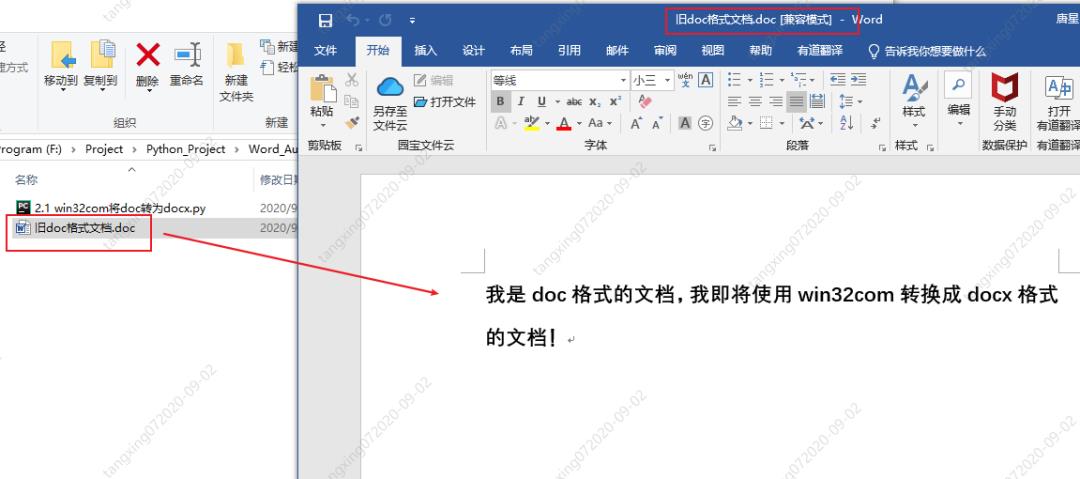
win32com 将 doc 转为 docx
旧文档:
示例代码:
import os
from win32com import client as wc

def TransDocToDocx(oldDocName,newDocxName):
    print("我是 TransDocToDocx 函数")
    # 打开word应用程序
    word = wc.Dispatch('Word.Application')

    # 打开 旧word 文件
    doc = word.Documents.Open(oldDocName)

    # 保存为 新word 文件,其中参数 12 表示的是docx文件
    doc.SaveAs(newDocxName, 12)

    # 关闭word文档
    doc.Close()
    word.Quit()

    print("生成完毕!")

if __name__ == "__main__":
    # 获取当前目录完整路径
    currentPath = os.getcwd()
    print("当前路径为:",currentPath)

    # 获取 旧doc格式word文件绝对路径名
    docName = os.path.join(currentPath,'旧doc格式文档.doc')
    print("docFilePath = ", docName)

    # 设置新docx格式文档文件名
    docxName = os.path.join(currentPath,'新生成docx格式文档.docx')

    TransDocToDocx(docName,docxName)
效果如下:

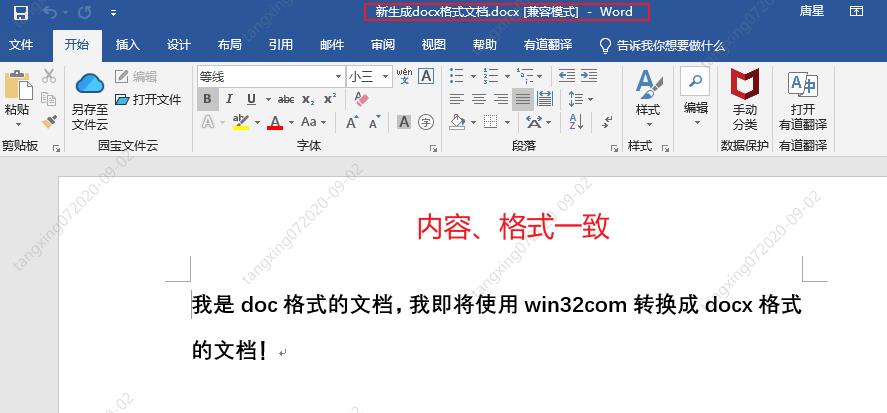
win32com 操作 word
打开新的word文档并添加内容
示例代码:
import win32com
from win32com.client import Dispatch, constants
import os

# 创建新的word文档
def funOpenNewFile():
    word = Dispatch('Word.Application')
    # 或者使用下面的方法,使用启动独立的进程:
    # word = DispatchEx('Word.Application')

    # 如果不声明以下属性,运行的时候会显示的打开word
    word.Visible = 1  # 0:后台运行 1:前台运行(可见)
    word.DisplayAlerts = 0  # 不显示,不警告

    # 创建新的word文档
    doc = word.Documents.Add()

    # 在文档开头添加内容
    myRange1 = doc.Range(0, 0)
    myRange1.InsertBefore('Hello word\\n')

    # 在文档末尾添加内容
    myRange2 = doc.Range()
    myRange2.InsertAfter('Bye word\\n')

    # 在文档i指定位置添加内容
    i = 0
    myRange3 = doc.Range(0, i)
    myRange3.InsertAfter("what's up, bro?\\n")

    # doc.Save()  # 保存
    doc.SaveAs(os.getcwd() + "\\\\funOpenNewFile.docx")  # 另存为
    doc.Close()  # 关闭 word 文档
    word.Quit()  # 关闭 office


if __name__ == '__main__':

    print("当前文件路径名:",os.getcwd())

    print("调用funOpenNewFile()")
    funOpenNewFile()
效果如下:
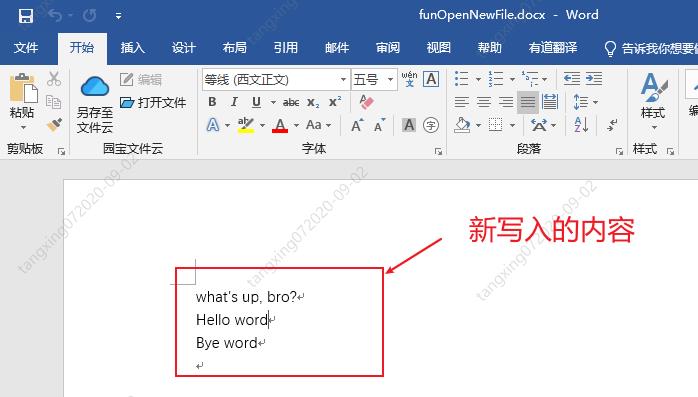
打开已存在word文档并添加内容
前提条件:
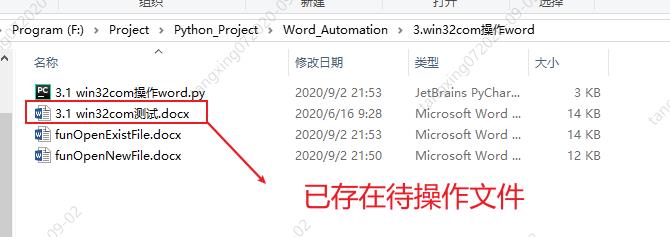
示例代码:
import win32com
from win32com.client import Dispatch, constants
import os

# 打开已存在的word文件
def funOpenExistFile():
    word = Dispatch('Word.Application')
    # 或者使用下面的方法,使用启动独立的进程:
    # word = DispatchEx('Word.Application')

    # 如果不声明以下属性,运行的时候会显示的打开word
    word.Visible = 1  # 0:后台运行 1:前台运行(可见)
    word.DisplayAlerts = 0  # 不显示,不警告

    doc = word.Documents.Open(os.getcwd() + "\\\\3.1 win32com测试.docx") # 打开一个已有的word文档

    # 在文档开头添加内容
    myRange1 = doc.Range(0, 0)
    myRange1.InsertBefore('Hello word\\n')

    # 在文档末尾添加内容
    myRange2 = doc.Range()
    myRange2.InsertAfter('Bye word\\n')

    # 在文档i指定位置添加内容
    i = 0
    myRange3 = doc.Range(0, i)
    myRange3.InsertAfter("what's up, bro?\\n")

    # doc.Save()  # 保存
    doc.SaveAs(os.getcwd() + "\\\\funOpenExistFile.docx")  # 另存为
    doc.Close()  # 关闭 word 文档
    word.Quit()  # 关闭 office

if __name__ == '__main__':
    print("当前文件路径名:",os.getcwd())

    print("调用funOpenExistFile()")
    funOpenExistFile()
效果如下:
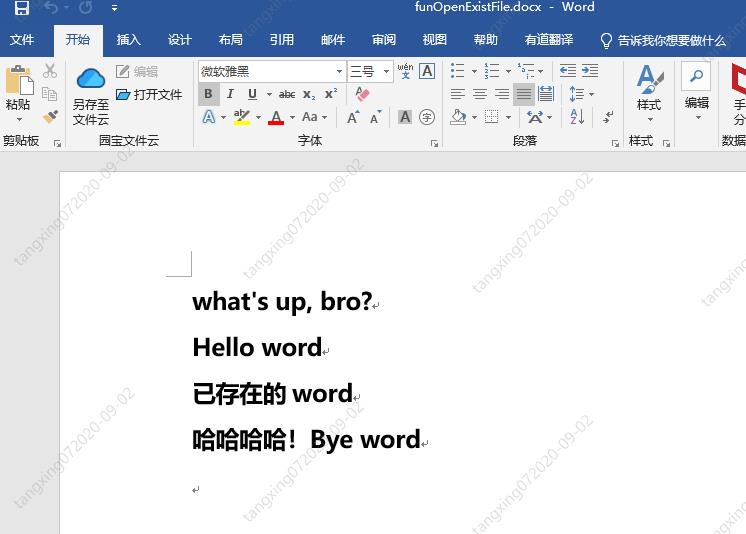
转换word为pdf
示例代码:
import win32com
from win32com.client import Dispatch, constants
import os

# 生成Pdf文件
def funGeneratePDF():
    word = Dispatch("Word.Application")
    word.Visible = 0  # 后台运行,不显示
    word.DisplayAlerts = 0  # 不警告
    doc = word.Documents.Open(os.getcwd() + "\\\\3.3 win32com转换word为pdf等格式.docx") # 打开一个已有的word文档
    doc.SaveAs(os.getcwd() + "\\\\3.3 win32com转换word为pdf等格式.pdf", 17)  # txt=4, html=10, docx=16, pdf=17
    doc.Close()
    word.Quit()

if __name__ == '__main__':
    funGeneratePDF()
效果如下:
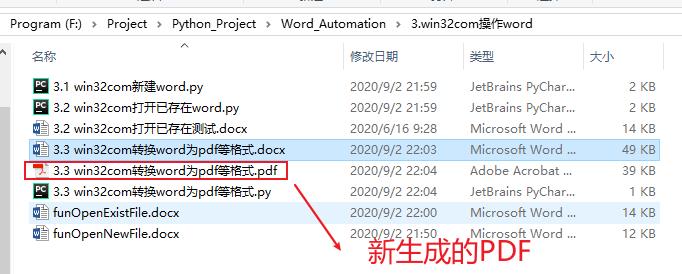
Python-docx 操作 word
官方文档:(最权威指南,没有之一)
https://python-docx.readthedocs.io/en/latest/
Python-docx官方例程
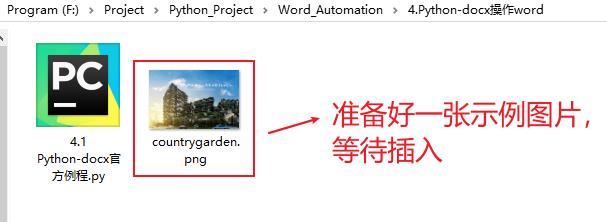
前提条件:
示例代码:
from docx import Document
from docx.shared import Inches

document = Document()

document.add_heading('Document Title', 0)

p = document.add_paragraph('A plain paragraph having some ')
p.add_run('bold').bold = True
p.add_run(' and some ')
p.add_run('italic.').italic = True

document.add_heading('Heading, level 1', level=1)
document.add_paragraph('Intense quote', style='Intense Quote')

document.add_paragraph(
    'first item in unordered list', style='List Bullet'
)
document.add_paragraph(
    'first item in ordered list', style='List Number'
)

document.add_picture('countrygarden.png', width=Inches(1.25))

records = (
    (3, '101', 'Spam'),
    (7, '422', 'Eggs'),
    (4, '631', 'Spam, spam, eggs, and spam')
)

table = document.add_table(rows=1, cols=3)
hdr_cells = table.rows[0].cells
hdr_cells[0].text = 'Qty'
hdr_cells[1].text = 'Id'
hdr_cells[2].text = 'Desc'
for qty, id, desc in records:
    row_cells = table.add_row().cells
    row_cells[0].text = str(qty)
    row_cells[1].text = id
    row_cells[2].text = desc

document.add_page_break()

document.save('4.1 Python-docx官方例程.docx')
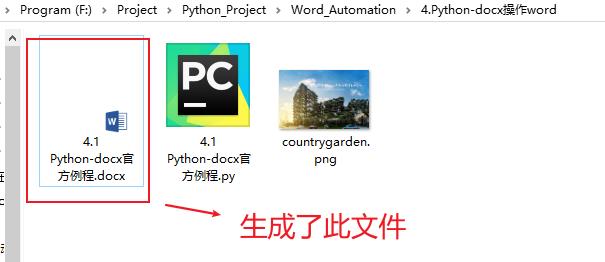
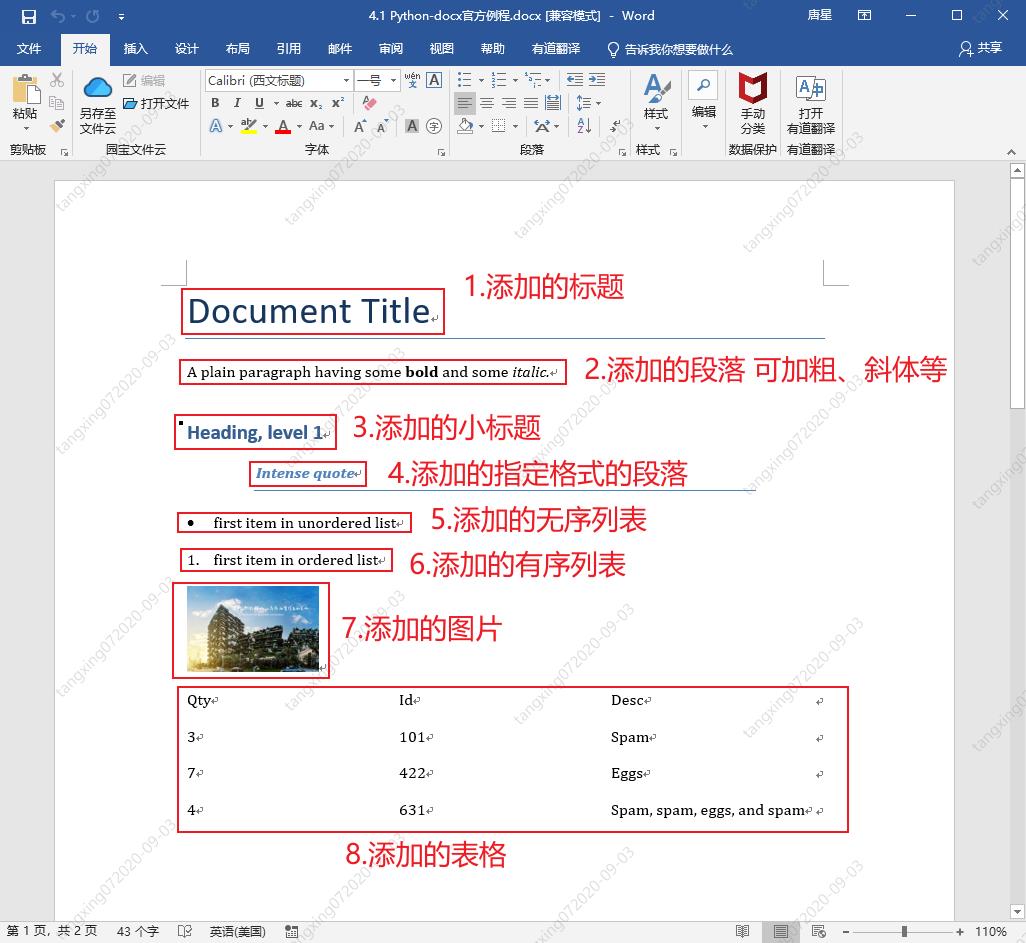
最终效果:

Python-docx官方例程解析
导入库操作
from docx import Document
导入英寸单位操作(可用于指定图片大小、表格宽高等)
from docx.shared import Inches
新建一个文档
document = Document()
加载旧文档(用于修改或添加内容)
document = Document('exist.docx')
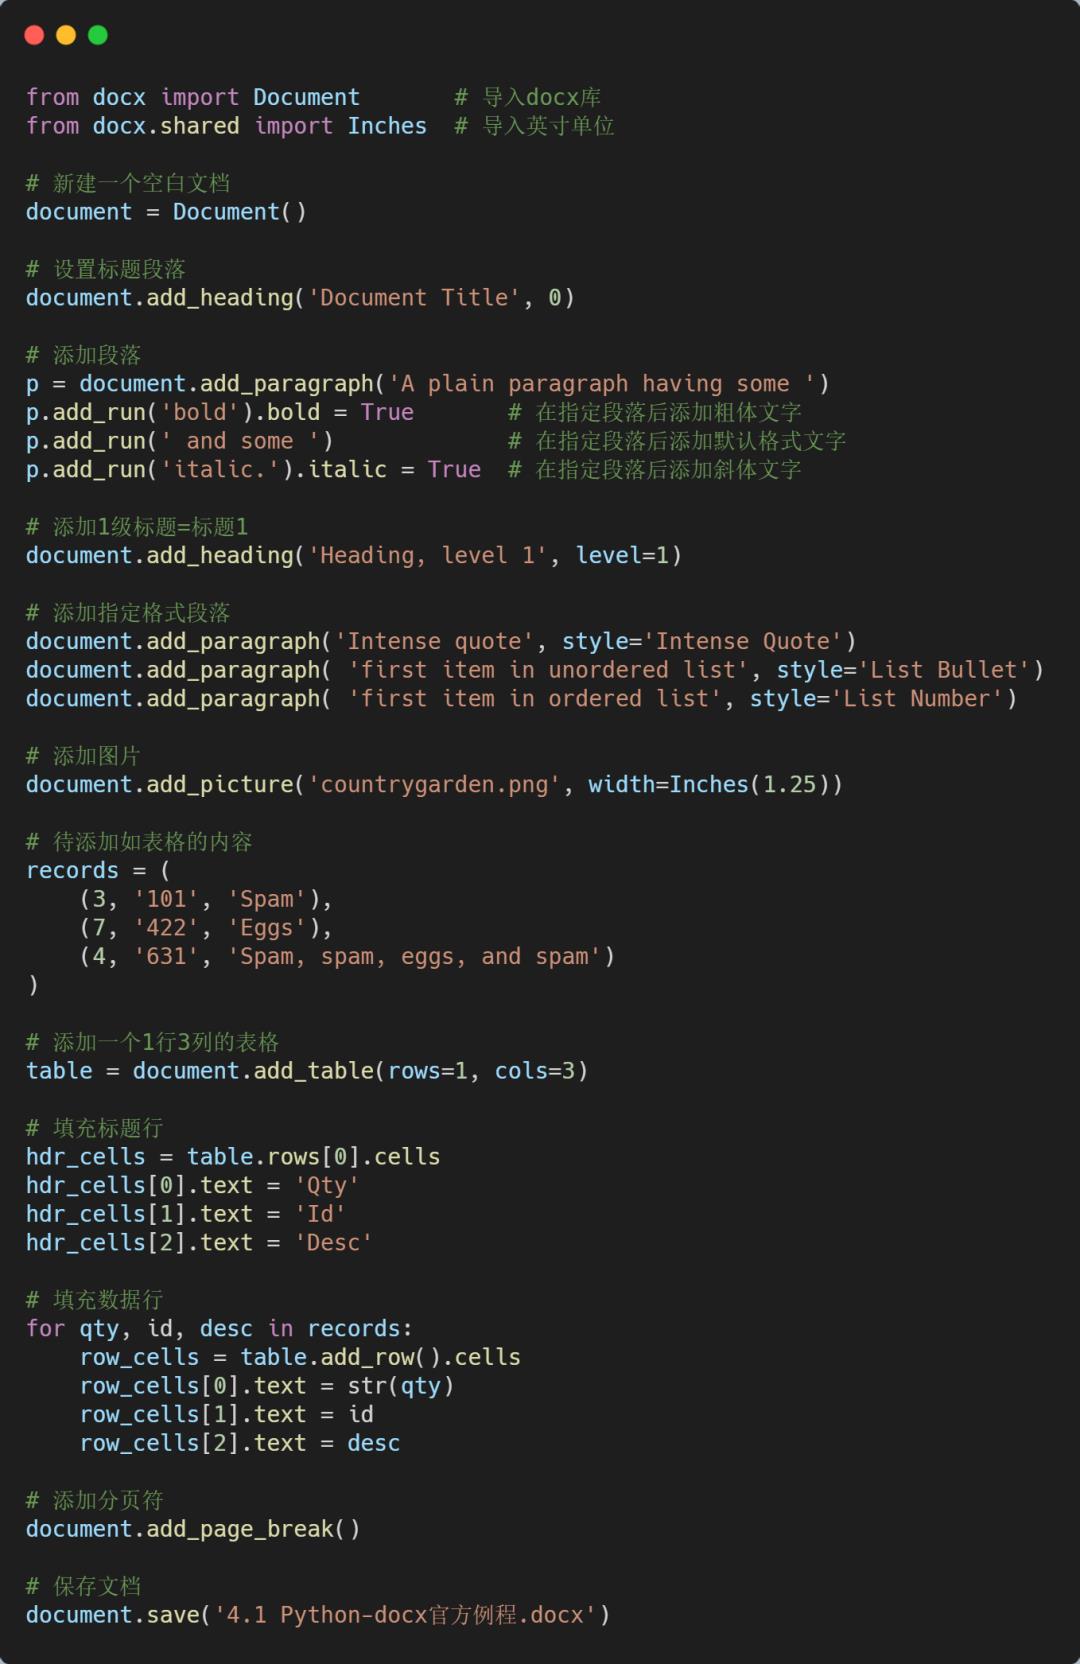
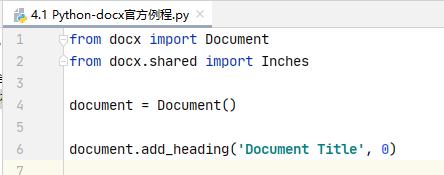
添加标题段落
document.add_heading('Document Title', 0)

添加段落操作
段落在 Word 中是基本内容。它们用于正文文本,也用于标题和项目列表(如项目符号)。
p = document.add_paragraph('A plain paragraph having some ')
在指定段落上添加内容
p.add_run('bold').bold = True # 添加粗体文字p.add_run(' and some ') # 添加默认格式文字p.add_run('italic.').italic = True # 添加斜体文字

添加标题操作
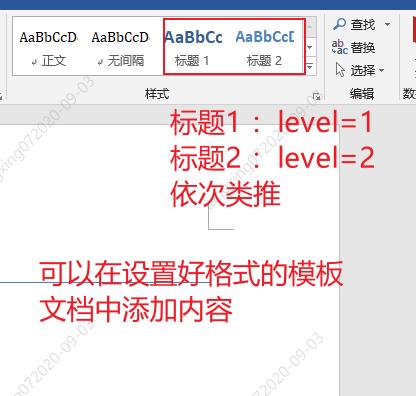
等级1-9 也就是标题1-标题9,我们可以在旧文档中将标题格式设置好,使用Python-docx打开旧文档,再添加相应等级标题即可。
document.add_heading('Heading, level 1', level=1)
添加指定样式段落
样式详情:
https://python-docx.readthedocs.io/en/latest/user/styles-understanding.html#understanding-styles
document.add_paragraph('Intense quote', style='Intense Quote')# 以下两句的含义等同于上面一句p = document.add_paragraph('Intense quote')p.style = 'Intense Quote'
添加无序列表操作
document.add_paragraph( 'first item in unordered list', style='List Bullet')
添加有序列表操作
document.add_paragraph( 'first item in ordered list', style='List Number')

添加图片操作
第一个参数为图片路径,需要正确无误
第二个参数为图片大小,单位英寸
document.add_picture('countrygarden.png', width=Inches(1.25))
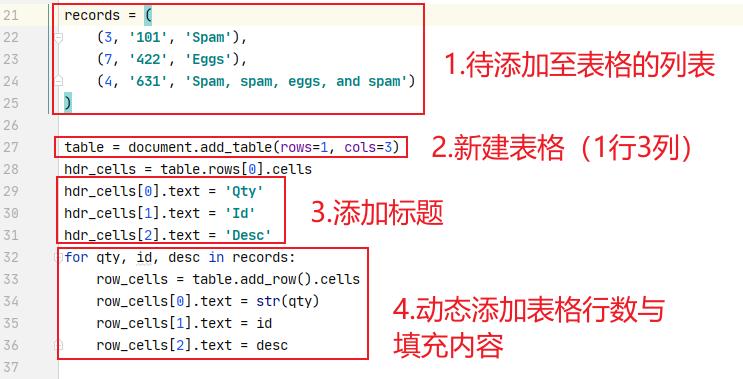
新建表格操作
table = document.add_table(rows=1, cols=3)
填充标题行操作
hdr_cells = table.rows[0].cells
hdr_cells[0].text = 'Qty'
hdr_cells[1].text = 'Id'
hdr_cells[2].text = 'Desc'
为每组内容添加数据行并填充
for qty, id, desc in records:
    row_cells = table.add_row().cells
    row_cells[0].text = str(qty)
    row_cells[1].text = id
    row_cells[2].text = desc
设置标题样式操作
table.style = 'LightShading-Accent1'

添加分页符操作
document.add_page_break()
保存当前文档操作
document.save('4.1 Python-docx官方例程.docx')
Python-docx 表格样式设置
表格样式设置代码:
from docx import *
document = Document()

table = document.add_table(3, 3, style="Medium Grid 1 Accent 1")
heading_cells = table.rows[0].cells
heading_cells[0].text = '第一列内容'
heading_cells[1].text = '第二列内容'
heading_cells[2].text = '第三列内容'

document.save("demo.docx")
遍历所有样式:
from docx.enum.style import WD_STYLE_TYPE
from docx import Document

document = Document()
styles = document.styles

# 生成所有表样式
for s in styles:
    if s.type == WD_STYLE_TYPE.TABLE:
        document.add_paragraph("表格样式 :  " + s.name)
        table = document.add_table(3, 3, style=s)
        heading_cells = table.rows[0].cells
        heading_cells[0].text = '第一列内容'
        heading_cells[1].text = '第二列内容'
        heading_cells[2].text = '第三列内容'
        document.add_paragraph("\\n")

document.save('4.3 所有表格样式.docx')
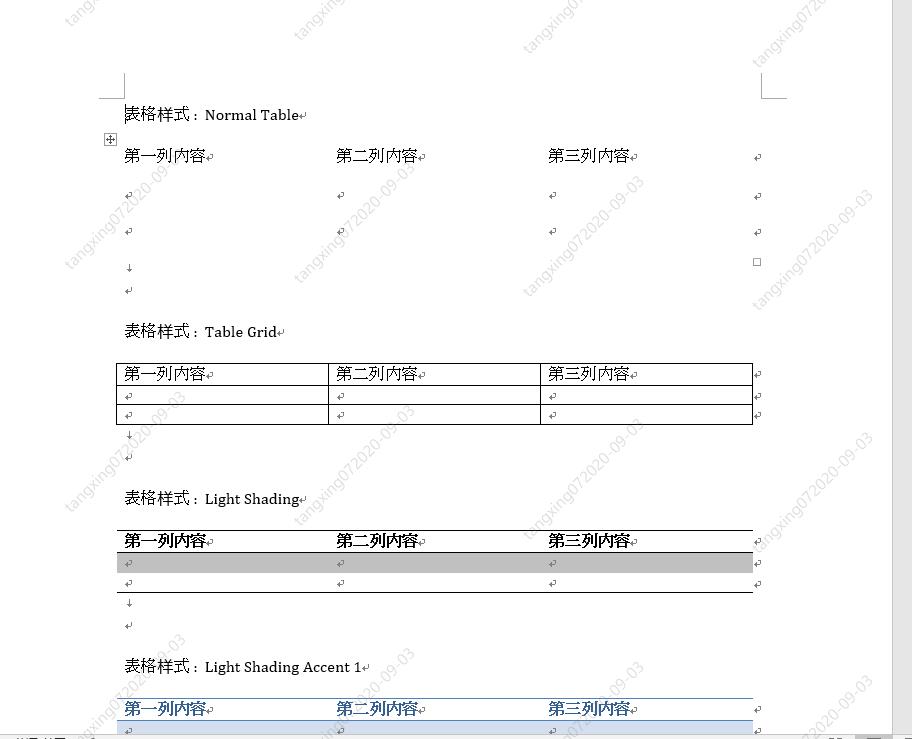
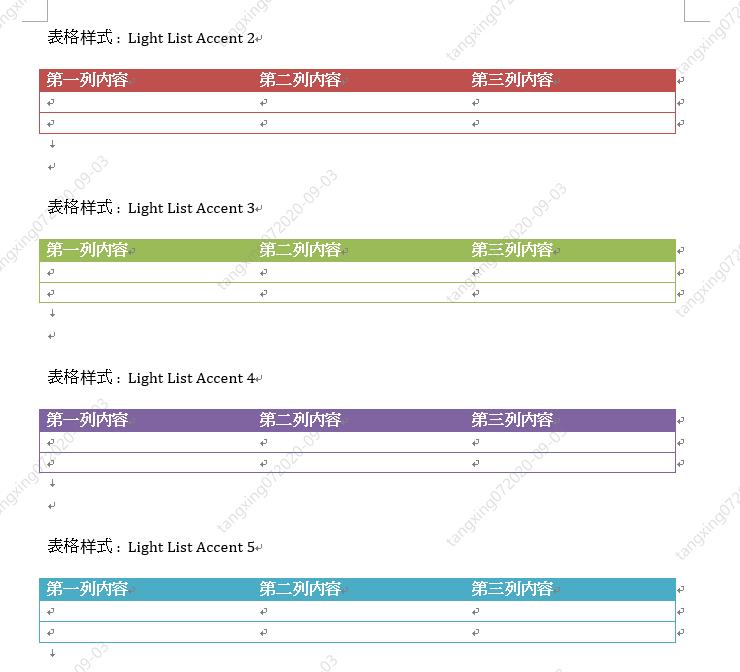
效果如下(大家按照喜欢的样式添加即可):
docx&matplotlib 自动生成数据分析报告
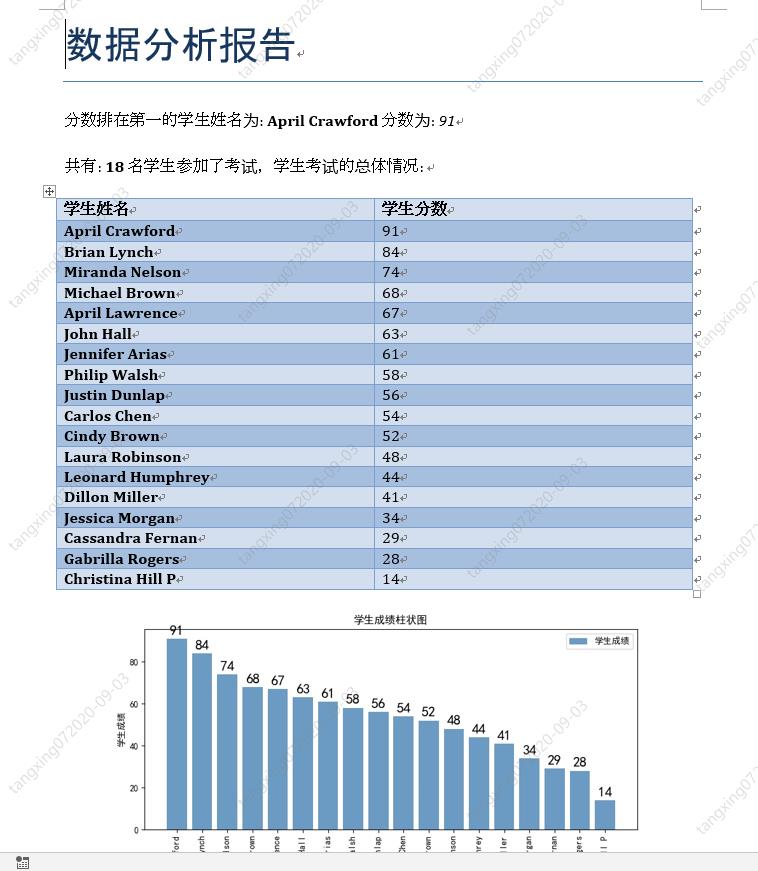
最终效果
数据获取
我们这里使用xlrd作为数据获取所使用的库,简单回顾一下:
import xlrd

xlsx = xlrd.open_workbook('./3_1 xlrd 读取 操作练习.xlsx')

# 通过sheet名查找:xlsx.sheet_by_name("sheet1")
# 通过索引查找:xlsx.sheet_by_index(3)
table = xlsx.sheet_by_index(0)

# 获取单个表格值 (2,1)表示获取第3行第2列单元格的值
value = table.cell_value(2, 1)
print("第3行2列值为",value)

# 获取表格行数
nrows = table.nrows
print("表格一共有",nrows,"行")

# 获取第4列所有值(列表生成式)
name_list = [str(table.cell_value(i, 3)) for i in range(1, nrows)]
print("第4列所有的值:",name_list)
表格内容:

编写数据获取代码:
我们这里只获取用户姓名和,分数,并将它们保存到列表中,看代码。
# 获取学习成绩信息
def GetExcelInfo():
    print("开始获取表格内容信息")

    # 打开指定文档
    xlsx = xlrd.open_workbook('学生成绩表格.xlsx')

    # 获取sheet
    sheet = xlsx.sheet_by_index(0)

    # 获取表格行数
    nrows = sheet.nrows
    print("一共 ",nrows," 行数据")

    # 获取第2列,和第4列 所有值(列表生成式),从第2行开始获取
    nameList = [str(sheet.cell_value(i, 1)) for i in range(1, nrows)]
    scoreList = [int(sheet.cell_value(i, 3)) for i in range(1, nrows)]

    # 返回名字列表和分数列表
    return nameList,scoreList
获取结果:

柱状图生成
我们先将获取的姓名和成绩使用 字典 数据结构关联起来,再对其排序:
# 将名字和分数列表合并成字典(将学生姓名和分数关联起来)
scoreDictionary = dict(zip(nameList, scoreList))
print("dictionary:",scoreDictionary)

# 对字典进行值排序,高分在前,reverse=True 代表降序排列
scoreOrder = sorted(scoreDictionary.items(), key=lambda x: x[1], reverse=True)
print("scoreOrder",scoreOrder)
效果如下:
# 合成的字典
dictionary: {'Dillon Miller': 41, 'Laura Robinson': 48, 'Gabrilla Rogers': 28, 'Carlos Chen': 54, 'Leonard Humphrey': 44, 'John Hall': 63, 'Miranda Nelson': 74, 'Jessica Morgan': 34, 'April Lawrence': 67, 'Cindy Brown': 52, 'Cassandra Fernan': 29, 'April Crawford': 91, 'Jennifer Arias': 61, 'Philip Walsh': 58, 'Christina Hill P': 14, 'Justin Dunlap': 56, 'Brian Lynch': 84, 'Michael Brown': 68}
# 排序后,再次转换成列表
scoreOrder [('April Crawford', 91), ('Brian Lynch', 84), ('Miranda Nelson', 74), ('Michael Brown', 68), ('April Lawrence', 67), ('John Hall', 63), ('Jennifer Arias', 61), ('Philip Walsh', 58), ('Justin Dunlap'