Java:一篇读懂注解的实现原理总结及使用示例
Posted LQS_Android
tags:
篇首语:本文由小常识网(cha138.com)小编为大家整理,主要介绍了Java:一篇读懂注解的实现原理总结及使用示例相关的知识,希望对你有一定的参考价值。
举例:创建自定义navigation注解处理器,分为两大部分:
一、创建自定义的注解,定义注解类;
二、创建自定义的注解解析器,定义解析规则;
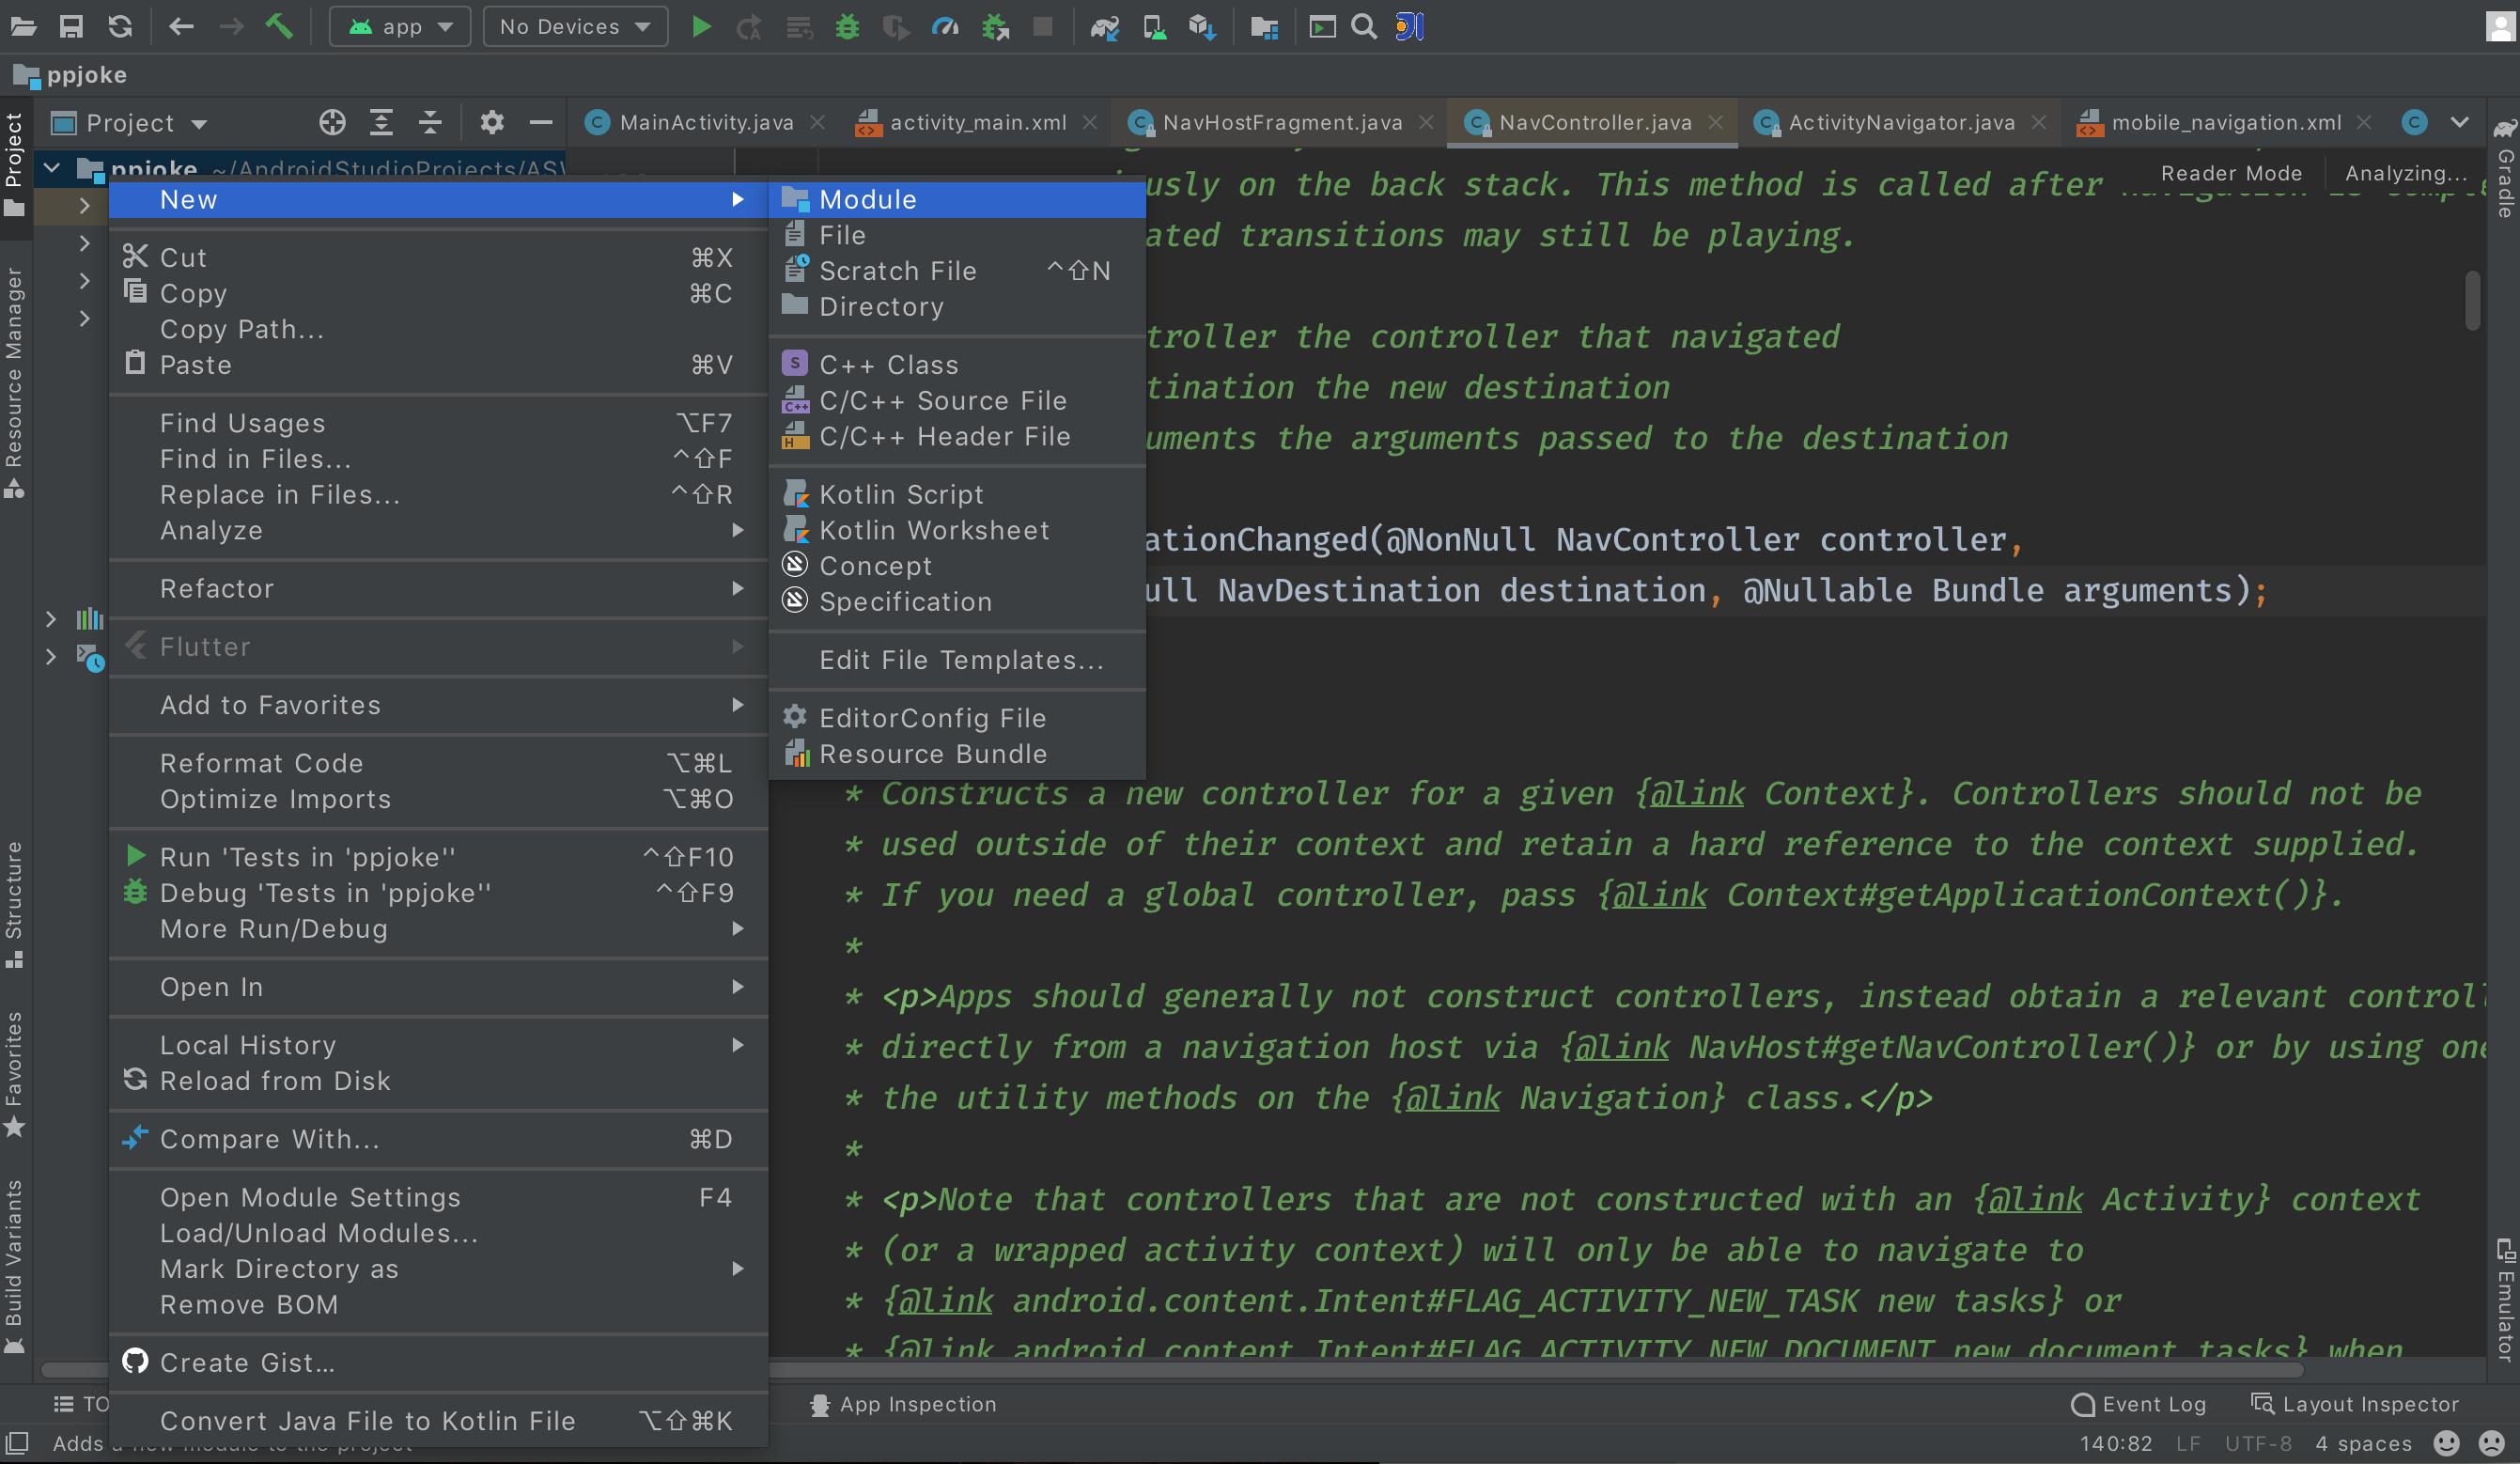
下面,我们来创建自己的注解,在项目根目录上右键新建New->Moudule->Java Library,填写自定义注解库的名字libnavannotation,如下:


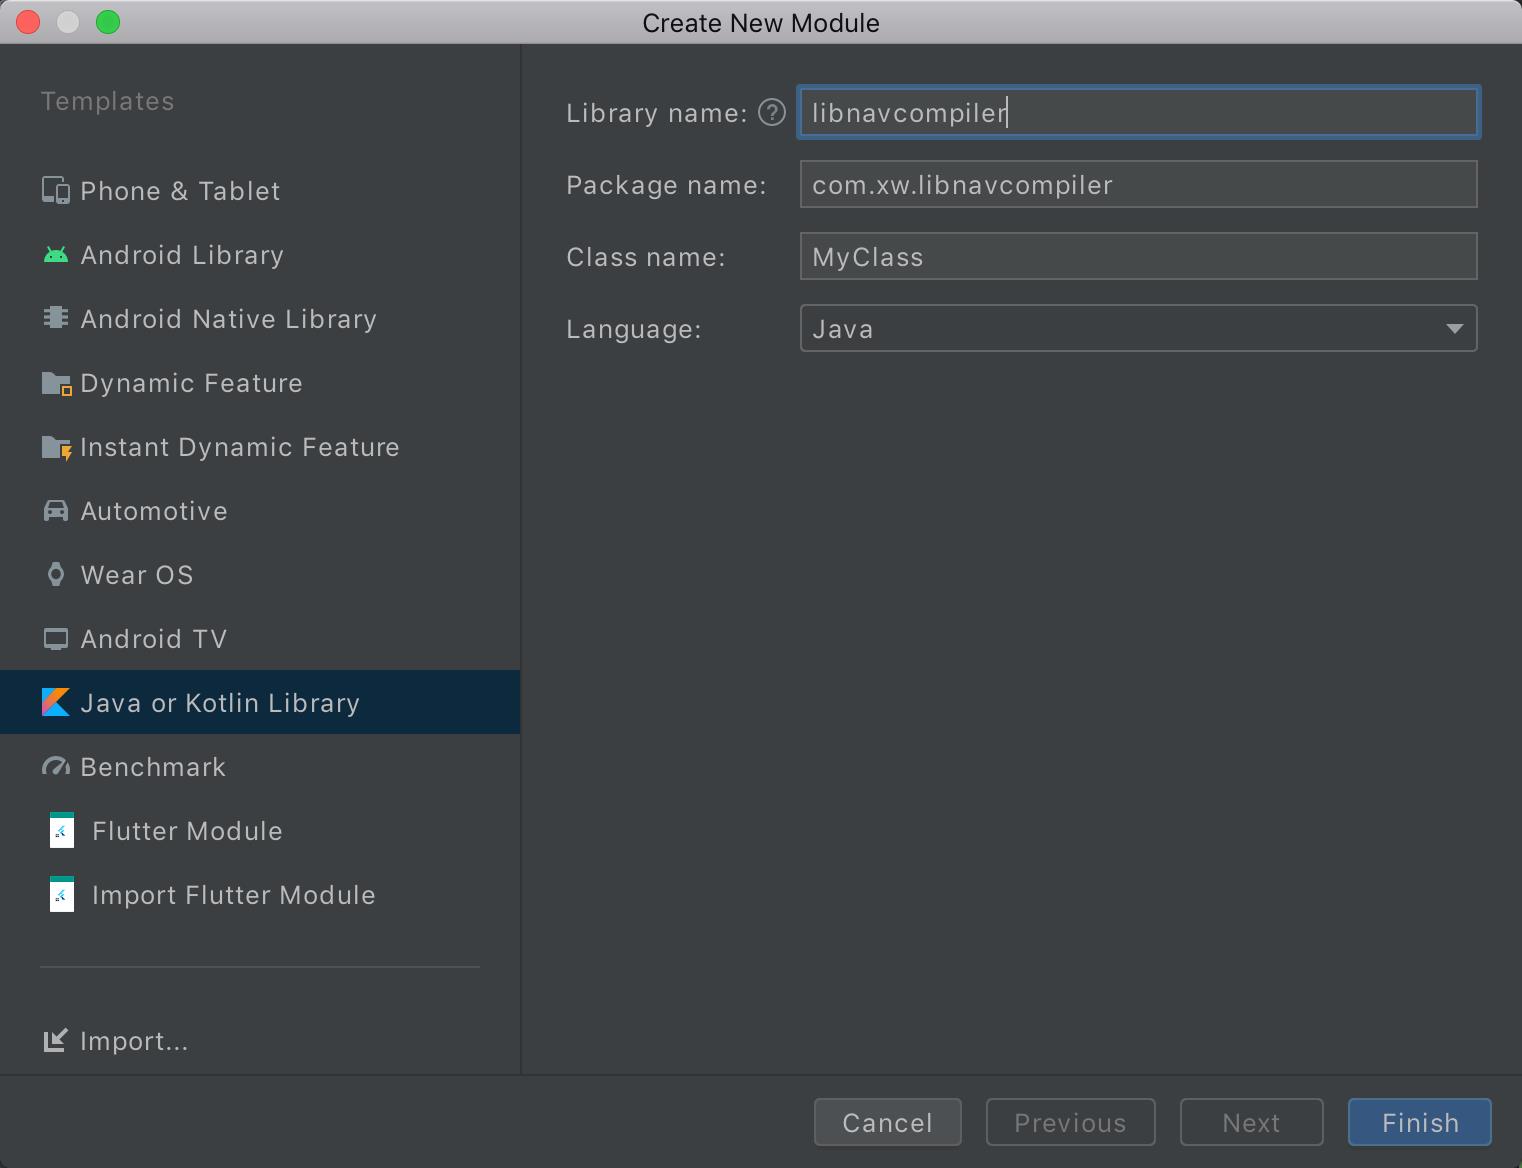
同样需要继续创建注解解析器:在项目根目录上右键新建New->Moudule->Java Library,填写自定义注解解析器库的名字libnavcompiler:
 通过上述的创建,我们项目的目录中会多出如下的目录:

将libnavannotation库和libnavcompiler库目录中的build.gradle中的源兼容性和目标兼容性由版本7改为版本8:
java {
    sourceCompatibility = JavaVersion.VERSION_1_7
    targetCompatibility = JavaVersion.VERSION_1_7
}
改为:
java {
    sourceCompatibility = JavaVersion.VERSION_1_8
    targetCompatibility = JavaVersion.VERSION_1_8
}
我们来添加依赖,只在自定义注解解析器libnavcompiler库 中添加注解相关的依赖,完整build.gradle文件内容如下:
plugins {
    id 'java-library'
}

java {
    sourceCompatibility = JavaVersion.VERSION_1_8
    targetCompatibility = JavaVersion.VERSION_1_8
}

dependencies {
    implementation fileTree(dir: 'libs', include: ['*.jar'])
    implementation project(':libnavannotation')
    implementation 'com.alibaba:fastjson:1.2.75'
    implementation 'com.google.auto.service:auto-service:1.0-rc6'
    annotationProcessor 'com.google.auto.service:auto-service:1.0-rc6'
}
下面来正式的创建两个注解类:ActivityDestination注解类和FragmentDestination注解类:

FragmentDestination注解类:
package com.mooc.libnavannotation;

import java.lang.annotation.ElementType;
import java.lang.annotation.Target;

@Target(ElementType.TYPE)
public @interface FragmentDestination {

    /**当前页面url**/
    String pageUrl();

    /**当前页面是否需要登录**/
    boolean needLogin() default false;

    /**当前页面是否作为默认起始页面**/
    boolean asStarter() default false;
}
ActivityDestination注解类:
package com.mooc.libnavannotation;

import java.lang.annotation.ElementType;
import java.lang.annotation.Target;

@Target(ElementType.TYPE)
public @interface ActivityDestination {
    String pageUrl();

    boolean needLogin() default false;

    boolean asStarter() default false;
}
然后我们来创建注解处理器(解析器)Processor:

NavProcessor
package com.mooc.libnavcompiler;

import com.alibaba.fastjson.JSON;
import com.alibaba.fastjson.JSONObject;
import com.google.auto.service.AutoService;
import com.mooc.libnavannotation.ActivityDestination;
import com.mooc.libnavannotation.FragmentDestination;
import java.io.File;
import java.io.FileOutputStream;
import java.io.IOException;
import java.io.OutputStreamWriter;
import java.lang.annotation.Annotation;
import java.lang.reflect.Type;
import java.util.HashMap;
import java.util.Set;
import javax.annotation.processing.AbstractProcessor;
import javax.annotation.processing.Filer;
import javax.annotation.processing.Messager;
import javax.annotation.processing.ProcessingEnvironment;
import javax.annotation.processing.Processor;
import javax.annotation.processing.RoundEnvironment;
import javax.annotation.processing.SupportedAnnotationTypes;
import javax.annotation.processing.SupportedSourceVersion;
import javax.lang.model.SourceVersion;
import javax.lang.model.element.Element;
import javax.lang.model.element.TypeElement;
import javax.tools.Diagnostic;
import javax.tools.FileObject;
import javax.tools.StandardLocation;

/**
 * APP页面导航信息收集注解处理器
 * <p>
 * AutoService注解:就这么一标记,annotationProcessor  project()应用一下,编译时就能自动执行该类了。
 * <p>
 * SupportedSourceVersion注解:声明我们所支持的jdk版本
 * <p>
 * SupportedAnnotationTypes:声明该注解处理器想要处理那些注解
 */
@AutoService(Processor.class)
@SupportedSourceVersion(SourceVersion.RELEASE_8)
@SupportedAnnotationTypes({"com.mooc.libnavannotation.FragmentDestination", "com.mooc.libnavannotation.ActivityDestination"})
public class NavProcessor extends AbstractProcessor {
    private Messager messager;
    private Filer filer;
    private static final String OUTPUT_FILE_NAME = "destination.json";

    @Override
    public synchronized void init(ProcessingEnvironment processingEnv) {
        super.init(processingEnv);
        //日志打印,在java环境下不能使用android.util.log.e()
        messager = processingEnv.getMessager();
        //文件处理工具
        filer = processingEnv.getFiler();
    }

    @Override
    public boolean process(Set<? extends TypeElement> annotations, RoundEnvironment roundEnv) {
        //通过处理器环境上下文roundEnv分别获取 项目中标记的FragmentDestination.class 和ActivityDestination.class注解。
        //此目的就是为了收集项目中哪些类 被注解标记了
        Set<? extends Element> fragmentElements = roundEnv.getElementsAnnotatedWith(FragmentDestination.class);
        Set<? extends Element> activityElements = roundEnv.getElementsAnnotatedWith(ActivityDestination.class);

        if (!fragmentElements.isEmpty() || !activityElements.isEmpty()) {
            HashMap<String, JSONObject> destMap = new HashMap<>();
            //分别 处理FragmentDestination  和 ActivityDestination 注解类型
            //并收集到destMap 这个map中。以此就能记录下所有的页面信息了
            handleDestination(fragmentElements, FragmentDestination.class, destMap);
            handleDestination(activityElements, ActivityDestination.class, destMap);

            //app/src/main/assets
            FileOutputStream fos = null;
            OutputStreamWriter writer = null;
            try {
                //filer.createResource()意思是创建源文件
                //我们可以指定为class文件输出的地方,
                //StandardLocation.CLASS_OUTPUT:java文件生成class文件的位置,/app/build/intermediates/javac/debug/classes/目录下
                //StandardLocation.SOURCE_OUTPUT:java文件的位置,一般在/ppjoke/app/build/generated/source/apt/目录下
                //StandardLocation.CLASS_PATH 和 StandardLocation.SOURCE_PATH用的不多,指的了这个参数,就要指定生成文件的pkg包名了
                FileObject resource = filer.createResource(StandardLocation.CLASS_OUTPUT, "", OUTPUT_FILE_NAME);
                String resourcePath = resource.toUri().getPath();
                messager.printMessage(Diagnostic.Kind.NOTE, "resourcePath:" + resourcePath);

                //由于我们想要把json文件生成在app/src/main/assets/目录下,所以这里可以对字符串做一个截取,
                //以此便能准确获取项目在每个电脑上的 /app/src/main/assets/的路径
                String appPath = resourcePath.substring(0, resourcePath.indexOf("app") + 4);
                String assetsPath = appPath + "src/main/assets/";

                File file = new File(assetsPath);
                if (!file.exists()) {
                    file.mkdirs();
                }

                //此处就是稳健的写入了
                File outPutFile = new File(file, OUTPUT_FILE_NAME);
                if (outPutFile.exists()) {
                    outPutFile.delete();
                }
                outPutFile.createNewFile();

                //利用fastjson把收集到的所有的页面信息 转换成JSON格式的。并输出到文件中
                String content = JSON.toJSONString(destMap);
                fos = new FileOutputStream(outPutFile);
                writer = new OutputStreamWriter(fos, "UTF-8");
                writer.write(content);
                writer.flush();
            } catch (IOException e) {
                e.printStackTrace();
            } finally {
                if (writer != null) {
                    try {
                        writer.close();
                    } catch (IOException e) {
                        e.printStackTrace();
                    }
                }

                if (fos != null) {
                    try {
                        fos.close();
                    } catch (IOException e) {
                        e.printStackTrace();
                    }
                }
            }
        }


        return true;
    }

    private void handleDestination(Set<? extends Element> elements, Class<? extends Annotation> annotationClaz, HashMap<String, JSONObject> destMap) {
        for (Element element : elements) {
            //TypeElement是Element的一种。
            //如果我们的注解标记在了类名上。所以可以直接强转一下。使用它得到全类名
            TypeElement typeElement = (TypeElement) element;
            //全类名com.mooc.ppjoke.home
            String clazName = typeElement.getQualifiedName().toString();
            //页面的id.此处不能重复,使用页面的类名做hascode即可
            int id = Math.abs(clazName.hashCode());
            //页面的pageUrl相当于隐士跳转意图中的host://schem/path格式
            String pageUrl = null;
            //是否需要登录
            boolean needLogin = false;
            //是否作为首页的第一个展示的页面
            boolean asStarter = false;
            //标记该页面是fragment 还是activity类型的
            boolean isFragment = false;

            Annotation annotation = element.getAnnotation(annotationClaz);
            if (annotation instanceof FragmentDestination) {
                FragmentDestination dest = (FragmentDestination) annotation;
                pageUrl = dest.pageUrl();
                asStarter = dest.asStarter();
                needLogin = dest.needLogin();
                isFragment = true;
            } else if (annotation instanceof ActivityDestination) {
                ActivityDestination dest = (ActivityDestination) annotation;
                pageUrl = dest.pageUrl();
                asStarter = dest.asStarter();
                needLogin = dest.needLogin();
                isFragment = false;
            }

            if (destMap.containsKey(pageUrl)) {
                messager.printMessage(Diagnostic.Kind.ERROR, "不同的页面不允许使用相同的pageUrl:" + clazName);
            } else {
                JSONObject object = new JSONObject();
                object.put("id", id);
                object.put("needLogin", needLogin);
                object.put("asStarter", asStarter);
                object.put("pageUrl", pageUrl);
                object.put("className", clazName);
                object.put("isFragment", isFragment);
                destMap.put(pageUrl, object);
            }
        }
    }
}
未完待续...
以上是关于Java:一篇读懂注解的实现原理总结及使用示例的主要内容,如果未能解决你的问题,请参考以下文章