Weblogic安装建域全过程-图形加脚本
Posted
tags:
篇首语:本文由小常识网(cha138.com)小编为大家整理,主要介绍了Weblogic安装建域全过程-图形加脚本相关的知识,希望对你有一定的参考价值。
写在前面:本文不是一口气写完,而是后期在工作中归纳总结,因此在本文中你会看到,主机名不同,端口信息不同等,这是正常现象。但是瑕不掩瑜,整体流程是经过生产环境检验的,本文在当前时间节点(2017年5月3号)状态下编写,后期可能会发现更高效简洁的方法,因此本文将持续更新完善。
1:软件介绍
WebLogic是美国Oracle公司出品的一个applicationserver,确切的说是一个基于JAVAEE架构的中间件,WebLogic是用于开发、集成、部署和管理大型分布式Web应用、网络应用和数据库应用的Java应用服务器。将Java的动态功能和Java Enterprise标准的安全性引入大型网络应用的开发、集成、部署和管理之中。
WebLogic是美商Oracle的主要产品之一,系并购BEA得来。是商业市场上主要的Java(J2EE)应用服务器软件(applicationserver)之一,是世界上第一个成功商业化的J2EE应用服务器, 已推出到12c(12.1.3) 版。而此产品也延伸出WebLogic Portal,WebLogic Integration等企业用的中间件(但当下Oracle主要以Fusion Middleware融合中间件来取代这些WebLogic Server之外的企业包),以及OEPE(Oracle Enterprise Pack for Eclipse)开发工具。
2:系统环境及软件版本
软件名称 | 软件版本 |
操作系统 | SUSE Linux Enterprise Server 11 (x86_64) sp3 |
内核版本 | 3.0.76-0.11-default |
Weblogic | 12c(12.1.3) |
JDK | 1.7.0_75 |
Cronolog | 1.6.2 |
操作系统版本:SUSE LinuxEnterprise Server 11 (x86_64) sp3
#查看命令:cat/etc/SuSE-release
内核版本:3.0.76-0.11-default
#查看命令:uname -r
3.1、创建weblogic用户
linux-5rbu:~ #groupadd weblogic
linux-5rbu:/home #
useradd -d/home/weblogic -m -g weblogic -G users,dialout,video,bin,weblogic weblogic
linux-5rbu:~ # echoweblogic | passwd --stdin weblogic
Changing passwordfor weblogic.
3.2、修改/etc/hosts
linux-5rbu:~ # vim/etc/HOSTNAME
suse11-weblogic
linux-5rbu:~ # hostnamesuse11-weblogic
linux-5rbu:~ # vim/etc/hosts
# hosts This file describes a number ofhostname-to-address
# mappings for the TCP/IPsubsystem. It is mostly
# used at boot time, when no nameservers are running.
# On small systems, this file canbe used instead of a
# "named" name server.
# Syntax:
# IP-Address Full-Qualified-Hostname Short-Hostname
#
127.0.0.1 localhost
# special IPv6addresses
::1 localhost ipv6-localhostipv6-loopback
fe00::0 ipv6-localnet
ff00::0 ipv6-mcastprefix
ff02::1 ipv6-allnodes
ff02::2 ipv6-allrouters
ff02::3 ipv6-allhosts
192.168.3.6 suse11-weblogic locahost
linux-5rbu:~ #
3.3、安装JDK
不同版本的weblogic对jdk的要求也不一样,请事先进行查询,避免重复安装
YDCKMAP-TEST:/soft# tar -zxf jdk-7u75-linux-x64.tar.gz -C/usr/local/JDK/
YDCKMAP-TEST:/soft# vim /etc/profile (添加如下四行内容)
exportJAVA_HOME=/usr/local/JDK/jdk1.7.0_75
exportCLASSPATH=.:$CLASSPATH:$JAVA_HOME/lib/dt.jar:$JAVA_HOME/lib/tools.jar
exportPATH=$JAVA_HOME/bin:$PATH
exportJRE_HOME=$JAVA_HOME/jre
LANG=zh_CN.utf8
export LANG
YDCKMAP-TEST:/soft# source /etc/profile
3.4、安装cronolog日志切割软件
YDCKMAP-TEST:/soft # tar -zxfcronolog-1.6.2.tar.gz
YDCKMAP-TEST:/soft # cd cronolog-1.6.2/
YDCKMAP-TEST:/soft #./configure--prefix=/usr/local/cronolog
YDCKMAP-TEST:/soft # make
YDCKMAP-TEST:/soft # make install
YDCKMAP-TEST:/soft #cd /usr/local/cronolog/sbin/
YDCKMAP-TEST: /usr/local/cronolog/sbin# cp * /usr/local/sbin/
4:安装weblogic
4.1、图形方式安装
因为weblogic12c版本之后都建议使用图形界面方式进行安装,所以在这里介绍使用图形方式进行安装
Linux端:exportDISPLAY=clientip:0.0【例如:export DISPLAY=192.168.3.254:0.0】
此处的0.0根据该软件在windows的实际开放端口进行配置
Windows端:打开Xmanager –Passive
1)
[email protected]:~/soft>export DISPLAY=192.168.3.254:0.0
[email protected]:~/soft>java -d64 -jar fmw_12.1.3.0.0_wls.jar -Djava.security.egd=file:/dev/./urandom
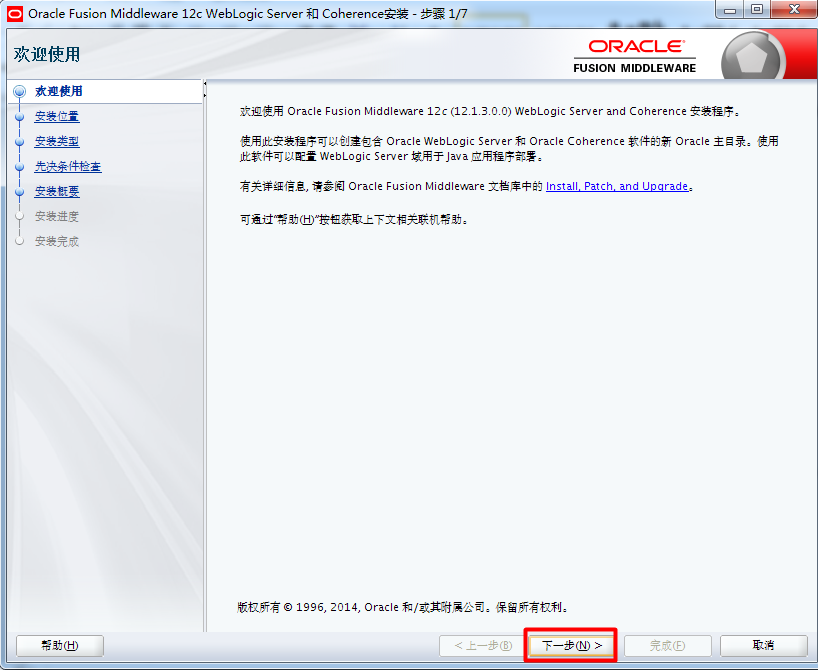
点击是之后将会在Windows显示图形安装界面
2) 点击确定
安装清单里面保存的只是该台服务器上所装的oracle系列产品清单,并不包含其他信息
3)点击下一步
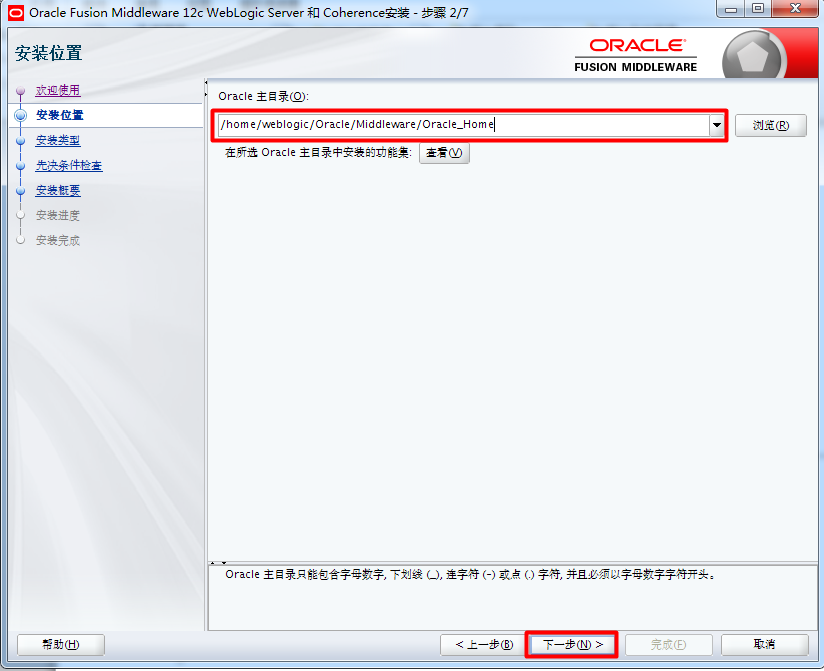
4)建议使用默认主目录,用户也可根据自身情况进行修改,之后点击下一步
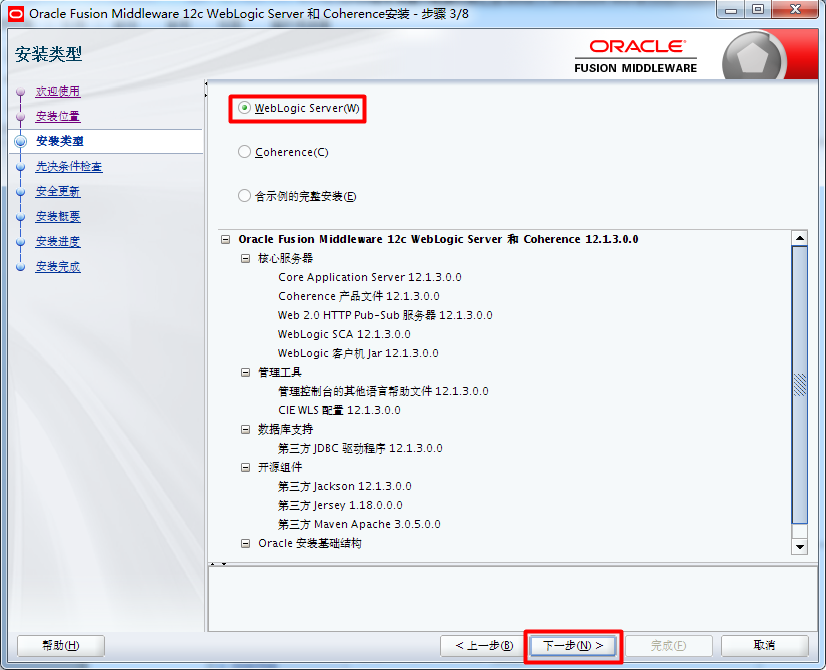
5)选择WeblogicServer,点击下一步
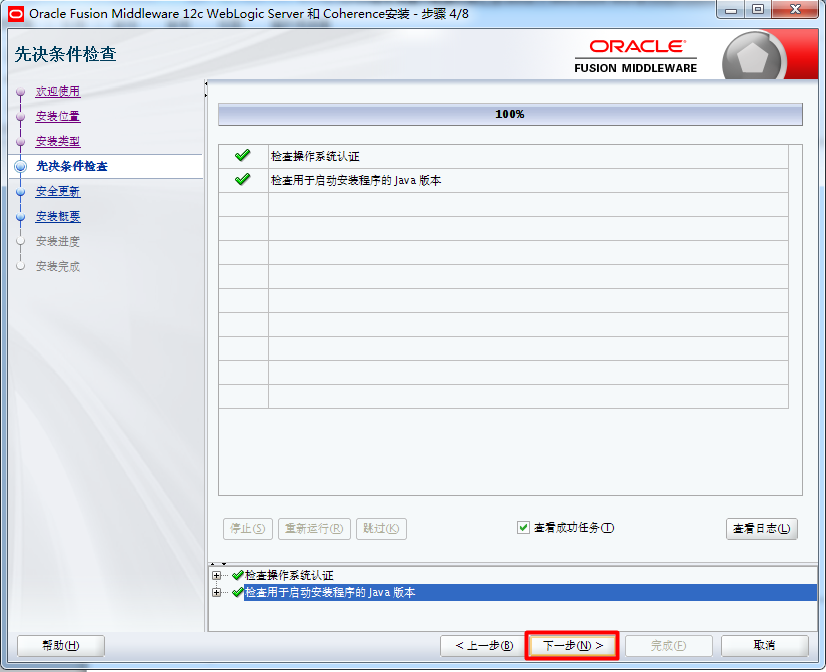
6)系统环境检查通过之后,点击下一步
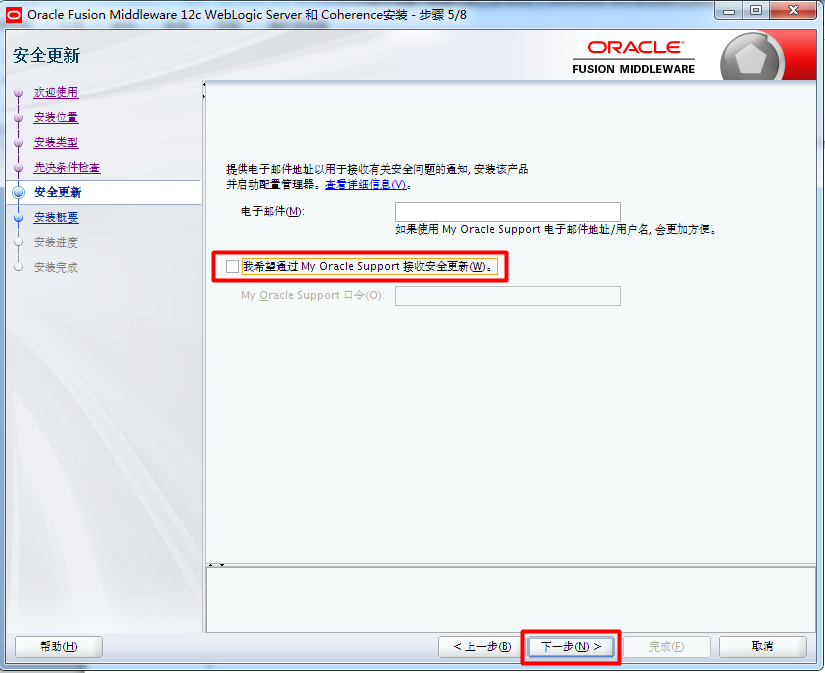
7)将接收安全更新前面方框内的对勾取消,点击下一步,之后点击是
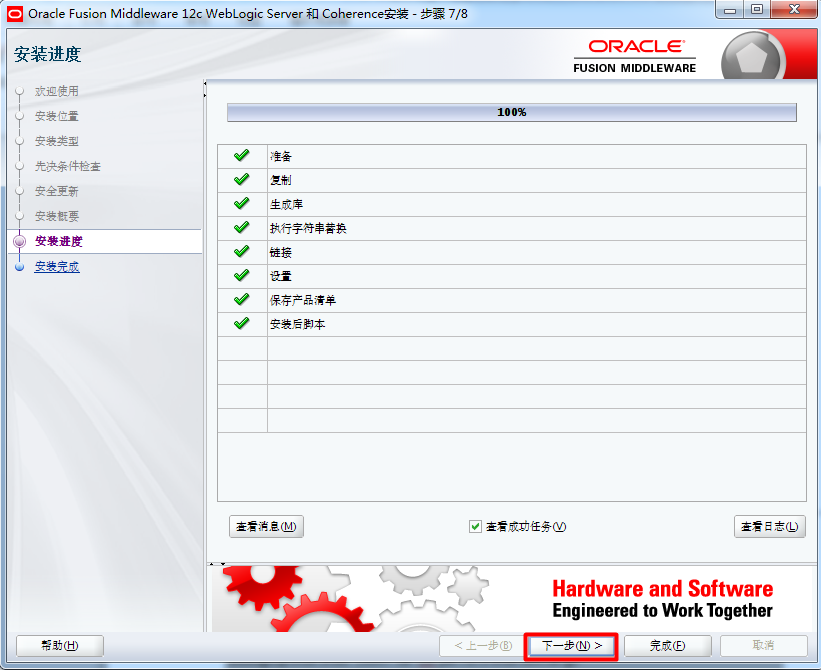
9)待安装进度为100%后,点击下一步
10)当勾选自动启动配置向导之后,之后将会弹出安装weblogic域界面,在这里我们将该对勾取消,后续通过手动的方式进行域的创建及相关配置,点击完成,weblogic安装完成。
4.2、脚本方式安装
Weblogic安装采取静默安装形式,也即通过相应文件自动安装
1) 生成oraInst.loc文件,文件内容如下所示
inventory_loc=/home/weblogic/oraInventory
inst_group=weblogic
2)生成wls.rsp响应文件,文件内容如下所示
[ENGINE]
#DO NOT CHANGETHIS.
ResponseFile Version=1.0.0.0.0
[GENERIC]
#The oraclehome location. This can be an existing Oracle Home or a new Oracle Home
ORACLE_HOME=/home/weblogic/weblogic12
#Set thisvariable value to the Installation Type selected. e.g. WebLogic Server, Coherence,Complete with Examples.
INSTALL_TYPE=WebLogicServer
#Providethe My Oracle Support Username. If you wish to ignore Oracle Configuration Managerconfiguration provide empty string for user name.
MYORACLESUPPORT_USERNAME=
#Providethe My Oracle Support Password
MYORACLESUPPORT_PASSWORD=<SECUREVALUE>
#Set thisto true if you wish to decline the security updates. Setting this to true and providingempty string for My Oracle Support username will ignore the Oracle ConfigurationManager configuration
DECLINE_SECURITY_UPDATES=true
#Set thisto true if My Oracle Support Password is specified
SECURITY_UPDATES_VIA_MYORACLESUPPORT=false
#Providethe Proxy Host
PROXY_HOST=
#Providethe Proxy Port
PROXY_PORT=
#Providethe Proxy Username
PROXY_USER=
#Providethe Proxy Password
PROXY_PWD=<SECUREVALUE>
#Type String(URL format) Indicates the OCM Repeater URL which should be of the format [scheme[Http/Https]]://[repeaterhost]:[repeater port]
COLLECTOR_SUPPORTHUB_URL=
3)执行weblogic安装
[email protected]:~> java -jar/soft/fmw_12.1.3.0.0_wls.jar -silent -responseFile /soft/wls.rsp -invPtrLoc /soft/oraInst.loc
待进度显示100%之后,weblogic即安装完毕。
5:创建weblogic域
5.1、图形方式创建
weblogic安装完毕之后,手动创建域需到指定目录下执行相关脚本。此时描写
weblogic12c版本之后建议使用图形界面方式进行域的创建,所以在这里使用图形方式进行安装,因Xmanager软件使用方便,因此使用该软件进行图形安装
Linux端:exportDISPLAY=clientip:0.0(clientip为本机的IP地址)
Windows端:打开Xmanager– Passive
[email protected]:~/weblogic12/wlserver/common/bin>pwd
/home/weblogic/weblogic12/wlserver/common/bin
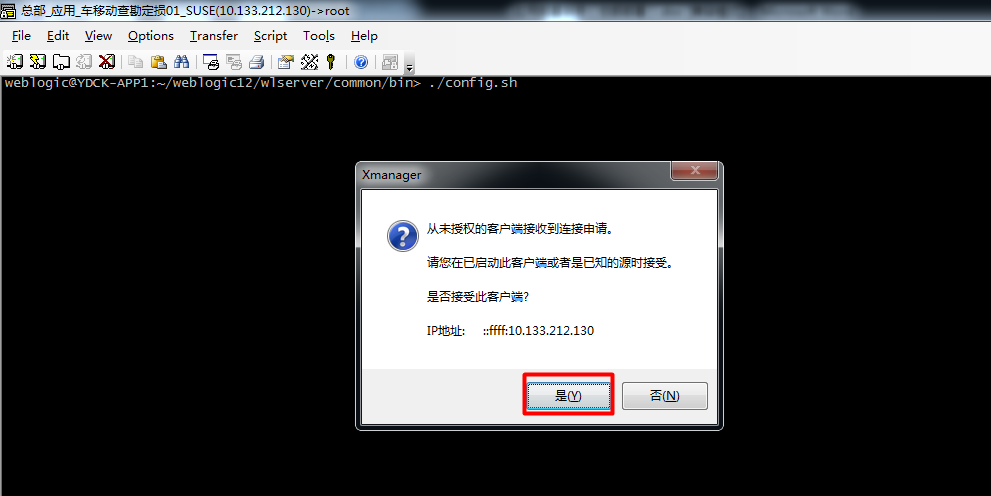
[email protected]:~/weblogic12/wlserver/common/bin> ./config.sh
1)执行该脚本,出现交互界面,点击是之后将会在Windows显示图形安装界面
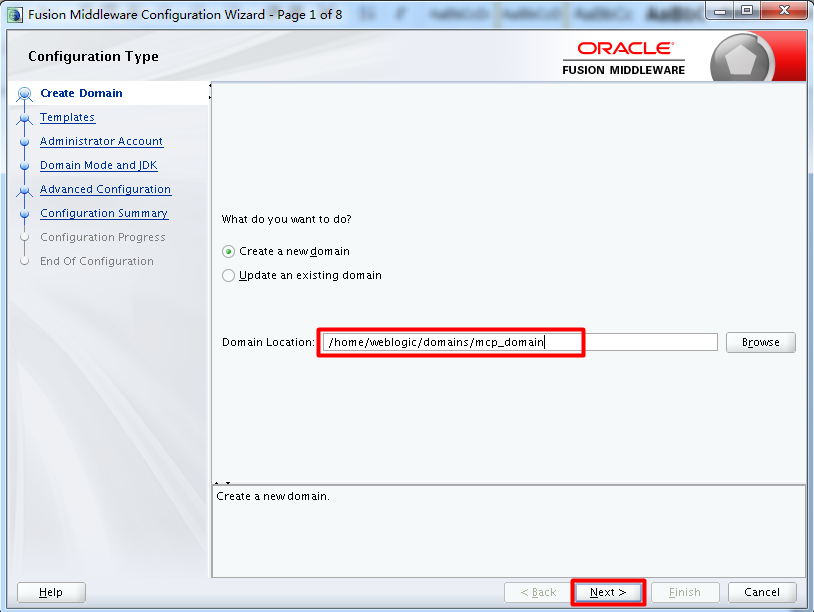
2)默认域名为base_domain,可根据自身需求修改为相应域名,在这里,我将要创建域的路径及域名修改为/home/weblogic/domains/mcp_domain,点击下一步
3)模板选择保持默认,点击下一步
4)此处设置weblogic域的用户名及密码,也是后续登录控制台的用户名及密码,因此十分关键,此处统一设置用户名/密码:weblogic/weblogic123,点击下一步
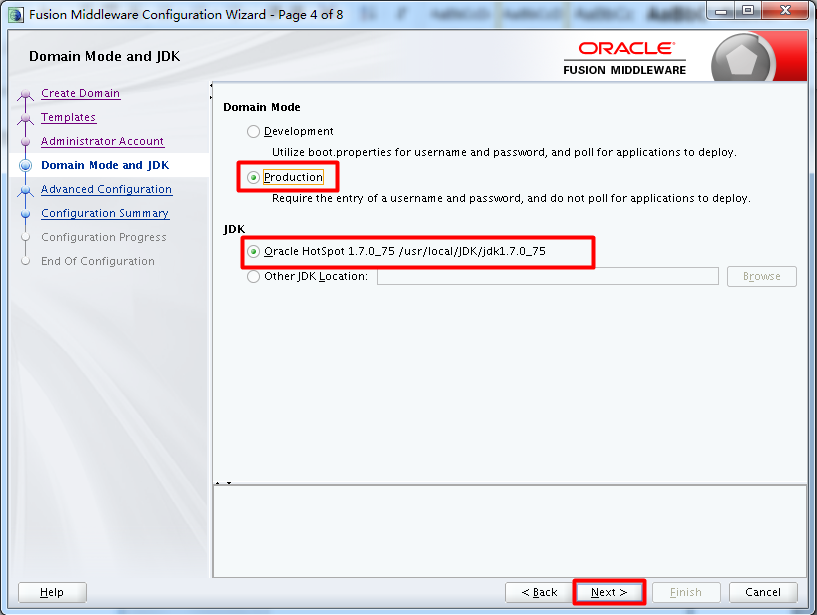
5)此处选择生产模式,点击下一步
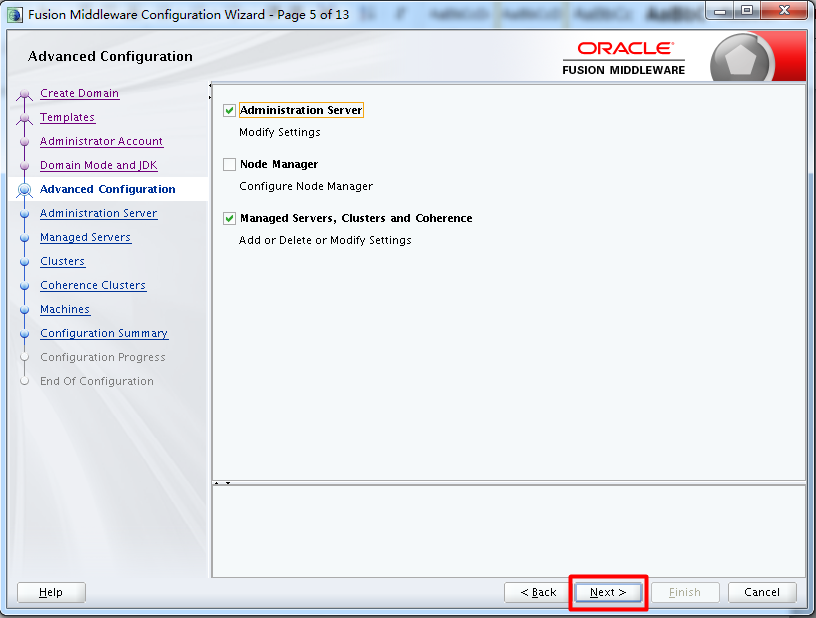
6)勾选管理服务器及受管服务器,此处暂时不勾选节点管理器,点击下一步
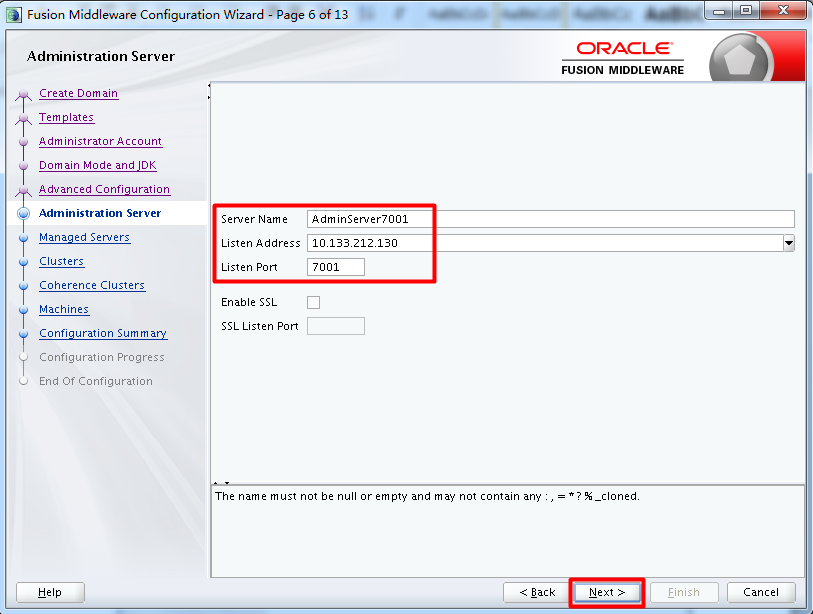
7)监听端口默认为7001,点击下一步
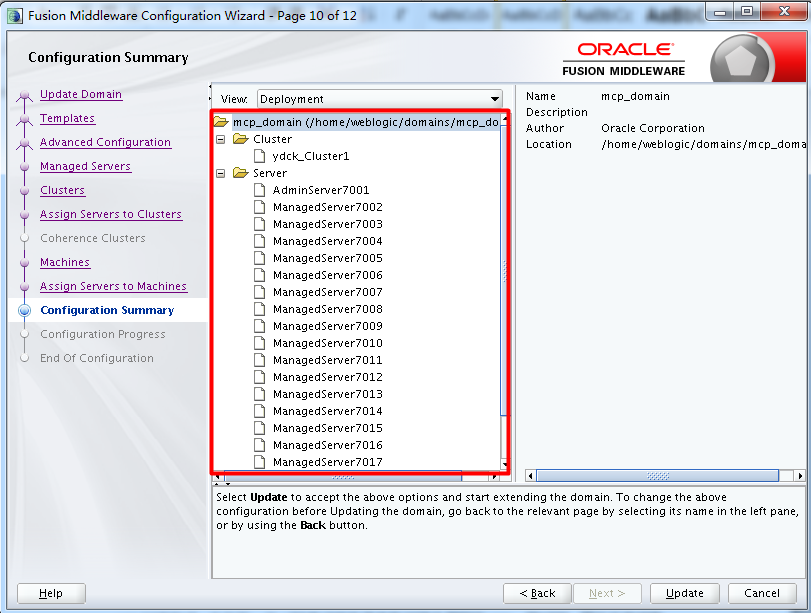
8)此处依次设置19个受管服务器,修改服务器名称及监听地址,点击下一步
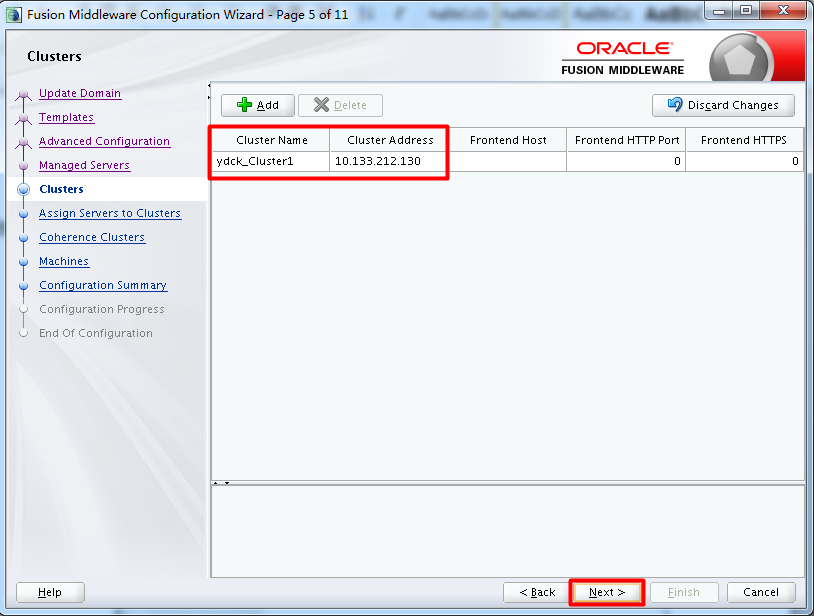
9)创建集群ydck_Cluster1,输入相关信息,点击下一步
10)将左端受管添加至集群管理节点下,点击下一步
11)计算机设置,保持默认,点击下一步
12)新建时点击创建,创建之后修改配置之后点击更新
13)创建完成,点击下一步(创建过程中进度条可能会停留在33%一段时间,属于正常现象,请耐心等待)
14)读条完成之后,点击完成,域创建完成
5.2、脚本方式创建域
1)创建脚本文件:#vim creat-clusterdomain.py【加粗部分为创建集群】
readTemplate(‘/home/weblogic/weblogic12/wlserver/common/templates/wls/wls.jar‘)
cd(‘Servers/AdminServer‘)
cmo.setName("AdminServer8001")
set(‘ListenAddress‘,‘10.133.212.29‘)
set(‘ListenPort‘,8001)
cd(‘/‘)
cd("/Security/base_domain/User/weblogic")
cmo.setPassword("weblogic123")
setOption("OverwriteDomain",‘true‘)
setOption(‘ServerStartMode‘,‘prod‘)
writeDomain(‘/home/xlcpt/domains/xlcpt_domain‘)
closeTemplate()
readDomain(‘/home/xlcpt/domains/xlcpt_domain‘)
cd(‘/‘)
create(‘ManagedServer8002‘,‘Server‘)
cd(‘Server/ManagedServer8002‘)
set(‘ListenPort‘,8002)
set(‘ListenAddress‘,‘10.133.212.29‘)
cd(‘/‘)
create(‘ManagedServer8003‘,‘Server‘)
cd(‘Server/ManagedServer8003‘)
set(‘ListenPort‘,8003)
set(‘ListenAddress‘,‘10.133.212.29‘)
cd(‘/‘)
create(‘ManagedServer8004‘,‘Server‘)
cd(‘Server/ManagedServer8004‘)
set(‘ListenPort‘,8004)
set(‘ListenAddress‘,‘10.133.212.30‘)
cd(‘/‘)
create(‘ManagedServer8005‘,‘Server‘)
cd(‘Server/ManagedServer8005‘)
set(‘ListenPort‘,8005)
set(‘ListenAddress‘,‘10.133.212.30‘)
cd(‘/‘)
create(‘ManagedServer8006‘,‘Server‘)
cd(‘Server/ManagedServer8006‘)
set(‘ListenPort‘,8006)
set(‘ListenAddress‘,‘10.133.212.31‘)
cd(‘/‘)
create(‘ManagedServer8007‘,‘Server‘)
cd(‘Server/ManagedServer8007‘)
set(‘ListenPort‘,8007)
set(‘ListenAddress‘,‘10.133.212.31‘)
cd(‘/‘)
create(‘xlcpt_Cluster‘,‘Cluster‘)
assign(‘Server‘,‘ManagedServer8002,ManagedServer8003,ManagedServer8004,ManagedServer8005,ManagedServer8006,ManagedServer8007‘,‘Cluster‘,‘xlcpt_Cluster‘)
cd(‘Cluster/xlcpt_Cluster‘)
set(‘MulticastAddress‘,‘237.0.0.101‘)
set(‘MulticastPort‘, 8050)
set(‘WeblogicPluginEnabled‘,‘true‘)
updateDomain()
closeDomain()
exit()
2)执行
# 执行方式【使用weblogic提供的wlst.sh脚本执行】:
/home/weblogic/weblogic12/wlserver/common/bin/wlst.sh creat-clusterdomain.py
6:日志路径创建及密码文件编写
1) 创建日志及目录【创建日志存放目录及主受管启动目录】
[email protected]:~> cd/home/xlcpt/domains/xlcpt_domain
[email protected]:~/domains/xlcpt_domain> mkdir -p ./log/{8001,8002,8003}
[email protected]:~/domains/xlcpt_domain>
mkdir -p ./servers/{AdminServer8001/security,ManagedServer8002/security,ManagedServer8003/security}
2) 创建安全属性文件安全属性文件boot.properties
[email protected]:~/domains/xlcpt_domain>
cat << EOF>servers/AdminServer8001/security/boot.properties
>username=weblogic
> password=weblogic123
> EOF
将该文件拷贝到受管目录的security目录下
7:服务启动及启动脚本的编写
1) 主管启动脚本
[email protected]:~/domains/xlcpt_domain/bin> vimstartAdmin8001.sh
#!/bin/bash
export USER_MEM_ARGS="-Xms2048m -Xmx2048m-XX:PermSize=512m -XX:MaxPermSize=1024m"
rm -rf /home/xlcpt/domains/xlcpt_domain/servers/AdminServer8001/tmp/*
sleep 2
/usr/bin/nohup sh startWebLogic.sh | /usr/local/sbin/cronolog"/home/xlcpt/domains/xlcpt_domain/log/8001/AdminServer8001.out.%Y-%m-%d"2>&1 &
sleep 2
tail -f /home/xlcpt/domains/xlcpt_domain/log/8001/AdminServer8001.out.$(date+%F)
2) 受管启动脚本【只以一个为例,其他都类似,只是修改下受管名称】
[email protected]:~/domains/xlcpt_domain/bin> vimstartManaged8002.sh
#!/bin/bash
export USER_MEM_ARGS="-Xms8192m -Xmx8192m-XX:PermSize=512m -XX:MaxPermSize=1024m"
rm -rf /home/xlcpt/domains/xlcpt_domain/servers/ManagedServer8002/stage/*
rm -rf/home/xlcpt/domains/xlcpt_domain/servers/ManagedServer8002/tmp/*
sleep 2
/usr/bin/nohup sh/home/xlcpt/domains/xlcpt_domain/bin/startManagedWebLogic.sh ManagedServer8002t3://10.133.212.29:8001 | /usr/local/sbin/cronolog"/home/xlcpt/domains/xlcpt_domain/log/8002/ManagedServer8002.out.%Y-%m-%d"2>&1 &
sleep 2
tail -f/home/xlcpt/domains/xlcpt_domain/log/8002/ManagedServer8002.out.$(date +%F)
本文出自 “清风揽月的博客” 博客,请务必保留此出处http://watchmen.blog.51cto.com/6091957/1921598
以上是关于Weblogic安装建域全过程-图形加脚本的主要内容,如果未能解决你的问题,请参考以下文章


