ESRPG C++ 操控主角移动
Posted TanZq_
tags:
篇首语:本文由小常识网(cha138.com)小编为大家整理,主要介绍了ESRPG C++ 操控主角移动相关的知识,希望对你有一定的参考价值。
前言
需要解决的问题:
- 如何把人物分块?
- 如何让人物运动?
- 如何让创建的人物在游戏中运行?
- 把人物分块之后如何让他运动统一?
创建新项目
因为是功能性复刻,所以那些地图什么东西的就不弄了。
直接创建一个C++第三人称工程。
创建角色
进入项目之后打开第三人称的C++基类,引擎自动给我们生成了一部分代码,但是有些代码是不需要的,(如果不知道现有代码的意思,推荐去看一些课程入门,我是看B站课程入门的,你如果感兴趣可以去看看。课程笔记)。
删除了摄影机的控件,因为需要把这个做为人物类的基类,他的子类可以是玩家,也可以是NPC,NPC是不需要摄像机的,所以将它删除。
考虑到后面可能会更新一些东西,所以把Tick函数加到其中,更新基类的一些变量。
UCLASS(config=Game)
class AESRPGCharacter : public ACharacter
{
	GENERATED_BODY()
public:
	AESRPGCharacter();

	************************************************************
	增加内容:
	// Called every frame
	virtual void Tick(float DeltaTime) override;

	************************************************************

	/** Base turn rate, in deg/sec. Other scaling may affect final turn rate. */
	UPROPERTY(VisibleAnywhere, BlueprintReadOnly, Category=Camera)
	float BaseTurnRate;

	/** Base look up/down rate, in deg/sec. Other scaling may affect final rate. */
	UPROPERTY(VisibleAnywhere, BlueprintReadOnly, Category=Camera)
	float BaseLookUpRate;

protected:

	/** Resets HMD orientation in VR. */
	void OnResetVR();

	/** Called for forwards/backward input */
	void MoveForward(float Value);

	/** Called for side to side input */
	void MoveRight(float Value);

	/**
	 * Called via input to turn at a given rate.
	 * @param Rate	This is a normalized rate, i.e. 1.0 means 100% of desired turn rate
	 */
	void TurnAtRate(float Rate);

	/**
	 * Called via input to turn look up/down at a given rate.
	 * @param Rate	This is a normalized rate, i.e. 1.0 means 100% of desired turn rate
	 */
	void LookUpAtRate(float Rate);

	/** Handler for when a touch input begins. */
	void TouchStarted(ETouchIndex::Type FingerIndex, FVector Location);

	/** Handler for when a touch input stops. */
	void TouchStopped(ETouchIndex::Type FingerIndex, FVector Location);

protected:
	// APawn interface
	virtual void SetupPlayerInputComponent(class UInputComponent* PlayerInputComponent) override;
};
CPP增加和删除了一些东西:
- 关于摄影机控件相关代码的也删除了。
- 跳跃速度改为了420.f,不希望它跳太高。
- 让tick函数调用父类。
//
// AESRPGCharacter

AESRPGCharacter::AESRPGCharacter()
{
	// Set size for collision capsule
	GetCapsuleComponent()->InitCapsuleSize(42.f, 96.0f);

	// set our turn rates for input
	BaseTurnRate = 45.f;
	BaseLookUpRate = 45.f;

	bUseControllerRotationPitch = false;
	bUseControllerRotationYaw = false;
	bUseControllerRotationRoll = false;

	// Configure character movement
	//GetCharacterMovement()->bOrientRotationToMovement = true; // Character moves in the direction of input...
	GetCharacterMovement()->RotationRate = FRotator(0.0f, 540.0f, 0.0f); // ...at this rotation rate
	GetCharacterMovement()->JumpZVelocity = 420.f;
	GetCharacterMovement()->AirControl = 0.2f;
}

void AESRPGCharacter::Tick(float DeltaTime)
{
	Super::Tick(DeltaTime);
}
然后我们以它为父类创建一个玩家类。
提供的新手包中,摄像机相关的控件是被私有属性,所以在我们的代码中也将他放入私有类中,并写一个函数进行调用。
Mesh 算一部分,把人物分成6部分,为后面的换装做铺垫。
也添加了Tick函数。
UCLASS()
class ESRPG_API APlayerCharacter : public AESRPGCharacter
{
	GENERATED_BODY()

	/** Camera boom positioning the camera behind the character */
	UPROPERTY(VisibleAnywhere, BlueprintReadOnly, Category = Camera, meta = (AllowPrivateAccess = "true"))
	class USpringArmComponent* CameraBoom;

	/** Follow camera */
	UPROPERTY(VisibleAnywhere, BlueprintReadOnly, Category = Camera, meta = (AllowPrivateAccess = "true"))
	class UCameraComponent* FollowCamera;

public:
	APlayerCharacter();

	// Called every frame
	virtual void Tick(float DeltaTime) override;

	UPROPERTY(Category=Character, VisibleAnywhere, BlueprintReadOnly, meta=(AllowPrivateAccess = "true"))
	USkeletalMeshComponent* HeadMesh;

	UPROPERTY(Category=Character, VisibleAnywhere, BlueprintReadOnly, meta=(AllowPrivateAccess = "true"))
	USkeletalMeshComponent* BodyMesh;

	UPROPERTY(Category=Character, VisibleAnywhere, BlueprintReadOnly, meta=(AllowPrivateAccess = "true"))
	USkeletalMeshComponent* PantsMesh;

	UPROPERTY(Category=Character, VisibleAnywhere, BlueprintReadOnly, meta=(AllowPrivateAccess = "true"))
	USkeletalMeshComponent* HandsMesh;

	UPROPERTY(Category=Character, VisibleAnywhere, BlueprintReadOnly, meta=(AllowPrivateAccess = "true"))
	USkeletalMeshComponent* FeetMesh;

public:
	/** Returns CameraBoom subobject **/
	FORCEINLINE class USpringArmComponent* GetCameraBoom() const { return CameraBoom; }
	/** Returns FollowCamera subobject **/
	FORCEINLINE class UCameraComponent* GetFollowCamera() const { return FollowCamera; }

public :
	UFUNCTION(BlueprintCallable)
		void UpdateCharacterRotation(float DeltaTime);

	// Save Controller Rotation.
	UPROPERTY(Category = "State|Rotation", VisibleAnywhere, BlueprintReadOnly, meta = (AllowPrivateAccess = "true"))
		FRotator PlayerControlRotation;

	// Save Player target rotation.
	UPROPERTY(Category = "State|Rotation", VisibleAnywhere, BlueprintReadOnly, meta = (AllowPrivateAccess = "true"))
		FRotator TargetCharacterRotation;

	// Save Player target rotation.
	UPROPERTY(Category = "State|Rotation", VisibleAnywhere, BlueprintReadOnly, meta = (AllowPrivateAccess = "true"))
		FRotator CharacterRotation;
};
SetMasterPoseComponent的作用就是将骨骼的控制权交给父类,这样在之后添加动画蓝图之后不会有“分头行动”的情况出现。
其他的都一样。
APlayerCharacter::APlayerCharacter()
{
	// Set body parts
	HeadMesh = CreateDefaultSubobject<USkeletalMeshComponent>(TEXT("HeadMesh"));
	HeadMesh->SetupAttachment(GetMesh());
	HeadMesh->SetMasterPoseComponent(GetMesh());

	BodyMesh = CreateDefaultSubobject<USkeletalMeshComponent>(TEXT("BodyMesh"));
	BodyMesh->SetupAttachment(GetMesh());
	BodyMesh->SetMasterPoseComponent(GetMesh());

	PantsMesh = CreateDefaultSubobject<USkeletalMeshComponent>(TEXT("PantsMesh"));
	PantsMesh->SetupAttachment(GetMesh());
	PantsMesh->SetMasterPoseComponent(GetMesh());

	HandsMesh = CreateDefaultSubobject<USkeletalMeshComponent>(TEXT("HandsMesh"));
	HandsMesh->SetupAttachment(GetMesh());
	HandsMesh->SetMasterPoseComponent(GetMesh());

	FeetMesh = CreateDefaultSubobject<USkeletalMeshComponent>(TEXT("FeetMesh"));
	FeetMesh->SetupAttachment(GetMesh());
	FeetMesh->SetMasterPoseComponent(GetMesh());

	// Create a camera boom (pulls in towards the player if there is a collision)
	CameraBoom = CreateDefaultSubobject<USpringArmComponent>(TEXT("CameraBoom"));
	CameraBoom->SetupAttachment(RootComponent);
	CameraBoom->TargetArmLength = 300.0f; // The camera follows at this distance behind the character
	CameraBoom->bUsePawnControlRotation = true; // Rotate the arm based on the controller

	// Create a follow camera
	FollowCamera = CreateDefaultSubobject<UCameraComponent>(TEXT("FollowCamera"));
	FollowCamera->SetupAttachment(CameraBoom, USpringArmComponent::SocketName); // Attach the camera to the end of the boom and let the boom adjust to match the controller orientation
	FollowCamera->bUsePawnControlRotation = false; // Camera does not rotate relative to arm
}

                  更新角色移动旋转角度,让角色朝向与摄像头一致。
void APlayerCharacter::Tick(float DeltaTime)
{
	Super::Tick(DeltaTime);
	UpdateCharacterRotation(DeltaTime);
}

void APlayerCharacter::UpdateCharacterRotation(float DeltaTime)
{
	if (HasAuthority())
	{
		PlayerControlRotation = GetControlRotation();
		TargetCharacterRotation = FRotator(0.f, PlayerControlRotation.Yaw, 0.f);
	}

	CharacterRotation = UKismetMathLibrary::RInterpTo(CharacterRotation, TargetCharacterRotation, DeltaTime, 5.f);
	SetActorRotation(CharacterRotation);
}
添加头文件:
#include "GameFramework/SpringArmComponent.h"
#include "Camera/CameraComponent.h"
#include "Kismet/KismetMathLibrary.h"
创建动画蓝图
新建一个继承AnimInstance的C++类,为之后的蓝图类更新一些变量。
(我在探索C++ 和 蓝图之前的均衡模式,有些地方就直接用的蓝图,比如说有图形界面、需要不断调试才知道某个东西放在某个位置是否合适的时候,使用蓝图效率会高很多。其他地方用的C++,对于编程逻辑实现这块,个人感觉比蓝图清晰很多,有些东西也没必要写那么多,有时候C++几行代码就写完了。)
- NativeInitializeAnimation 相当于beginPlay
- NativeUpdateAnimation 相当于Tick函数
UCLASS()
class ESRPG_API UJessAnim : public UAnimInstance
{
	GENERATED_BODY()

public:
	// init data
	virtual void NativeInitializeAnimation() override;

	// update animation data.
	virtual void NativeUpdateAnimation(float DeltaSeconds) override;

	UPROPERTY(VisibleAnywhere, BlueprintReadWrite)
		class APlayerCharacter* Man;

	// Update all Variables
	UFUNCTION(BlueprintCallable)
		void UpdateVariables();

	// Update Movement Variable
	UFUNCTION(BlueprintCallable)
		void UpdateMovementVariables();

	// Man Run Speed
	UPROPERTY(VisibleAnywhere, BlueprintReadWrite)
		FVector ManVelocity;

	// move Speed
	UPROPERTY(VisibleAnywhere, BlueprintReadWrite)
		float Speed;

	// move Direction
	UPROPERTY(VisibleAnywhere, BlueprintReadWrite)
		float MoveDirection;

	// Judge whether the character is moving.
	UPROPERTY(VisibleAnywhere, BlueprintReadWrite)
		bool bIsMoving;

	// Judge whether the character is in Air.
	UPROPERTY(VisibleAnywhere, BlueprintReadWrite)
		bool bIsInAir;

	// Save Last Velocity Rotation
	UPROPERTY(VisibleAnywhere, BlueprintReadWrite)
		FRotator LastVelocityRotation;

	// Save Target Direction
	UPROPERTY(VisibleAnywhere, BlueprintReadWrite)
		float TargetDirection;
};
CPP文件:
更新相关变量,作用后面会体现。
写代码的时候多将代码模块化,方便后面Debug。
***********************************************************
添加头文件:
#include "Kismet/KismetMathLibrary.h"
#include "GameFramework/PawnMovementComponent.h"
#include "GameFramework/CharacterMovementComponent.h"

***********************************************************

void UJessAnim::NativeInitializeAnimation()
{
	Man = Cast<APlayerCharacter>(TryGetPawnOwner());
}

void UJessAnim::NativeUpdateAnimation(float DeltaSeconds)
{
	if (Man)
	{
		UpdateVariables();
	}
}

void UJessAnim::UpdateVariables()
{
	UpdateMovementVariables();
}

void UJessAnim::UpdateMovementVariables()
{
	// Update Speed
	ManVelocity = Man->GetVelocity();
	Speed = ManVelocity.Size();

	// get Lateral Speed
	FVector LateralSpeed = ManVelocity;
	LateralSpeed.Z = 0.f;

	// Judge whether the character is moving
	bIsMoving = UKismetMathLibrary::NotEqual_VectorVector(LateralSpeed, FVector(0), 1.f);

	// Update other related variables...
	bIsInAir = Man->GetMovementComponent()->IsFalling();

	if (bIsMoving)
	{
		// Update Man Direction
		LastVelocityRotation = UKismetMathLibrary::Conv_VectorToRotator(ManVelocity);
		TargetDirection = UKismetMathLibrary::NormalizedDeltaRotator(LastVelocityRotation, TryGetPawnOwner()->GetActorRotation()).Yaw;
		if (UKismetMathLibrary::Abs(MoveDirection - TargetDirection) > 270.f)
		{
			MoveDirection = TargetDirection;
		}
		else
		{
			MoveDirection = UKismetMathLibrary::FInterpTo(MoveDirection, TargetDirection, GetWorld()->DeltaTimeSeconds, 10.f);
		}
	}
}
创建动画蓝图,(不要使用右键继承的方式。)要使用这种方式创建蓝图
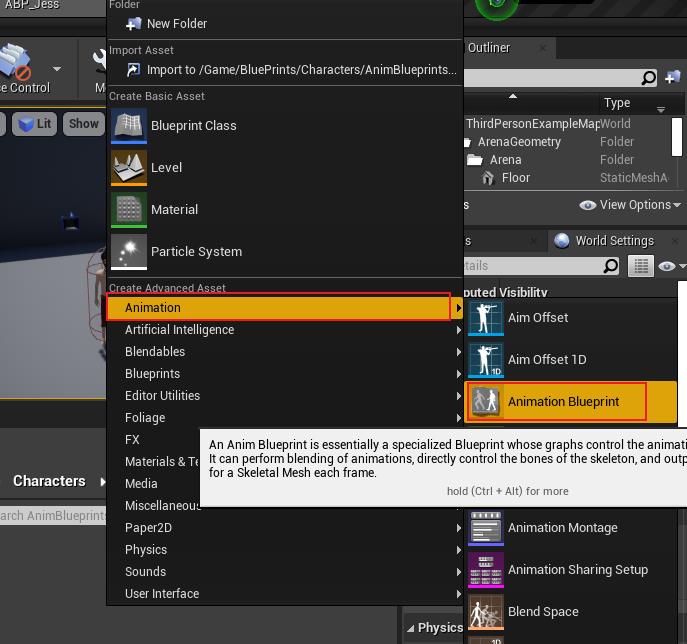
并且选择对应的骨骼。
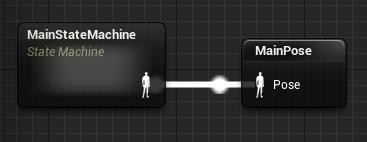
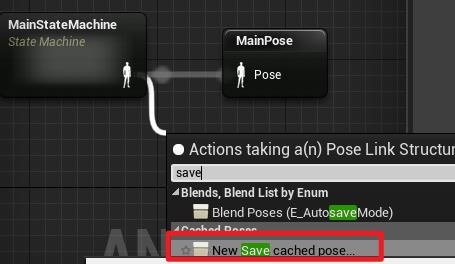
新建一个状态机,并且将状态保存在一个缓存姿势中:
将线连出来,输入Save 就会弹出来。
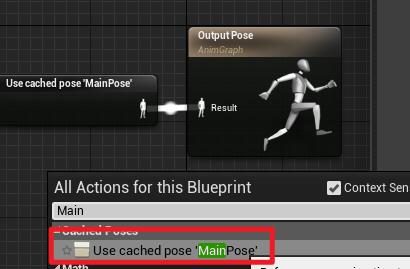
连接到输出姿势,右键输入缓存姿势的名字就会弹出来。
接下来将状态机中的内容补充完整:
接下来处理Idle状态:
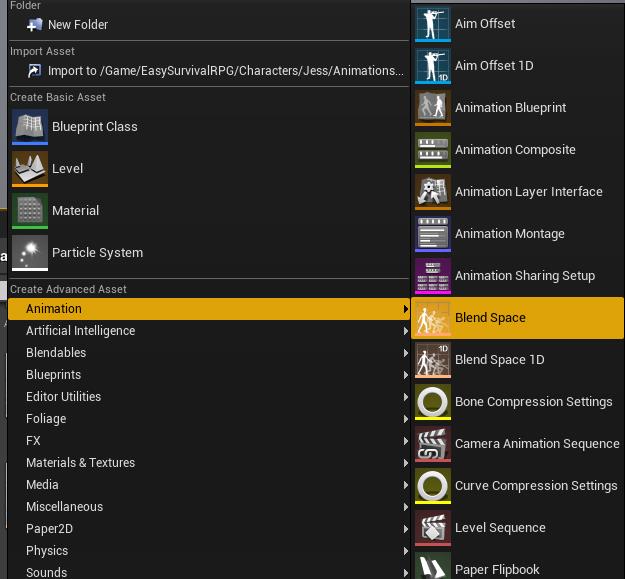
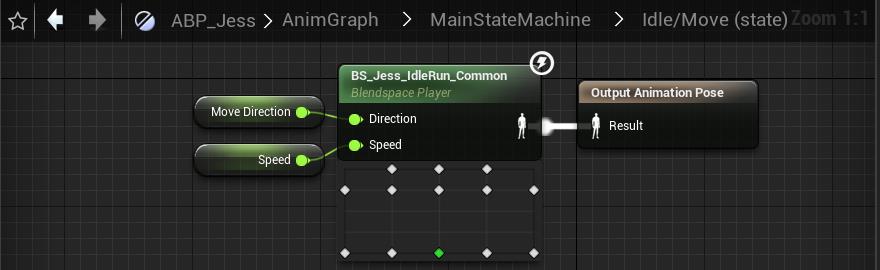
新建混合空间:
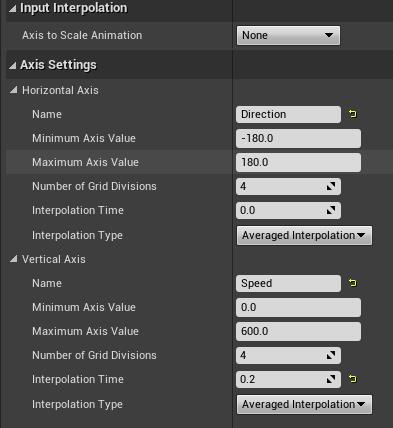
设置方向:
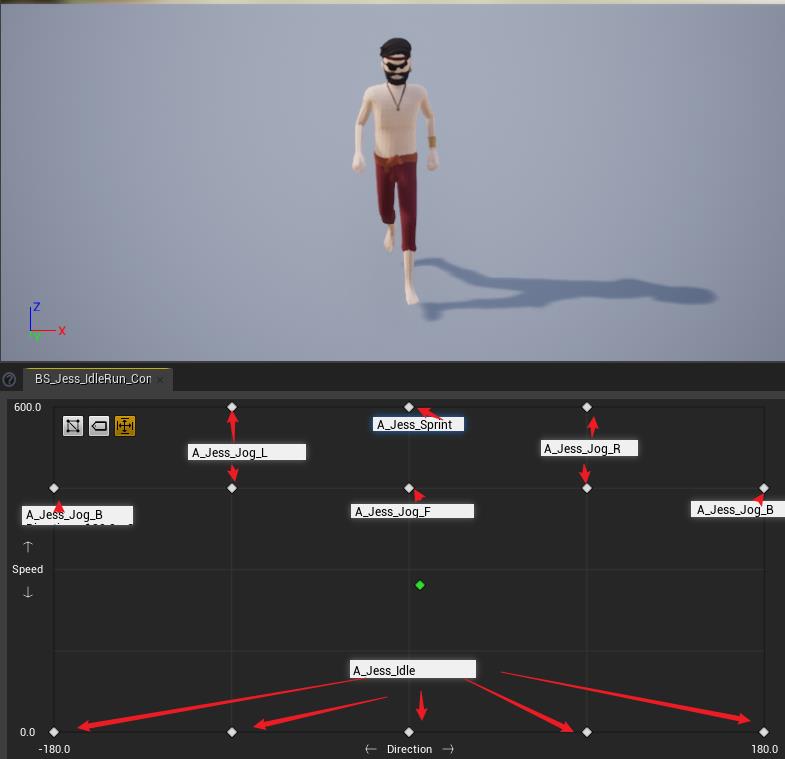
把对应的动画放到其中就可以了, 这里有个小技巧,向左向右加速的动画是同一个动画,但是他们的速度却是不一样的,动作一样,但是上面的动画播放速率大一些。
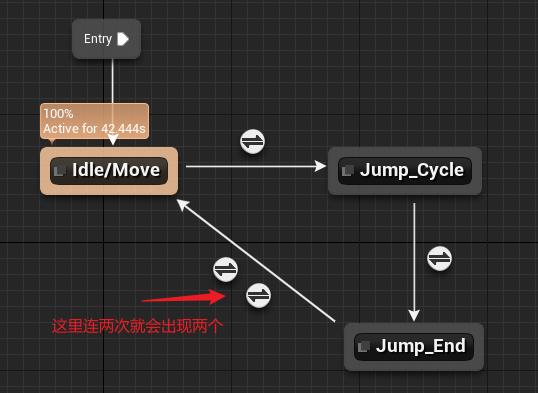
将新建的混合空间放入状态机中:
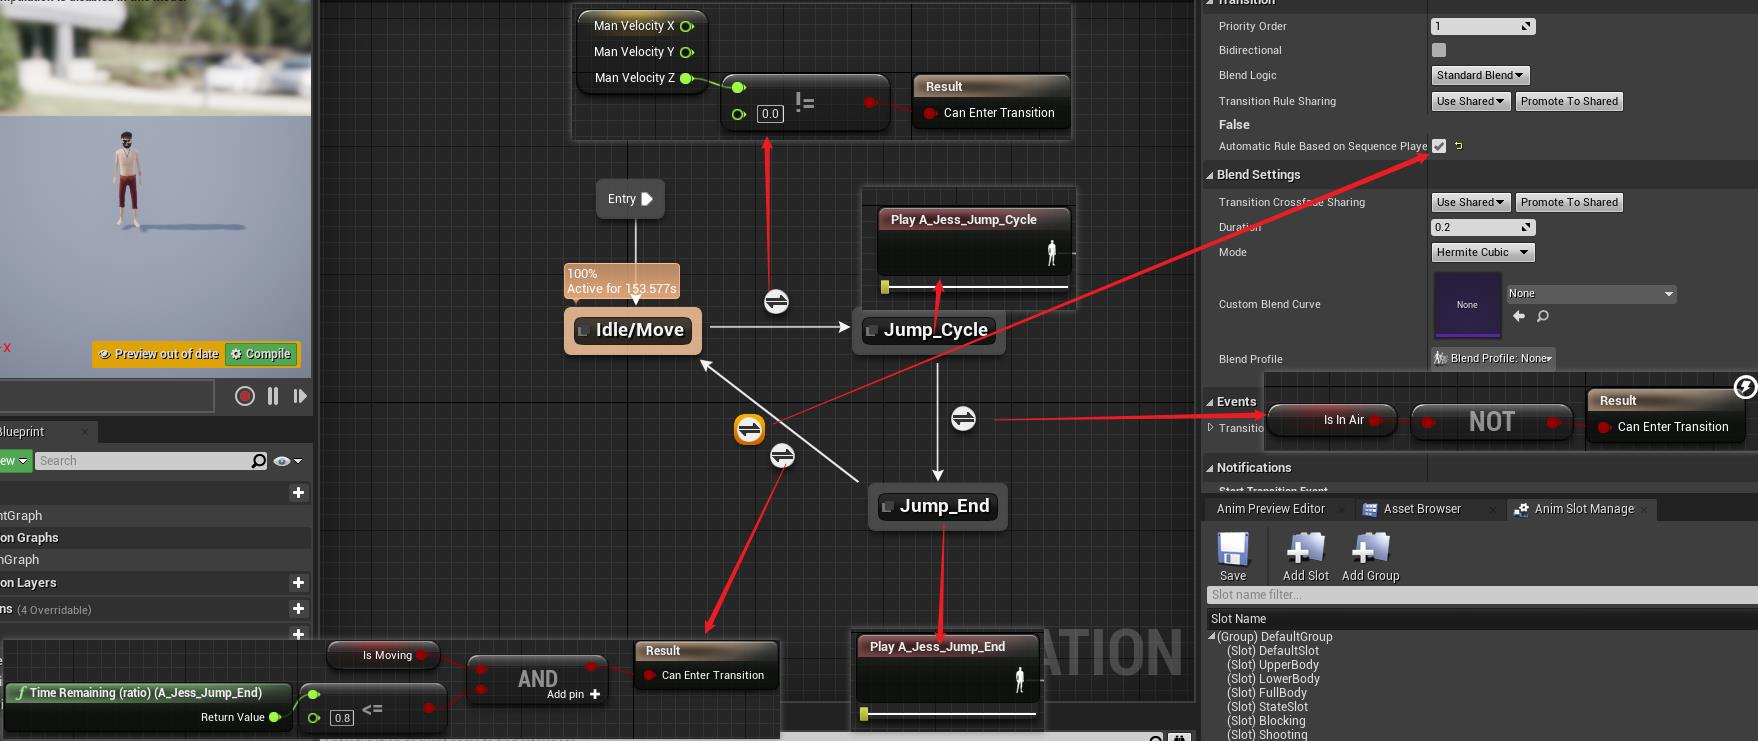
只要人物有向上的速度,就进入跳跃状态,于此同时,引擎每一帧都会更新Is In Air,当不处于空中状态的时候就会结束跳跃。
设置两个状态转移条件主要在于方便调试和修改,相当于 ||,或的意思,两者其一都可以,上面那个处理按下跳跃之后不运动了,Jump_End动画结束之后进入Idle状态,下面的那个处理处于运动状态,并且动画快要放完的时候,进行转换,进入跑步状态。
人物模型设置
以玩家类为父类创建蓝图:
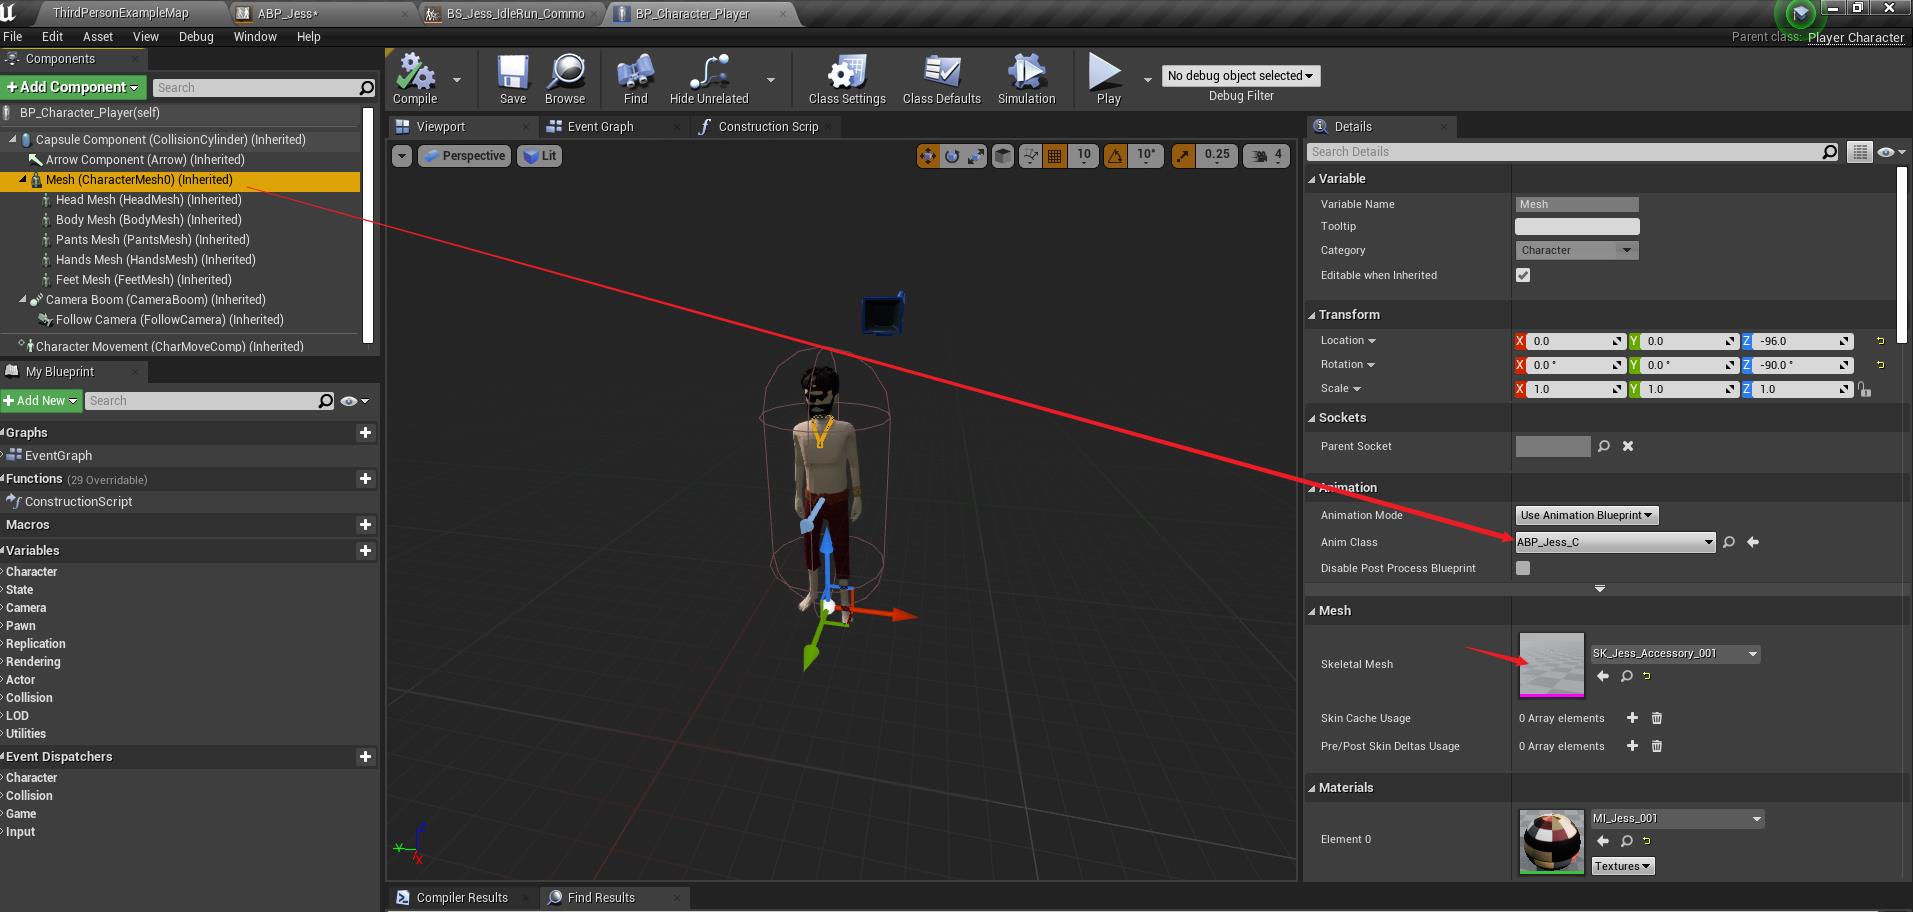
点击Mesh骨骼组件,设置位置和旋转值,加载动画蓝图,骨骼组件。
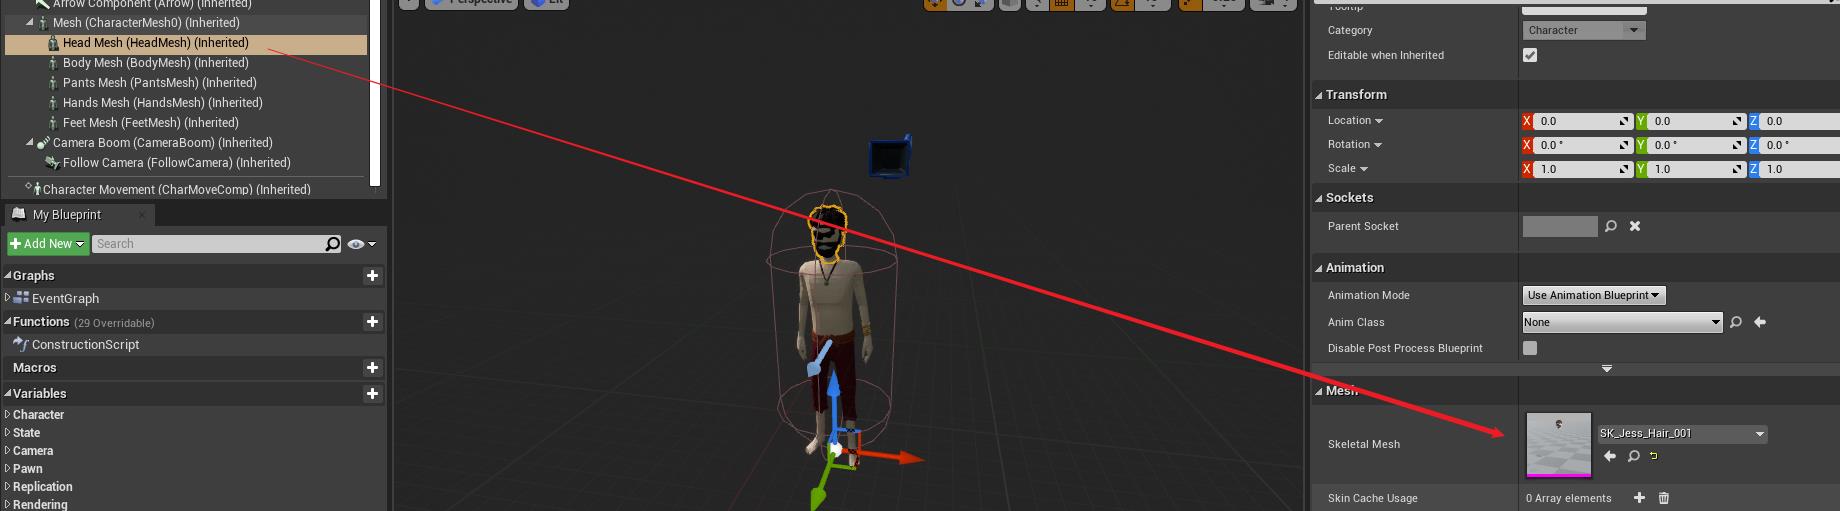
下面的组件只需加载对应的骨骼组件就行:
摄像机勾选摄影机滞后,摄影机就不会移动的很快,而是以一种速度缓慢的移动到角色的位置。

创建游戏模式
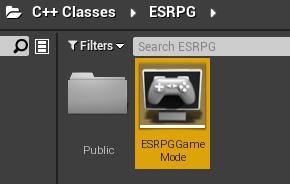
以它为父类,创建蓝图类。
打开全局设置:
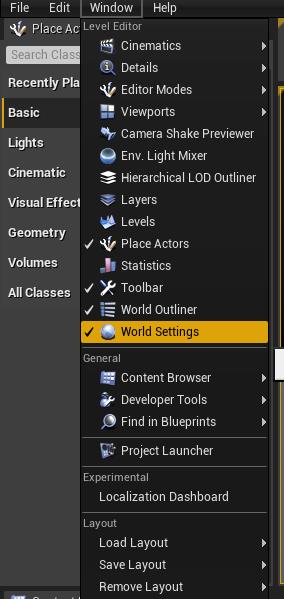
设置蓝图模式,默认Pawn类设置为玩家类蓝图。

最后编译体验一下吧。
以上是关于ESRPG C++ 操控主角移动的主要内容,如果未能解决你的问题,请参考以下文章