menpo 人脸识别测试样例
Posted 아둔한 돼지
tags:
篇首语:本文由小常识网(cha138.com)小编为大家整理,主要介绍了menpo 人脸识别测试样例相关的知识,希望对你有一定的参考价值。
menpo作为一个集成程度比较高的开发库,里面集合了opencv numpy 还有很多其他的库,理论上数据之间可以相互转换,如果大家用的不熟练的话可以将该库的输出转化为自己熟悉的库比如numpy,用于做人脸识别是比较方便的(我不是要做这个的所以人脸识别具体怎么搞我也不太清楚,我是想用该库做医学图像分割),在该领域一个比较核心的点是landmark localization,所以下面将会演示如何使用menpo的库进行人脸特征点识别。今天只是分享个实例,每个函数的具体意思和参数要求会在下一篇博文中讲解,今天只是展示一下如何使用(我不会告诉你我还没看明白他的底层库的),算法具体原理就不细讲了(我也不懂,貌似该库是对几十篇顶刊的算法实现),包括AAM SDM APS 等等诸多算法,从某种角度讲这能让我们使用高级算法的同时还不用自己去实现,节省很大一部分时间。
首先完成上面对库的安装和环境的搭建,为了使效果更直观我使用了jupyter 来进行程序运行,jupyter如何在linux下安装可以参考其他博客
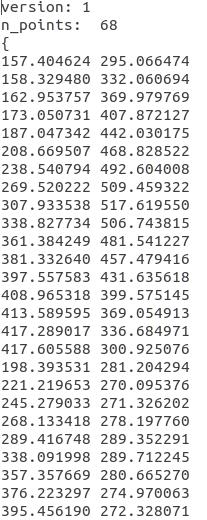
数据源来自于http://ibug.doc.ic.ac.uk/resources/facial-point-annotations/ 的LFPW数据源。该数据源中包括png类型图片 还有pts点集,具体情况如下:
 数据信息如下:

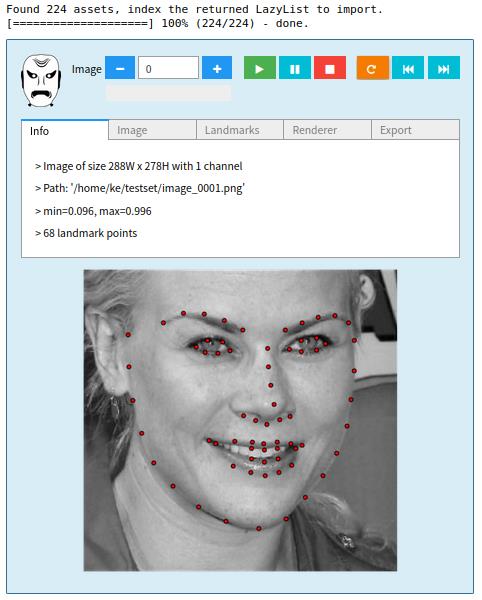
将数据资源下载完成后就可以加载图片和数据点集了:
%matplotlib inline
from menpowidgets import visualize_images

import menpo.io as mio
from menpo.visualize import print_progress
from menpo.landmark import labeller, face_ibug_68_to_face_ibug_68_trimesh

path_to_images = '/home/ke/testset/'
training_images = []
for img in print_progress(mio.import_images(path_to_images, verbose=True)):
    # convert to greyscale
    if img.n_channels == 3:
        img = img.as_greyscale()
    # crop to landmarks bounding box with an extra 20% padding
    img = img.crop_to_landmarks_proportion(0.2)
    # rescale image if its diagonal is bigger than 400 pixels
    d = img.diagonal()
    if d > 400:
        img = img.rescale(400.0 / d)
    # define a TriMesh which will be useful for Piecewise Affine Warp of HolisticAAM
    labeller(img, 'PTS', face_ibug_68_to_face_ibug_68_trimesh)
    # append to list
    training_images.append(img)
visualize_images(training_images)
需要修改path_to_image 为你图片存的路径,其他的无需修改,下面是效果展示:
下面是训练模型(包括了特征点对齐,生成shape_model 和appearance_model),训练完成后会告诉你在不同scale下的模型已经训练完毕
from menpofit.aam import PatchAAM
from menpo.feature import fast_dsift
patch_aam = PatchAAM(training_images, group='PTS', patch_shape=[(15, 15), (23, 23)],
                     diagonal=150, scales=(0.5, 1.0), holistic_features=fast_dsift,
                     max_shape_components=20, max_appearance_components=150,
                     verbose=True)
随后就是基于光流法生成一个fillter用于最终的fitting,
from menpofit.aam import LucasKanadeAAMFitter, WibergInverseCompositional

fitter = LucasKanadeAAMFitter(patch_aam, lk_algorithm_cls=WibergInverseCompositional,
                              n_shape=[5, 20], n_appearance=[30, 150])
print(fitter)
生成完filter后就可以进行测试了,首先导入路径和图片,该图片即为测试图片
from pathlib import Path
import menpo.io as mio
path_to_lfpw = Path('/home/ke/testset/')

image = mio.import_image(path_to_lfpw / 'image_0021.png')
image = image.as_greyscale()
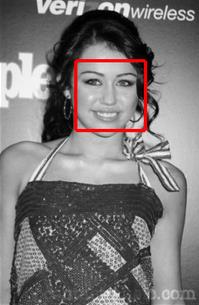
一般需要定位模型的初始位置,否则大概率出现收敛不成功的问题,一个好的初始位置在该问题中很重要,在该库中可以使用 load_dlib_frontal_face_detector()函数生成人脸的初始位置,并将该位置作为filter的输入位置
from menpodetect import load_dlib_frontal_face_detector

# Load detector
detect = load_dlib_frontal_face_detector()

# Detect
bboxes = detect(image)
print("{} detected faces.".format(len(bboxes)))

# View
if len(bboxes) > 0:
    image.view_landmarks(group='dlib_0', line_colour='red',
                         render_markers=False, line_width=4);
如上图所示可以较为准确的识别人脸的位置,大家如果想用在其他领域也可以使用这个menpodetect库,里面集成了opencv dlib 还有其他很多的人脸检测的资源,有兴趣的可以玩一下。
随后就可以使用filter进行最后的拟合了:initial_bbox是初始的位置
# initial bbox
initial_bbox = bboxes[0]

# fit image
result = fitter.fit_from_bb(image, initial_bbox, max_iters=[15, 5],
                            gt_shape=image.landmarks['PTS'].lms)

# print result
print(result)
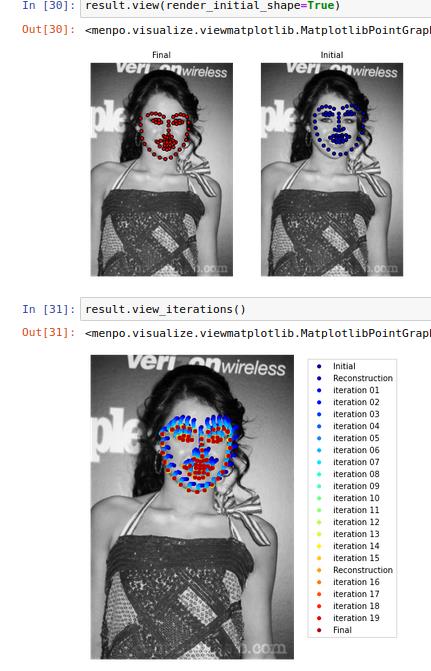
下面是最终的人脸识别效果:

他可以显示迭代过程,效果很不错,今天就分享到这,我要继续去看库文件了。
该库可用于医疗图像分割、人脸识别等等很多领域,鉴于大家看英文感觉麻烦,我就看一点给大家分享一点,学会了该库感觉还是很有用的,如果后面时间的多的话会写一下原理和具体实现
以上是关于menpo 人脸识别测试样例的主要内容,如果未能解决你的问题,请参考以下文章