egg项目添加自动化swagger-ui可视化文档功能,支持Authorization验证
Posted IT飞牛
tags:
篇首语:本文由小常识网(cha138.com)小编为大家整理,主要介绍了egg项目添加自动化swagger-ui可视化文档功能,支持Authorization验证相关的知识,希望对你有一定的参考价值。
后端使用egg完成接口开发,借助swagger自动化,大大方便前后端的数据业务对接工作,做到所有接口有文档可查。
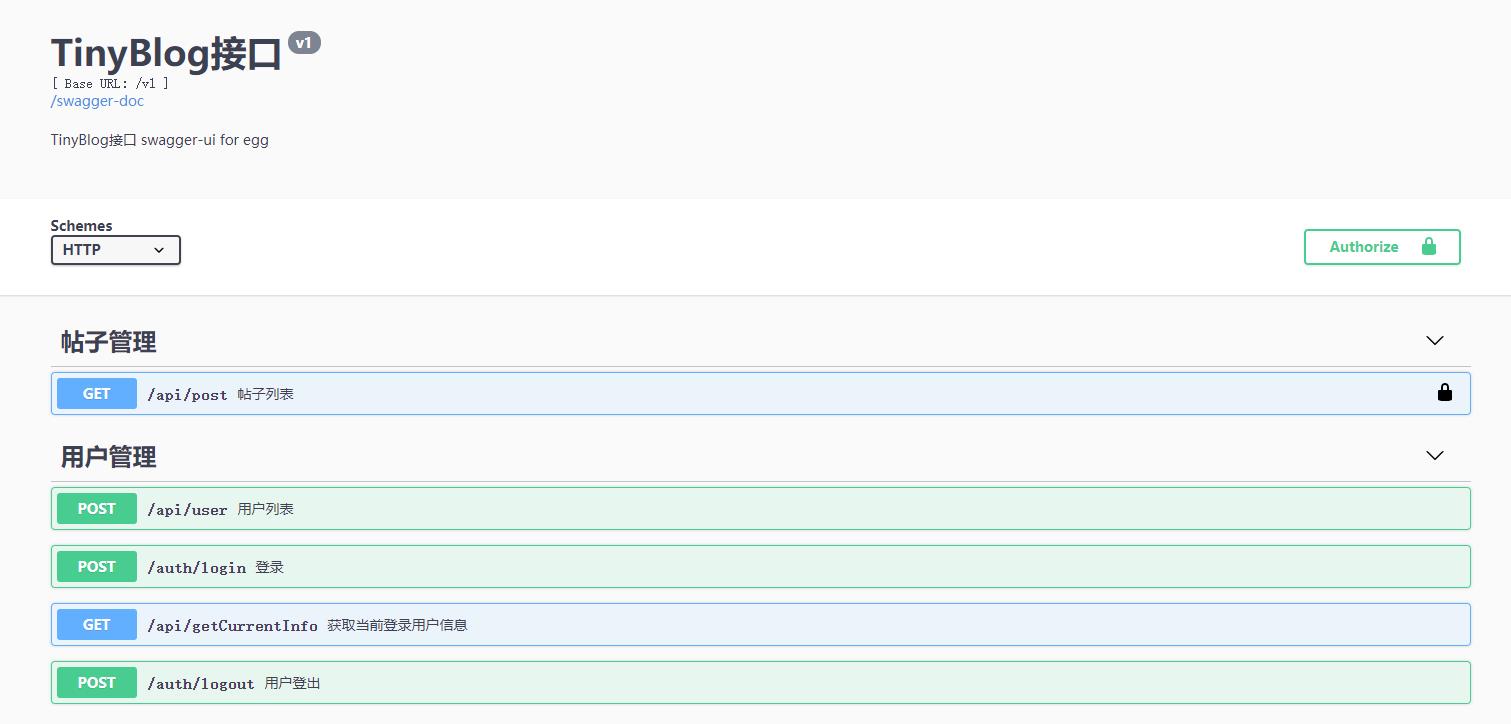
这里介绍使用npm install egg-swagger-doc-feat来实现,自动生成接口文档,如图:
一、安装
npm i egg-swagger-doc-feat --save
二、用法
// {app_root}/config/plugin.js
exports.swaggerdoc = {
  enable: true,
  package: 'egg-swagger-doc-feat',
};
三、配置文件
// {app_root}/config/config.default.js
exports.swaggerdoc = {
  dirScanner: './app/controller',
  apiInfo: {
    title: 'egg-swagger',
    description: 'swagger-ui for egg',
    version: '1.0.0',
  },
  schemes: ['http', 'https'],
  consumes: ['application/json'],
  produces: ['application/json'],
  securityDefinitions: {
    // apikey: {
    //   type: 'apiKey',
    //   name: 'clientkey',
    //   in: 'header',
    // },
    // oauth2: {
    //   type: 'oauth2',
    //   tokenUrl: 'http://petstore.swagger.io/oauth/dialog',
    //   flow: 'password',
    //   scopes: {
    //     'write:access_token': 'write access_token',
    //     'read:access_token': 'read access_token',
    //   },
    // },
  },
  enableSecurity: false,
  // enableValidate: true,
  routerMap: false,
  enable: true,
};
四、创建约定文件
在app目录下创建contract文件夹,并新建post.js、index.js
完成插件引入之后,如果不修改默认配置,应用启动后,会自动扫描app/contract下的文件。此目录下的文件用于生命接口的验证请求接口是提交的数据,和相应数据;
每个约定文件返回一个数据对象,对象定义了这个接口在提交时,数据的类型、格式、是否必填;
例如:id: { type: 'string', description: 'id 唯一键', required: true, example: '1' },
这行代码表示字段名id,是字符串类型,必填;
description:描述内容,用于在swagger-ui文档中显示提示;
example:数据演示
这里还支持format属性,可以赋值正则,字符串的高级验证功能,类似format: /^1[34578]\\d{9}$/。
//index.js
module.exports = {
    baseRequest: {
        id: { type: 'string', description: 'id 唯一键', required: true, example: '1' },
    },
    baseResponse: {
        code: { type: 'integer', required: true, example: 0 },
        data: { type: 'string', example: '请求成功' },
        errorMessage: { type: 'string', example: '请求成功' },
    },
};

//user.js
module.exports = {
    loginRequest: {
        name: {
            type: 'string',
            required: true,
            description: '用户名',
            example: 'admin'
        },
        password: {
            type: 'string',
            required: true,
            description: '密码',
            example: '123',
        }
    }
}
在app/controller控制器中的所有action方法前,添加swageer配置注释
如果提交时没有数据,不用验证,则可以把@request xxx去掉;
const { Controller } = require("egg");
/**
 * @Controller 用户管理
 */
class UserController extends Controller {
    constructor(ctx) {
        super(ctx);
    }

    /**
     * @summary 登录
     * @description 账号、密码登录
     * @router post /auth/login
     * @request body loginRequest *body(DTO)
     * @response 200 baseResponse 创建成功(DTO)
     */
    async login() {
        const { ctx, service } = this
        // 校验参数
        ctx.validate(ctx.rule.loginRequest);
        // 组装参数
        const payload = ctx.request.body || {}
        // 调用 Service 进行业务处理
        const res = await service.userAccess.login(payload)
        // 设置响应内容和响应状态码
        ctx.helper.success({ ctx, res })
    }
}

module.exports = UserController;
五、生成
执行运行命令npm run dev,控制台会显示文档地址

打开文档:http://127.0.0.1:端口/swagger-ui.html
六、接口token验证
调整配置文件{app_root}/config/config.default.js
- 开启enableSecurity,配置securityDefinitions.apikey
exports.swaggerdoc = {
...
  securityDefinitions: {
     apikey: {
       type: 'apiKey',
       name: 'Authorization',//jwt一般是这名字,根据需要调整
       in: 'header',
     },
  },
  enableSecurity: true,
...
};
- 在接口注释中添加
@apikey - 进入swagger-ui文档,点击Authorize按钮,配置口令值

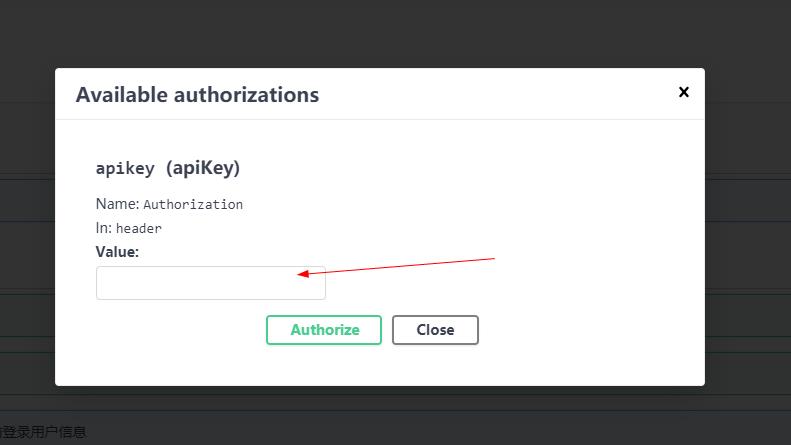
4. 再提交是,request头中会带上Authorization

官方文档:https://www.nodenpm.com/egg-swagger-doc-feat/package.html
以上是关于egg项目添加自动化swagger-ui可视化文档功能,支持Authorization验证的主要内容,如果未能解决你的问题,请参考以下文章