Day374.shiro授权&Shiro+jsp整合Springboot -Shiro
Posted 阿昌喜欢吃黄桃
tags:
篇首语:本文由小常识网(cha138.com)小编为大家整理,主要介绍了Day374.shiro授权&Shiro+jsp整合Springboot -Shiro相关的知识,希望对你有一定的参考价值。
Shiro授权
一、授权
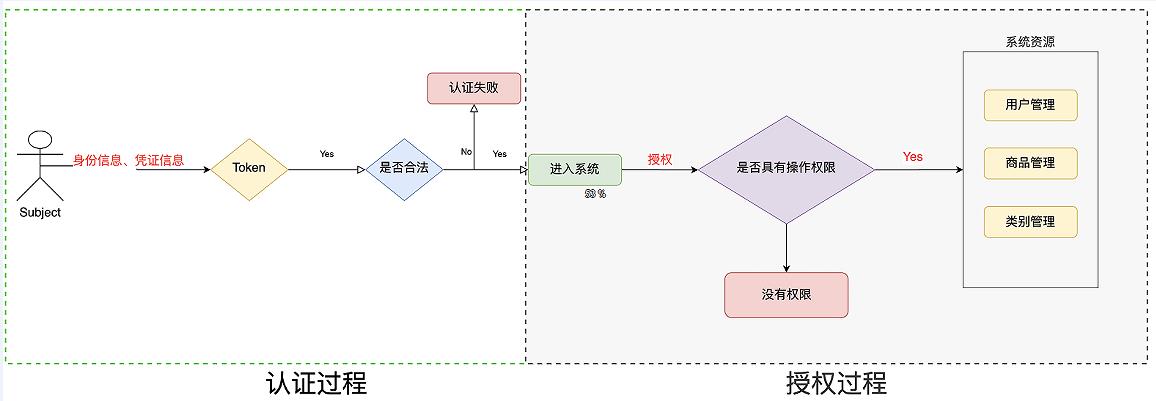
授权,即访问控制,控制谁能访问哪些资源。主体进行身份认证后需要分配权限方可访问系统的资源,对于某些资源没有权限是无法访问的。
二、关键对象
授权可简单理解为who对what(which)进行How操作:
Who,即主体(Subject),主体需要访问系统中的资源。
What,即资源(Resource),如系统菜单、页面、按钮、类方法、系统商品信息等。资源包括资源类型和资源实例,比如商品信息为资源类型,类型为t01的商品为资源实例,编号为001的商品信息也属于资源实例。
How,权限/许可(Permission),规定了主体对资源的操作许可,权限离开资源没有意义,如用户查询权限、用户添加权限、某个类方法的调用权限、编号为001用户的修改权限等,通过权限可知主体对哪些资源都有哪些操作许可。
三、授权流程
四、授权方式
-
基于角色的访问控制
-
RBAC基于角色的访问控制(Role-Based Access Control)是以角色为中心进行访问控制
if(subject.hasRole("admin")){
   //操作什么资源
}
-
-
基于资源的访问控制
-
RBAC基于资源的访问控制(Resource-Based Access Control)是以资源为中心进行访问控制
if(subject.isPermission("user:update:01")){ //资源实例
  //对01用户进行修改
}
if(subject.isPermission("user:update:*")){  //资源类型
  //对01用户进行修改
}
-
五、权限字符串
权限字符串的规则是:资源标识符:操作:资源实例标识符,意思是对哪个资源的哪个实例具有什么操作,“:”是资源/操作/实例的分割符,权限字符串也可以使用*通配符。
例子:
- 用户创建权限:user:create,或user:create:*
- 用户修改实例001的权限:user:update:001
- 用户实例001的所有权限:user : * :001
A:B:C,A通过B来操作C
六、shiro中授权编程实现方式
-
编程式
Subject subject = SecurityUtils.getSubject(); if(subject.hasRole(“admin”)) { //有权限 } else { //无权限 } -
注解式
@RequiresRoles("admin") public void hello() { //有权限 } -
标签式
JSP/GSP 标签:在JSP/GSP 页面通过相应的标签完成:
<shiro:hasRole name="admin">
	<!— 有权限—>
</shiro:hasRole>
注意: Thymeleaf 中使用shiro需要额外集成!
七、开发授权
1.realm的实现
public class CustomerRealm extends AuthorizingRealm {
    //认证方法
    @Override
    protected AuthorizationInfo doGetAuthorizationInfo(PrincipalCollection principals) {
        //获取主身份,也就是用户名
        String primaryPrincipal = (String) principals.getPrimaryPrincipal();
        System.out.println("primaryPrincipal = " + primaryPrincipal);

        SimpleAuthorizationInfo simpleAuthorizationInfo = new SimpleAuthorizationInfo();
        //添加角色
        simpleAuthorizationInfo.addRole("admin");

        simpleAuthorizationInfo.addStringPermission("user:update:*");
        simpleAuthorizationInfo.addStringPermission("product:*:*");

        return simpleAuthorizationInfo;
    }

    //授权方法
    @Override
    protected AuthenticationInfo doGetAuthenticationInfo(AuthenticationToken token) throws AuthenticationException {
        String principal = (String) token.getPrincipal();
        if("xiaochen".equals(principal)){
            String password = "3c88b338102c1a343bcb88cd3878758e";
            String salt = "Q4F%";
            return new SimpleAuthenticationInfo(principal,
                                                password,
                                               ByteSource.Util.bytes(salt),
                                                this.getName());
        }
        return null;
    }

}
2.授权
public class TestAuthenticatorCusttomerRealm {
    public static void main(String[] args) {
        //创建securityManager
        DefaultSecurityManager defaultSecurityManager = new DefaultSecurityManager();
        //IniRealm realm = new IniRealm("classpath:shiro.ini");
        //设置为自定义realm获取认证数据
        CustomerRealm customerRealm = new CustomerRealm();
        //设置md5加密
        HashedCredentialsMatcher credentialsMatcher = new HashedCredentialsMatcher();
        credentialsMatcher.setHashAlgorithmName("MD5");
        credentialsMatcher.setHashIterations(1024);//设置散列次数
        customerRealm.setCredentialsMatcher(credentialsMatcher);
        defaultSecurityManager.setRealm(customerRealm);
        //将安装工具类中设置默认安全管理器
        SecurityUtils.setSecurityManager(defaultSecurityManager);
        //获取主体对象
        Subject subject = SecurityUtils.getSubject();
        //创建token令牌
        UsernamePasswordToken token = new UsernamePasswordToken("achang", "123");
        try {
            subject.login(token);//用户登录
            System.out.println("登录成功~~");
        } catch (UnknownAccountException e) {
            e.printStackTrace();
            System.out.println("用户名错误!!");
        }catch (IncorrectCredentialsException e){
            e.printStackTrace();
            System.out.println("密码错误!!!");
        }

        //认证通过
        if(subject.isAuthenticated()){
            //基于角色权限管理
            boolean admin = subject.hasRole("admin");

            //基于多角色权限控制,hasAllRoles只要有一个该subject不含有,就返回false
            boolean roles = subject.hasAllRoles(Arrays.asList("admin","super"));

            //是否具有其中一个角色,返回布尔数组,含有就是t,不含有就是f
            boolean[] booleans = subject.hasRoles(Arrays.asList("admin","super","user"));


            boolean permitted = subject.isPermitted("product:create:001");
            System.out.println(permitted);
        }

    }
}
整合SpringBoot项目实战
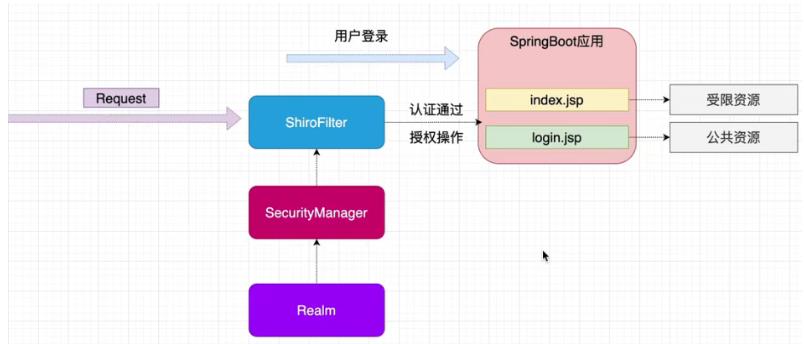
零、整合思路
一、创建springboot项目
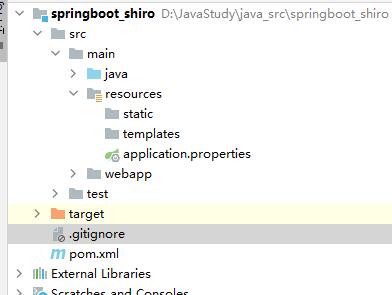
二、引入shiro依赖
<dependency>
  <groupId>org.apache.shiro</groupId>
  <artifactId>shiro-spring-boot-starter</artifactId>
  <version>1.5.3</version>
</dependency>
三、配置shiro环境
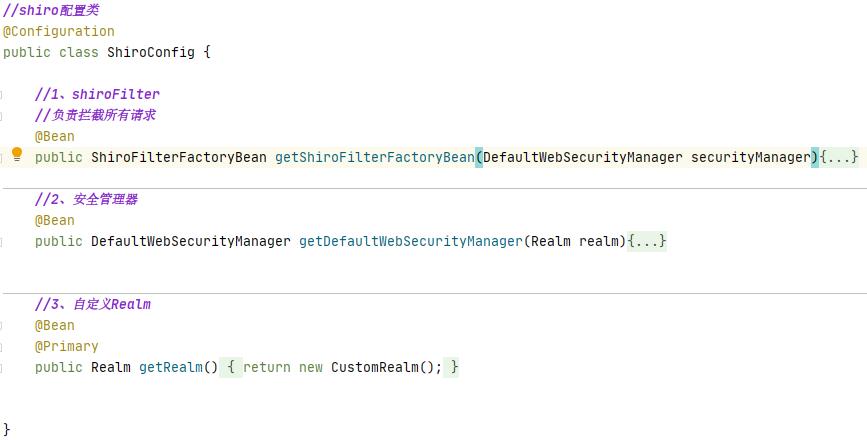
1.配置shiroFilterFactoryBean
//1、shiroFilter
//负责拦截所有请求
@Bean
public ShiroFilterFactoryBean getShiroFilterFactoryBean(DefaultWebSecurityManager securityManager){
    ShiroFilterFactoryBean shiroFilterFactoryBean = new ShiroFilterFactoryBean();
    //注入安全管理器
    shiroFilterFactoryBean.setSecurityManager(securityManager);

    //设置受限资源
    HashMap<String, String> map = new HashMap<>();
    map.put("/index.jsp","authc");//authc 请求这个资源,需要认证授权
    shiroFilterFactoryBean.setFilterChainDefinitionMap(map);

    //默认认证界面路径
    shiroFilterFactoryBean.setLoginUrl("/login.jsp");

    return shiroFilterFactoryBean;
}
2.配置WebSecurityManager
//2、安全管理器
@Bean
public DefaultWebSecurityManager getDefaultWebSecurityManager(Realm realm){
    DefaultWebSecurityManager defaultWebSecurityManager = new DefaultWebSecurityManager();
    defaultWebSecurityManager.setRealm(realm);
    return defaultWebSecurityManager;
}
3.创建自定义realm
//自定义Realm
public class CustomRealm extends AuthorizingRealm {
    @Override
    protected AuthorizationInfo doGetAuthorizationInfo(PrincipalCollection principals) {
        return null;
    }

    @Override
    protected AuthenticationInfo doGetAuthenticationInfo(AuthenticationToken token) throws AuthenticationException {
        return null;
    }
}
4.配置自定义realm
//3、自定义Realm
@Bean
@Primary
public Realm getRealm(){
    return new CustomRealm();
}
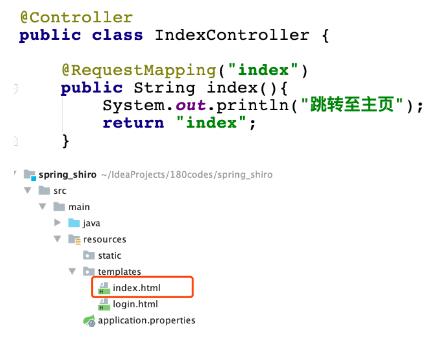
5.编写控制器跳转至index.html
@Controller
public class IndexController {
    @RequestMapping("index")
    public String index(){
        System.out.println("跳转至主页");
        return "index";
    }
}
6.启动springboot应用访问index
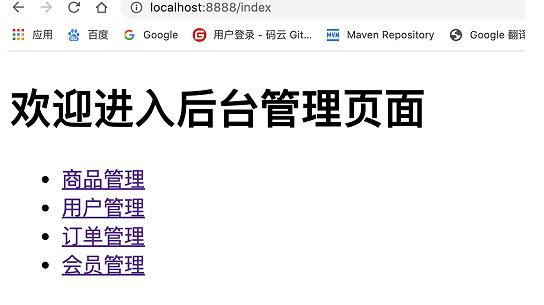
- 注意:
- 默认在配置好shiro环境后默认环境中没有对项目中任何资源进行权限控制,所有现在项目中所有资源都可以通过路径访问
7.加入权限控制
-
修改ShiroFilterFactoryBean配置
//设置受限资源 HashMap<String, String> map = new HashMap<>(); map.put("/index.jsp","authc");//authc 请求这个资源,需要认证授权 //map.put("/**","authc"); shiroFilterFactoryBean.setFilterChainDefinitionMap(map); //默认认证界面路径 shiroFilterFactoryBean.setLoginUrl("/login.jsp");- /** 代表拦截项目中一切资源 authc 代表shiro中的一个filter的别名,详细内容看文档的shirofilter列表
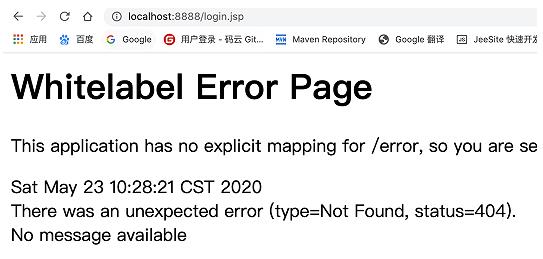
8.重启项目访问查看
四、常见过滤器
- 注意: shiro提供和多个默认的过滤器,我们可以用这些过滤器来配置控制指定url的权限:
| 配置缩写 | 对应的过滤器 | 功能 |
|---|---|---|
| anon | AnonymousFilter | 指定url可以匿名访问 |
| authc | FormAuthenticationFilter | 指定url需要form表单登录,默认会从请求中获取username、password,rememberMe等参数并尝试登录,如果登录不了就会跳转到loginUrl配置的路径。我们也可以用这个过滤器做默认的登录逻辑,但是一般都是我们自己在控制器写登录逻辑的,自己写的话出错返回的信息都可以定制嘛。 |
| authcBasic | BasicHttpAuthenticationFilter | 指定url需要basic登录 |
| logout | LogoutFilter | 登出过滤器,配置指定url就可以实现退出功能,非常方便 |
| noSessionCreation | NoSessionCreationFilter | 禁止创建会话 |
| perms | PermissionsAuthorizationFilter | 需要指定权限才能访问 |
| port | PortFilter | 需要指定端口才能访问 |
| rest | HttpMethodPermissionFilter | 将http请求方法转化成相应的动词来构造一个权限字符串,这个感觉意义不大,有兴趣自己看源码的注释 |
| roles | RolesAuthorizationFilter | 需要指定角色才能访问 |
| ssl | SslFilter | 需要https请求才能访问 |
| user | UserFilter | 需要已登录或“记住我”的用户才能访问 |
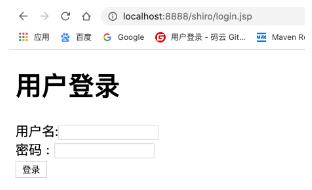
五、认证实现
1. 在login.jsp中开发认证界面
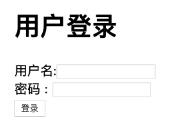
<form action="${pageContext.request.contextPath}/user/login" method="post">
  用户名:<input type="text" name="username" > <br/>
  密码  : <input type="text" name="password"> <br>
  <input type="submit" value="登录">
</form>
2. 开发controller
@Controller
@RequestMapping("user")
public class UserController {
    /**
    * 用来处理身份认证
    * @param username
    * @param password
    * @return
    */
    @RequestMapping("login")
    public String login(String username,String password){
        //获取主体对象
        Subject subject = SecurityUtils.getSubject();
        try {
            subject.login(new UsernamePasswordToken(username,password));
            return  "redirect:/index.jsp";
        } catch (UnknownAccountException e) {
            e.printStackTrace();
            System.out.println("用户名错误!");
        }catch (IncorrectCredentialsException e){
            e.printStackTrace();
            System.out.println("密码错误!");
        }
        return "redirect:/login.jsp";
    }
}
- 在认证过程中使用subject.login进行认证
3.开发realm中返回静态数据(未连接数据库)
@Override
    protected AuthenticationInfo doGetAuthenticationInfo(AuthenticationToken token) throws AuthenticationException {
        System.out.println("==========================");
        String principal = (String) token.getPrincipal();
        if("achang".equals(principal)){
            return new SimpleAuthenticationInfo(principal,"123456",this.getName());
        }
        return null;
    }
}
4.启动项目以realm中定义静态数据进行认证

- 认证功能没有md5和随机盐的认证就实现啦
六、退出认证
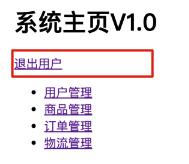
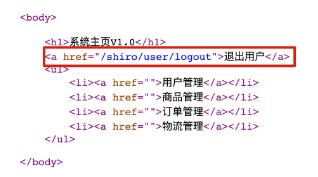
1.开发页面退出连接
2.开发controller
@Controller
@RequestMapping("user")
public class UserController {
  /**
    * 退出登录
    *
    */
  @RequestMapping("logout")
  public String logout(){
    Subject subject = SecurityUtils.getSubject();
    subject.logout();//退出用户
    return "redirect:/login.jsp";
  }
}
3.修改退出连接访问退出路径
4.退出之后访问受限资源立即返回认证界面
七、MD5、Salt的认证实现
1.开发数据库注册
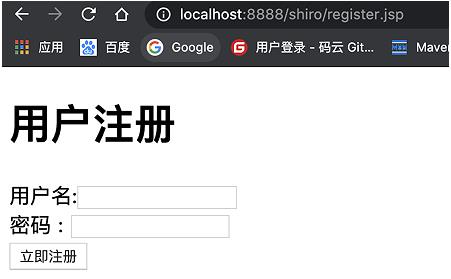
0.开发注册界面
<h1>用户注册</h1>
<form action="${pageContext.request.contextPath}/user/register" method="post">
  用户名:<input type="text" name="username" > <br/>
  密码  : <input type="text" name="password"> <br>
  <input type="submit" value="立即注册">
</form>
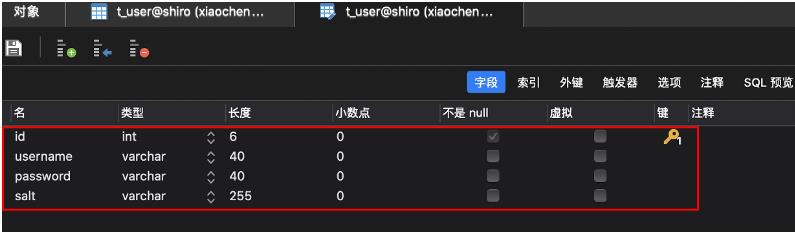
1.创建数据表结构
SET NAMES utf8mb4;
SET FOREIGN_KEY_CHECKS = 0;
-- ----------------------------
-- Table structure for t_user
-- ----------------------------
DROP TABLE IF EXISTS `t_user`;
CREATE TABLE `t_user` (
    `id` int(6) NOT NULL AUTO_INCREMENT,
    `username` varchar(40) DEFAULT NULL,
    `password` varchar(40) DEFAULT NULL,
    `salt` varchar(255) DEFAULT NULL,
    PRIMARY KEY (`id`)
) ENGINE=InnoDB AUTO_INCREMENT=2 DEFAULT CHARSET=utf8;

SET FOREIGN_KEY_CHECKS = 1;
2.项目引入依赖
<!--mybatis相关依赖-->
<dependency>
    <groupId>org.mybatis.spring.boot</groupId>
    <artifactId>mybatis-spring-boot-starter</artifactId>
    <version>2.1.2</version>
</dependency>

<!--mysql-->
<dependency>
    <groupId>mysql</groupId以上是关于Day374.shiro授权&Shiro+jsp整合Springboot -Shiro的主要内容,如果未能解决你的问题,请参考以下文章