fabric BYFN命令简化
Posted sanqima
tags:
篇首语:本文由小常识网(cha138.com)小编为大家整理,主要介绍了fabric BYFN命令简化相关的知识,希望对你有一定的参考价值。
fabric的入门案例first-network,是使用sh脚本进行自动化部署,部署的模式是solo模式,即1order+4peer。该案例使用./byfn up即可完成单机版的多节点部署。由于BYFN将.pem证书文件路径也放到命令中,导致命令太长,现在把这些路径放到一个.sh里,使能这个.sh脚本,就可以缩短命令了。
1、准备4个.sh文件
1.1 peer0.org1的.sh文件
//mul_peer01.sh
#!/bin/bash
##peer01.sh

export CHANNEL_NAME=mychannel
export CORE_PEER_ADDRESS=peer0.org1.example.com:7051
export CORE_PEER_LOCALMSPID=Org1MSP
export CORE_PEER_TLS_ROOTCERT_FILE=/opt/gopath/src/github.com/hyperledger/fabric/peer/crypto/peerOrganizations/org1.example.com/peers/peer0.org1.example.com/tls/ca.crt
export CORE_PEER_MSPCONFIGPATH=/opt/gopath/src/github.com/hyperledger/fabric/peer/crypto/peerOrganizations/org1.example.com/users/Admin@org1.example.com/msp
export ORDERER_CA=/opt/gopath/src/github.com/hyperledger/fabric/peer/crypto/ordererOrganizations/example.com/orderers/orderer.example.com/msp/tlscacerts/tlsca.example.com-cert.pem
export Peer01_TLS=/opt/gopath/src/github.com/hyperledger/fabric/peer/crypto/peerOrganizations/org1.example.com/peers/peer0.org1.example.com/tls/ca.crt
export Peer11_TLS=/opt/gopath/src/github.com/hyperledger/fabric/peer/crypto/peerOrganizations/org1.example.com/peers/peer1.org1.example.com/tls/ca.crt
export Peer02_TLS=/opt/gopath/src/github.com/hyperledger/fabric/peer/crypto/peerOrganizations/org2.example.com/peers/peer0.org2.example.com/tls/ca.crt
export Peer12_TLS=/opt/gopath/src/github.com/hyperledger/fabric/peer/crypto/peerOrganizations/org2.example.com/peers/peer1.org2.example.com/tls/ca.crt
1.2 peer1.org1的.sh文件
//mul_peer11.sh
#!/bin/bash
##peer11.sh

export CHANNEL_NAME=mychannel
export CORE_PEER_ADDRESS=peer1.org1.example.com:8051
export CORE_PEER_LOCALMSPID=Org1MSP
export CORE_PEER_TLS_ROOTCERT_FILE=/opt/gopath/src/github.com/hyperledger/fabric/peer/crypto/peerOrganizations/org1.example.com/peers/peer1.org1.example.com/tls/ca.crt
export CORE_PEER_MSPCONFIGPATH=/opt/gopath/src/github.com/hyperledger/fabric/peer/crypto/peerOrganizations/org1.example.com/users/Admin@org1.example.com/msp
export ORDERER_CA=/opt/gopath/src/github.com/hyperledger/fabric/peer/crypto/ordererOrganizations/example.com/orderers/orderer.example.com/msp/tlscacerts/tlsca.example.com-cert.pem
export Peer01_TLS=/opt/gopath/src/github.com/hyperledger/fabric/peer/crypto/peerOrganizations/org1.example.com/peers/peer0.org1.example.com/tls/ca.crt
export Peer11_TLS=/opt/gopath/src/github.com/hyperledger/fabric/peer/crypto/peerOrganizations/org1.example.com/peers/peer1.org1.example.com/tls/ca.crt
export Peer02_TLS=/opt/gopath/src/github.com/hyperledger/fabric/peer/crypto/peerOrganizations/org2.example.com/peers/peer0.org2.example.com/tls/ca.crt
export Peer12_TLS=/opt/gopath/src/github.com/hyperledger/fabric/peer/crypto/peerOrganizations/org2.example.com/peers/peer1.org2.example.com/tls/ca.crt
1.3 peer0.org2的.sh文件
//mul_peer02.sh
#!/bin/bash
##peer02.sh

export CHANNEL_NAME=mychannel
export CORE_PEER_ADDRESS=peer0.org2.example.com:9051
export CORE_PEER_LOCALMSPID=Org2MSP
export CORE_PEER_TLS_ROOTCERT_FILE=/opt/gopath/src/github.com/hyperledger/fabric/peer/crypto/peerOrganizations/org2.example.com/peers/peer0.org2.example.com/tls/ca.crt
export CORE_PEER_MSPCONFIGPATH=/opt/gopath/src/github.com/hyperledger/fabric/peer/crypto/peerOrganizations/org2.example.com/users/Admin@org2.example.com/msp
export ORDERER_CA=/opt/gopath/src/github.com/hyperledger/fabric/peer/crypto/ordererOrganizations/example.com/orderers/orderer.example.com/msp/tlscacerts/tlsca.example.com-cert.pem
export Peer01_TLS=/opt/gopath/src/github.com/hyperledger/fabric/peer/crypto/peerOrganizations/org1.example.com/peers/peer0.org1.example.com/tls/ca.crt
export Peer11_TLS=/opt/gopath/src/github.com/hyperledger/fabric/peer/crypto/peerOrganizations/org1.example.com/peers/peer1.org1.example.com/tls/ca.crt
export Peer02_TLS=/opt/gopath/src/github.com/hyperledger/fabric/peer/crypto/peerOrganizations/org2.example.com/peers/peer0.org2.example.com/tls/ca.crt
export Peer12_TLS=/opt/gopath/src/github.com/hyperledger/fabric/peer/crypto/peerOrganizations/org2.example.com/peers/peer1.org2.example.com/tls/ca.crt
1.4 peer1.org2的.sh文件
//mul_peer12.sh
#!/bin/bash
##peer12.sh

export CHANNEL_NAME=mychannel
export CORE_PEER_ADDRESS=peer1.org2.example.com:10051
export CORE_PEER_LOCALMSPID=Org2MSP
export CORE_PEER_TLS_ROOTCERT_FILE=/opt/gopath/src/github.com/hyperledger/fabric/peer/crypto/peerOrganizations/org2.example.com/peers/peer1.org2.example.com/tls/ca.crt
export CORE_PEER_MSPCONFIGPATH=/opt/gopath/src/github.com/hyperledger/fabric/peer/crypto/peerOrganizations/org2.example.com/users/Admin@org2.example.com/msp
export ORDERER_CA=/opt/gopath/src/github.com/hyperledger/fabric/peer/crypto/ordererOrganizations/example.com/orderers/orderer.example.com/msp/tlscacerts/tlsca.example.com-cert.pem
export Peer01_TLS=/opt/gopath/src/github.com/hyperledger/fabric/peer/crypto/peerOrganizations/org1.example.com/peers/peer0.org1.example.com/tls/ca.crt
export Peer11_TLS=/opt/gopath/src/github.com/hyperledger/fabric/peer/crypto/peerOrganizations/org1.example.com/peers/peer1.org1.example.com/tls/ca.crt
export Peer02_TLS=/opt/gopath/src/github.com/hyperledger/fabric/peer/crypto/peerOrganizations/org2.example.com/peers/peer0.org2.example.com/tls/ca.crt
export Peer12_TLS=/opt/gopath/src/github.com/hyperledger/fabric/peer/crypto/peerOrganizations/org2.example.com/peers/peer1.org2.example.com/tls/ca.crt
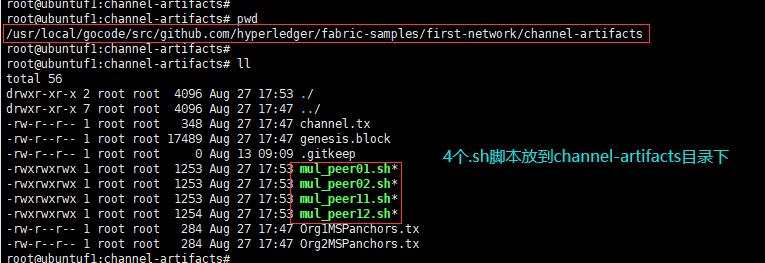
将这4个文件:mul_peer01.sh、mul_peer11.sh、mul_peer02.sh、mul_peer12.sh放到fabric-samples/first-network/channel-artifacts目录下,如图(1)所示:
//.sh的存放路径:
/usr/local/gocode/src/github.com/hyperledger/fabric-samples/first-network/channel-artifacts
2、锚节点命令对比
2.1 更新锚节点peer0.org1(原始版)
peer channel update -o orderer.example.com:7050 -c mychannel -f ./channel-artifacts/Org1MSPanchors.tx --tls true --cafile /opt/gopath/src/github.com/hyperledger/fabric/peer/crypto/ordererOrganizations/example.com/orderers/orderer.example.com/msp/tlscacerts/tlsca.example.com-cert.pem
2.2 更新锚节点peer0.org1(简化版)
source channel-artifacts/mul_peer01.sh
peer channel update -o orderer.example.com:7050 -c mychannel -f ./channel-artifacts/Org1MSPanchors.tx --tls true --cafile $ORDERER_CA
2.3 更新锚节点peer0.org2(原始版)
peer channel update -o orderer.example.com:7050 -c mychannel -f ./channel-artifacts/Org2MSPanchors.tx --tls true --cafile /opt/gopath/src/github.com/hyperledger/fabric/peer/crypto/ordererOrganizations/example.com/orderers/orderer.example.com/msp/tlscacerts/tlsca.example.com-cert.pem
2.4 更新锚节点peer0.org2(简化版)
source channel-artifacts/mul_peer02.sh
peer channel update -o orderer.example.com:7050 -c mychannel -f ./channel-artifacts/Org2MSPanchors.tx --tls true --cafile $ORDERER_CA
3 链码初始化命令对比
3.1 初始化(原始版)
peer chaincode instantiate -o orderer.example.com:7050 --tls true --cafile /opt/gopath/src/github.com/hyperledger/fabric/peer/crypto/ordererOrganizations/example.com/orderers/orderer.example.com/msp/tlscacerts/tlsca.example.com-cert.pem -C mychannel -n mycc -l golang -v 1.0 -c '{"Args":["init","a","100","b","200"]}' -P 'AND ('\\''Org1MSP.peer'\\'','\\''Org2MSP.peer'\\'')'
3.2 初始化(简化版)
source channel-artifacts/mul_peer01.sh
peer chaincode instantiate -o orderer.example.com:7050 --tls true --cafile $ORDERER_CA -C mychannel -n mycc -l golang -v 1.0 -c '{"Args":["init","a","100","b","200"]}' -P 'AND ('\\''Org1MSP.peer'\\'','\\''Org2MSP.peer'\\'')'
4、链码调用
4.1 调用(原始版)
peer chaincode invoke -o orderer.example.com:7050 --tls true --cafile /opt/gopath/src/github.com/hyperledger/fabric/peer/crypto/ordererOrganizations/example.com/orderers/orderer.example.com/msp/tlscacerts/tlsca.example.com-cert.pem -C mychannel -n mycc --peerAddresses peer0.org1.example.com:7051 --tlsRootCertFiles /opt/gopath/src/github.com/hyperledger/fabric/peer/crypto/peerOrganizations/org1.example.com/peers/peer0.org1.example.com/tls/ca.crt --peerAddresses peer0.org2.example.com:9051 --tlsRootCertFiles /opt/gopath/src/github.com/hyperledger/fabric/peer/crypto/peerOrganizations/org2.example.com/peers/peer0.org2.example.com/tls/ca.crt -c '{"Args":["invoke","a","b","10"]}'
4.2 调用(简化版)
## 启用4个.sh里任意一个即可,这里选择mul_peer01.sh
source channel-artifacts/mul_peer01.sh

peer chaincode invoke -o orderer.example.com:7050 --tls true --cafile $ORDERER_CA -C mychannel -n mycc --peerAddresses peer0.org1.example.com:7051 --tlsRootCertFiles $Peer01_TLS --peerAddresses peer0.org2.example.com:9051 --tlsRootCertFiles $Peer02_TLS -c '{"Args":["invoke","a","b","10"]}'
5、副录
5.1 查询a的值
peer chaincode query -C mychannel -n mycc -c '{"Args":["query","a"]}'
5.2 查询b的值
peer chaincode query -C mychannel -n mycc -c '{"Args":["query","b"]}'
5.3 安装链码
peer chaincode install -n mycc -v 1.0 -l golang -p github.com/chaincode/chaincode_example02/go/
5.4 设置挂载目录
修改fabric-samples/first-network/docker-compose-cli.yaml里的cli容器:
    volumes:
        - /usr/local/gocode/src/github.com/hyperledger:/opt/gopath/src/github.com/hyperledger
        - /usr/local/gocode/pkg:/opt/gopath/pkg
        - /usr/local/gocode/src/github.com/hyperledger/fabric-samples/chaincode:/opt/gopath/src
以上是关于fabric BYFN命令简化的主要内容,如果未能解决你的问题,请参考以下文章
[Fabric] First-NetWork(byfn.sh文件分析)
Fabric samples first network byfn sh up 频道创建失败
Hyperledger Fabric 1.1安装部署-chaincode测试
❤️区块链Hyperledger Fabric 老版本 1.1.0 快速部署安装 教程合集❤️