Gin内容介绍√
Posted 行走的皮卡丘
tags:
篇首语:本文由小常识网(cha138.com)小编为大家整理,主要介绍了Gin内容介绍√相关的知识,希望对你有一定的参考价值。
Gin内容介绍
Golang
参考博客和文档:

主要内容
本教程主要从下面几个方面来进行讲解
- Gin框架基本使用
- GORM基本使用
- Web开发项目实战
关于Web
- Web是基于HTTP协议进行交互的应用网络
- Web就是通过使用浏览器/APP访问的各种资源
 一个请求对应一
创建项目
首先我们使用Goland创建一个Go项目
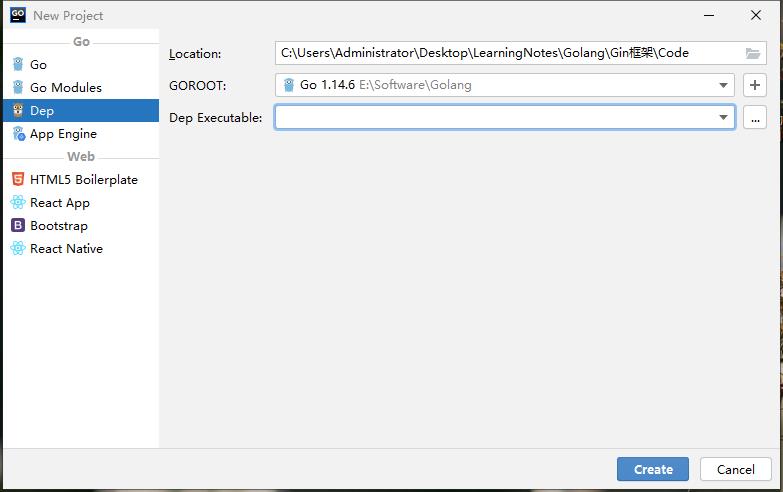
创建完成后,打开命令窗口,输入下面的命令,创建一个依赖管理
go mod init gin_demo
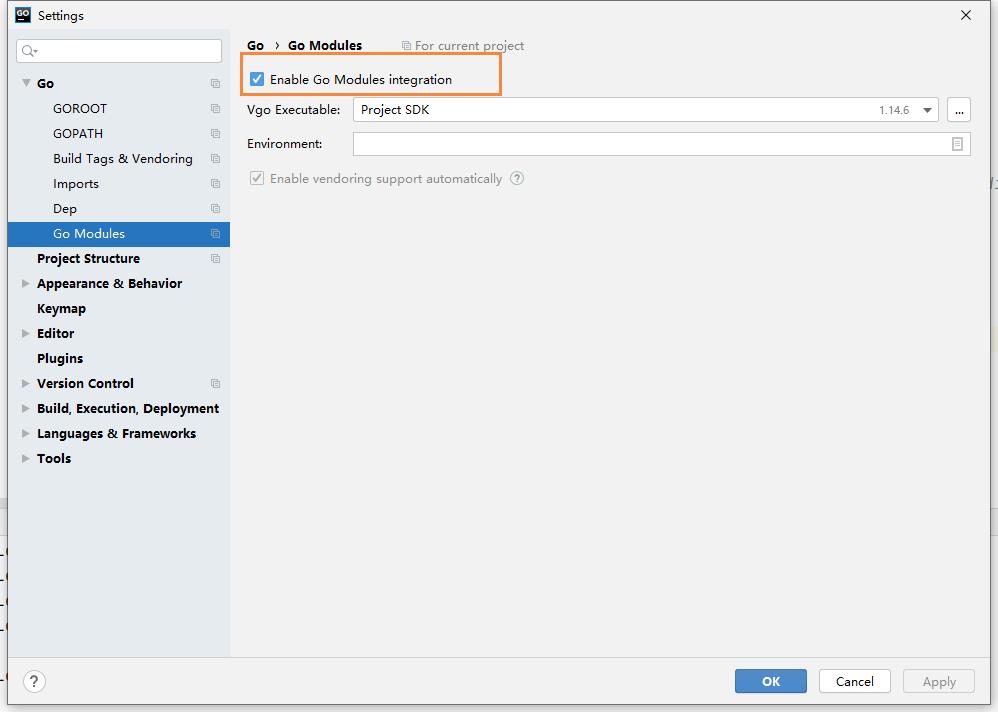
然后打开setting页面,勾选这个选项【不勾选会导致go.mod依赖爆红】
我们创建一个main.go文件,然后使用go代码实现一个请求和响应
package main

import (
	"fmt"
	"net/http"
)

// http.ResponseWriter:代表响应,传递到前端的
// *http.Request:表示请求,从前端传递过来的
func sayHello(w http.ResponseWriter, r *http.Request) {
	_, _ = fmt.Fprintln(w, "hello Golang!");
}

func main() {
	http.HandleFunc("/hello", sayHello)
	err := http.ListenAndServe(":9090", nil)
	if err != nil {
		fmt.Println("http server failed, err:%v \\n", err)
		return
	}
}
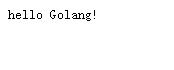
在浏览器访问如下地址
http://localhost:9090/hello
就能打开我们的hello golang页面了
我们可以给文字添加色彩
// http.ResponseWriter:代表响应,传递到前端的
// *http.Request:表示请求,从前端传递过来的
func sayHello(w http.ResponseWriter, r *http.Request) {
	_, _ = fmt.Fprintln(w, "<h1 style='color:red'>hello Golang!<h1>");
}
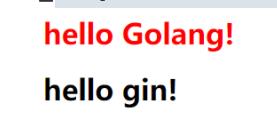
然后重启后,在刷新

我们还可以把里面的字符串放在一个文件里,我们定义一个 hello.html文件
<html>
    <title>hello golang</title>
    <body>
        <h1 style='color:red'>
            hello Golang!
        </h1>
        <h1>
            hello gin!
        </h1>
        <img src="https://timgsa.baidu.com/timg?image&quality=80&size=b9999_10000&sec=1600011052622&di=9aeee5de695a40c8d469f0c3980c2d48&imgtype=0&src=http%3A%2F%2Fa4.att.hudong.com%2F22%2F59%2F19300001325156131228593878903.jpg">
    </body>
</html>
然后修改刚刚的main.go,使用 ioutil解析文件
package main

import (
	"fmt"
	"io/ioutil"
	"net/http"
)

// http.ResponseWriter:代表响应,传递到前端的
// *http.Request:表示请求,从前端传递过来的
func sayHello(w http.ResponseWriter, r *http.Request) {
	html, _ := ioutil.ReadFile("./template/hello.html")
	_, _ = fmt.Fprintln(w, string(html));
}

func main() {
	http.HandleFunc("/hello", sayHello)
	err := http.ListenAndServe(":9090", nil)
	if err != nil {
		fmt.Println("http server failed, err:%v \\n", err)
		return
	}
}
最后刷新我们的页面,就出来这样的效果了,这就是我们通过golang开发的一个Web页面
为什么要用框架
我们通过上面的http包,就能够实现一个web的开发,那为什么还要用gin呢?
其实框架的好处,就是别人帮我们搭建了一个舞台,同时提供了很多现成的轮子,让我们专注于业务的开发,同时让开发效率更高。
Gin框架介绍
Gin是一个用Go语言编写的web框架。它是一个类似于martini但拥有更好性能的API框架, 由于使用了httprouter,速度提高了近40倍。 如果你是性能和高效的追求者, 你会爱上Gin。
Go世界里最流行的Web框架,Github上有32K+star。 基于httprouter开发的Web框架。 中文文档齐全,简单易用的轻量级框架。
Gin框架安装与使用
安装
下载并安装Gin:
go get -u github.com/gin-gonic/gin
第一个Gin示例:
package main

import (
	"github.com/gin-gonic/gin"
)

func main() {
	// 创建一个默认的路由引擎
	r := gin.Default()
	// GET:请求方式;/hello:请求的路径
	// 当客户端以GET方法请求/hello路径时,会执行后面的匿名函数
	r.GET("/hello", func(c *gin.Context) {
		// c.JSON:返回JSON格式的数据
		c.JSON(200, gin.H{
			"message": "Hello world!",
		})
	})
	// 启动HTTP服务,默认在0.0.0.0:8080启动服务
	r.Run()
}
将上面的代码保存并编译执行,然后使用浏览器打开127.0.0.1:8080/hello就能看到一串JSON字符串。
RESTful API
REST与技术无关,代表的是一种软件架构风格,REST是Representational State Transfer的简称,中文翻译为“表征状态转移”或“表现层状态转化”。
推荐阅读阮一峰 理解RESTful架构
简单来说,REST的含义就是客户端与Web服务器之间进行交互的时候,使用HTTP协议中的4个请求方法代表不同的动作。
GET用来获取资源POST用来新建资源PUT用来更新资源DELETE用来删除资源。
只要API程序遵循了REST风格,那就可以称其为RESTful API。目前在前后端分离的架构中,前后端基本都是通过RESTful API来进行交互。
例如,我们现在要编写一个管理书籍的系统,我们可以查询对一本书进行查询、创建、更新和删除等操作,我们在编写程序的时候就要设计客户端浏览器与我们Web服务端交互的方式和路径。按照经验我们通常会设计成如下模式:
| 请求方法 | URL | 含义 |
|---|---|---|
| GET | /book | 查询书籍信息 |
| POST | /create_book | 创建书籍记录 |
| POST | /update_book | 更新书籍信息 |
| POST | /delete_book | 删除书籍信息 |
同样的需求我们按照RESTful API设计如下:
| 请求方法 | URL | 含义 |
|---|---|---|
| GET | /book | 查询书籍信息 |
| POST | /book | 创建书籍记录 |
| PUT | /book | 更新书籍信息 |
| DELETE | /book | 删除书籍信息 |
Gin框架支持开发RESTful API的开发。
func main() {
	r := gin.Default()
	r.GET("/book", func(c *gin.Context) {
		c.JSON(200, gin.H{
			"message": "GET",
		})
	})

	r.POST("/book", func(c *gin.Context) {
		c.JSON(200, gin.H{
			"message": "POST",
		})
	})

	r.PUT("/book", func(c *gin.Context) {
		c.JSON(200, gin.H{
			"message": "PUT",
		})
	})

	r.DELETE("/book", func(c *gin.Context) {
		c.JSON(200, gin.H{
			"message": "DELETE",
		})
	})

   	// 启动HTTP服务,默认在0.0.0.0:8080启动服务
	r.Run()
}
开发RESTful API的时候我们通常使用Postman来作为客户端的测试工具。
Gin渲染
HTML渲染
我们首先定义一个存放模板文件的templates文件夹,然后在其内部按照业务分别定义一个posts文件夹和一个users文件夹。 posts/index.html文件的内容如下:
{{define "posts/index.html"}}
<!DOCTYPE html>
<html lang="en">

<head>
    <meta charset="UTF-8">
    <meta name="viewport" content="width=device-width, initial-scale=1.0">
    <meta http-equiv="X-UA-Compatible" content="ie=edge">
    <title>posts/index</title>
</head>
<body>
    {{.title}}
</body>
</html>
{{end}}
users/index.html文件的内容如下:
{{define "users/index.html"}}
<!DOCTYPE html>
<html lang="en">
<head>
    <meta charset="UTF-8">
    <meta name="viewport" content="width=device-width, initial-scale=1.0">
    <meta http-equiv="X-UA-Compatible" content="ie=edge">
    <title>users/index</title>
</head>
<body>
    {{.title}}
</body>
</html>
{{end}}
Gin框架中使用LoadHTMLGlob()或者LoadHTMLFiles()方法进行HTML模板渲染。
func main() {
	r := gin.Default()
	r.LoadHTMLGlob("templates/**/*")
	//r.LoadHTMLFiles("templates/posts/index.html", "templates/users/index.html")
	r.GET("/posts/index", func(c *gin.Context) {
		c.HTML(http.StatusOK, "posts/index.html", gin.H{
			"title": "posts/index",
		})
	})

	r.GET("users/index", func(c *gin.Context) {
		c.HTML(http.StatusOK, "users/index.html", gin.H{
			"title": "users/index",
		})
	})

	r.Run(":8080")
}
自定义模板函数
定义一个不转义相应内容的safe模板函数如下:
func main() {
	router := gin.Default()
	router.SetFuncMap(template.FuncMap{
		"safe": func(str string) template.HTML{
			return template.HTML(str)
		},
	})
	router.LoadHTMLFiles("./index.tmpl")

	router.GET("/index", func(c *gin.Context) {
		c.HTML(http.StatusOK, "index.tmpl", "<a href='https://liwenzhou.com'>李文周的博客</a>")
	})

	router.Run(":8080")
}
在index.tmpl中使用定义好的safe模板函数:
<!DOCTYPE html>
<html lang="zh-CN">
<head>
    <title>修改模板引擎的标识符</title>
</head>
<body>
<div>{{ . | safe }}</div>
</body>
</html>
为了让index.tmpl文件有语法显示,我们还需要配置一下
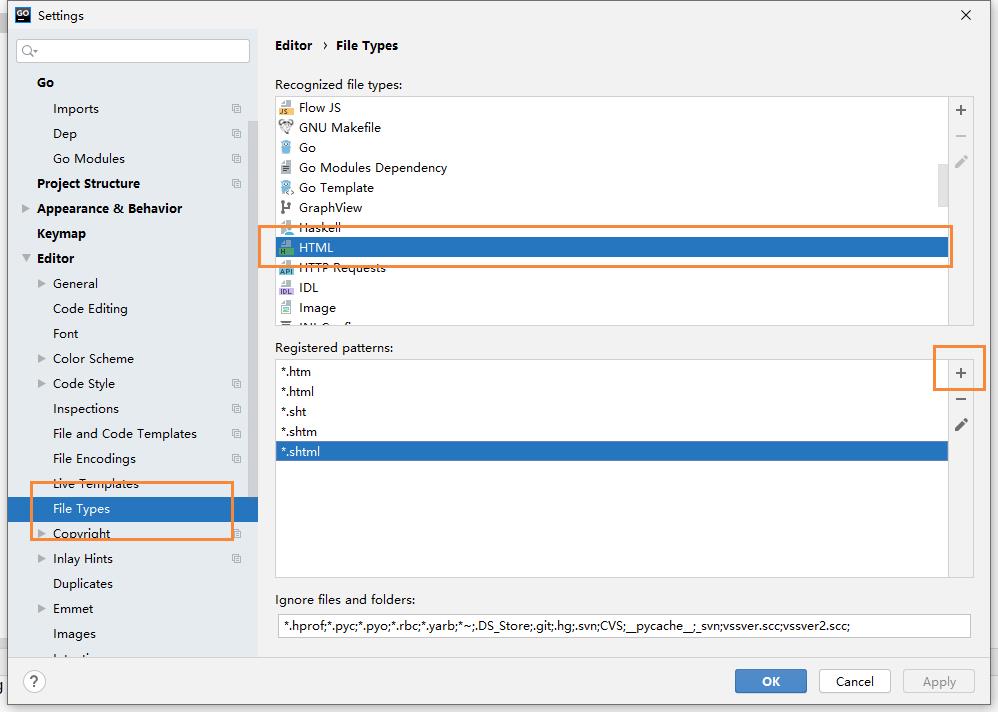
然后我们加入 *.tmpl,保存即可
静态文件处理
当我们渲染的HTML文件中引用了静态文件时,我们只需要按照以下方式在渲染页面前调用gin.Static方法即可。
func main() {
	r := gin.Default()
	r.Static("/static", "./static")
	r.LoadHTMLGlob("templates/**/*")
   // ...
	r.Run(":8080")
}
使用模板继承
Gin框架默认都是使用单模板,如果需要使用block template功能,可以通过"github.com/gin-contrib/multitemplate"库实现,具体示例如下:
首先,假设我们项目目录下的templates文件夹下有以下模板文件,其中home.tmpl和index.tmpl继承了base.tmpl:
templates
├── includes
│   ├── home.tmpl
│   └── index.tmpl
├── layouts
│   └── base.tmpl
└── scripts.tmpl
然后我们定义一个loadTemplates函数如下:
func loadTemplates(templatesDir string) multitemplate.Renderer {
	r := multitemplate.NewRenderer()
	layouts, err := filepath.Glob(templatesDir + "/layouts/*.tmpl")
	if err != nil {
		panic(err.Error())
	}
	includes, err := filepath.Glob(templatesDir + "/includes/*.tmpl")
	if err != nil {
		panic(err.Error())
	}
	// 为layouts/和includes/目录生成 templates map
	for _, include := range includes {
		layoutCopy := make([]string, len(layouts))
		copy(layoutCopy, layouts)
		files := append(layoutCopy, include)
		r.AddFromFiles(filepath.Base(include), files...)
	}
	return r
}
我们在main函数中
func indexFunc(c *gin.Context){
	c.HTML(http.StatusOK, "index.tmpl", nil)
}

func homeFunc(c *gin.Context){
	c.HTML(http.StatusOK, "home.tmpl", nil)
}

func main(){
	r := gin.Default()
	r.HTMLRender = loadTemplates("./templates")
	r.GET("/index", indexFunc)
	r.GET("/home", homeFunc)
	r.Run()
}
补充文件路径处理
关于模板文件和静态文件的路径,我们需要根据公司/项目的要求进行设置。可以使用下面的函数获取当前执行程序的路径。
func getCurrentPath() string {
	if ex, err := os.Executable(); err == nil {
		return filepath.Dir(ex)
	}
	return "./"
}
JSON渲染
func main() {
	r := gin.Default()

	// gin.H 是map[string]interface{}的缩写
	r.GET("/someJSON", func(c *gin.Context) {
		// 方式一:自己拼接JSON
		c.JSON(http.StatusOK, gin.H{"message": "Hello world!"})
	})
	r.GET("/moreJSON", func(c *gin.Context) {
		// 方法二:使用结构体
		var msg struct {
			Name    string `json:"user"`
			Message string
			Age     int
		}
		msg.Name = "LYY"
		msg.Message = "Hello world!"
		msg.Age = 18
		c.JSON(http.StatusOK, msg)
	})
	r.Run(":8080")
}
XML渲染
注意需要使用具名的结构体类型。
func main() {
	r := gin.Default()
	// gin.H 是map[string]interface{}的缩写
	r.GET("/someXML", func(c *gin.Context) {
		// 方式一:自己拼接JSON
		c.XML(http.StatusOK, gin.H{"message": "Hello world!"})
	})
	r.GET("/moreXML", func(c *gin.Context) {
		// 方法二:使用结构体
		type MessageRecord struct {
			Name    string
			Message string
			Age     int
		}
		var msg MessageRecord
		msg.Name = "LYY"
		msg.Message = "Hello world!"
		msg.Age = 18
		c.XML(http.StatusOK, msg)
	})
	r.Run(":8080")
}
YMAL渲染
r.GET("/someYAML", func(c *gin.Context) {
	c.YAML(http.StatusOK, gin.H{"message": "ok", "status": http.StatusOK})
})
protobuf渲染
r.GET("/someProtoBuf", func(c *gin.Context) {
reps := []int64{int64(1), int64(2)}
label := "test"
// protobuf 的具体定义写在 testdata/protoexample 文件中。
data := &protoexample.Test{
Label: &label,
Reps: reps,
}
// 请注意,数据在响应中变为二进制数据
// 将输出被 protoexample.Test protobuf 序列化了的数据
c.ProtoBuf(http.StatusOK, data)
}