负载均衡LVS-DR模式群集部署实操
Posted 老张学coding
tags:
篇首语:本文由小常识网(cha138.com)小编为大家整理,主要介绍了负载均衡LVS-DR模式群集部署实操相关的知识,希望对你有一定的参考价值。
文章目录
一、LVS-DR群集部署命令解析
第一步、部署负载调度器(DR服务器:192.168.100.10)
systemctl stop firewalld
systemctl disable firewalld
setenforce 0

modprobe ip_vs
cat /proc/net/ip_vs

cd /etc/sysconfig/network-scripts/
ls
cp ifcfg-ens33  ifcfg-ens33:0
ls
vim ifcfg-ens33:0
#内容保留这几行
DEVICE=ens33:0
ONBOOT=yes
IPADDR=192.168.100.15
NETMASK=255.255.255.255

ifup ens33:0
ifconfig
vim /etc/sysctl.conf
#添加内容
net.ipv4.ip_forward = 0
net.ipv4.conf.all.send_redirects = 0
net.ipv4.conf.default.send_redirects = 0
net.ipv4.conf.ens33.send_redirects = 0
############
sysctl -p
###########
yum -y install ipvsadm

ipvsadm-save >/etc/sysconfig/ipvsadm
systemctl  start ipvsadm
systemctl  status ipvsadm
ipvsadm -C
ipvsadm -A -t 192.168.100.15:80 -s rr
ipvsadm -a -t 192.168.100.15:80 -r 192.168.100.30:80 -g
ipvsadm -a -t 192.168.100.15:80 -r 192.168.100.40:80 -g
ipvsadm
ipvsadm -ln
第二步、部署共享存储(NFS 服务器:192.168.100.20)
systemctl stop firewalld
systemctl disable firewalld
setenforce 0
cd /opt/
mkdir accp kgc
echo '<h1>this is kgc test web!</h1>' > kgc/index.html
echo '<h1>this is accp test web!</h1>' > accp/index.html
ls
cd accp/
cat index.html
cd ..
cd kgc
cat index.html
vim /etc/exports
#添加内容
/opt/kgc 192.168.100.0/24(ro,sync)
/opt/accp 192.168.100.0/24(ro,sync)

############
systemctl start rpcbind
systemctl start nfs
showmount  -e
第三步、配置节点服务器
配置节点服务器1: 192.168.100.30
systemctl stop firewalld
systemctl disable firewalld
setenforce 0
showmount -e 192.168.100.20
###########
cd /etc/sysconfig/network-scripts/
cp ifcfg-lo ifcfg-lo:0
vim ifcfg-lo:0
#修改后的内容
DEVICE=lo:0
IPADDR=192.168.100.15
NETMASK=255.255.255.255
ONBOOT=yes
###########3
ifup ifcfg-lo:0
ifconfig
###########
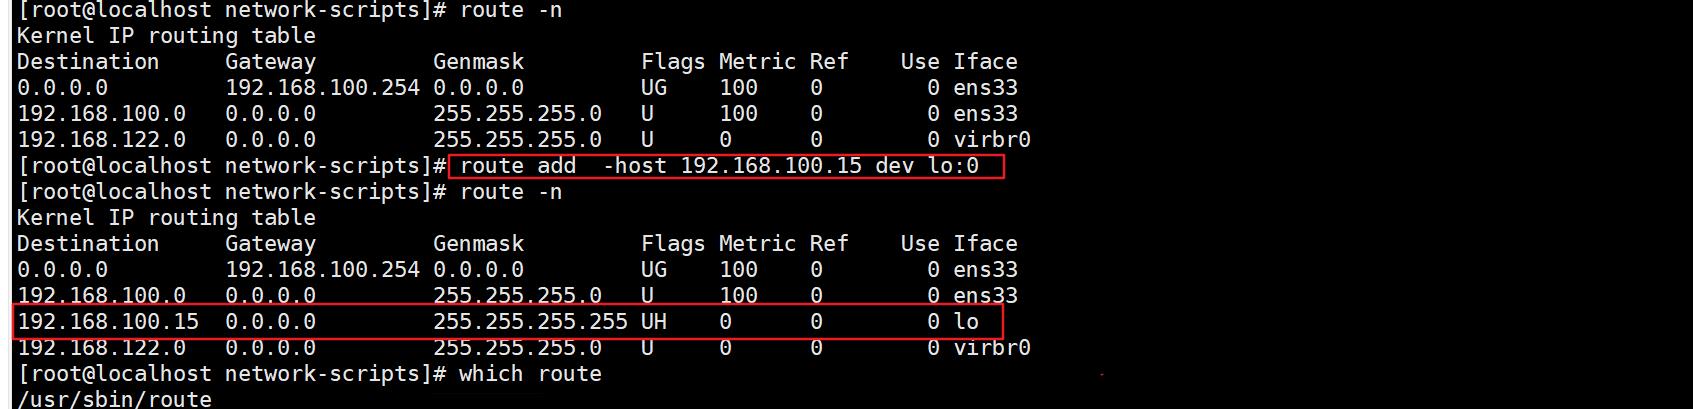
route -n
route add -host 192.168.100.15 dev lo:0
route -n
which route
cd /etc/rc.d
vim rc.local
#添加后的内容
/usr/sbin/route add -host 192.168.100.15 dev lo:0
chmod +x /etc/rc.d/rc.local
ll
cd /etc/
ll rc.local
###############
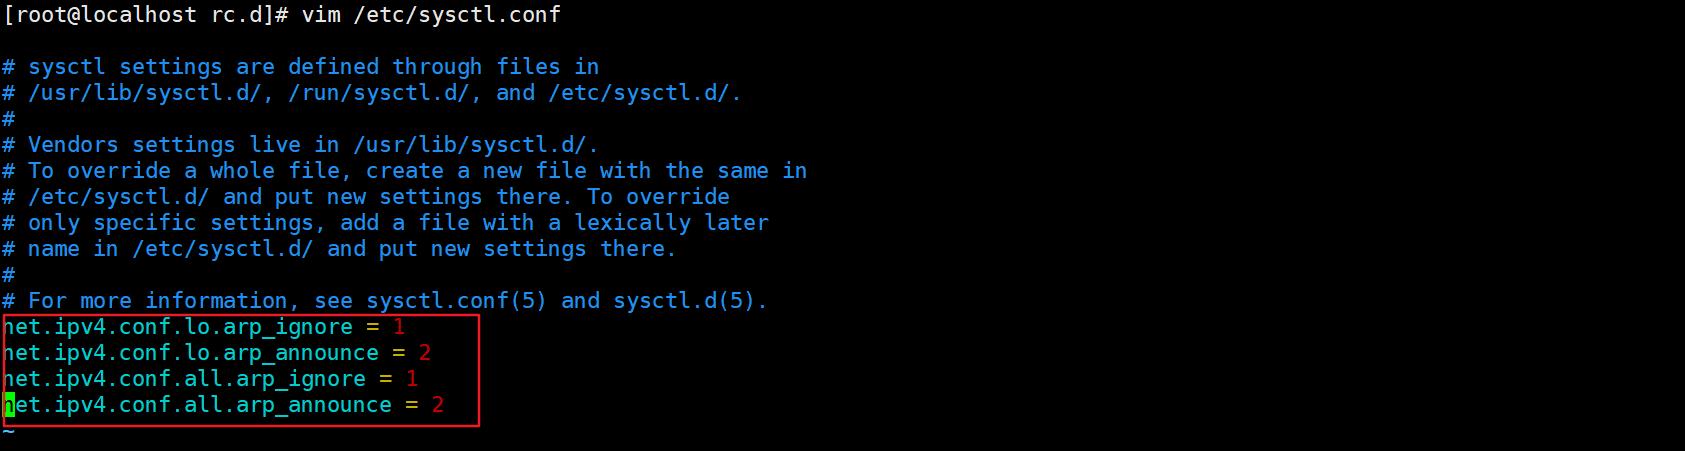
vim /etc/sysctl.conf
#添加内容
net.ipv4.conf.lo.arp_ignore = 1
net.ipv4.conf.lo.arp_announce = 2
net.ipv4.conf.all.arp_ignore = 1
net.ipv4.conf.all.arp_announce = 2
##################
sysctl -p
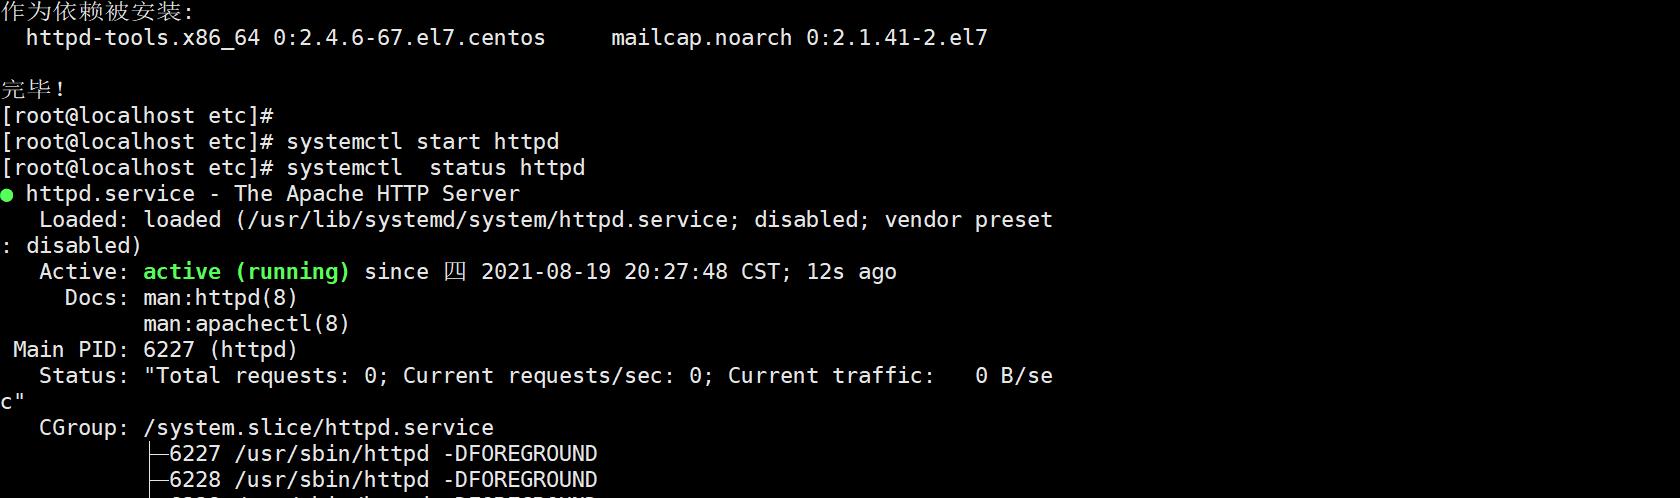
yum -y install httpd
###############yum安装出现错误的时候看挂载,然后将光盘挂载到/mnt下
#df -h
#umount /dev/sr0 -l
#mount /dev/sr0 /mnt/
#yum -y install httpd
systemctl start httpd
systemctl status httpd
cd /var/www/html/
ls
mount 192.168.100.20:/opt/kgc /var/www/html/
ls html/
cat html/index.html
#############
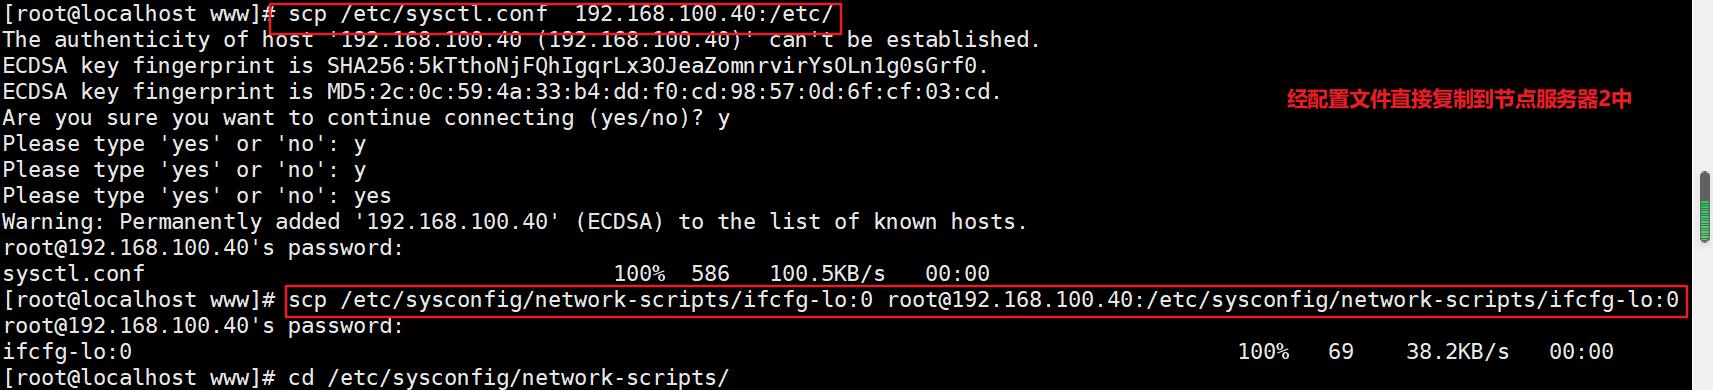
scp /etc/sysctl.conf 192.168.100.40:/etc/
scp /etc/sysconfig/network-scripts/ifcfg-lo:0 root@192.168.100.40:/etc/sysconfig/network-scripts/ifcfg-lo:0
配置节点服务器2: 192.168.100.40
systemctl stop firewalld
systemctl disable firewalld
setenforce 0
showmount -e 192.168.100.20
#################
cat /etc/sysctl.conf
cat /etc/sysconfig/network-scripts/ifcfg-lo:0
yum -y install httpd

systemctl start httpd
systemctl  status httpd

cd /var/www/html/
ls
mount 192.168.100.20:/opt/accp /var/www/html/
ls html/
####可能出不来index.html,先cd .. 然后再ls html/
cat index.html
systemctl restart network
ifconfig
route add -host 192.168.100.15 dev lo:0
route -n
二、LVS-DR群集部署实操
前期准备
DR服务器:192.168.100.10 192.168.100.15
NFS服务器:192.168.100.20
节点服务器1 :192.168.100.30
节点服务器2 :192.168.100.40
windows:192.168.100.50
VIP:192.168.100.15
第一步、部署负载调度器(DR服务器:192.168.100.10)
systemctl stop firewalld
systemctl disable firewalld
setenforce 0
modprobe ip_vs
cat /proc/net/ip_vs

###############配置VIP
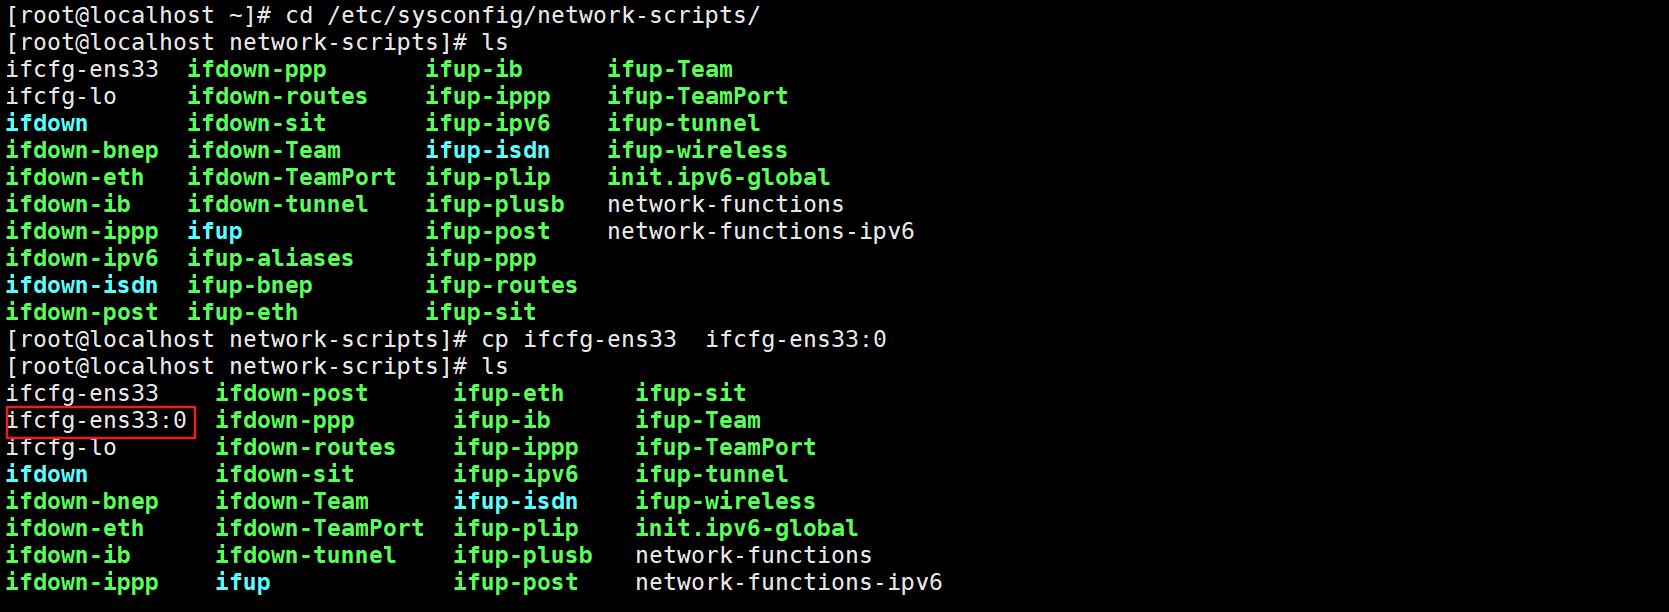
cd /etc/sysconfig/network-scripts/
ls
cp ifcfg-ens33 ifcfg-ens33:0
ls
vim ifcfg-ens33:0
#内容保留这几行
DEVICE=ens33:0
ONBOOT=yes
IPADDR=192.168.100.15
NETMASK=255.255.255.255
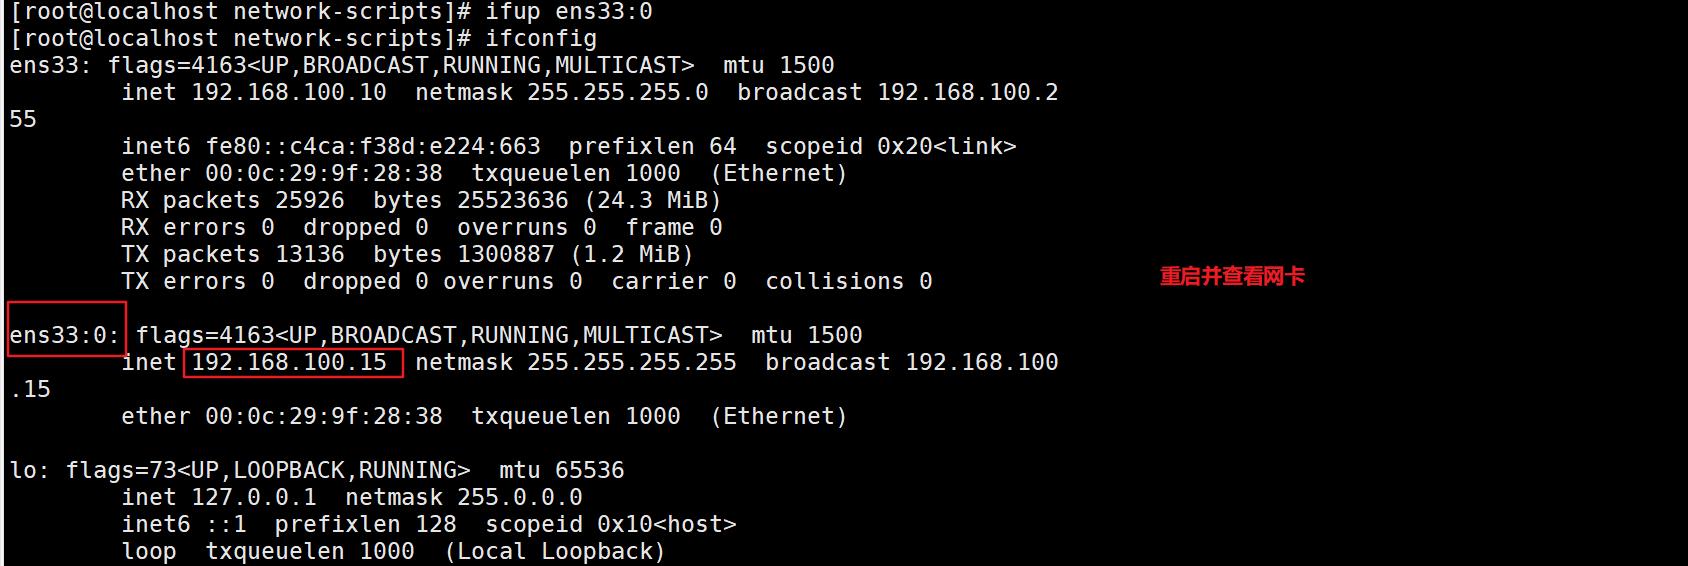
#############重启网卡,并查看网卡情况
ifup ens33:0
ifconfig

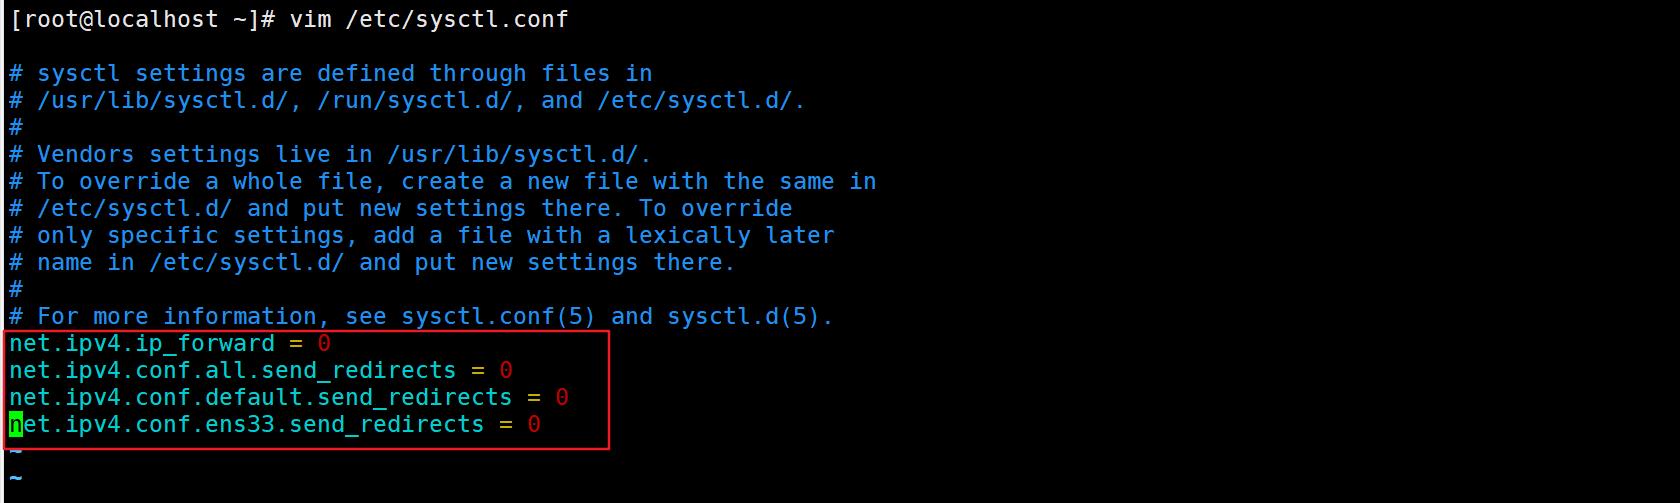
################调整proc相应参数
vim /etc/sysctl.conf
#添加内容
net.ipv4.ip_forward = 0
net.ipv4.conf.all.send_redirects = 0
net.ipv4.conf.default.send_redirects = 0
net.ipv4.conf.ens33.send_redirects = 0
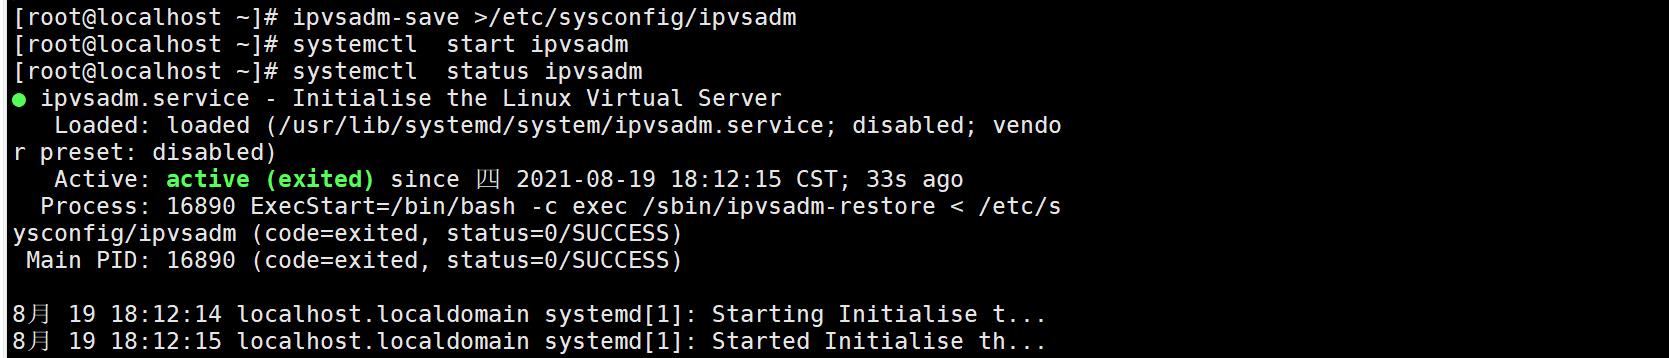
配置负载分配策略
yum -y install ipvsadm
ipvsadm-save >/etc/sysconfig/ipvsadm
systemctl start ipvsadm
systemctl status ipvsadm
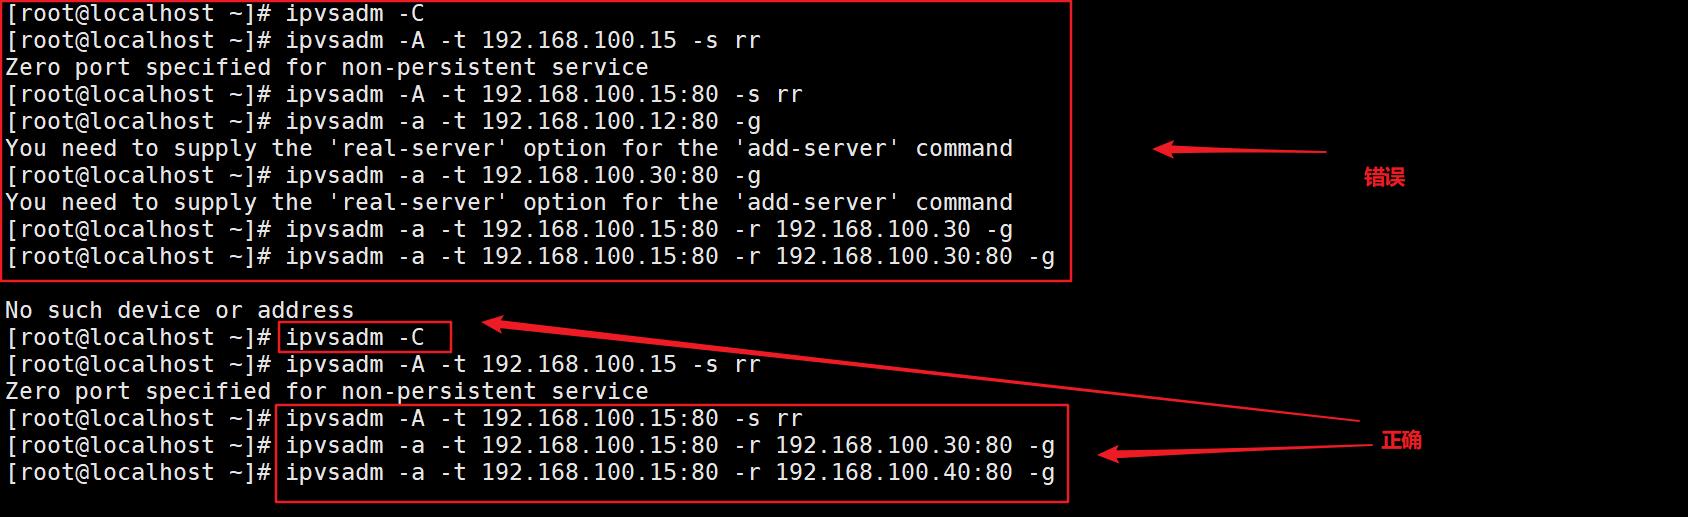
ipvsadm -C
ipvsadm -A -t 192.168.100.15:80 -s rr
ipvsadm -a -t 192.168.100.15:80 -r 192.168.100.30:80 -g
ipvsadm -a -t 192.168.100.15:80 -r 192.168.100.40:80 -g #-g是DR模式,-i是隧道模式
ipvsadm
ipvsadm -ln #查看节点状态,Route代表DR模式

第二步、部署共享存储(NFS 服务器:192.168.100.20)
systemctl stop firewalld
systemctl disable firewalld
setenforce 0

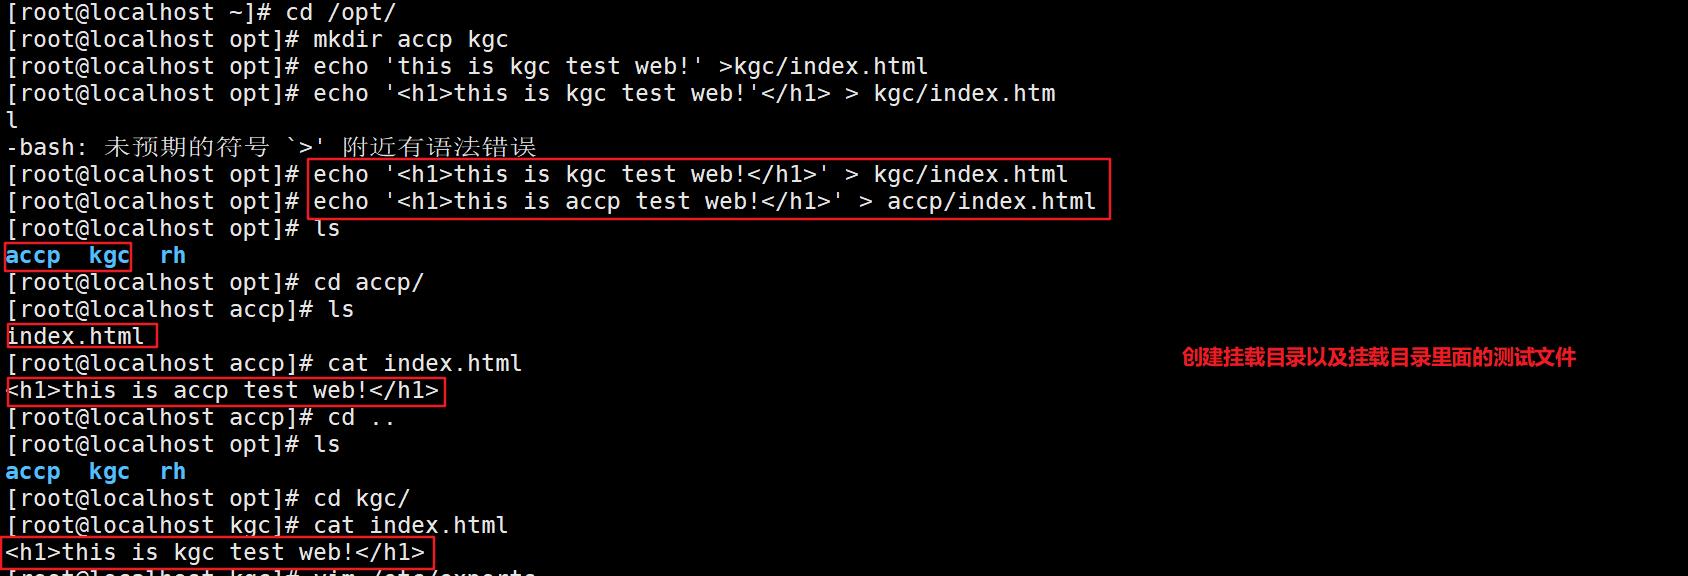
cd /opt/
mkdir accp kgc
echo '<h1>this is kgc test web!</h1>' > kgc/index.html
echo '<h1>this is accp test web!</h1>' > accp/index.html
ls
cd accp/
cat index.html
cd ..
cd kgc
cat index.html
vim /etc/exports
#添加内容
/opt/kgc 192.168.100.0/24(ro,sync)
/opt/accp 192.168.100.0/24(ro,sync)

############
systemctl start rpcbind
systemctl start nfs
showmount  -e

第三步、配置节点服务器
配置节点服务器1: 192.168.100.30
systemctl stop firewalld
systemctl disable firewalld
setenforce 0

showmount -e 192.168.100.20

#######配置VIP,192.168.100.15
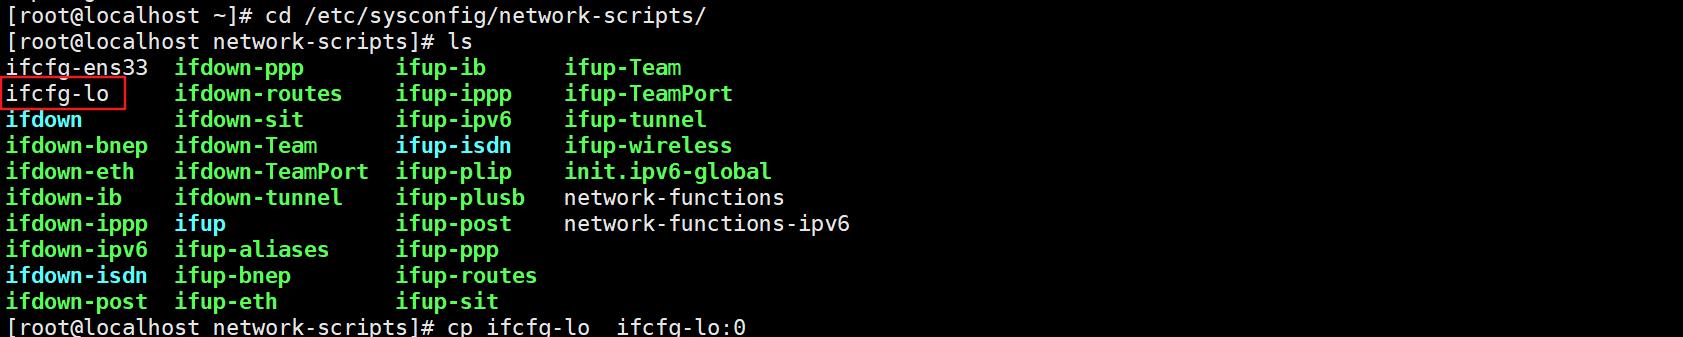
cd /etc/sysconfig/network-scripts/
cp ifcfg-lo ifcfg-lo:0
vim ifcfg-lo:0
#修改后的内容
DEVICE=lo:0
IPADDR=192.168.100.15
NETMASK=255.255.255.255
ONBOOT=yes
###########
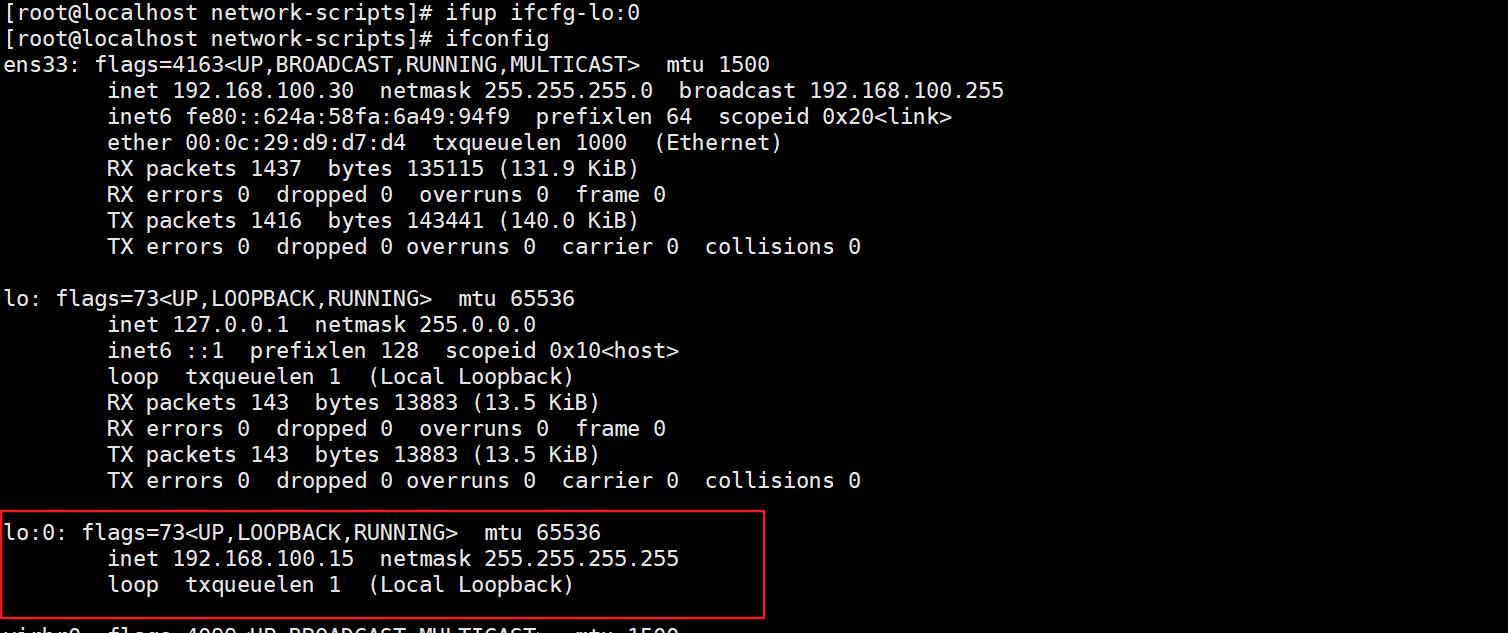
ifup ifcfg-lo:0
ifconfig

route -n
route add  -host 192.168.100.15 dev lo:0
route -n
which route
cd /etc/rc.d
vim rc.local
#添加后的内容
/usr/sbin/route add  -host 192.168.100.15 dev lo:0
chmod +x /etc/rc.d/rc.local
ll
cd /etc/
ll rc.local


###############调整内核ARP的响应参数,以阻止更新VIP的MAC地址里面发生冲突
vim /etc/sysctl.conf
#添加内容
net.ipv4.conf.lo.arp_ignore = 1
net.ipv4.conf.lo.arp_announce = 2
net.ipv4.conf.all.arp_ignore = 1
net.ipv4.conf.all.arp_announce = 2
##################
sysctl  -p

yum -y install httpd
systemctl start httpd
systemctl  status httpd
cd /var/www/html/
ls
mount 192.168.100.20:/opt/kgc /var/www/html/
ls html/
cat html/index.html

#############
scp /etc/sysctl.conf  192.168.100.40:/etc/
scp /etc/sysconfig/network-scripts/ifcfg-lo:0 root@192.168.100.40:/etc/sysconfig/network-scripts/ifcfg-lo:0
配置节点服务器2: 192.168.100.40
systemctl stop firewalld
systemctl disable firewalld
setenforce 0
showmount -e 192.168.100.20
#################
cat /etc/sysctl.conf
cat /etc/sysconfig/network-scripts/ifcfg-lo:0
yum -y install httpd

systemctl start httpd
systemctl  status httpd

cd /var/www/html/
ls
mount 192.168.100.20:/opt/accp /var/www/html/
ls html/
####可能出不来index.html,先cd .. 然后再ls html/
cat index.html
systemctl restart network
ifconfig
route add -host 192.168.100.15 dev lo:0
route -n

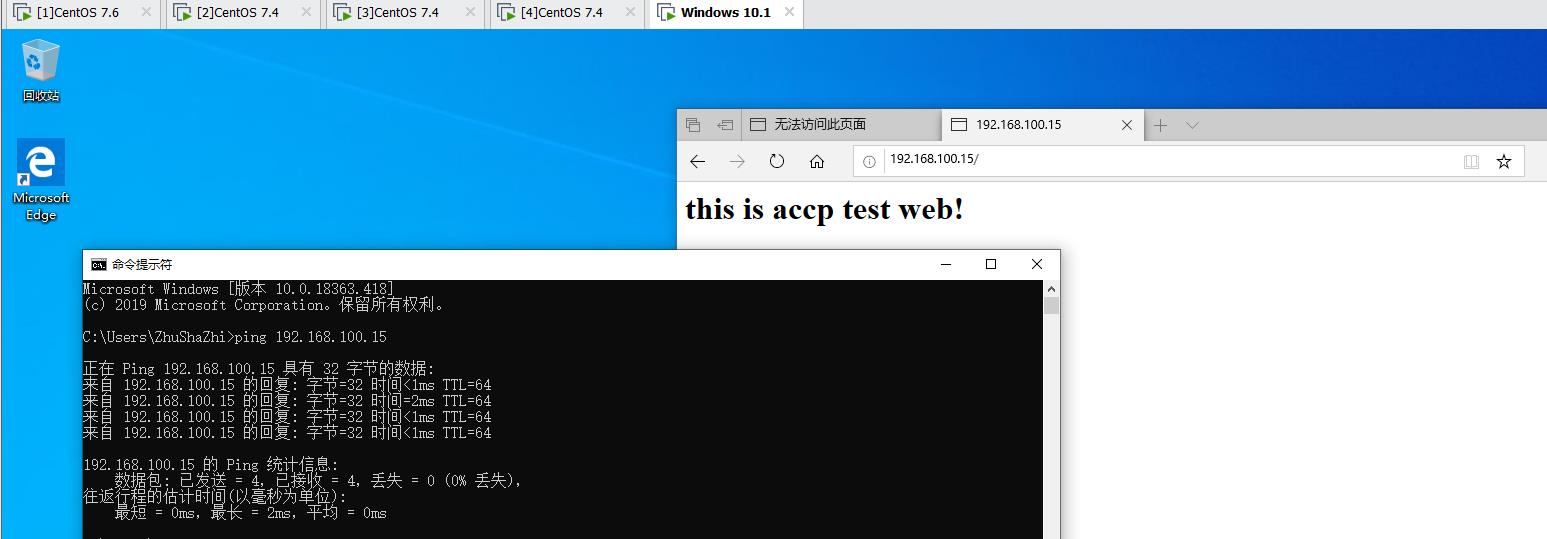
第四步、测试


以上是关于负载均衡LVS-DR模式群集部署实操的主要内容,如果未能解决你的问题,请参考以下文章