Python,OpenCV提取图片中的多个茄子种子轮廓,并按从左到右排序后显示
Posted 程序媛一枚~
tags:
篇首语:本文由小常识网(cha138.com)小编为大家整理,主要介绍了Python,OpenCV提取图片中的多个茄子种子轮廓,并按从左到右排序后显示相关的知识,希望对你有一定的参考价值。
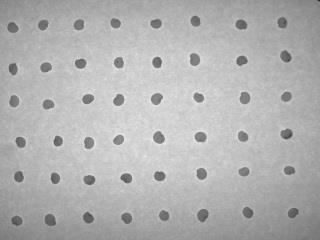
写这篇博客源于博友的提问,期望把下图中的多个茄子种子按从左到右的顺序提取出来;
1. 效果图
在每颗茄子种子上绘制绿色圆形,效果图如下:

在每颗茄子种子上绘制蓝色矩形,效果图如下:

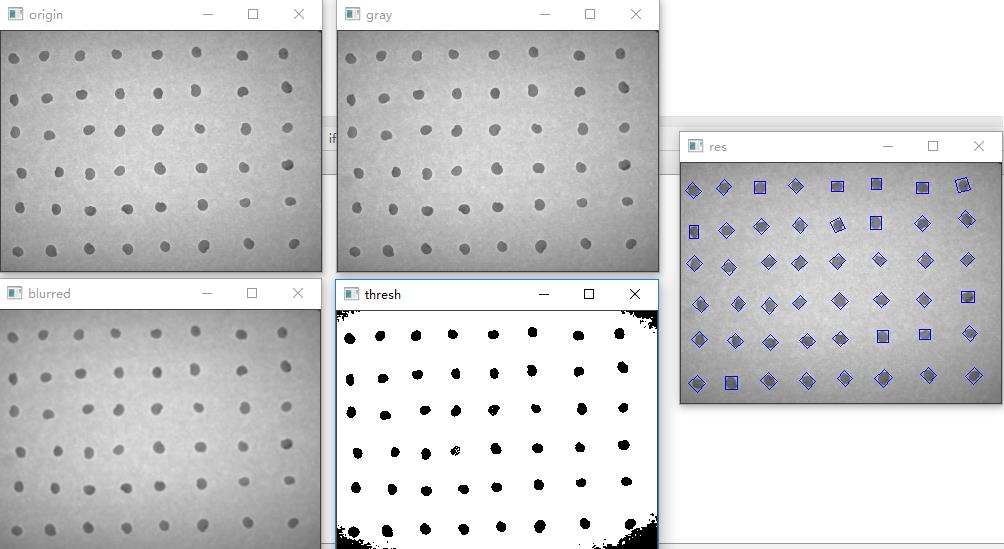
原图 VS 灰度图 VS 高斯模糊图 VS 阈值化图 VS 最终效果图如下
原图 — 转灰度图 忽略色彩对提取轮廓的影响;
灰度图 — 高斯模糊后图 忽略高频噪音的影响;
高斯模糊图 — 阈值化图 使提取物体与背景明显的被分为前景和背景;
阈值化图 ——应用轮廓检测,获取轮廓,并简单过滤,绘制矩形边界框在轮廓上;
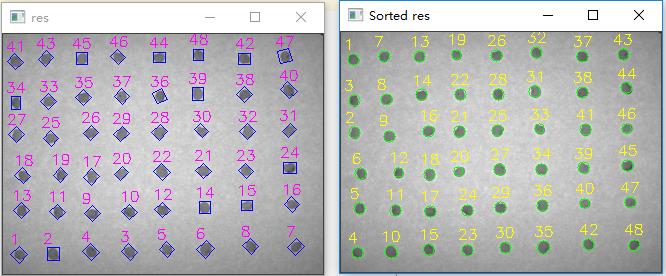
增加根据轮廓从左到右排序,未排序 VS 排序效果图如下:
由于只是单纯根据轮廓的坐标x排序,所以并不是理所当然的 从左到右,从上到下的效果。
2. 源码
# 提取图片中的每个茄子种子,提供了俩种方法,一种单纯的python图片剪裁,效果并不好(图片简单的裁剪,有的种子会剪裁残缺,有的会包含俩个)
# 另一种先预处理图像:转灰度图、高斯模糊、阈值化、轮廓提取、轮廓过滤、轮廓排序,绘制效果图;效果要好很多。
import argparse

import cv2
import numpy as np


# 简单分割,效果并不好
def crop(img):
    qz1 = img[:30, :40]
    width = 40
    height = 30
    cv2.imshow("qz", qz1)
    cv2.waitKey(0)

    for w in range(0, int(320 / width)):
        for h in range(0, int(240 / height)):
            print(w * width, h * height, (w + 1) * width, (h + 1) * height)
            cv2.imshow(str(w) + "" + str(h), img[h * height:(h + 1) * height, w * width:(w + 1) * width])
            cv2.waitKey(0)

    cv2.destroyAllWindows()


# 轮廓排序 默认从左到右
# --cnts 待排序的轮廓列表
# --method 排序方法 自上而下,从左到右等
def sort_cnts(cnts, method="left-to-right"):
    # 初始化反向标志和排序索引
    reverse = False
    i = 0

    # 处理是否需要逆向排序
    if method == "right-to-left" or method == "bottom-to-top":
        reverse = True

    # 处理时根据边界框的x坐标排序还是y坐标排序,如果是自上而下或者自下而上则需要根据y坐标排序而不是x坐标
    if method == "top-to-bottom" or method == "bottom-to-top":
        i = 1

    # 构建边界框list 并使用python魔术lambda表达式进行排序
    boundingBoxes = [cv2.boundingRect(c) for c in cnts]
    (cnts, boundingBoxes) = zip(*sorted(zip(cnts, boundingBoxes),
                                        key=lambda b: b[1][i], reverse=reverse))

    # 返回排序后的轮廓和边界框
    return (cnts, boundingBoxes)


# 绘制轮廓ID号
def draw_contour(image, c, i):
    # 计算轮廓区域的中心,并绘制⭕代表中心
    M = cv2.moments(c)
    cX = int(M["m10"] / M["m00"])
    cY = int(M["m01"] / M["m00"])

    # 在图像上绘制轮廓数
    cv2.putText(image, "{}".format(i + 1), (cX - 10, cY - 10), cv2.FONT_HERSHEY_SIMPLEX,
                0.5, (0, 255, 255), 1)

    (x, y), radius = cv2.minEnclosingCircle(c)
    center = (int(x), int(y))
    radius = int(radius)
    cv2.circle(image, center, radius, (0, 255, 0), 1)

    # 返回绘制了轮廓数的图像
    return image


# 构建命令行参数及解析
# --image 输入图像路径
# --preprocess:预处理类型,thresh或blur
ap = argparse.ArgumentParser()
ap.add_argument("-i", "--image", required=False, default='images/qz.jpg',
                help="path to input image to be OCR'd")
ap.add_argument("-p", "--preprocess", required=False, type=str, default="thresh",
                help="type of preprocessing to be done")
ap.add_argument("-m", "--method", required=False, default='left-to-right',
                help="Sorting method")
args = vars(ap.parse_args())

image = cv2.imread(args["image"])
origin = image.copy()
print(image.shape)
cv2.imshow("origin", image)

# 法一:图片简单的裁剪,有的种子会剪裁残缺,有的会包含俩个
# crop(image)


gray = cv2.cvtColor(image, cv2.COLOR_BGR2GRAY)
cv2.imshow("gray", gray)

# 预处理以便将前景与背景分割开来
# 检测是该用阈值还是模糊预处理步骤
# 高斯模糊处理以减少高频噪声
blurred = cv2.GaussianBlur(gray, (3, 3), 0)
cv2.imshow("blurred", blurred)

thresh = cv2.threshold(gray, 140, 255, cv2.THRESH_BINARY)[1]

cv2.imshow("thresh", thresh)
contours, hierarchy = cv2.findContours(thresh, 1, 2)
print(len(contours))

# 根据面积过滤掉面积过大、过小的不合法轮廓
cnts = [cnt for cnt in contours if cv2.contourArea(cnt) > 14 and cv2.contourArea(cnt) < 150]
print(len(cnts))

for i, cnt in enumerate(cnts):
    # print(i, area)
    M = cv2.moments(cnt)
    cX = int(M["m10"] / M["m00"])
    cY = int(M["m01"] / M["m00"])
    # 在图像上绘制轮廓及中心
    # cv2.drawContours(image, [cnt], -1, (0, 255, 0), 2)
    # cv2.circle(image, (cX, cY), 7, (0, 0, 255), -1)
    cv2.putText(image, str(i + 1), (cX - 10, cY - 10),
                cv2.FONT_HERSHEY_SIMPLEX, 0.5, (255, 0, 255), 1)

    # 在图像上绘制最小外接圆(绿色)
    # (x, y), radius = cv2.minEnclosingCircle(cnt)
    # center = (int(x), int(y))
    # radius = int(radius)
    # cv2.circle(image, center, radius, (0, 255, 0), 1)

    # 在图像上绘制面积最小外接矩形蓝色
    rect = cv2.minAreaRect(cnt)
    box = cv2.boxPoints(rect)
    box = np.int0(box)
    cv2.drawContours(image, [box], 0, (255, 0, 0), 1)

cv2.imshow("res", image)
cv2.waitKey(0)

# 根据提供的方法对轮廓进行排序
(cnts, boundingBoxes) = sort_cnts(cnts, method=args["method"])

# 遍历排序后的轮廓,并绘制在图像上
for (i, c) in enumerate(cnts):
    draw_contour(origin, c, i)

# 展示排序后的输出图像
cv2.imshow("Sorted res", origin)
cv2.waitKey(0)
以上是关于Python,OpenCV提取图片中的多个茄子种子轮廓,并按从左到右排序后显示的主要内容,如果未能解决你的问题,请参考以下文章