axios + json-server用法演示
Posted eyes++
tags:
篇首语:本文由小常识网(cha138.com)小编为大家整理,主要介绍了axios + json-server用法演示相关的知识,希望对你有一定的参考价值。
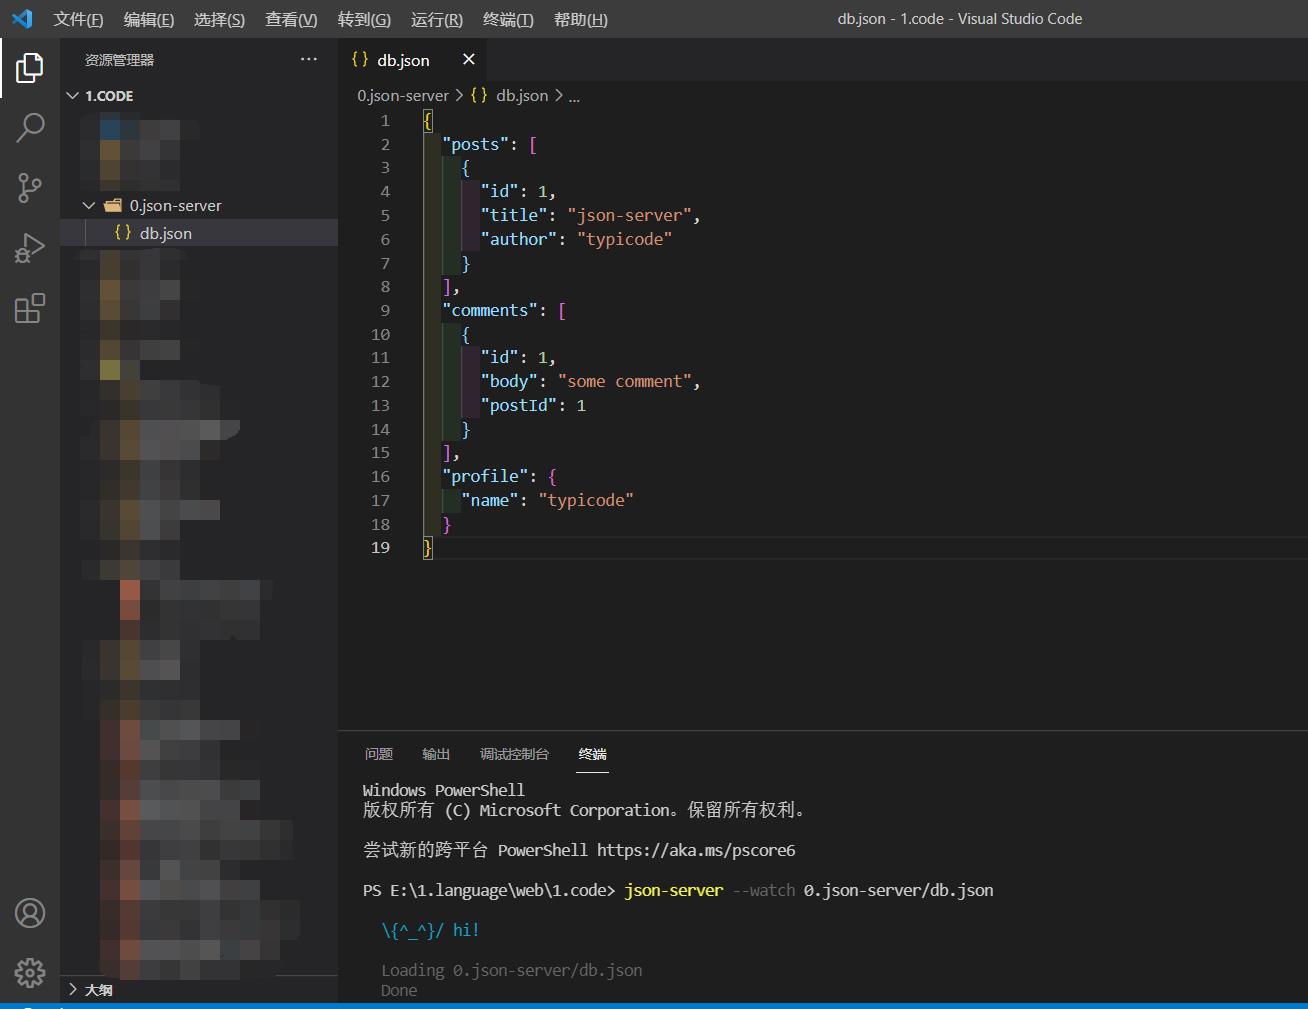
json-server可以在前端模拟服务器返回json格式数据,使用时需要全局安装json-server包
npm i -g json-server
使用时需要开启服务,需要在终端找到自己的json文件并且监视:
json-server --watch db.json

然后就可以开始写代码了:
基础使用:
<!DOCTYPE html>
<html lang="en">

<head>
    <meta charset="UTF-8">
    <meta http-equiv="X-UA-Compatible" content="IE=edge">
    <meta name="viewport" content="width=device-width, initial-scale=1.0">
    <title>Document</title>
    <link href="https://cdn.bootcdn.net/ajax/libs/twitter-bootstrap/5.0.2/css/bootstrap.min.css" rel="stylesheet">
    <script src="https://cdn.bootcdn.net/ajax/libs/axios/0.21.1/axios.min.js"></script>
</head>

<body>
    <div class="container">
        <h2 class="page-header">基本使用</h2>
        <button class="btn btn-primary">发送GET请求</button>
        <button class="btn btn-warning">发送POST请求</button>
        <button class="btn btn-success">发送PUT请求</button>
        <button class="btn btn-danger">发送DELETE请求</button>
    </div>

    <script>
        // 获取按钮
        const btns = document.querySelectorAll('button');

        // GET请求
        btns[0].onclick = () => {
            axios({
                // 请求类型
                method: 'GET',
                // URL
                url: 'http://localhost:3000/posts'
            }).then(response => {
                console.log(response);
            })
        }

        // POST请求
        btns[1].onclick = () => {
            axios({
                // 请求类型
                method: 'POST',
                // URL
                url: 'http://localhost:3000/comments',
                // 设置请求体
                data: {
                    id: 2,
                    title: "这是一个POST请求",
                    author: "eyes++"
                }
            }).then(response => {
                console.log(response);
            })
        }

        // PUT请求
        btns[2].onclick = () => {
            axios({
                // 请求类型
                method: 'PUT',
                // URL
                url: 'http://localhost:3000/comments/2',
                // 设置请求体
                data: {
                    id: 2,
                    title: "这是一个PUT请求",
                    author: "eyes"
                }
            }).then(response => {
                console.log(response);
            })
        }

        // delete请求
        btns[3].onclick = () => {
            axios({
                // 请求类型
                method: 'delete',
                // URL
                url: 'http://localhost:3000/comments/2',
            }).then(response => {
                console.log(response);
            })
        }
    </script>
</body>
</html>
axios的一些方法:
<!DOCTYPE html>
<html lang="en">

<head>
    <meta charset="UTF-8">
    <meta http-equiv="X-UA-Compatible" content="IE=edge">
    <meta name="viewport" content="width=device-width, initial-scale=1.0">
    <title>Document</title>
    <link href="https://cdn.bootcdn.net/ajax/libs/twitter-bootstrap/5.0.2/css/bootstrap.min.css" rel="stylesheet">
    <script src="https://cdn.bootcdn.net/ajax/libs/axios/0.21.1/axios.min.js"></script>
</head>

<body>
    <div class="container">
        <h2 class="page-header">其他方法</h2>
        <button class="btn btn-primary">发送GET请求</button>
        <button class="btn btn-warning">发送POST请求</button>
    </div>
    <script>
        // 获取按钮
        const btns = document.querySelectorAll('button');

        // 发送GET请求
        btns[0].onclick = () => {
            axios.request({
                method: 'GET',
                url: 'http://localhost:3000/comments'
            }).then(response => {
                console.log(response);
            })
        }

        // 发送POST请求
        btns[1].onclick = () => {
            axios.post(
                'http://localhost:3000/comments',
                {
                    "body": "这是一个POST请求",
                    "postId": 2
                }
            ).then(response => {
                console.log(response);
            })
        }
    </script>
</body>

</html>
以上是关于axios + json-server用法演示的主要内容,如果未能解决你的问题,请参考以下文章