使用Linux Bridge 搭建vxlan 实现 虚拟机跨物理机通信
Posted
tags:
篇首语:本文由小常识网(cha138.com)小编为大家整理,主要介绍了使用Linux Bridge 搭建vxlan 实现 虚拟机跨物理机通信相关的知识,希望对你有一定的参考价值。
#实验环境:
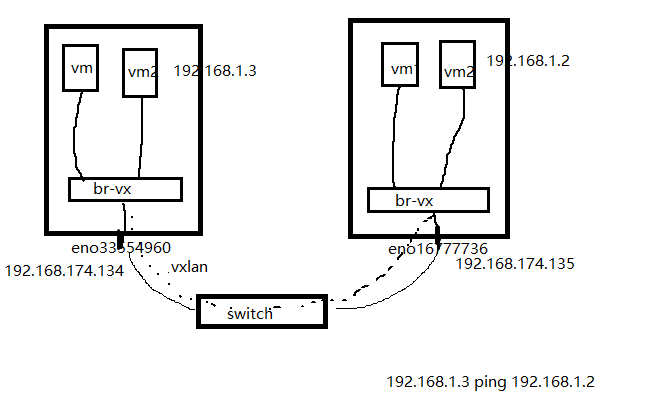
#本次实验要让192.168.1.3 跨物理节点 ping 通 192.168.1.2
#两台物理机:
| KVM_1 | 192.168.174.134 |
| KVM_2 | 192.168.174.135 |
#在KVM_1主机上操作
#安装KVM相关软件
[[email protected]_1 ~]# yum -y install qemu-kvm libvirt virt-install bridge-utils
[[email protected]_1 ~]# systemctl start libvirtd.service
[[email protected]_1 ~]# brctl addbr br-vx #创建网桥
[[email protected]_1 ~]# ip link set br-vx up #启动网桥
[[email protected]_1 ~]# ip link add vxlan10 type vxlan id 100 remote 192.168.174.135 dstport 4789 dev eno33554960
#创建vxlan隧道 remote 为远程地址 dstport 为远程端口 dev 为本地物理出口
[[email protected]_1 ~]# ip link set vxlan10 up #开启隧道
[[email protected]_1 ~]# brctl addif br-vx vxlan10 #将隧道加入网桥
#在KVM_2主机上操作
#安装KVM相关软件
[[email protected]_2 ~]# yum -y install qemu-kvm libvirt virt-install bridge-utils
[[email protected]_2 ~]# systemctl start libvirtd.service
[[email protected]_2 ~]# brctl addbr br-vx #创建网桥
[[email protected]_2 ~]# ip link set br-vx up #启动网桥
[[email protected]_2 ~]# ip link add vxlan10 type vxlan id 100 remote 192.168.174.134 dstport 4789 dev eno16777736
#创建vxlan隧道 remote 为远程地址 dstport 为远程端口 dev 为本地物理出口
[[email protected]_2 ~]# ip link set vxlan10 up #开启隧道
[[email protected]_2 ~]# brctl addif br-vx vxlan10 #将隧道加入网桥
#创建虚拟机 此处用的是 cirros镜像 下载地址
[[email protected]_1 ~]# virt-install --name=vm4 --network bridge=br-vx --graphics vnc,listen=0.0.0.0 --noautoconsole --ram=512 --vcpus=1 --boot hd --disk path=/opt/cirros-0.3.4-x86_64-disk.img
[[email protected]_1 ~]# brctl show
bridge namebridge idSTP enabledinterfaces
br-vx8000.265a5b09d49enovnet0
vxlan10
virbr08000.52540057b868yesvirbr0-nic
[[email protected]_2 ~]# virt-install --name=vm4 --network bridge=br-vx --graphics vnc,listen=0.0.0.0 --noautoconsole --ram=512 --vcpus=1 --boot hd --disk path=/opt/cirros-0.3.4-x86_64-disk.img
[[email protected]_2 ~]# brctl show
bridge name bridge id STP enabled interfaces
br-vx 8000.e6d9912583a0 no vnet0
vxlan10
virbr0 8000.5254006a8c44 yes virbr0-nic
#创建虚拟机时 网络选择的是连接 到 br-vx 而不是default网络(virbr0)
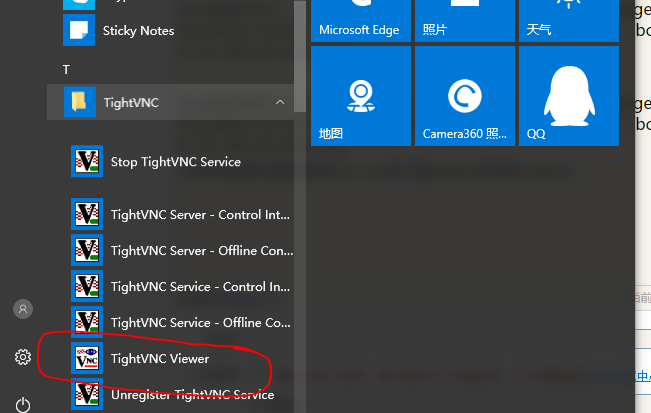
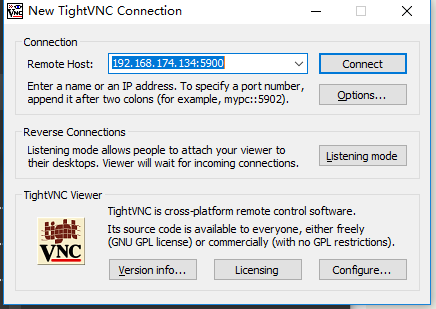
#用VNC连接到虚拟机
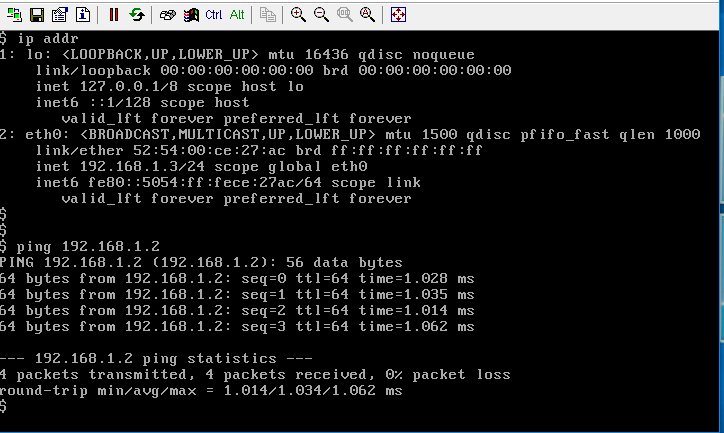
#由于我们没有搭建DHCP 所以需要手动设置IP地址
#重启
#KVM_2上的虚拟机进行相同的操作
#测试 192.168.1.3 ping 另一台物理机上的 虚拟机 192.168.1.2
#注意:由于我们用的都是命令进行配置的所以物理机重启后就会没有了
# 所以这里给出 br-vx的配置文件
[[email protected]_2 ~]# cat /etc/sysconfig/network-scripts/ifcfg-br-vx
DEVICE=br-vx
STP=no
TYPE=Bridge
BOOTPROTO=none
DEFROUTE=yes
IPV4_FAILURE_FATAL=no
IPV6INIT=yes
IPV6_AUTOCONF=no
IPV6_DEFROUTE=yes
IPV6_FAILURE_FATAL=no
NAME=br-vx
UUID=8fc90c0c-81b9-496c-b25f-de6e8a206bf9
ONBOOT=yes
IPADDR=192.168.1.1 #这里的IP地址是网桥的IP地址,方便做DHCP
PREFIX=24
本文出自 “Chauncey” 博客,请务必保留此出处http://cqwujiang.blog.51cto.com/10808946/1914123
以上是关于使用Linux Bridge 搭建vxlan 实现 虚拟机跨物理机通信的主要内容,如果未能解决你的问题,请参考以下文章


