利用nodemcu和mqtt协议让嵌入式设备接入互联网(一.layui前端框架)
Posted blots
tags:
篇首语:本文由小常识网(cha138.com)小编为大家整理,主要介绍了利用nodemcu和mqtt协议让嵌入式设备接入互联网(一.layui前端框架)相关的知识,希望对你有一定的参考价值。
前言
为了让自己的嵌入设备接入互联网,而且能互相通讯,用直接的TCP或者UDP协议肯定是不够的,在了解了目前物联网行业后,发现物联网常用的协议是mqtt协议(message queuing telemetry transport,消息队列遥测传输协议)。mqtt是一种基于发布/订阅模式的轻量级通讯协议,很适合用于物联网的技术场景。
然后就决定用mqtt协议作为通讯协议。
对于wifi模块,选择了nodemcu,这是一个非常有名的开源物联网平台,是基于lua语言开发的,我们能用它很快很简单的完成连接wifi,实现mqtt协议这些操作。某宝10块就能买一块。
参考github上的一个项目,其实大多数框架和工具都是用的一样的,传送门。基于该项目,我选择layui作为web的前端框架,主要用其中的UI样式来搭建网页前端。利用koa作为后端框架 ,主要用koa框架来监听加载静态资源。利用aedes 作为mqtt的消息服务器,aedes 是一个Stream-based MQTT broker(基于流的mqtt代理器),所以还要利用websocket-stream工具将消息流,从mqtt服务器传给http服务器。最后ui效果如下,车子可以将想传递的信息通过mqtt传出来。

这个难倒不难,但涉及到的知识面比较广,我从前也没碰过html,nodejs等网络相关的知识,所以就把所有的知识拆开来讲。今天先简单讲HTML相关的知识,以及怎么用layui前端框架快速做UI界面,大佬请绕行。
HTML知识简单总结
细节的我不讲,可以参考菜鸟教程HTML教程,和B站HTML速成。
我只讲一些小技巧和关键的知识。由于我经常切换语言,所以选用的是vscode编辑器,而不是其他的编辑器。电脑浏览器我用的google,手机的华为官方浏览器,其他的没有测试。
vscode快捷操作
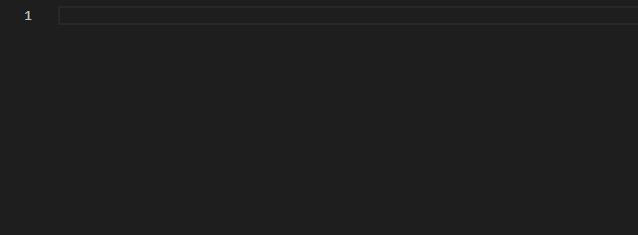
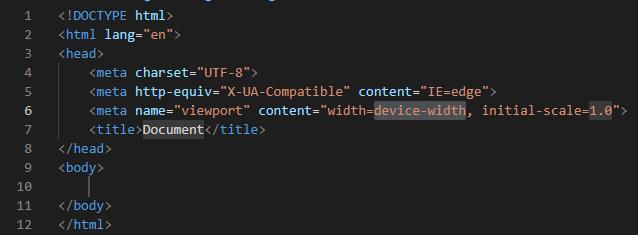
- 输入感叹号回车,可以快速生成html代码框架
- 输入 . 加类名可以快速生成类标签
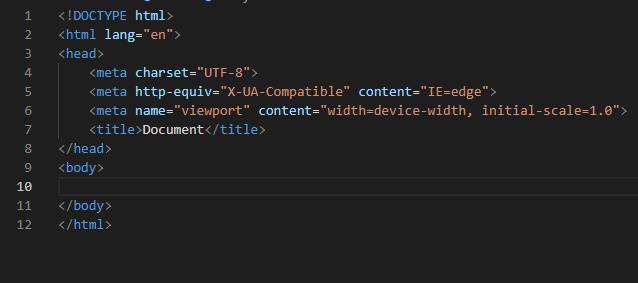
- 输入标签名快速生成结束标签
- 注释快捷键 ctrl + /, 取消注释重复ctrl + /即可
HTML知识总结
HMTL结构
<!DOCTYPE>声明用做指示web浏览器使用那个HTML版本,对于HTML5<!DOCTYPE html>,对于HMTL其他版本,有其他的写法。
<!DOCTYPE>是声明不是标签,且它必须位于HTML文档的第一行位于<html>标签之前。<html>标签,该标签定义了文档的开始点和结束点。HTML常见的文档结构是<!DOCTYPE> <html> <head> ... </head> <body> ... </body> </html><html>还有一个常用的属性设置,例如<html lang='zh'>,lang属性表明了是中文网址还是英文网址,是给搜索引擎判断的,不影响html的内容,可以不设置。
头部
头部主要用来描述文档的一些通用属性,如编码方式,标题内容等,还可以插入全局的CSS文件和scripts脚本。所有的头部相关的内容都放在<head>和</head>之间。
<meta>标签,meta常用的有三个属性。charset属性,用来规定编码方式,例如<meta charset="UTF-8">表明用utf-8编码,编码格式跟浏览器的设置有关,常用的是utf-8,如果出现乱码的情况,检查浏览器的编码方式,与其设置相同即可。name属性,配合content使用,例如<meta name="keywords" content="前端">,告诉搜索引擎,网页的关键字。例如,<meta name="viewport" content="width=device-width, initial-scale=1.0">,viewport是视口的意思,width=device-width是指视口宽度等于设备宽度,initial-scale=1.0表示初始状态不做缩放。这个属性在需要在移动设备访问的网站很重要。http-equiv属性,配合content使用,例如<meta http-equiv="X-UA-Compatible" content="IE=edge,chrome=1">,意思是如果安装了GCF(google chrome浏览器内嵌框架),则使用GCF渲染,如果没有GCF,则使用最高版本的IE内核渲染。例如<meta http-equiv="refresh" content="1">可以让浏览器每一秒刷新一次网页。
只介绍我目前用的几种,详细的可参考这篇博文HTML meta标签总结与属性使用介绍
<title>标签,用于指示网页名字,在浏览器的标签页上显示。<link>标签,用于定义文档和外部资源的关系,常用与链接CSS样式表。如下,链接了文件所在目录下的base.css文件和子目录下的layui.css文件,rel代表两者的关系,被链接文档是当前文档的样式表,href定义被链接文档的位置。<link rel="stylesheet" href="layui/css/layui.css"> <link rel="stylesheet" href="./base.css">
身体
身体部分的内容,便是网页的主要内容了,所有的身体相关的内容都放在<body>和</body>之间。
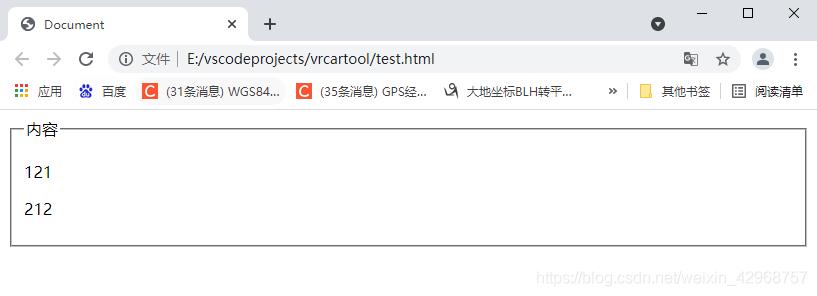
<p></p>标签定义段落,<h1></h1>标签定义一级标题,标题标签最多有6个,只能使用<h1>~<h6><a></a>标签可定义锚(archor),锚常用来做超链接,不同于<link>只能用在头部,<a>一般用在body部分,例如<a href="https://www.baidu.com/">百度主页</a>便可以点击百度主页调到百度的网址。<div></div>标签,常搭配class或id属性使用,对内容进行分区。<fieldset></fieldset>标签,当元素放入到fieldset标签内,浏览器用特殊的方式显示他们。例如这段代码,效果如下图,会生成一个方框。其中<legend></legend>中的内容是内嵌在方框上的标题。... <body> <fieldset> <legend> 内容 </legend> <p>121</p> <p>212</p> </fieldset> </body> ...
<script></script>标签,script 元素既可以包含脚本语句,也可以通过 src 属性指向外部脚本文件。
样式表CSS
参考B站教程CSS速成和W3school教程CSS教程。
CSS的语法很简单,由选择器和声明块组成。如下图。
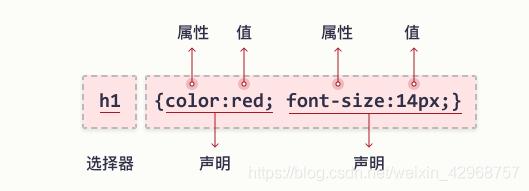
选择器有多种类型,这里只讲常用的三种,声明块类似于jason的键值语法。
- 元素选择器,例如p,h1,h2,a这种都属于元素选择器。格式如下
p
{
margin-top: 5%;
text-align:right;
font-size: 2em;
}
- 类选择器,类基本是自己定义的,使用方法如下
.box
{
margin-top: 5%;
text-align:right;
font-size: 2em;
}
<div class="box">This is important!</div>
- id选择器,id也是自己定义的,使用方法如下
#mostImportant {color:red; background:yellow;}
<h1 id="mostImportant">This is important!</h1>
layui介绍
layui是一个中国社区维护的开源Web UI解决方案。Layui官网,下载解压后是一个不到1M的文件,使用也很方便,直接放到项目目录。如官方示例,只要在头部链接layui.css文件,在body部分,链接layui.js,便可以使用layui中的特性了。
<!DOCTYPE html>
<html>
<head>
<meta charset="utf-8">
<meta name="viewport" content="width=device-width, initial-scale=1, maximum-scale=1">
<title>开始使用 layui</title>
<link rel="stylesheet" href="./layui/css/layui.css">
</head>
<body>
<!-- 你的 HTML 代码 -->
<script src="./layui/layui.js"></script>
<script>
layui.use(['layer', 'form'], function(){
var layer = layui.layer
,form = layui.form;
layer.msg('Hello World');
});
</script>
</body>
</html>
官网
layui的官方文档讲的很详细,使用起来也很方便,这里我就不多叙述了。
源码
这里用了layui的栅格系统,让内容的显示,在当前屏幕下水平排列,如果屏幕大小低于临界值则堆叠排列。由于没有用到layui的js文件的一些效果,所以我没有引用layui.js文件。
base.css是我自定义的一个样式表,目的是保证每个块的格式相同。
mqtt.min.js是可以让我们在网页端使用mqtt协议的脚本文件
webclient.js是自定义脚本,用于使用mqtt协议,订阅topic,将topic中包含的内容显示在html界面上。
js文件的讲解会放在后面讲。
index.html
<!DOCTYPE html>
<html lang="en">
<head>
<meta charset="UTF-8">
<meta http-equiv="X-UA-Compatible" content="IE=edge,chrome=1">
<!-- 该语句每一秒刷新网页 -->
<!-- <meta http-equiv="refresh" content="1"> -->
<meta name="viewport" content="width=device-width, initial-scale=1.0">
<link rel="stylesheet" href="layui/css/layui.css">
<link rel="stylesheet" href="./base.css">
<title>index</title>
</head>
<body>
<fieldset class="layui-elem-field">
<legend>状态显示</legend>
<div class="layui-container">
<div class="layui-row layui-col-space10">
<div class="layui-col-md3">
<div class="basebox" style="background-color: burlywood;">
<div class="layui-row">
<div class="layui-col-xs6">
<div class="title">
油门踏板:
</div>
</div>
<div class="layui-col-xs6">
<div class="content" id='throttle'>
0%
</div>
</div>
</div>
</div>
</div>
<div class="layui-col-md3">
<div class="basebox" style="background-color: rgb(222, 135, 183);">
<div class="layui-row">
<div class="layui-col-xs6">
<div class="title">
刹车踏板:
</div>
</div>
<div class="layui-col-xs6">
<div class="content" id='brake'>
0%
</div>
</div>
</div>
</div>
</div>
<div class="layui-col-md3">
<div class="basebox" style="background-color: rgb(148, 135, 222);">
<div class="layui-row">
<div class="layui-col-xs7">
<div class="title">
方向盘角度:
</div>
</div>
<div class="layui-col-xs5">
<div class="content" id='steer'>
0°
</div>
</div>
</div>
</div>
</div>
<div class="layui-col-md3">
<div class="basebox" style="background-color: rgb(222, 135, 183);">
<div class="layui-row">
<div class="layui-col-xs6">
<div class="title">
轮子转速:
</div>
</div>
<div class="layui-col-xs6">
<div class="content" id='rotationspeed'>
0rpm
</div>
</div>
</div>
</div>
</div>
<div class="layui-col-md3">
<div class="basebox" style="background-color: rgb(222, 135, 157);">
<div class="layui-row">
<div class="layui-col-xs6">
<div class="title">
电量:
</div>
</div>
<div class="layui-col-xs6">
<div class="content" id='SOC'>
0%
</div>
</div>
</div>
</div>
</div>
</div>
</div>
</fieldset>
<!-- <script src="./layui/layui.js"></script> -->
<!-- <script src="https://unpkg.com/mqtt@4.2.8/dist/mqtt.min.js"></script> -->
<script src="./mqtt.min.js"></script>
<script src="./webclient.js" charset="utf-8"></script>
</body>
</html>
base.css
.basebox
{
    height: 50px;
    margin-top: 1%;
    background-color:#ffffff;
    border-radius: 5px;
}
.title
{
    margin-top: 2%;
    text-align:left;
    font-size: 2em;
}
 .content
{
    margin-top: 5%;
    text-align:right;
    font-size: 2em;
}
以上是关于利用nodemcu和mqtt协议让嵌入式设备接入互联网(一.layui前端框架)的主要内容,如果未能解决你的问题,请参考以下文章
中国移动物联网开放平台OneNET学习笔记——设备接入(MQTT协议)OneNET Studio篇