Android学习笔记-UI开发
Posted 倒霉蛋子
tags:
篇首语:本文由小常识网(cha138.com)小编为大家整理,主要介绍了Android学习笔记-UI开发相关的知识,希望对你有一定的参考价值。
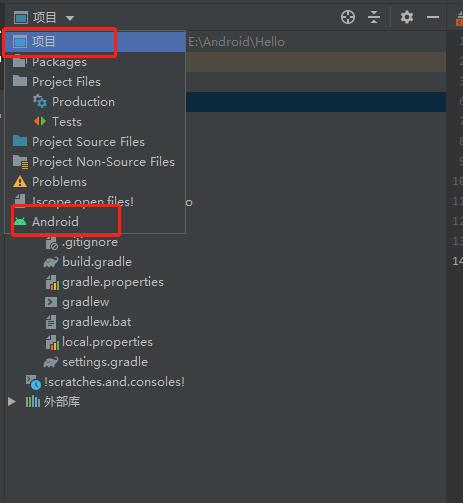
P2 工程结构介绍
project和module的区别: project仅仅是项目,手机上看不到,而module是手机上的app
下载gradle
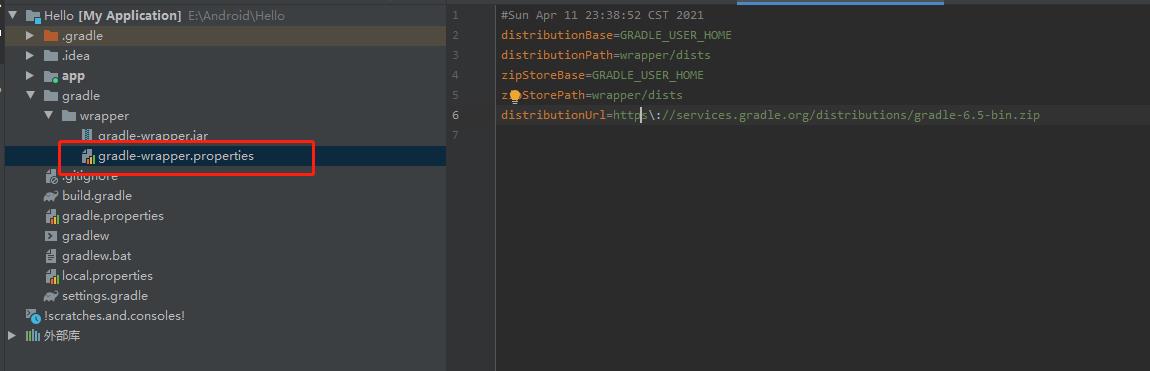
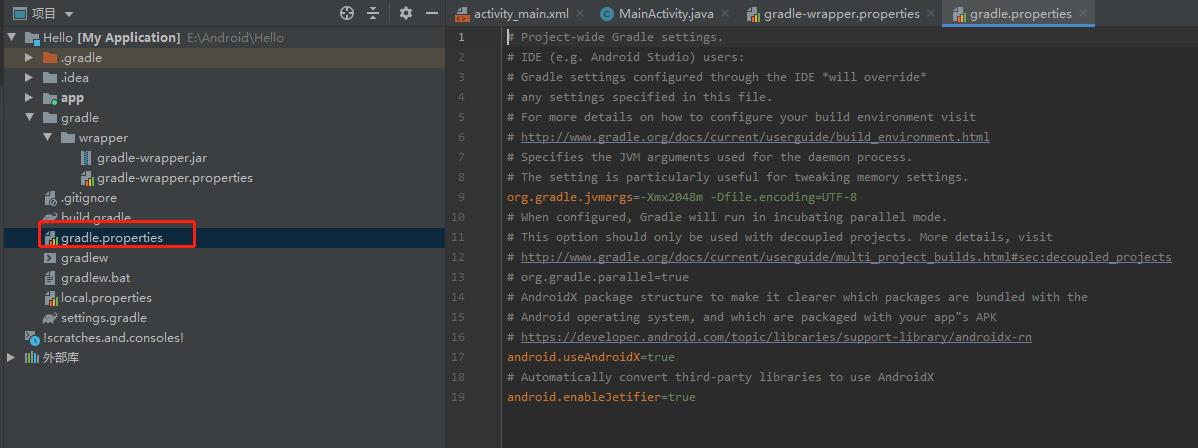
gradle全局配置文件
sdk位置local.properties

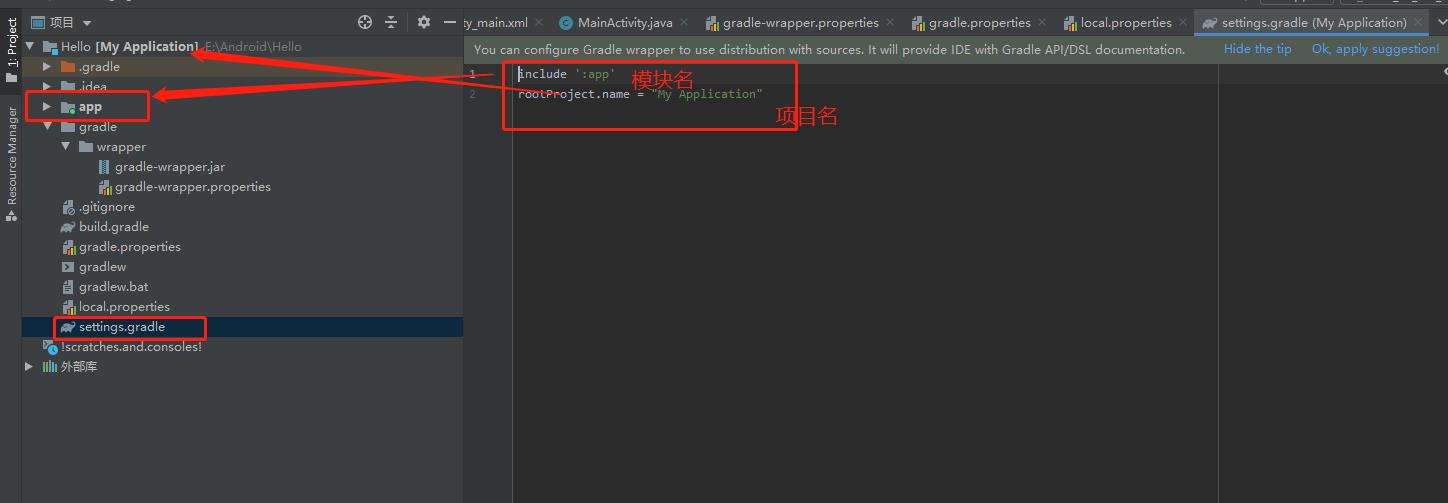
引入的模块setting.gradle
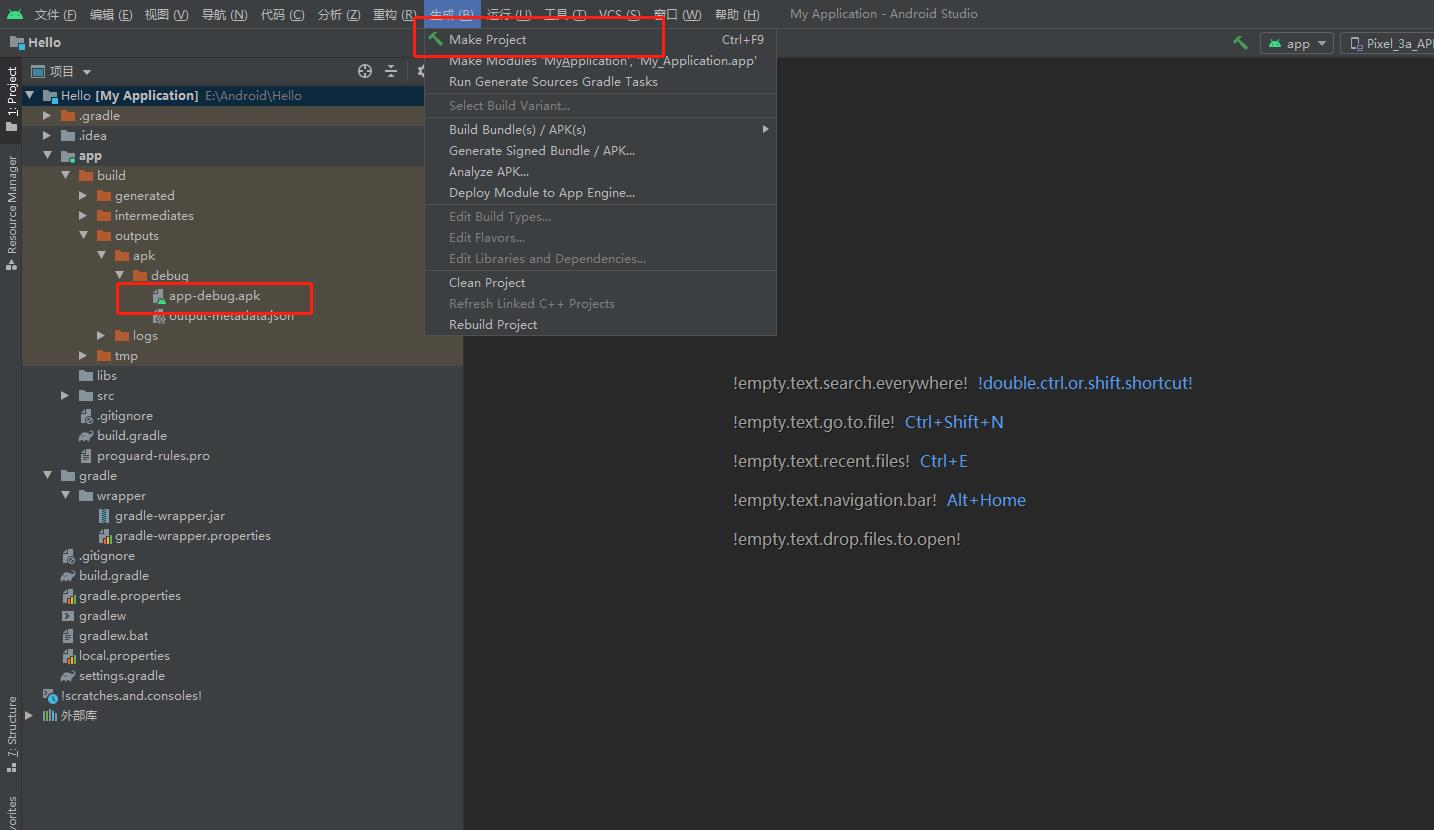
生成apk
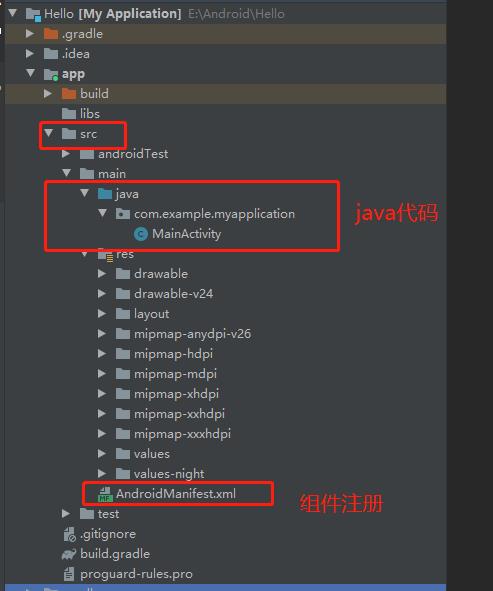
src
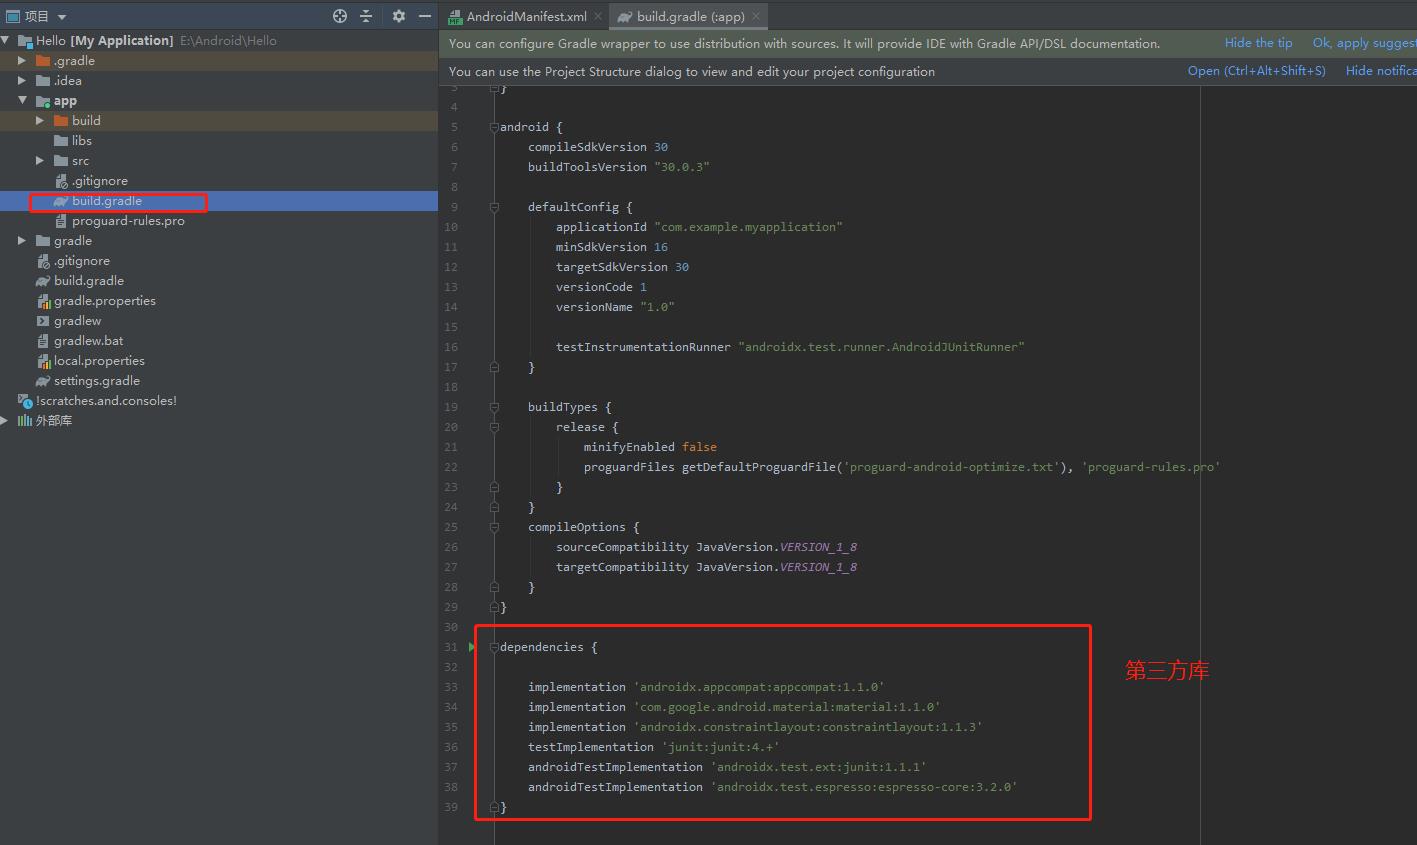
引入第三方库build.gradle
资源

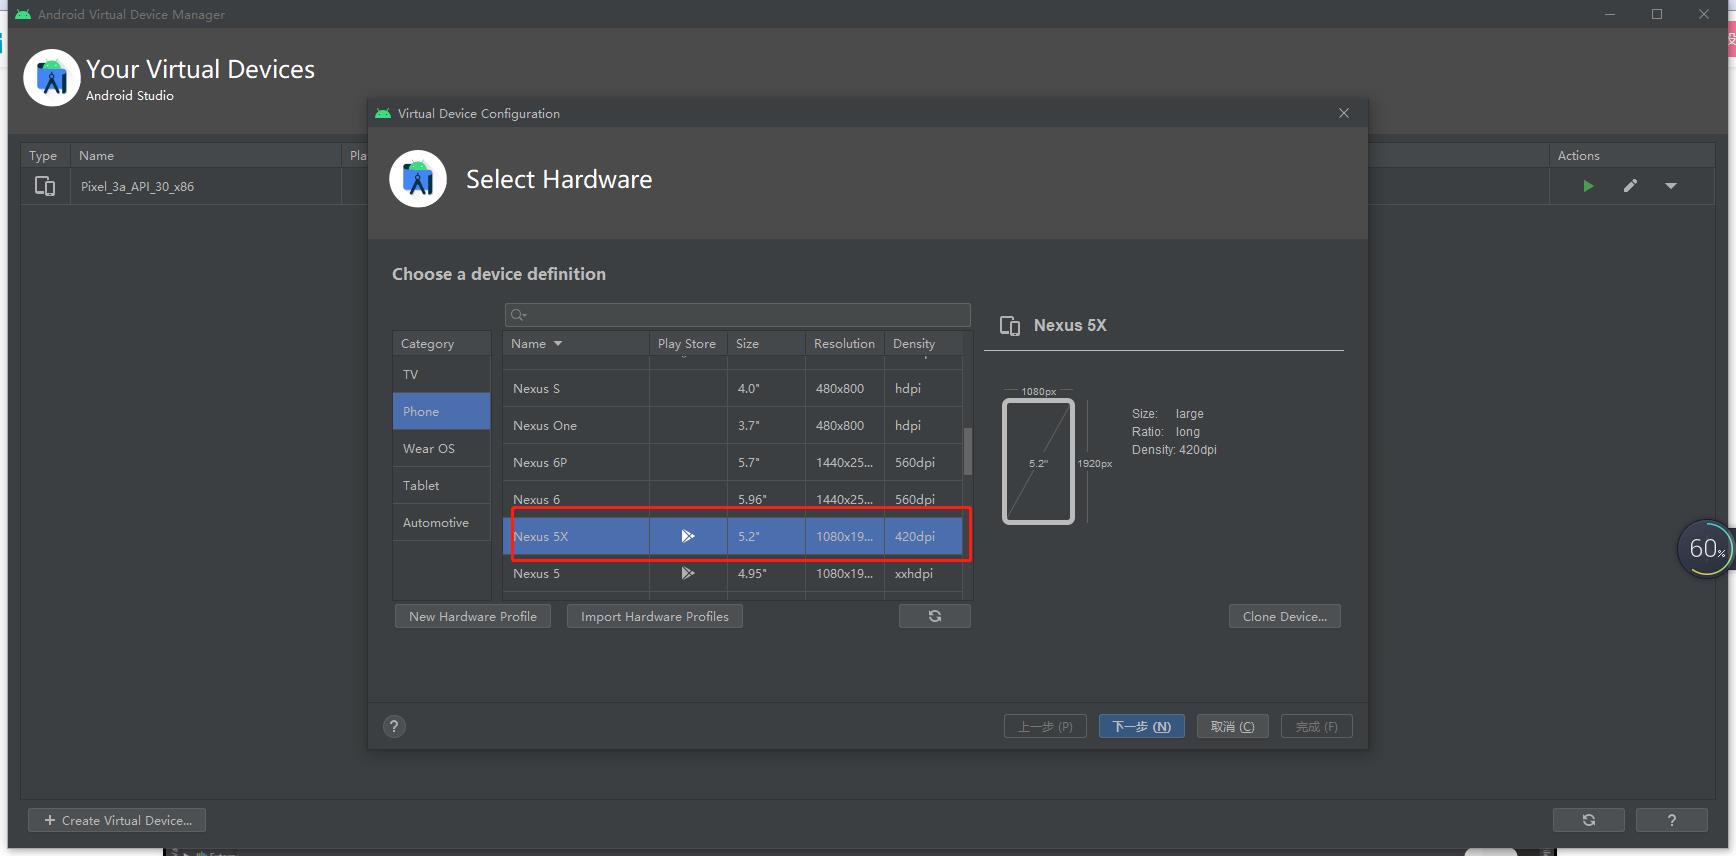
虚拟机安装

P3 TextView1控件
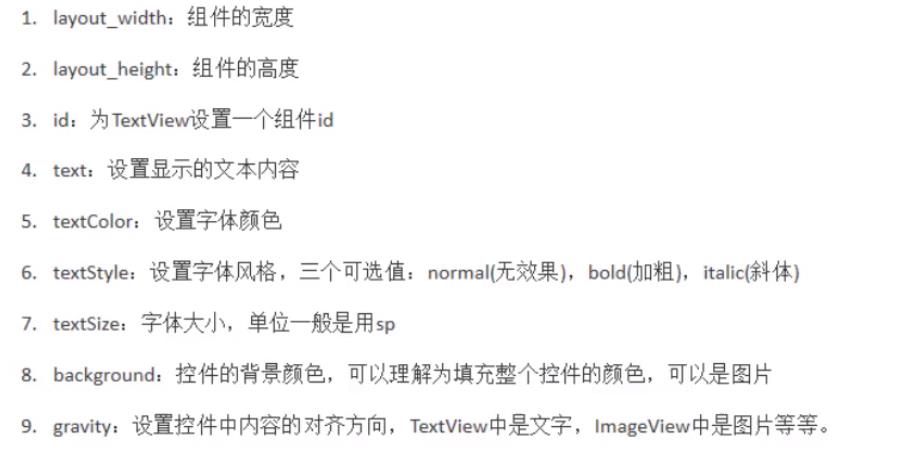
常见属性
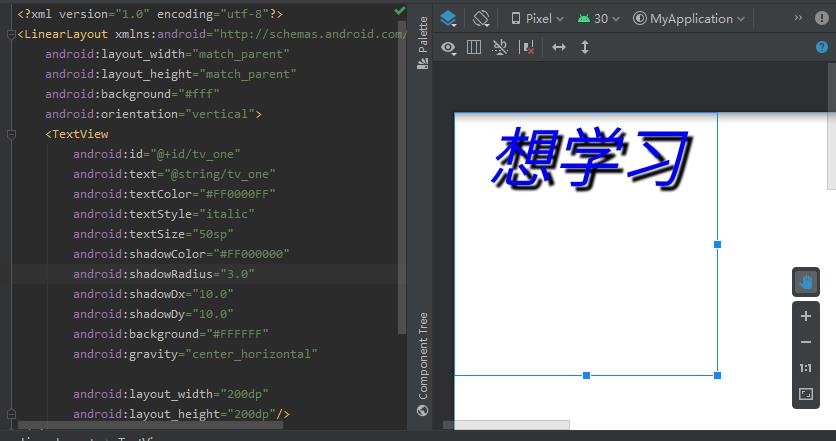
activity_main.xml
<?xml version="1.0" encoding="utf-8"?>
<LinearLayout xmlns:android="http://schemas.android.com/apk/res/android"
    android:layout_width="match_parent"
    android:layout_height="match_parent"
    android:background="#fff"
    android:orientation="vertical">
    <TextView
        android:id="@+id/tv_one"
        android:text="@string/tv_one"
        android:textColor="#FF0000FF"
        android:textStyle="italic"
        android:textSize="50sp"
        android:background="#FFFF0000"
        android:gravity="center_horizontal"
        android:layout_width="200dp"
        android:layout_height="200dp"/>
</LinearLayout>
注意 配置值的时候不直接写数值,而是引用res中values目录下配置文件。

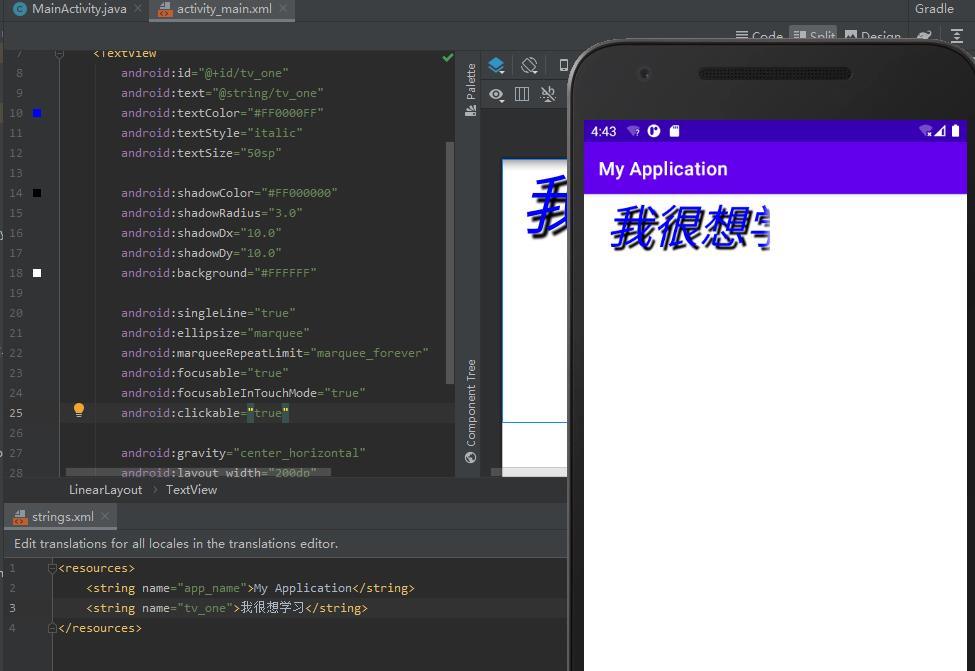
P4 TextView2
带阴影的textview
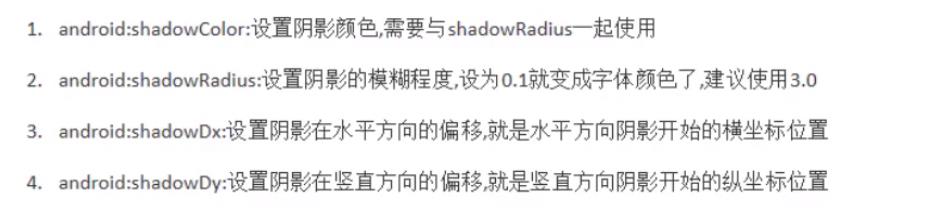
        android:shadowColor="#FF000000"
        android:shadowRadius="3.0"
        android:shadowDx="10.0"
        android:shadowDy="10.0"
P5 TextView3
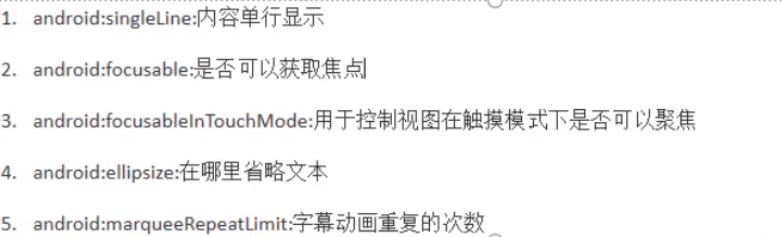
实现跑马灯效果
    <TextView
        android:id="@+id/tv_one"
        android:text="@string/tv_one"
        android:textColor="#FF0000FF"
        android:textStyle="italic"
        android:textSize="50sp"

        android:shadowColor="#FF000000"
        android:shadowRadius="3.0"
        android:shadowDx="10.0"
        android:shadowDy="10.0"
        android:background="#FFFFFF"

        android:singleLine="true"
        android:ellipsize="marquee"
        android:marqueeRepeatLimit="marquee_forever"
        android:focusable="true"
        android:focusableInTouchMode="true"
        android:clickable="true"

        android:gravity="center_horizontal"
        android:layout_width="200dp"
        android:layout_height="200dp">
        <requestFocus/>
    </TextView>
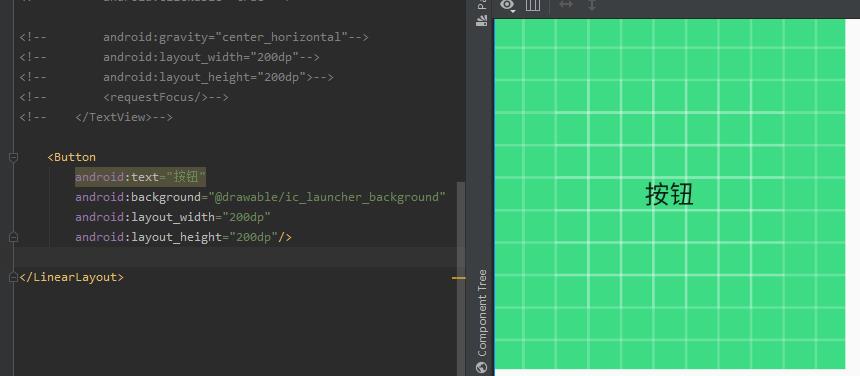
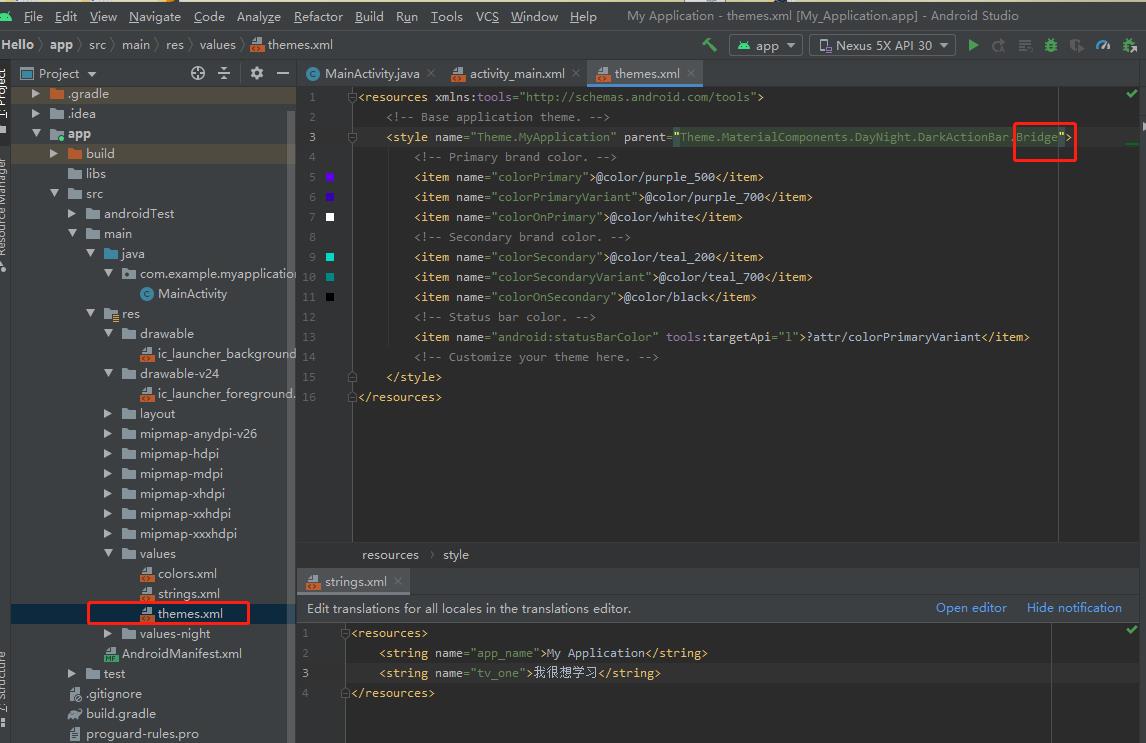
P6 Button1
令button的background属性生效
    <Button
        android:text="按钮"
        android:background="@drawable/ic_launcher_background"
        android:layout_width="200dp"
        android:layout_height="200dp"/>
background可用自定义selector
android:background="@drawable/button_selector"
button_selector.xml
<?xml version="1.0" encoding="utf-8"?>
<selector xmlns:android="http://schemas.android.com/apk/res/android">
    <item android:drawable="@drawable/btn_normal" android:state_pressed="false"/> <!--按键按下时-->

    <item android:drawable="@drawable/btn_pressed" android:state_pressed="true"/> <!--按键没有按下时-->

</selector>
btn_pressed.xml
<?xml version="1.0" encoding="utf-8"?>
<shape xmlns:android="http://schemas.android.com/apk/res/android">
    <solid android:color="#020c41"></solid> <!--按键内部填充-->
    <stroke android:width="1dp" android:color="#FFFFFF"></stroke> <!--边框-->
</shape>
btn_normal.xml
<?xml version="1.0" encoding="utf-8"?>
<shape xmlns:android="http://schemas.android.com/apk/res/android">
    <solid android:color="@color/white"></solid>
    <stroke android:width="1dp" android:color="#FFFFFF"></stroke>
</shape>
导入drawable图片

颜色选择器
<?xml version="1.0" encoding="utf-8"?>
<selector xmlns:android="http://schemas.android.com/apk/res/android">
    <item android:color="#57565D" android:state_pressed="false"/><!--按键没有按下,文字的颜色-->
    <item android:color="#FFFFFF" android:state_pressed="true"/><!--按键按下时,文字的颜色-->
</selector>
P7 Button事件
//获得按钮
        Button btn = findViewById(R.id.btn_one);
点击事件
        //点击事件
        btn.setOnClickListener(new View.OnClickListener() {
            @Override
            public void onClick(View v) {
                Log.e(TAG,"S");  //打印东西
            }
        });
也可以设置button的onclick属性
android:onClick=""
长按事件
        //长按事件
        btn.setOnLongClickListener(new View.OnLongClickListener() {
            @Override
            public boolean onLongClick(View v) {
                return false;
            }
        });
触摸事件
        //触摸事件
        btn.setOnTouchListener(new View.OnTouchListener() {
            @Override
            public boolean onTouch(View v, MotionEvent event) {
                return false;  //当返回true,不会处理其他事件
            }
        });
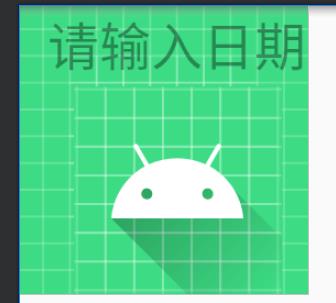
P8 EditText
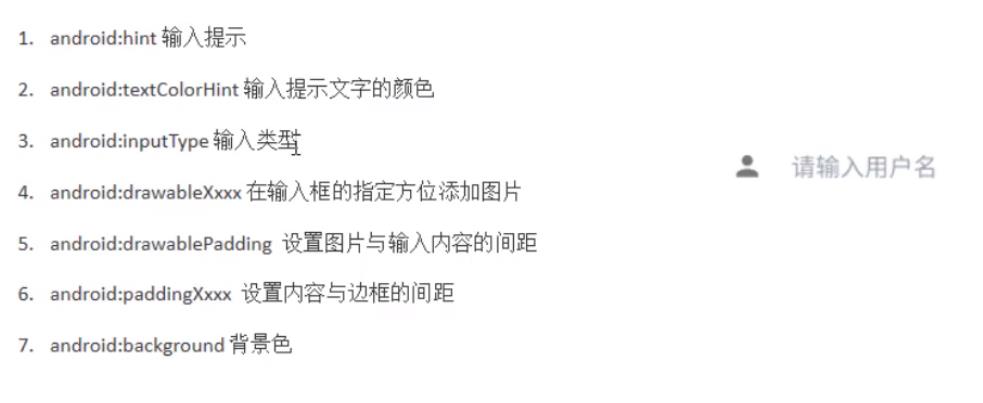
    <EditText
        android:layout_width="100dp"
        android:layout_height="100dp"
        android:hint="请输入日期"
        android:inputType="date"
        android:drawableBottom="@mipmap/ic_launcher"
        android:background="@drawable/ic_launcher_background"
        android:paddingLeft="10dp"
        />
P9 ImageView
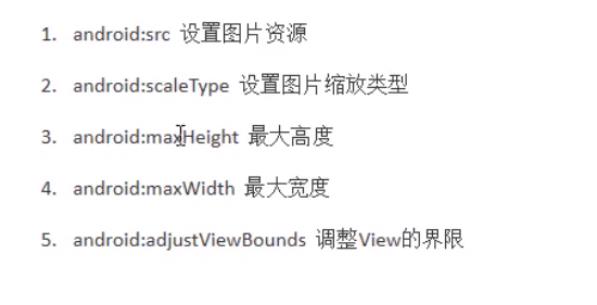
3、4属性搭配5属性使用
    <ImageView
        android:src="@mipmap/ic_launcher"
        android:scaleType="fitStart"
        android:maxHeight="500dp"
        android:maxWidth="500dp"
        android:adjustViewBounds="true"
        android:layout_width="wrap_content"
        android:layout_height="wrap_content"/>
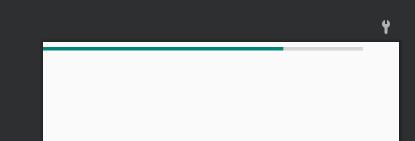
P10 ProgressBar
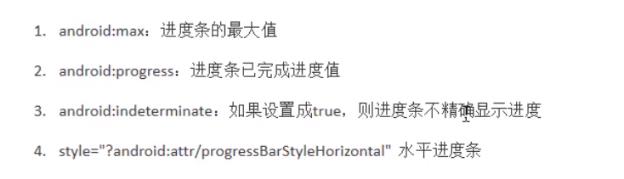
    <ProgressBar
        style="?android:attr/progressBarStyleHorizontal"
        android:layout_width="370dp"
        android:layout_height="wrap_content"
        android:max="200"
        android:progress="150" />
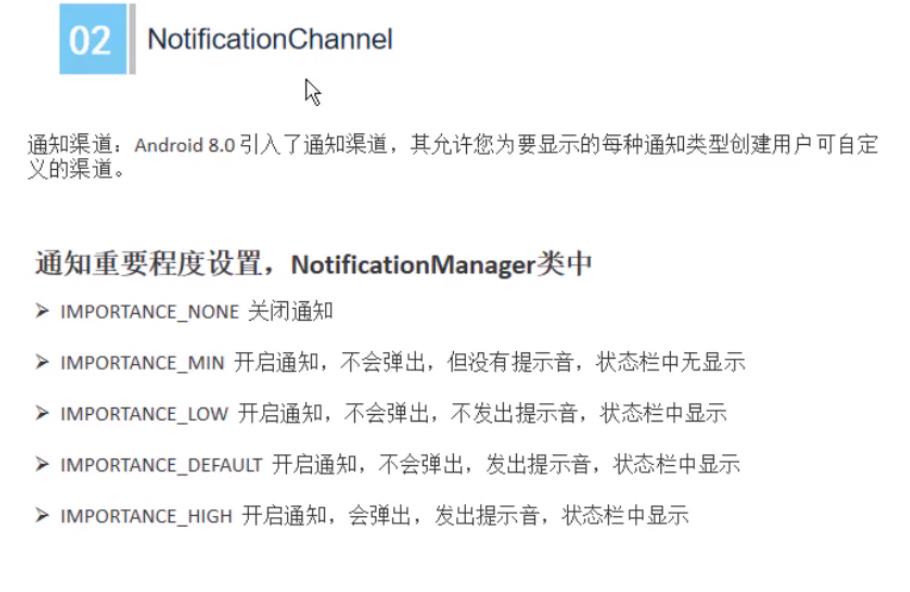
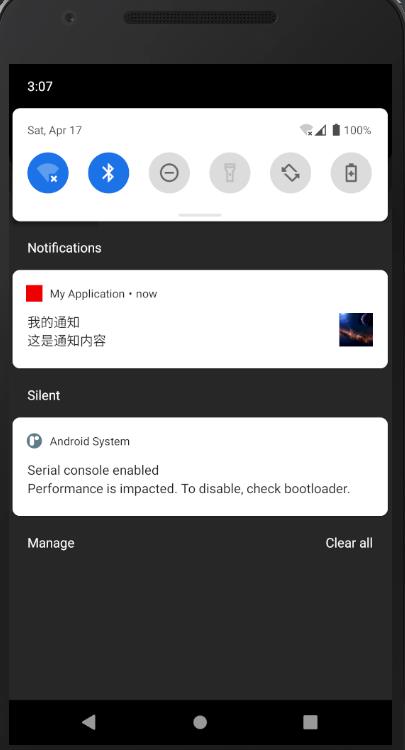
P11 notification
得先创建NotificationManager和Notification


<!--按钮触发发送通知-->
   <Button
        android:layout_width="100dp"
        android:layout_height="50dp"
        android:onClick="sendN"
        android:text="@string/sendNotification"/>
新建通知具体消息的activity
public class NotificationActivity extends Activity {
    @Override
    protected void onCreate(@Nullable Bundle savedInstanceState) {
        super.onCreate(savedInstanceState);
        Log.e("TAG", "onCreate: 进入通知");
    }
}
通知所有内容
    private NotificationManager manager;
    private Notification notification;
    @Override
    protected void onCreate(Bundle savedInstanceState) {
        super.onCreate(savedInstanceState);
        setContentView(R.layout.activity_main);
        //创建通知管理
        manager = (NotificationManager) getSystemService(NOTIFICATION_SERVICE);

        //创建通道渠道
        if (Build.VERSION.SDK_INT >= Build.VERSION_CODES.O){
            NotificationChannel channel = new NotificationChannel(
                    "vashon","测试通知",NotificationManager.IMPORTANCE_HIGH);
            manager.createNotificationChannel(channel);
        }
        //我的消息具体内容
        Intent intent = new Intent(this,NotificationActivity.class);
        PendingIntent pendingIntent = PendingIntent.getActivity(
                this,0,intent,0);
        //创建通知
        notification = new NotificationCompat.Builder(this,"vashon")
                .setContentTitle("我的通知")
                .setContentText("这是通知内容")
                .setSmallIcon(R.drawable.ic_launcher_background)//不能是RGB图
                .setLargeIcon(BitmapFactory.decodeResource(getResources(),R.drawable.timg))//大图标
                .setColor(Color.parseColor("#ff0000")) //小图标颜色
                .setAutoCancel(true) //点击后取消
                .setContentIntent(pendingIntent)   //通知具体信息
                .build();
    }

    public void sendN(View view) {
        manager.notify(1,notification);
        //manager.cancel(1);取消通知
    }
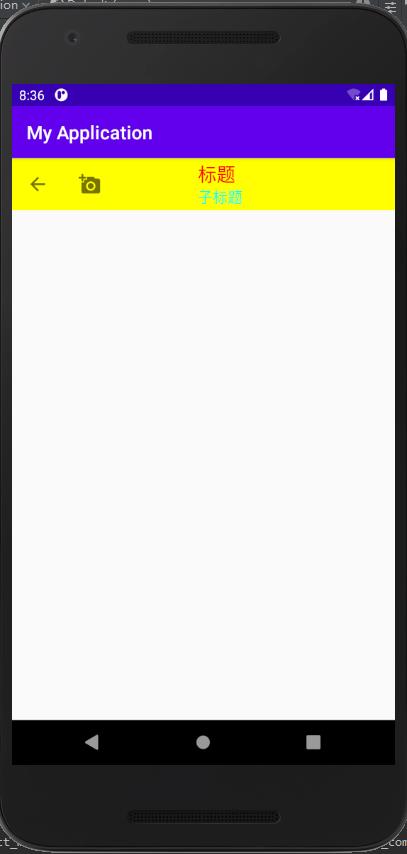
P12 ToolBar

    <androidx.appcompat.widget.Toolbar
        android:id="@+id/tb"
        android:layout_width="match_parent"
        android:layout_height="?attr/actionBarSize"
        android:background="#ffff00"
        app:navigationIcon="@drawable/ic_baseline_arrow_back_24"
        app:title="标题"
        app:titleTextColor="#ff0000"
        app:subtitle="子标题"
        app:subtitleTextColor="#00ffff"
        app:logo="@drawable/ic_baseline_add_a_photo_24"
        app:titleMarginStart="120dp"
        />
居中layout_gravity
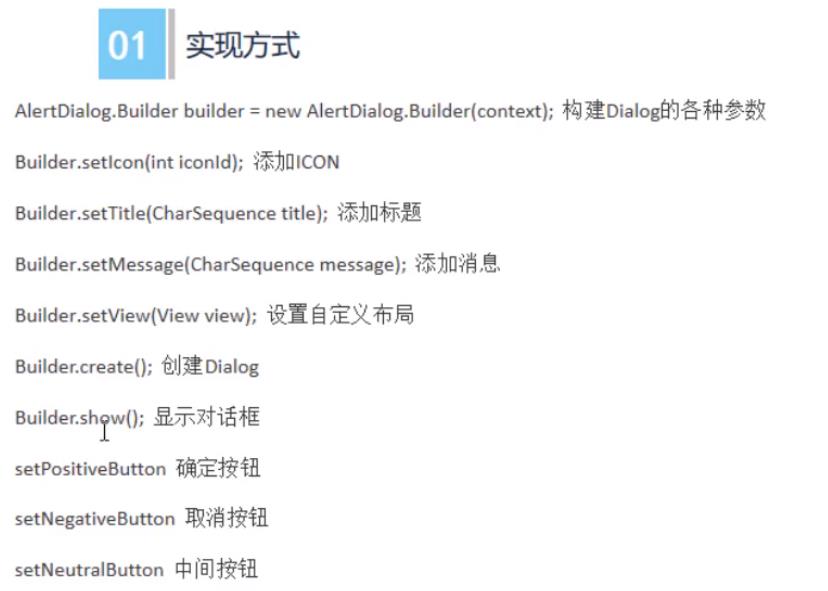
P13 AlertDialog
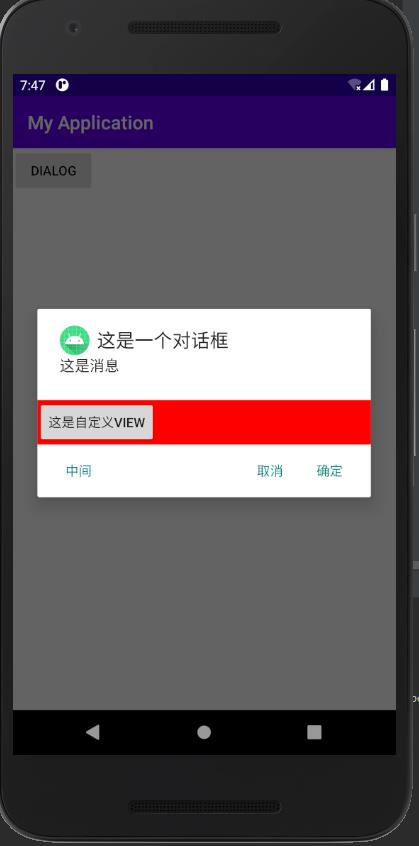
    public void dialogClick(View view) {
        //新建View区域
        View dialogView = getLayoutInflater().inflate(R.layout.dialog_view,null);

        AlertDialog.Builder builder = new AlertDialog.Builder(this);
        builder.setIcon(R.mipmap.ic_launcher)
                .setTitle("这是一个对话框")
                .setMessage("这是消息")
                .setView(dialogView)
                .setPositiveButton("确定", new DialogInterface.OnClickListener() {
                    @Override
                    public void onClick(DialogInterface dialog, int which) {
                        Log.e(TAG, "onClick: 确定" );
                    }
                })
                .setNegativeButton("取消", new DialogInterface.OnClickListener() {
                    @Override
                    public void onClick(DialogInterface dialog, int which) {
                        Log.e(TAG, "onClick: 取消" );
                    }
                })
                .setNeutralButton("中间", new DialogInterface.OnClickListener() {
                    @Override
                    public void onClick(DialogInterface dialog, int which) 以上是关于Android学习笔记-UI开发的主要内容,如果未能解决你的问题,请参考以下文章