linux12k8s -->10搭建wordpess+ discuz
Posted FikL-09-19
tags:
篇首语:本文由小常识网(cha138.com)小编为大家整理,主要介绍了linux12k8s -->10搭建wordpess+ discuz相关的知识,希望对你有一定的参考价值。
文章目录
一、搭建wordpress
1、构建镜像
2、构思架构,同时编写配置清单
	1、创建名称空间
	2、部署
	3、测试网络连接
3、部署
1、搭建wordpress
# 1、编写wordpress文件
[root@k8s-m-01 ~]# vim wordpress.yaml
# 数据库服务部署
# 数据库名称空间创建
apiVersion: v1
kind: Namespace
metadata:
  name: mysql
---
# 数据库控制器创建
apiVersion: apps/v1
kind: Deployment
metadata:
  name: mysql
  namespace: mysql
spec:
  selector:
    matchLabels:
      app: mysql
  template:
    metadata:
      labels:
        app: mysql
    spec:
      containers:
        - name: mysql
          image: mysql:5.7
          env:
            - name: MYSQL_ROOT_PASSWORD
              value: "123"
            - name: MYSQL_DATABASE
              value: wordpress
          livenessProbe: # 存活性检查
            exec:
              command:
                - "/bin/bash"
                - "-c"
                - "cat /etc/mysql/my.cnf"
            initialDelaySeconds: 0
            periodSeconds: 3
            timeoutSeconds: 1
            successThreshold: 1
            failureThreshold: 3
          readinessProbe: # 就绪性检查
            tcpSocket:
              port: 3306
            initialDelaySeconds: 20
            periodSeconds: 1
            successThreshold: 3
            failureThreshold: 1
            timeoutSeconds: 1
---
# 给数据库配置Service
apiVersion: v1
kind: Service
metadata:
  name: mysql
  namespace: mysql
spec:
  selector:
    app: mysql
  ports:
    - port: 3306
      targetPort: 3306
  type: NodePort
# 数据库部署完毕
---
# 创建项目的名称空间
apiVersion: v1
kind: Namespace
metadata:
  namespace: wordpress
  name: wordpress
---
# 创建项目的控制器
apiVersion: apps/v1
kind: Deployment
metadata:
  name: wordpress
  namespace: wordpress
spec:
  selector:
    matchLabels:
      app: wordpress
  template:
    metadata:
      labels:
        app: wordpress
    spec:
      containers:
        - name: php
          image: alvinos/php:wordpress-v2
          imagePullPolicy: Always
          livenessProbe:
            exec:
              command:
                - "/bin/bash"
                - "-c"
                - "ps -ef | grep php"
            initialDelaySeconds: 0
            periodSeconds: 3
            timeoutSeconds: 1
            successThreshold: 1
            failureThreshold: 1
          readinessProbe:
            tcpSocket:
              port: 9000
            initialDelaySeconds: 20
            periodSeconds: 1
            timeoutSeconds: 1
            successThreshold: 3
            failureThreshold: 1
        - name: nginx
          image: alvinos/nginx:wordpress-v2
          imagePullPolicy: Always
          livenessProbe:
            exec:
              command:
                - "/bin/bash"
                - "-c"
                - "cat /etc/nginx/nginx.conf"
            initialDelaySeconds: 0
            periodSeconds: 3
            timeoutSeconds: 1
            successThreshold: 1
            failureThreshold: 1
          readinessProbe:
            tcpSocket:
              port: 80
            initialDelaySeconds: 10
            periodSeconds: 1
            timeoutSeconds: 1
            successThreshold: 3
            failureThreshold: 1
# 控制器部署完毕
---
# 部署控制器Service
apiVersion: v1
kind: Service
metadata:
  name: wordpress
  namespace: wordpress
spec:
  selector:
    app: wordpress
  ports:
    - port: 80
      targetPort: 80
      name: http
      nodePort: 30080
    - port: 443
      targetPort: 443
      name: https
  type: NodePort
# 2、查看svc
[root@k8s-m-01 blog]# kubectl get svc -n wordpress
NAME        TYPE       CLUSTER-IP      EXTERNAL-IP   PORT(S)                      AGE
wordpress   NodePort   10.99.127.193   <none>        80:30080/TCP,443:30404/TCP   5m11s
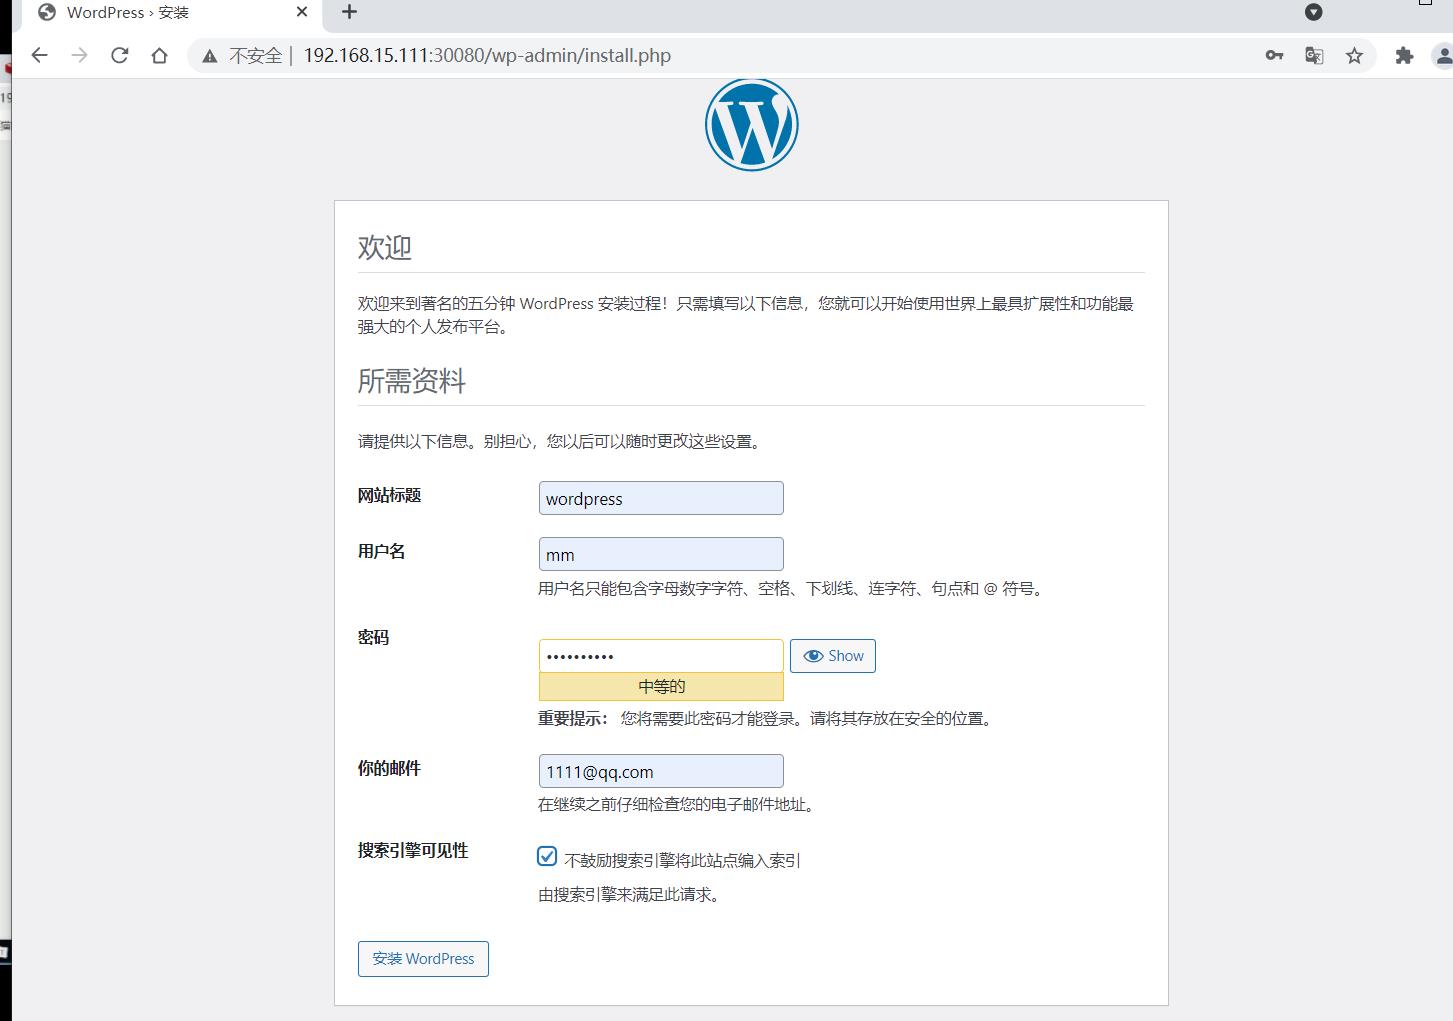
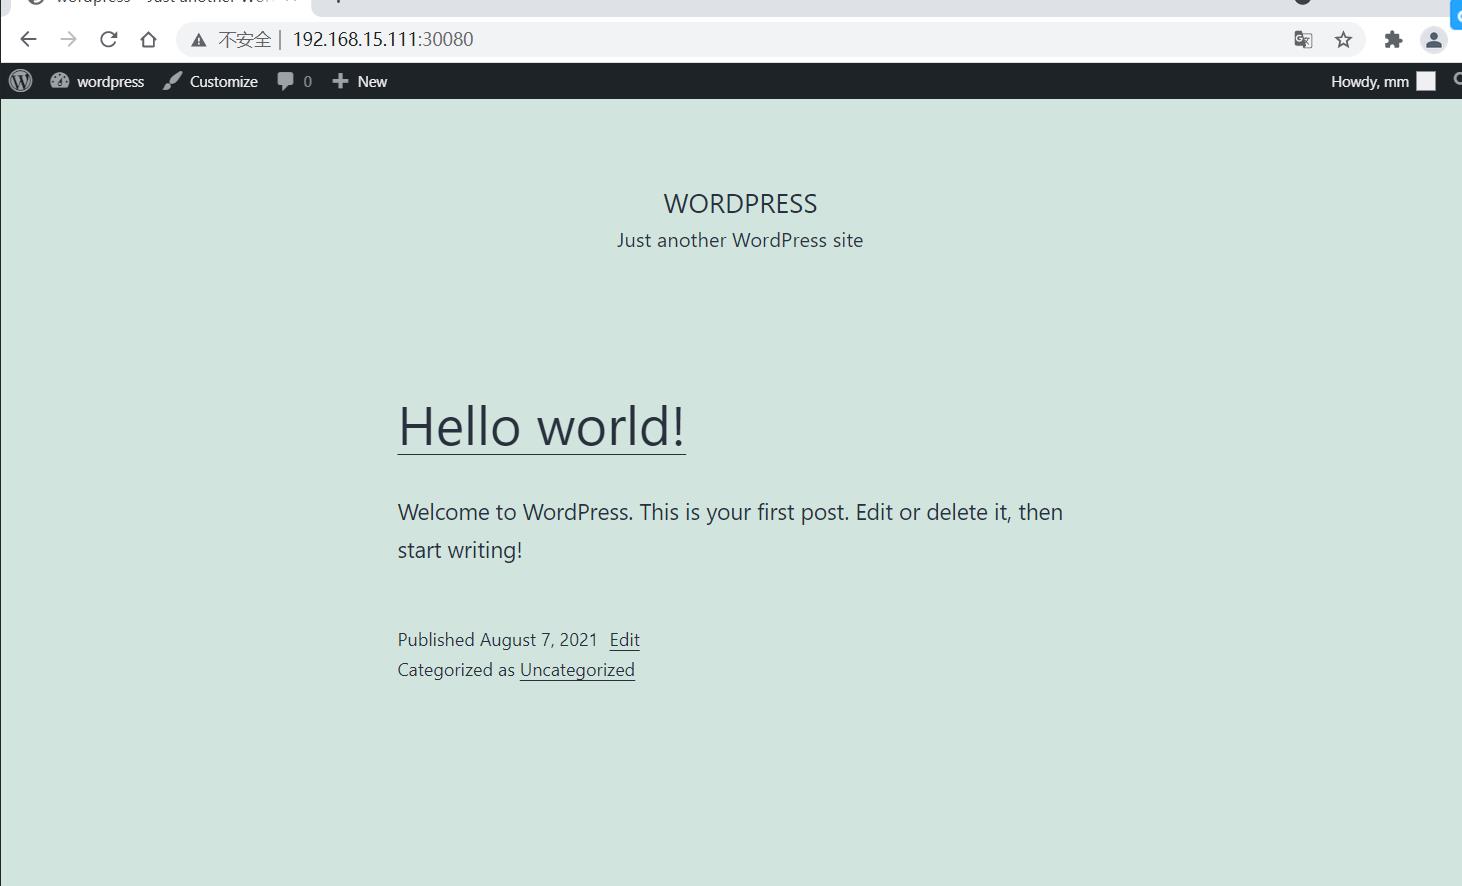
# 3、IP访问
192.168.15.111:30080
二、健康检查搭建discuz
1、创建目录
[root@k8s-m-01 ~]# mkdir -p discuz
[root@k8s-m-01 ~]# cd discuz/
[root@k8s-m-01 discuz]# mkdir php
[root@k8s-m-01 discuz]# mkdir nginx
2、构建nginx
# 1、上次代码包
[root@k8s-m-01 nginx]# wget http://www.mmin.xyz:81/package/blog/Discuz_X3.4_SC_UTF8_20210320_%281%29.zip
# 2、解压后把upload改名成discuz
[root@k8s-m-01 nginx]# mv upload discuz
# 3、准备nginx文件
[root@k8s-m-01 nginx]# vim nginx.conf
user  www;
worker_processes  auto;

error_log  /var/log/nginx/error.log notice;
pid        /var/run/nginx.pid;


events {
    worker_connections  1024;
}


http {
    include       /etc/nginx/mime.types;
    default_type  application/octet-stream;

    log_format  main  '$remote_addr - $remote_user [$time_local] "$request" '
                      '$status $body_bytes_sent "$http_referer" '
                      '"$http_user_agent" "$http_x_forwarded_for"';

    access_log  /var/log/nginx/access.log  main;

    sendfile        on;
    #tcp_nopush     on;

    keepalive_timeout  65;

    gzip  on;
    gzip_min_length 1k;
    gzip_comp_level 1;
    gzip_types text/plain application/javascript application/x-javascript text/css application/xml text/javascript application/x-httpd-php image/jpeg image/gif image/png application/vnd.ms-fontobject font/ttf font/opentype font/x-woff image/svg+xml;
    gzip_vary on;
    gzip_disable "MSIE [1-6]\\.";
    gzip_buffers 32 4k;
    gzip_http_version 1.0;

    include /etc/nginx/conf.d/*.conf;
}
[root@k8s-m-01 nginx]# vim default.conf
server {
    listen       80;
    listen  [::]:80;
    server_name  localhost;
    root   /usr/share/nginx/html;

    location / {
        index  index.php;
    }

    location ~ \\.php$ {
        fastcgi_pass   127.0.0.1:9000;
        fastcgi_index  index.php;
        fastcgi_param  SCRIPT_FILENAME  $document_root$fastcgi_script_name;
        include        fastcgi_params;
    }

}
# 4、构建Dockerfile
[root@k8s-m-01 nginx]# vim Dockerfile
FROM nginx

RUN groupadd www -g 666 && \\
    useradd www -u 666 -g 666

ADD nginx.conf /etc/nginx/nginx.conf

ADD default.conf /etc/nginx/conf.d/default.conf

RUN rm -rf  /usr/share/nginx/html

ADD discuz /usr/share/nginx/html

RUN chown -R www.www /usr/share/nginx/html

WORKDIR /usr/share/nginx/html

EXPOSE 80  443

CMD ["nginx","-g","daemon off;"]
# 5、查看
[root@k8s-m-01 nginx]# ll
total 20
-rw-r--r--  1 root root  389 Aug  9 09:05 default.conf
drwxr-xr-x 13 root root 4096 Aug  9 10:19 discuz
-rw-r--r--  1 root root  353 Aug  9 09:13 Dockerfile
-rw-r--r--  1 root root 1043 Aug  9 09:05 nginx.conf
# 6、上次到自己仓库(也可以不需要)
[root@k8s-m-01 nginx]# docker build -t  registry.cn-shanghai.aliyuncs.com/aliyun_mm/discuz:nginx-v2 .
[root@k8s-m-01 nginx]# docker push  registry.cn-shanghai.aliyuncs.com/aliyun_mm/discuz:nginx-v2
3、构建php
# 1、把discuz包也复制到php中
[rook8s-m-01 php]# cp -r ../nginx/discuz .
# 2、上传php.tar.gz
[rook8s-m-01 php]# wget http://www.mmin.xyz:81/package/lnmp/php.tar.gz
# 3、编写Dockerfile
[root@k8s-m-01 php]# vim Dockerfile
FROM centos:7

RUN groupadd www -g 666 && \\
    useradd www -u 666 -g 666

ADD php.tar.gz /tmp

RUN yum -y localinstall /tmp/*.rpm

RUN sed -i 's#apache#www#g' /etc/php-fpm.d/www.conf
RUN sed -i 's#127.0.0.1:9000#9000#g' /etc/php-fpm.d/www.conf
RUN sed -i 's#;request_terminate_timeout#request_terminate_timeout#g' /etc/php-fpm.d/www.conf

EXPOSE 9000

WORKDIR /usr/share/nginx/html

ADD discuz /usr/share/nginx/html

RUN chown -R www.www /usr/share/nginx/html

CMD php-fpm -F
# 4、查看
[root@k8s-m-01 php]# ll
total 19436
drwxr-xr-x 13 root root     4096 Aug  9 10:19 discuz
-rw-r--r--  1 root root      477 Aug  9 09:24 Dockerfile
-rw-r--r--  1 root root 19889622 Jul 25 01:01 php.tar.gz
# 5、上次到自己仓库(也可以不需要)
[root@k8s-m-01 nginx]# docker build -t  registry.cn-shanghai.aliyuncs.com/aliyun_mm/discuz:php-v2 .
[root@k8s-m-01 nginx]# docker push  registry.cn-shanghai.aliyuncs.com/aliyun_mm/discuz:php-v2
3、编写yaml文件
# 1、编写mysql.yaml
[root@k8s-m-01 discuz]# vim mysql.yaml
kind: Namespace
apiVersion: v1
metadata:
  name: mysql
---
kind: Deployment
apiVersion: apps/v1
metadata:
  name: mysql
  namespace: mysql
spec:
  selector:
    matchLabels:
      app: mysql
  template:
    metadata:
      labels:
        app: mysql
    spec:
      containers:
        - name: mysql
          image: mysql:5.7
          env:
            - name: MYSQL_ROOT_PASSWORD
              value: "123"
            - name: MYSQL_DATABASE
              value: discuz
          livenessProbe:
            exec:
              command:
                - "/bin/sh"
                - "-c"
                - "cat /etc/mysql/my.cnf"
            initialDelaySeconds: 0
            periodSeconds: 3
            timeoutSeconds: 1
            successThreshold: 1
            failureThreshold: 3
          readinessProbe:
            tcpSocket:
              port: 3306
            initialDelaySeconds: 30
            periodSeconds: 1
            timeoutSeconds: 1
            successThreshold: 3
            failureThreshold: 1
---
kind: Service
apiVersion: v1
metadata:
  name: mysql
  namespace: mysql
spec:
  ports:
    - port: 3306
      targetPort: 3306
      protocol: TCP
      name: mysql
  selector:
    app: mysql
# 2、编写web.yaml
[root@k8s-m-01 discuz]# vim web.yaml
kind: Namespace
apiVersion: v1
metadata:
  name: web
---
apiVersion: apps/v1
kind: Deployment
metadata:
  name: web
  namespace: web
spec:
  selector:
    matchLabels:
      app: web
  template:
    metadata:
      labels:
        app: web
    spec:
      containers:
        - name: php
          image: registry.cn-shanghai.aliyuncs.com/aliyun_mm/discuz:php-v2
          imagePullPolicy: Always
          livenessProbe:
            exec:
              command:
                - "/bin/sh"
                - "-c"
                - "cat /etc/php-fpm.d/www.conf"
            initialDelaySeconds: 0
            periodSeconds: 3
            timeoutSeconds: 1
            successThreshold: 1
            failureThreshold: 3
          readinessProbe:
            tcpSocket:
              port: 9000
            initialDelaySeconds: 10
            periodSeconds: 1
            timeoutSeconds: 1
            successThreshold: 3
            failureThreshold: 1
        - name: nginx
          image: registry.cn-shanghai.aliyuncs.com/aliyun_mm/discuz:nginx-v2
          imagePullPolicy: Always
          livenessProbe:
            exec:
              command:
                - "/bin/sh"
                - "-c"
                - "cat /etc/nginx/nginx.conf"
            initialDelaySeconds: 0
            periodSeconds: 3
            timeoutSeconds: 1
            successThreshold: 1
            failureThreshold: 3
          readinessProbe:
            tcpSocket:
              port: 80
            initialDelaySeconds: 30
            periodSeconds: 1
            timeoutSeconds: 1
            successThreshold: 3
            failureThreshold: 1
---
kind: Service
apiVersion: v1
metadata:
  name: web
  namespace: web
spec:
  ports:
    - port: 80
      targetPort: 80
      protocol: TCP
      name: http
  selector:
    app: web
  type: NodePort
4、生成aml文件
# 1、生成yaml文件
[root@k8s-m-01 discuz]# kubectl apply -f web.yaml
[root@k8s-m-01 discuz]# kubectl apply -f mysql.yaml
# 2、查看
[root@k8s-m-01 discuz]# kubectl get pod -n web
NAME                   READY   STATUS    RESTARTS   AGE
web-7f897d448c-9hr26   2/2     Running   0          16m
[root@k8s-m-01 discuz]# kubectl get pod -n mysql
NAME                     READY   STATUS    RESTARTS   AGE
mysql-6f9b947c9f-vs5rv   1/1     Running   0          30m
[root@k8s-m-01 discuz]# kubectl get svc -n web web
NAME   TYPE       CLUSTER-IP      EXTERNAL-IP   PORT(S)        AGE
web    NodePort   10.98.114.209   <none>        80:32263/TCP   30m
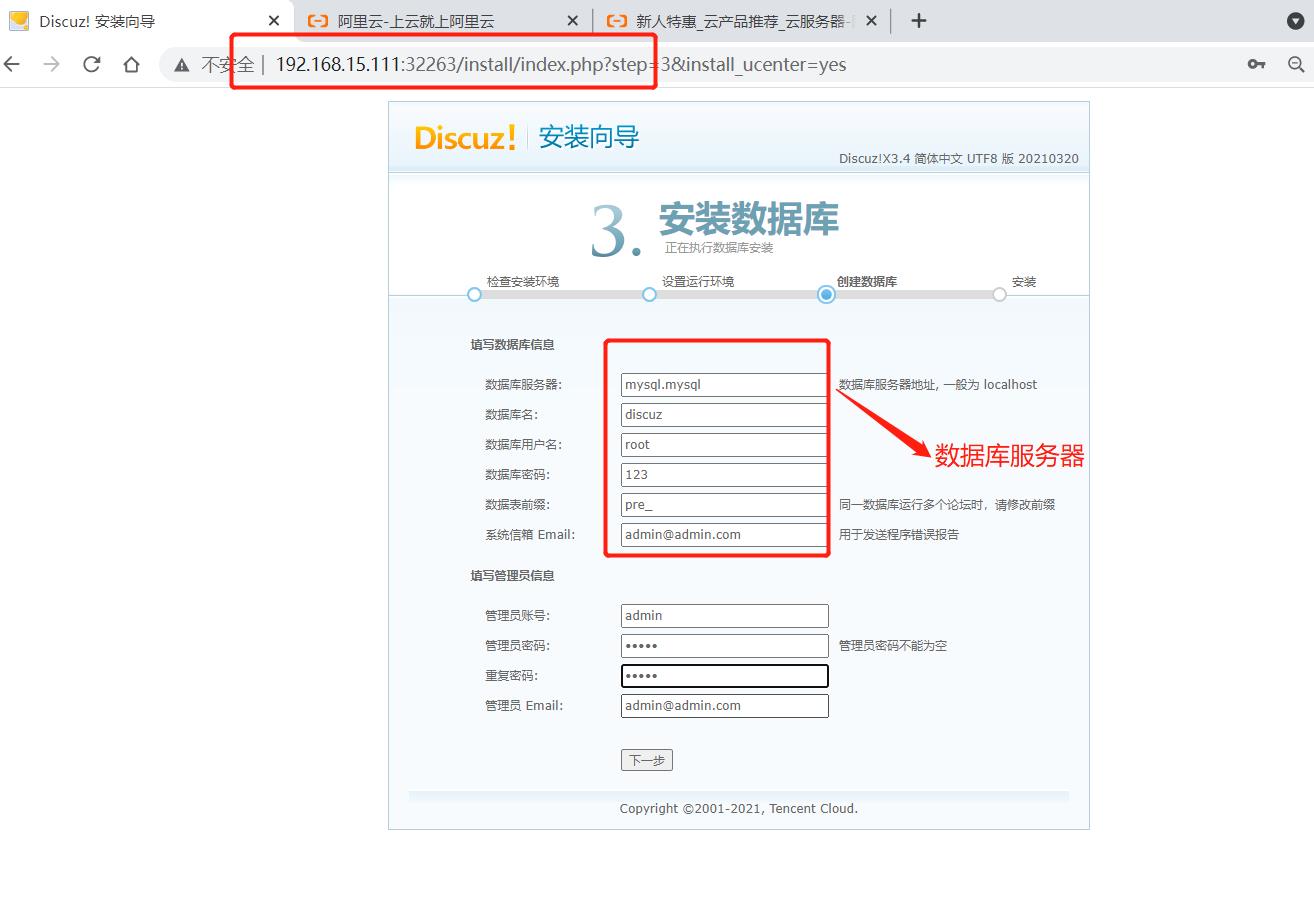
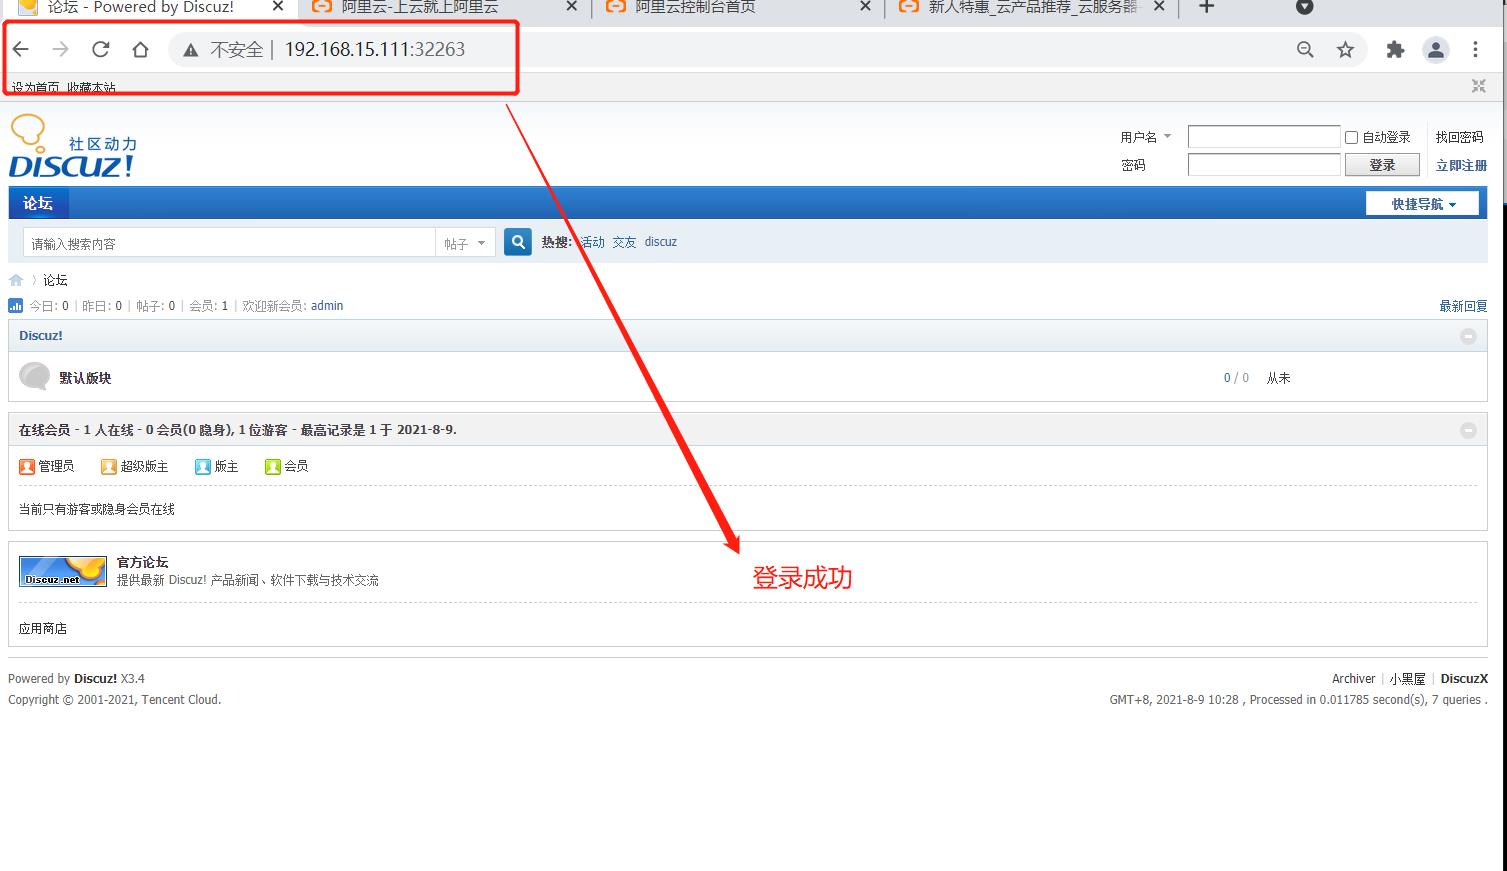
# 3、IP访问
192.168.15.111.32263
5、故障排查
# 1、报css错误,连接不上css
[root@k8s-m-01 discuz]# kubectl cp -n web web-7f897d448c-b67pk:/usr/share/nginx/html . -c php
# 2、把discuz包重新生成并上传
与前面类似,略过
# 3、删除web的pod,让其自己生成
[root@k8s-m-01 discuz]# kubectl delete pod -n web web-7f897d448c-9hr26
三、数据卷搭建Discuz
连接:https://gitee.com/3dming/DiscuzL/attach_files
要求:ingress —> headless service —> pod
1、要有健康检查
2、要求有https
3、要求有存储卷,数据持久化,防止容器停止或宕机数据随之丢失
(hostpath:类似于docker -v参数,将存储卷挂载在本地【pod部署的节点上】)
# 1、准备软件包
[root@k8s-m-01  discuz]# wget http://www.mmin.xyz:81/package/blog/Discuz_X3.4_SC_UTF8_20210320_%281%29.zip
[root@k8s-m-01  discuz]# ll
总用量 12044
-rw-r--r-- 1 root root 12330468 4月   7 2021 Discuz_X3.4_SC_UTF8_20210320.zip
# 2、解压discuz
[root@k8s-m-01  discuz]# unzip Discuz_X3.4_SC_UTF8_20210320.zip
[root@k8s-m-01  discuz]# ll
总用量 12172
-rw-r--r--  1 root root 12330468 4月   7 2021 Discuz_X3.4_SC_UTF8_20210320.zip
-rw-r--r--  1 root root    17886 3月  20 10:36 LICENSE
-rw-r--r--  1 root root    31040 1月  19 17:18 qqqun.png
drwxr-xr-x  2 root root      124 3月  22 19:44 readme
-rw-r--r--  1 root root    71107 1月  19 17:20 readme.html
drwxr-xr-x 13 root root     4096 3月  22 19:44 upload
drwxr-xr-x  4 root root       94 3月  22 19:44 utility

# 3、给upload打包以便后边存储卷hostpath使用
[root@k8s-m-01  discuz]# tar -czf discuz.tar.gz upload/
[root@k8s-m-01  discuz]# ll
总用量 22260
-rw-r--r--  1 root root 10329409 4月   4 01:42 discuz.tar.gz

# 4、给每个节点都推一份upload压缩包并授权777upload
[root@k8s-m-01 discuz]# chmod o+w -R upload/
[root@k8s-m-01 discuz]# for i in n2 n1;do ssh root@$i "mkdir -pv /opt/discuz" && scp discuz.tar.gz root@$i:/opt/discuz/; ssh root@$i "cd /opt/discuz && tar -xf discuz.tar.gz -C /opt/discuz && chmod -R o+w /opt/discuz/upload"; done

# 5、编写配置清单思路梳理
  1.部署MySQL集群
    命名空间
    service提供负载均衡
    使用控制器部署MySQL实例
  2.部署discuz应用
    创建命名空间
    创建service提供负载均衡(headless service)
    创建ingress,用于域名转发
  3.服务之间的互连
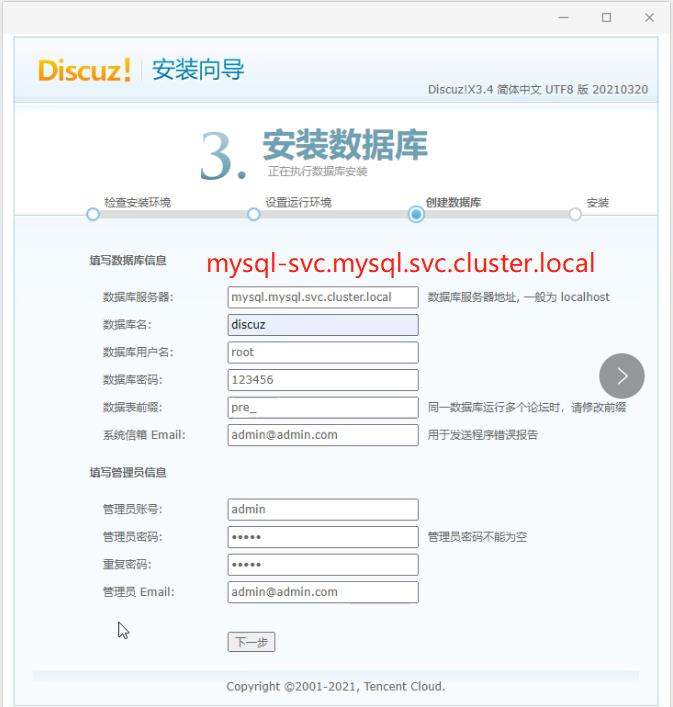
    discuz连接MySQL===》mysql.mysql.svc.cluster.local
==============================================================================

# 6、创建证书
[root@k8s-m-01  discuz]#  openssl genrsa -out tls.key 2048
Generating RSA private key, 2048 bit long modulus
.+++
........................................................................+++
e is 65537 (0x10001)
[root@k8s-m-01  discuz]# openssl req -new -x509 -key tls.key -out tls.crt -subj /C=CN/ST=ShangHai/L=ShangHai/O=Ingress/CN=www.discuz.cluster.local.com  #注意域名要与配置清单定义相同

# 7、部署证书
[root@k8s-m-01  discuz]# kubectl create namespace discuz  #部署证书之前要先创命名空间
namespace/discuz created
[root@k8s-m-01  discuz]#  kubectl -n discuz create secret tls discuz-secret --cert=tls.crt --key=tls.key  #注意证书的secretna
me要与配置清单定义相同(discuz-secret)
secret/discuz-secret created
[root@k8s-m-01  discuz]# ll  #查看生成证书
-rw-r--r--  1 root root     1334 4月   4 03:50 tls.crt
-rw-r--r--  1 root root     1675 4月   4 03:49 tls.key

# 8、部署配置清单
[root@k8s-m-01  discuz]# vim discuz.yaml
apiVersion: v1  #定义MySQL命名空间
kind: Namespace
metadata:
  name: mysql
---
apiVersion: v1  #定义MySQLservice
kind: Service
metadata:
  name: mysql-svc
  namespace: mysql
spec:
  ports:
    - port: 3306
      targetPort: 3306
      name: mysql
      protocol: TCP
  selector:
    app: mysql
    deploy: discuz
---
apiVersion: apps/v1  #定义MySQL控制器
kind: Deployment
metadata:
  name: mysql-deployment
  namespace: mysql
spec:
  selector:
    matchLabels:
      app: mysql
      deploy: discuz
  template:
    metadata:
      labels:
        app: mysql
        deploy: discuz
    spec:
      nodeName: gdx3  #指定调度到哪个节点上(kubectl get nodes  查看nodename)
      containers:
        - name: mysql
          image: mysql:5.7
          livenessProbe:  #存活性检查
            tcpSocket:
              port: 3306
          readinessProbe:  #就绪性检查
            tcpSocket:
              port: 3306
          env:
            - name: MYSQL_ROOT_PASSWORD
              value: "123456"
            - name: MYSQL_DATABASE
              value: "discuz"
          volumeMounts:   #容器存储卷===》相当于挂载
            - mountPath: /var/lib/mysql
              name: mysql-data
      volumes:  #宿主机挂载目录
         - name: mysql-data
           hostPath:
             path: /opt/discuz/mysql
---
apiVersion: v1  #discuz命名空间
kind: Namespace
metadata:
  name: discuz
---
apiVersion: v1  #discuzservice
kind: Service
metadata:
  name: discuz-svc
  namespace: discuz
spec:
  clusterIP: None  #使用无头service,因为下方用了ingress域名解析
  ports:
    - port: 80
      targetPort: 80
      name: http
  selector:
    app: discuz
    deploy: discuz
---
apiVersion: apps/v1  #discuz控制器
kind: Deployment
metadata:
  name: discuz-deployment
  namespace: discuz
spec:
  selector:
    matchLabels:
      app: discuz
      deploy: discuz
  template:
    metadata:
      labels:
        app: discuz
        deploy: discuz
    spec:
      nodeName: gdx3  #因为没有nfs共享目录,此处指定一台节点
      containers:
        - name: php
          image: elaina0808/lnmp-php:v6
          livenessProbe:  #存活性检查
            tcpSocket:
              port: 9000
          readinessProbe:  #就绪性检查
            tcpSocket:
              port: 9000
          volumeMounts:  #存储卷挂载
            - mountPath: /usr/share/nginx/html
              name: discuz-data
        - name: nginx
          image: elaina0808/lnmp-nginx:v9
          livenessProbe:   #存活性检查
            httpGet:
              port: 80
              path: /
          readinessProbe:  #就绪性检查
            httpGet:
              port: 80
              path: /
          volumeMounts:  #存储卷挂载
            - mountPath: /usr/share/nginx/html
              name: discuz-data
      volumes:  #存储卷挂载
        - name: discuz-data
          hostPath:
            path: /opt/discuz/upload
---
apiVersion: extensions/v1beta1  #定义ingress域名解析
kind: Ingress
metadata:
  name: discuz-ingress
  namespace: discuz
spec:
  tls:  #使用https加密
    - hosts:
        - www.discuz.cluster.local.com
       secretName: discuz-secret
  rules:
    - host: www.discuz.cluster.local.com
      http:
        paths:
          - backend:
              serviceName: discuz-svc
              servicePort:  80

# 9.生成容器
[root@k8s-m-01  discuz]# kubectl get pods -n discuz
NAME                                READY   STATUS    RESTARTS   AGE
discuz-deployment-cbbbfc54b-l22wq   2/2     Running   0          58m

# 10、查看nginx php容器是否正常运行
[root@k8s-m-01  discuz]# kubectl get pods -n discuz
NAME                                READY   STATUS    RESTARTS   AGE
discuz-deployment-cbbbfc54b-l22wq   2/2     Running   0          58m

# 11、查看数据库容器是否正常启动
[root@k8s-m-01  discuz]# kubectl get pods -n mysql
NAME                               READY   STATUS    RESTARTS   AGE
mysql-deployment-c687787fc-l7n5s   1/1     Running   0          118m


# 12、查看ingress是否正常
[root@k8s-m-01  discuz]# kubectl get ingress  -n discuz
NAME             CLASS    HOSTS                          ADDRESS         PORTS     AGE
discuz-ingress   <none>   www.discuz.cluster.local.com   192.168.12.12   80, 443   121m


# 13、查看端口号
[root@k8s-m-01  discuz]# kubectl get svc -n ingress-nginx
NAME                                 TYPE        CLUSTER-IP      EXTERNAL-IP   PORT(S)                      AGE
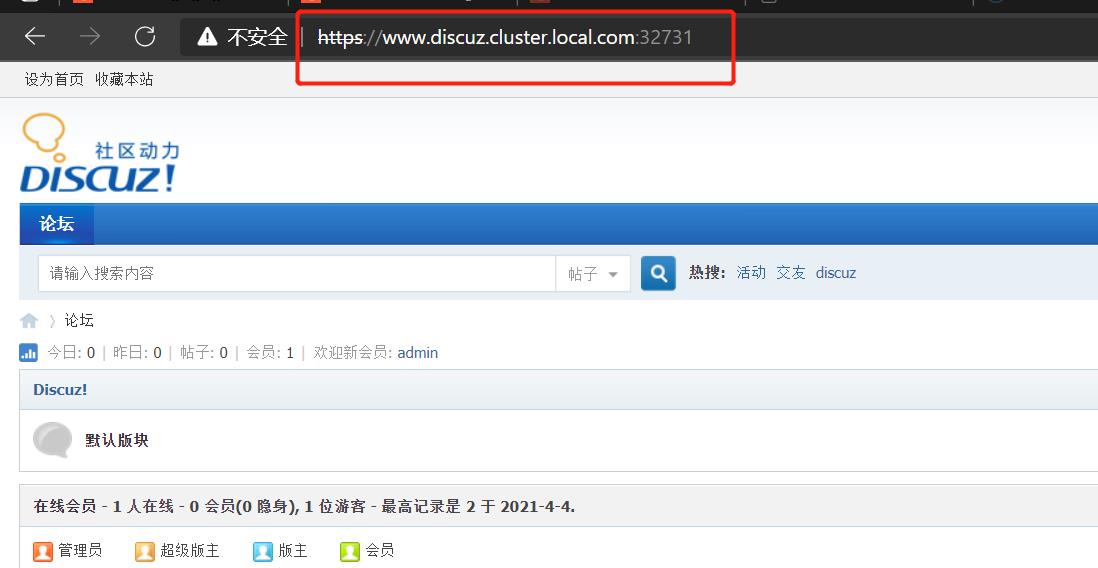
ingress-nginx-controller             NodePort    10.96.60.88     <none>        80:32708/TCP,443:32731/TCP   36h
ingress-nginx-controller-admission   ClusterIP   10.106.141.57   <none>        443/TCP                      36h

#14、配置主机host文件并访问
192.168.12.11 www.discuz.cluster.local.com
以上是关于linux12k8s -->10搭建wordpess+ discuz的主要内容,如果未能解决你的问题,请参考以下文章