5. Hadoop集群搭建-免密互通配置 | 更改主机名-基于CentOS7-连载中
Posted AdminLog
tags:
篇首语:本文由小常识网(cha138.com)小编为大家整理,主要介绍了5. Hadoop集群搭建-免密互通配置 | 更改主机名-基于CentOS7-连载中相关的知识,希望对你有一定的参考价值。
续上一篇文章:4. Hadoop集群搭建-克隆虚拟机/从机-基于CentOS7-【连载中】
前言
- 请确保三台主机可以互相Ping通
- 尽量去做”快照“备份,以免发生故障后及时恢复,避免造成更大的损失。
- 本次使用软件:Xshell 6:蓝奏下载,百度网盘下载Xshell6 - 提取码: x2f3
- Xshell使用技巧请参阅:Hadoop集群搭建-Xshell小技巧-基于CentOS7-【连载中】
正文
配置hosts文件
- Xshell连接三台主机,步骤详见:5.2 Hadoop集群搭建-Xshell新建会话连接图解-基于CentOS7-【连载中】
- 将三台主机页面设置为”瓷砖排列“,详见:Hadoop集群搭建-Xshell小技巧-基于CentOS7-【连载中】
- 在Master窗口输入
vim /etc/hosts(需要提前安装vim彩色代码命令:yum install -y vim) - 在最后一行输入IP地址空格后输入主机名,每个主机IP和主机名后要回车,也就是每个主机各占一行

- 保存后发送到其他两台主机(需要输入其他两台主机的密码,需要输入”yes“时请输入”yes“):
scp /etc/hosts root@slave1:/etc/
[root@localhost ~]# scp /etc/hosts root@slave1:/etc/
The authenticity of host 'slave1 (192.168.***.***)' can't be established.
ECDSA key fingerprint is SHA256:1uOH6LWY9vqqbkbz93f6fbsHV/jKPEN8I0Zm37qb1ZU.
ECDSA key fingerprint is MD5:05:d2:b6:50:5f:32:f1:38:92:d9:c2:8e:df:42:e6:dc.
Are you sure you want to continue connecting (yes/no)? yes
Warning: Permanently added 'slave1,192.168.**.***' (ECDSA) to the list of known hosts.
root@slave1's password:
hosts                                                                                       100%  224   217.8KB/s   00:00
[root@localhost ~]# scp /etc/hosts root@slave2:/etc/
The authenticity of host 'slave2 (192.168.**.***)' can't be established.
ECDSA key fingerprint is SHA256:1uOH6LWY9vqqbkbz93f6fbsHV/jKPEN8I0Zm37qb1ZU.
ECDSA key fingerprint is MD5:05:d2:b6:50:5f:32:f1:38:92:d9:c2:8e:df:42:e6:dc.
Are you sure you want to continue connecting (yes/no)? yes
Warning: Permanently added 'slave2,192.168.***.****' (ECDSA) to the list of known hosts.
root@slave2's password:
hosts                                                                                       100%  224   154.8KB/s   00:00
配置免密
- 三台主机都要输入:
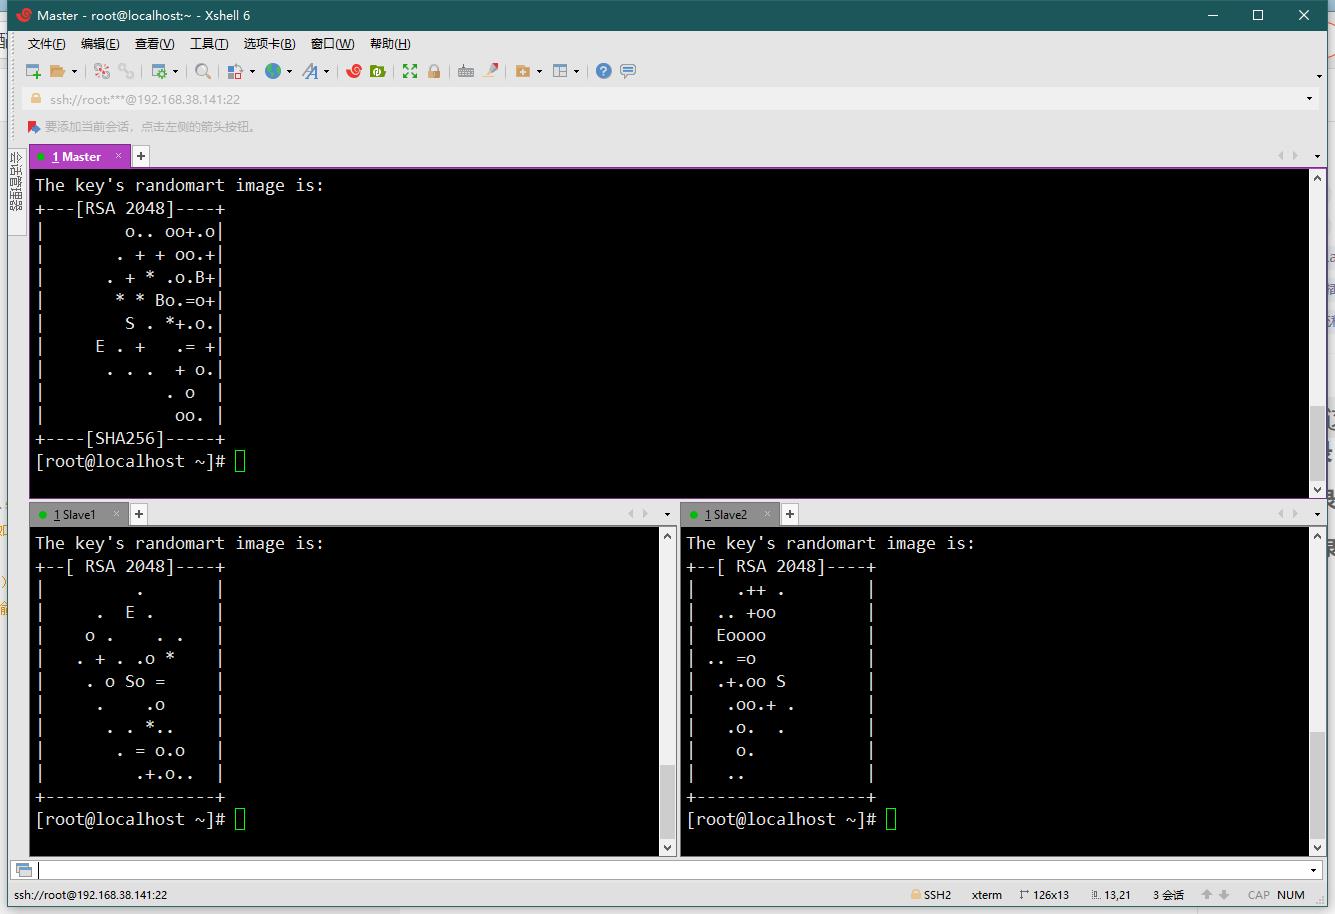
ssh-keygen -t rsa生成密钥- 解释:
Enter file in which to save the key (/root/.ssh/id_rsa):(/root/.ssh/id_rsa)
密钥的生成路径保存的位置为(/root/.ssh/id_rsa),如果默认即回车,不默认即在冒号后方输入自己的路径
/root/.ssh/id_rsa already exists.
Overwrite (y/n)?出现这个是因为之前配置过(生成过)密钥,询问是否覆盖,y是覆盖,n是不覆盖。
Enter passphrase (empty for no passphrase):输入密钥的密码,不需要直接回车
Enter same passphrase again:再次输入相同的密码(和上一步一样,跳过。如果上一步输入了密码这一步就要输入同样的密码。)
回车密钥生成
- 在撰写栏中一路回车(建议参阅5.1 Hadoop集群搭建-Xshell小技巧-基于CentOS7-【连载中】后使用更流畅):

- 撰写栏输入(也就是三台主机都要输入)
ssh-copy-id master将密钥发送给master主机:
[root@localhost ~]# ssh-copy-id master
/usr/bin/ssh-copy-id: INFO: Source of key(s) to be installed: "/root/.ssh/id_rsa.pub"
The authenticity of host 'master (192.168.**.***)' can't be established.
ECDSA key fingerprint is SHA256:1uOH6LWY9vqqbkbz93f6fbsHV/jKPEN8I0Zm37qb1ZU.
ECDSA key fingerprint is MD5:05:d2:b6:50:5f:32:f1:38:92:d9:c2:8e:df:42:e6:dc.
Are you sure you want to continue connecting (yes/no)? yes
/usr/bin/ssh-copy-id: INFO: attempting to log in with the new key(s), to filter out any that are already installed
/usr/bin/ssh-copy-id: INFO: 1 key(s) remain to be installed -- if you are prompted now it is to install the new keys
root@master's password:

Number of key(s) added: 1

Now try logging into the machine, with:   "ssh 'master'"
and check to make sure that only the key(s) you wanted were added.
- 转到master输入:
cd /root/.ssh/使用ls查看该目录下文件:
[root@localhost ~]# cd /root/.ssh/
[root@localhost .ssh]# ls
authorized_keys  id_rsa  id_rsa.pub  known_hosts
- 将
authorized_keys文件发送到其他两台从机:scp authorized_keys root@slave1:/root/.ssh/
[root@localhost .ssh]# scp authorized_keys root@slave1:/root/.ssh/
root@slave1's password:
authorized_keys                                                                             100% 1224     1.0MB/s   00:00
[root@localhost .ssh]# scp authorized_keys root@slave2:/root/.ssh/
root@slave2's password:
authorized_keys                                                                             100% 1224     1.1MB/s   00:00
验证免密是否成功
- 在撰写栏输入:
ssh master连接master查看是否需要密码,如不需要即为配置免密成功(若询问yes/no,请输入yes) - 在撰写栏输入:
exit退出连接 - 之后再在撰写栏输入:
ssh slave1连接slave1查看是否需要密码,如不需要即为配置免密成功 - 在撰写栏输入:
exit退出连接(若询问yes/no,请输入yes) - 之后再在撰写栏输入:
ssh slave2连接slave2查看是否需要密码,如不需要即为配置免密成功 - 在撰写栏输入:
exit退出连接(若询问yes/no,请输入yes)
更改主机名
说白了,更改主机名就是为了让用户(自己)区分哪一台是主机哪一台是从机
| 临时变更主机名(重启失效) | hostname 主机名(例:hostname master) |
|---|---|
| 永久变更主机名 (重启不失效) | hostnamectl set-hostname 主机名 (例: hostname set-hostname master) |
| 临时或永久变更用户名后刷新 | bash |
临时变更用户名例:
[root@localhost ~]# hostname master
[root@localhost ~]# bash
[root@master ~]#
永久变更用户名例:
[root@localhost ~]# hostnamectl set-hostname slave1
[root@localhost ~]# bash
[root@slave1 ~]#
相关文章:
5.1 Hadoop集群搭建-Xshell小技巧-基于CentOS7-【连载中】
5.2 Hadoop集群搭建-Xshell新建会话连接图解-基于CentOS7-【连载中】
以上是关于5. Hadoop集群搭建-免密互通配置 | 更改主机名-基于CentOS7-连载中的主要内容,如果未能解决你的问题,请参考以下文章