基于概率分析的智能AI扫雷程序秒破雷界世界纪录
Posted 小小明(代码实体)
tags:
篇首语:本文由小常识网(cha138.com)小编为大家整理,主要介绍了基于概率分析的智能AI扫雷程序秒破雷界世界纪录相关的知识,希望对你有一定的参考价值。
大家好,我是小小明,上次的我带大家玩了数独:
今天我将带你用非常高端的姿势玩扫雷。本文涉及的技术点非常多,非常硬核,万字长文,高能预警。
本文从图像识别到windows消息处理,最终到直接的内存修改。中间写了一套基于概率分析的扫雷AI算法,模拟雷界的高阶玩家的操作,轻松拿下高级的世界纪录。
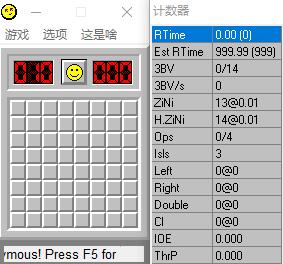
据说扫雷的世界记录是:

对于中级我玩的大概就是这情况,直接超过世界纪录的7秒:

对于高级也轻松超过世界纪录:

初级世界记录居然是0.49秒,虽然有点难,但我们还是可以超越(0.4秒和0.37秒):


文章目录
扫雷游戏的介绍
简介
《扫雷》是一款大众类的益智小游戏,游戏的基本操作包括左键单击(Left Click)、右键单击(Right Click)、双击(Chording)三种。其中左键用于打开安全的格子;右键用于标记地雷;双击在一个数字周围的地雷标记完时,相当于对数字周围未打开的方块均进行一次左键单击操作。
基本游戏步骤:开局后,首先要用鼠标在灰色区域点一下,会出现一些数字,1代表在这个数字周围有1个地雷,2表示在它周围有2个雷,3表示在它周围有3个雷;在确信是雷的地方,点一下右键,用右键标识出该出的地雷;确信不是雷的地方,按一下鼠标左键,打开相应的数字。
扫雷程序下载
OD和win98扫雷下载
链接:http://pan.baidu.com/s/1gfA10K7 密码:eiqp
Arbiter版扫雷下载

基于图像分析的桌面前端交互程序
获取扫雷程序的窗口位置
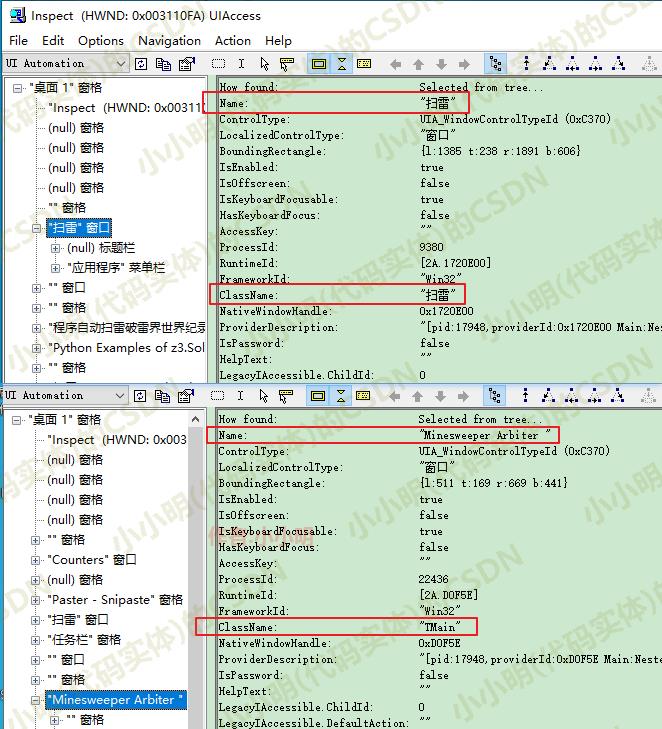
这步需要调用windows API查找扫雷游戏的窗口,需要传入扫雷游戏得标题和类名,这个可以通过inspect.exe工具进行获取。
inspect.exe工具是系统自带工具,我通过everything获取到路径为:
C:\\Program Files (x86)\\Windows Kits\\8.1\\bin\\x64\\inspect.exe

打开扫雷游戏后,就可以通过以下代码获取扫雷游戏的窗口对象:
import win32gui

# 扫雷游戏窗口
# class_name, title_name = "TMain", "Minesweeper Arbiter "
class_name, title_name = "扫雷", "扫雷"
hwnd = win32gui.FindWindow(class_name, title_name)

if hwnd:
    left, top, right, bottom = win32gui.GetWindowRect(hwnd)
    print(f"窗口坐标,左上角:({left},{top}),右下角:({right},{bottom})")
    w, h = right-left, bottom-top
    print(f"窗口宽度:{w},高度:{h}")
else:
    print("未找到窗口")
窗口坐标,左上角:(86,86),右下角:(592,454)
窗口宽度:506,高度:368
可以通过代码激活并前置窗口:
https://docs.microsoft.com/zh-cn/windows/win32/api/winuser/nf-winuser-setforegroundwindow
不过有时SetForegroundWindow调用有一些限制导致失败,我们可以再调用之前输入一个键盘事件:
import win32com.client as win32


def activateWindow(hwnd):
    # SetForegroundWindow调用有一些限制,我们可以再调用之前输入一个键盘事件
    shell = win32.Dispatch("WScript.Shell")
    shell.SendKeys('%')
    win32gui.SetForegroundWindow(hwnd)

activateWindow(hwnd)
根据窗口坐标抓取雷区图像
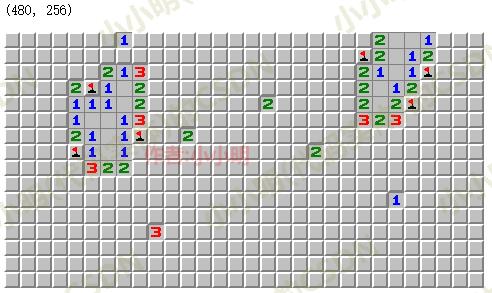
前面我们获取到了扫雷程序的窗口坐标,下面我就可以获取雷区的图像:
from PIL import ImageGrab

# 根据窗口坐标抓取雷区图像
rect = (left+15, top+101, right-11, bottom-11)
img = ImageGrab.grab().crop(rect)
print(img.size)
img

注意:15,101等偏移量是我对98版扫雷反复测试得到的坐标,若你使用扫雷网下载的Arbiter可能坐标会发生变化。
基于雷区图像可以计算出雷盘大小:
# 每个方块16*16
bw, bh = 16, 16


def get_board_size():
    # 横向有w个方块
    l, t, r, b = (left+15, top+101, right-11, bottom-11)
    w = (r - l) // bw
    # 纵向有h个方块
    h = (b - t) // bh
    return (w, h), (l, t, r, b)


# 获取雷盘大小和位置
(w, h), rect = get_board_size()
print(f"宽:{w},高:{h},雷盘位置:{rect}")
宽:30,高:16,雷盘位置:(1425, 108, 1905, 364)
读取剩余地雷数量
先截图显示地雷数量的图片:
num_img = ImageGrab.grab().crop((left+20, top+62, left+20+39, top+62+23))
num_img

然后拆分出每个数字图像并灰度处理:
for i in range(3):
    num_i = num_img.crop((13*i+1, 1, 13*(i+1)-1, 22)).convert("L")
    print(num_i.size)
    display(num_i)

把雷数设置成8后重新运行上面的代码,在执行以下代码,则可以看到各个像素点的演示值:
pixels = num_i.load()
print("yx", end=":")
for x in range(11):
    print(str(x).zfill(2), end=",")
print()
for y in range(21):
    print(str(y).zfill(2), end=":")
    for x in range(11):
        print(str(pixels[x, y]).zfill(2), end=",")
    print()
yx:00,01,02,03,04,05,06,07,08,09,10,
00:00,76,76,76,76,76,76,76,76,76,00,
01:76,00,76,76,76,76,76,76,76,00,76,
02:76,76,00,76,76,76,76,76,00,76,76,
03:76,76,76,00,00,00,00,00,76,76,76,
04:76,76,76,00,00,00,00,00,76,76,76,
05:76,76,76,00,00,00,00,00,76,76,76,
06:76,76,76,00,00,00,00,00,76,76,76,
07:76,76,76,00,00,00,00,00,76,76,76,
08:76,76,00,00,00,00,00,00,00,76,76,
09:76,00,76,76,76,76,76,76,76,00,76,
10:00,76,76,76,76,76,76,76,76,76,00,
11:76,00,76,76,76,76,76,76,76,00,76,
12:76,76,00,00,00,00,00,00,00,76,76,
13:76,76,76,00,00,00,00,00,76,76,76,
14:76,76,76,00,00,00,00,00,76,76,76,
15:76,76,76,00,00,00,00,00,76,76,76,
16:76,76,76,00,00,00,00,00,76,76,76,
17:76,76,76,00,00,00,00,00,76,76,76,
18:76,76,00,76,76,76,76,76,00,76,76,
19:76,00,76,76,76,76,76,76,76,00,76,
20:00,76,76,76,76,76,76,76,76,76,00,
于是可以很清楚知道,每个数字都由7个小块组成,我们可以对这7块每块任取一个像素点获取颜色值。将这7块的颜色值是否等于76来表示一个二进制,最终转成一个整数:
def get_pixel_code(pixels):
    key_points = np.array([
        pixels[5, 1], pixels[1, 5], pixels[9, 5],
        pixels[9, 5], pixels[5, 10],
        pixels[1, 15], pixels[9, 15], pixels[5, 19]
    ]) == 76
    code = int("".join(key_points.astype("int8").astype("str")), 2)
    return code
经过逐个测试,最终得到每个数字对应的特征码,最终封装成如下方法:
code2num = {
    247: 0, 50: 1, 189: 2,
    187: 3, 122: 4, 203: 5,
    207: 6, 178: 7, 255: 8, 251: 9
}

def get_mine_num(full_img=None):
    full_img = ImageGrab.grab()
    num_img = full_img.crop((left+20, top+62, left+20+39, top+62+23))
    mine_num = 0
    for i in range(3):
        num_i = num_img.crop((13*i+1, 1, 13*(i+1)-1, 22)).convert("L")
        code = get_pixel_code(num_i.load())
        mine_num = mine_num*10+code2num[code]
    return mine_num

get_mine_num()
经测试可以准确读取,左上角雷区的数量。
读取雷区数据
通过以下代码可以拆分出雷区每个格子的图像:
img = ImageGrab.grab().crop(rect)
for y in range(h):
    for x in range(w):
        img_block = img.crop((x * bw, y * bh, (x + 1) * bw, (y + 1) * bh))
可以获取每个格子的灰度图片的颜色列表:
colors = img_block.convert("L").getcolors()
colors
[(54, 128), (148, 192), (54, 255)]
结果表示了(出现次数,颜色值)组成的列表。
为了方便匹配,将其转换为16进制并文本拼接:
def colors2signature(colors):
    return "".join(hex(b)[2:].zfill(2) for c in colors for b in c)
然后就可以得到整个雷区的每个单元格组成的特征码的分布:
from collections import Counter

counter = Counter()
img = ImageGrab.grab().crop(rect)
for y in range(h):
    for x in range(w):
        img_block = img.crop((x * bw, y * bh, (x + 1) * bw, (y + 1) * bh))
        colors = img_block.convert("L").getcolors()
        signature = colors2signature(colors)
        counter[signature] += 1
counter.most_common(20)
[('368094c036ff', 388),
 ('4d001f8090c004ff', 87),
 ('281d1f80b9c0', 2),
 ('414b1f80a0c0', 1),
 ('3e4c1f80a3c0', 1),
 ('4d00904c1f8004ff', 1)]
经过反复测试终于得到各种情况的特征码:
rgb_unknown = '368094c036ff'
rgb_1 = '281d1f80b9c0'
rgb_2 = '414b1f80a0c0'
rgb_3 = '3e4c1f80a3c0'
rgb_4 = '380f1f80a9c0'
rgb_5 = '46261f809bc0'
rgb_6 = '485a1f8099c0'
rgb_7 = '2c001f80b5c0'
rgb_8 = '6b8095c0'
rgb_nothing = '1f80e1c0'
rgb_red = '1600114c36806dc036ff'
rgb_boom = '4d001f8090c004ff'
rgb_boom_red = '4d00904c1f8004ff'
rgb_boom_error = '34002e4c1f807ec001ff'
# 数字1-8表示周围有几个雷
#  0 表示已经点开是空白的格子
# -1 表示还没有点开的格子
# -2 表示红旗所在格子
# -3 表示踩到雷了已经失败
img_match = {rgb_1: 1, rgb_2: 2, rgb_3: 3, rgb_4: 4,
             rgb_5: 5, rgb_6: 6, rgb_7: 7, rgb_8: 8, rgb_nothing: 0,
             rgb_unknown: -1, rgb_red: -2, rgb_boom: -3, rgb_boom_red: -3, rgb_boom_error: -3}
尝试匹配雷区数据:
import numpy as np
board = np.zeros((h, w), dtype="int8")
board.fill(-1)
for y in range(h):
    for x in range(w):
        img_block = img.crop((x * bw, y * bh, (x + 1) * bw, (y + 1) * bh))
        colors = img_block.convert("L").getcolors()
        signature = colors2signature(colors)
        board[y, x] = img_match[signature]
print(board)


可以看到雷区的数据都能正确匹配并获取。
自动操作扫雷程序
下面我们封装一个控制鼠标点击的方法:
import win32api
import win32con


def click(x, y, is_left_click=True):
    if is_left_click:
        win32api.SetCursorPos((x, y))
        win32api.mouse_event(
            win32con.MOUSEEVENTF_LEFTDOWN, 0, 0, 0, 0)
        win32api.mouse_event(
            win32con.MOUSEEVENTF_LEFTUP, 0, 0, 0, 0)
    else:
        win32api.SetCursorPos((x, y))
        win32api.mouse_event(
            win32con.MOUSEEVENTF_RIGHTDOWN, 0, 0, 0, 0)
        win32api.mouse_event(
            win32con.MOUSEEVENTF_RIGHTUP, 0, 0, 0, 0)


(w, h), (l, t, r, b) = get_board_size()


def click_mine_area(px, py, is_left_click=True):
    x, y = l+px*bw + bw // 2, t+py*bh + + bh // 2
    click(x, y, is_left_click)
调用示例:
import time
import win32con

activateWindow(hwnd)
time.sleep(0.2)
click_mine_area(3, 3)
注意:第一次操作程序,需要点击激活窗口,激活需要等待几毫秒生效后开始操作。
更快的操作方法:
可以直接发生windows消息,来模拟鼠标操作,这样组件直接在底层消息级别接收到鼠标点击的事件,缺点是看不到鼠标的移动。封装一下:
def message_click(x, y, is_left_click=True):
    if is_left_click:
        win32api.SendMessage(hwnd,
                             win32con.WM_LBUTTONDOWN,
                             win32con.MK_LBUTTON,
                             win32api.MAKELONG(x, y))
        win32api.SendMessage(hwnd,
                             win32con.WM_LBUTTONUP,
                             win32con.MK_LBUTTON,
                             win32api.MAKELONG(x, y))
    else:
        win32api.SendMessage(hwnd,
                             win32con.WM_RBUTTONDOWN,
                             win32con.MK_RBUTTON,
                             win32api.MAKELONG(x, y))
        win32api.SendMessage(hwnd,
                             win32con.WM_RBUTTONUP,
                             win32con.MK_RBUTTON,
                             win32api.MAKELONG(x, y))

# 雷区格子在窗体上的起始坐标
offest_x, offest_y = 0xC, 0x37
# 每个格子方块的宽度和高度 16*16
bw, bh = 16, 16

def message_click_mine_area(px, py, is_left_click=True):
    x, y = offest_x+px*bw + bw // 2, offest_y+py*bh + + bh // 2
    message_click(x, y, is_left_click)
调用示例:
message_click_mine_area(3, 4, False)
注意:windows消息级的鼠标操作不需要激活窗口就可以直接操作。
前端交互程序整体封装
import win32api
import win32con
import numpy as np
import win32com.client as win32
from PIL import ImageGrab
import win32gui
# 每个方块16*16
bw, bh = 16, 16
# 剩余雷数图像特征码
code2num = {
247: 0, 50: 1, 189: 2,
187: 3, 122: 4, 203: 5,
207: 6, 178: 7, 255: 8, 251: 9
}
# 雷区图像特征码
rgb_unknown = '368094c036ff'
rgb_1 = '281d1f80b9c0'
rgb_2 = '414b1f80a0c0'
rgb_3 = '3e4c1f80a3c0'
rgb_4 = '380f1f80a9c0'
rgb_5 = '46261f809bc0'
rgb_6 = '485a1f8099c0'
rgb_7 = '2c001f80b5c0'
rgb_8 = '6b8095c0'
rgb_nothing = '1f80e1c0'
rgb_red = '1600114c36806dc036ff'
rgb_boom = '4d001f8090c004ff'
rgb_boom_red = '4d00904c1f8004ff'
rgb_boom_error = '34002e4c1f807ec001ff'
rgb_question = '180036807cc036ff'
# 数字1-8表示周围有几个雷
# 0 表示已经点开是空白的格子
# -1 表示还没有点开的格子
# -2 表示红旗所在格子
# -3 表示踩到雷了已经失败
# -4 表示被玩家自己标记为问号
img_match = {rgb_1: 1, rgb_2: 2, rgb_3: 3, rgb_4: 4,
rgb_5: 5, rgb_6: 6, rgb_7: 7, rgb_8: 8, rgb_nothing: 0,
rgb_unknown: -1, rgb_red: -2, rgb_boom: -3, rgb_boom_red: -3,
rgb_boom_error: -3, rgb_question: -