Real-Time Super-Resolution System of 4K-Video Based on Deep Learning----代码实践
Posted MengYa_Dream
tags:
篇首语:本文由小常识网(cha138.com)小编为大家整理,主要介绍了Real-Time Super-Resolution System of 4K-Video Based on Deep Learning----代码实践相关的知识,希望对你有一定的参考价值。
Real-Time Super-Resolution System of 4K-Video Based on Deep Learning----阅读阶段
本篇主要记录分享,github上的具体操作与实践,实现一次完整的test实践。
再次,感谢作者分享他们的研究成果及代码
文章地址:Real-Time Super-Resolution System of 4K-Video Based on Deep Learning
引用申明 :
Yanpeng Cao, Chengcheng Wang, Changjun Song, Yongming Tang and He Li. EGVSR. https://github.com/Thmen/EGVSR, 2021.
@misc{thmen2021egvsr,
author = {Yanpeng Cao, Chengcheng Wang, Changjun Song, Yongming Tang and He Li},
title = {EGVSR},
howpublished = {\\url{https://github.com/Thmen/EGVSR}},
year = {2021}
}
正文
基础:ubuntu18.04 anaconda3
项目地址 先大致阅读一遍相关内容,再进行具体实践;阅读过程中主要检查自身配置是否能够满足项目所需要的环境(Dependencies & Experimental Environment)以及其相关的注意事项。笔者主要以test进行具体操作:
1.ubuntu终端下载Github
git clone + github项目git链接如果提示无git命令,就安装git命令,以下语句作用相同,根据情况尝试。
sudo apt install git
sudo pip3 install git
pip install git             #笔者常用 conda中缺module
2.安装requirements.txt配置环境
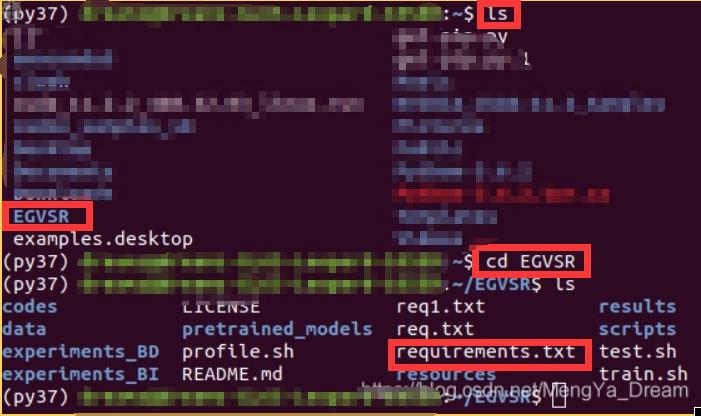
根据项目的Dependencies ,可以在项目文件夹中,找到requirements.txt,与其作用相同,因此直接install requirements.txt即可:

这里笔者使用的是Anaconda3创建的虚拟环境
conda create -n py37 python=3.7    #命令创建一个名称为py37的python版本为3.7的虚拟环境
source activate py37               #进入虚拟环境
且安装时需要cd到requirements.txt的同一目录下,ls 查看目录,cd进入目录

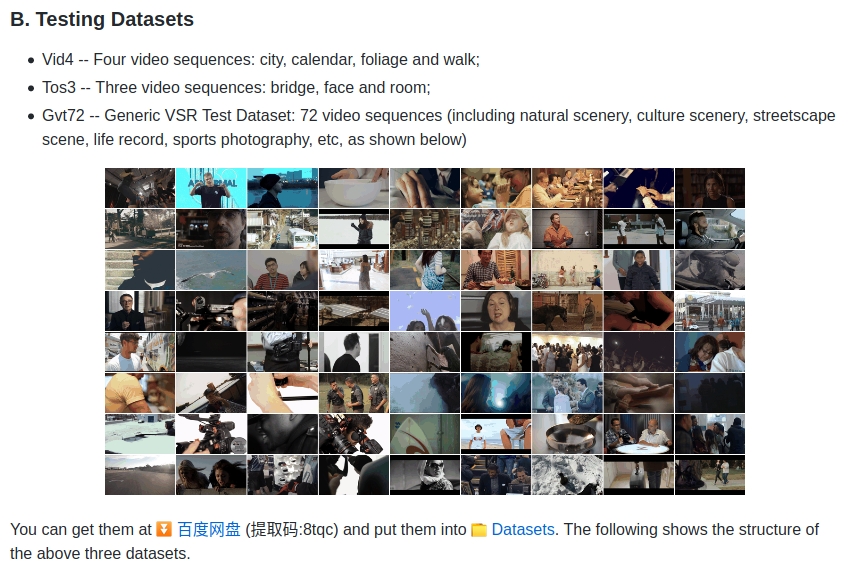
conda install --yes --file requirements.txt3.下载Testing Datasets
根据要求解压到对应文件夹

4. 运行test.sh
如果成功运行,那么test也就到此结束。
sh test.sh5.问题罗列
但是,很明显,真正的问题才刚刚开始出现;尤其对python略知一二的我还是面临了巨大挑战。
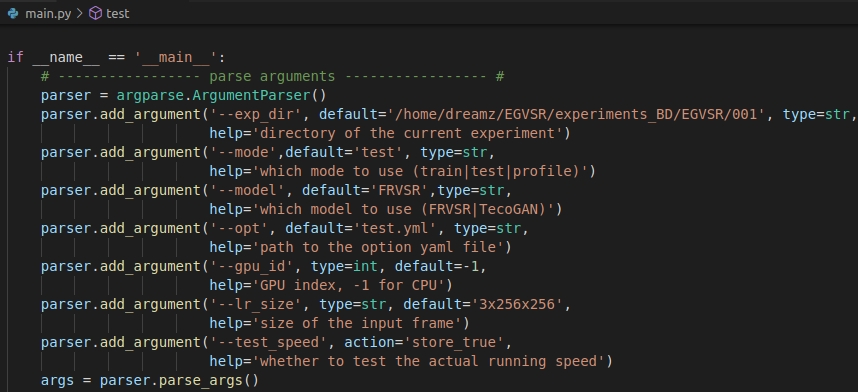
问题1:error:excepted one_argument
usage: main.py [-h] --exp_dir EXP_DIR --mode MODE --model MODEL --opt OPT
               [--gpu_id GPU_ID] [--lr_size LR_SIZE] [--test_speed]
main.py: error: argument --model: expected one argument
解决:
方法一:修改main.py(有效性强)
 方法二:修改test.sh,或者将相关参数直接以命令行输入到终端
(笔者同时对main.py和test.sh都作了修改)

问题2:import相关module,其在Vscode样式为白色,初步判定为未import成功
解决:现学python
然后,观察到main.py等文件中相关import失败,经过查找资料,判定为此时相关的module与main.py不在同一目录下,因此import需要修改。
import torch
import utils.base_utils as base_utils       #笔者修改
import utils.data_utils as data_utils       #笔者修改

from data.__init__ import create_dataloader, prepare_data    #笔者修改
#from data import create_dataloader, prepare_data  #原import方式,注释
from models import define_model
from models.networks import define_generator
from metrics.metric_calculator import MetricCalculator
from metrics.model_summary import register, profile_model
#from utils import base_utils, data_utils          #原import方式,注释
问题3:_pickle.UnpicklingError: A load persistent id instruction was encountered,
but no persistent_load function was specified.
解决:报错点在net.load_state_dict(torch.load(load_path)) ,感觉load_state_dict好像不存在
,考虑是不是pytorch有什么注意项,随后发现和pytorch的版本有很大的关联。
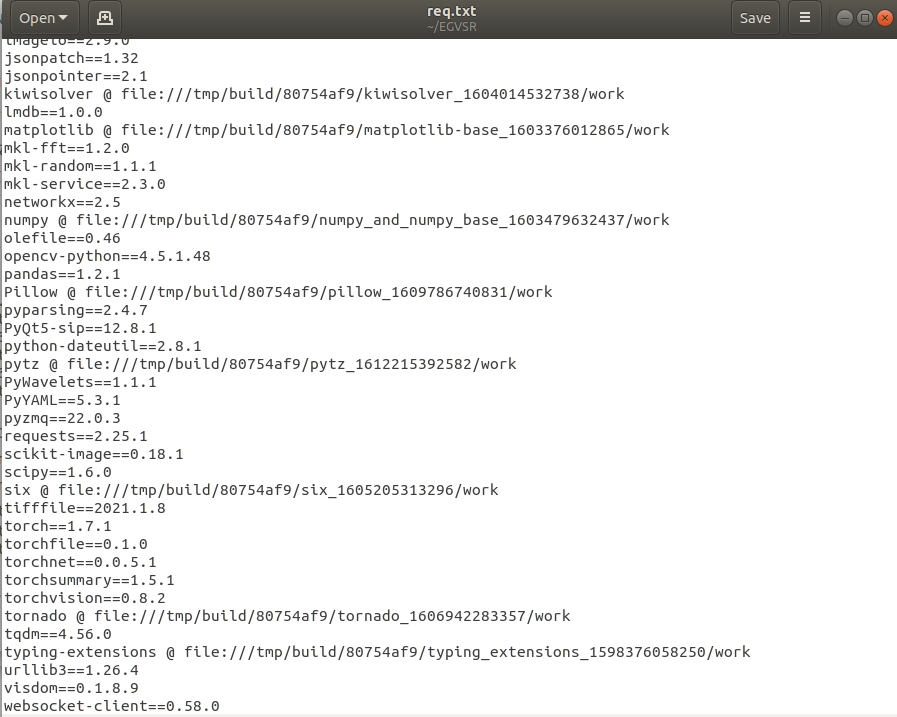
项目虽然在Dependencies中表示Pytorch在1.0.0以上,但是其实际上还是有要求的,在其req.txt,这也是笔者惨痛的教训(毕竟这个错误点花了很久很久的时间才解决)
这里明确了torch==1.7.1查询Pytorch_previous-versions,检查对应版本进行安装
conda install pytorch==1.7.1 torchvision==0.8.2 torchaudio==0.7.2 cudatoolkit=10.1 -c pytorch
 总结:
总结:
以上问题按出现顺序进行整理,仅代表个人判断和解决方式。 test成功!
以上是关于Real-Time Super-Resolution System of 4K-Video Based on Deep Learning----代码实践的主要内容,如果未能解决你的问题,请参考以下文章