esbuild 配置开发环境
Posted twinkle||cll
tags:
篇首语:本文由小常识网(cha138.com)小编为大家整理,主要介绍了esbuild 配置开发环境相关的知识,希望对你有一定的参考价值。
esbuild相信在使用过vite的同学都知道,vite是开发环境使用的是esbuild来进行编译代码的,生成环境打包使用的是rollup,想看rollup的同学,可以查看我的往期文章。(实战 rollup 第一节入门) (rollup 实战第二节 搭建开发环境)(rollup 实战第二节 搭建开发环境)
使用方式
esbuild的官网里面有说明,esbuild的使用方式,提供三种方式:cli,js,go

搭建开发环境
既然需要使用
esbuilld, 那肯定是需要安装esbuild的依赖的,npm install esbuild -D的。这里需要说明一下,esbuild, 他提供的不是类似webpack,rollup的配置文件,而是提供一些转换函数(在node环境或者go环境来执行的),直接来帮你转换代码的。
本人是一名前端开发工程师,对于go不了解,这里也只做js的两种方式来配置开发环境。
方式一 cli
使用cli的方式这个和webpck,rollup一样,给我们做出了许多的指令: --bundle --w --outfile等.
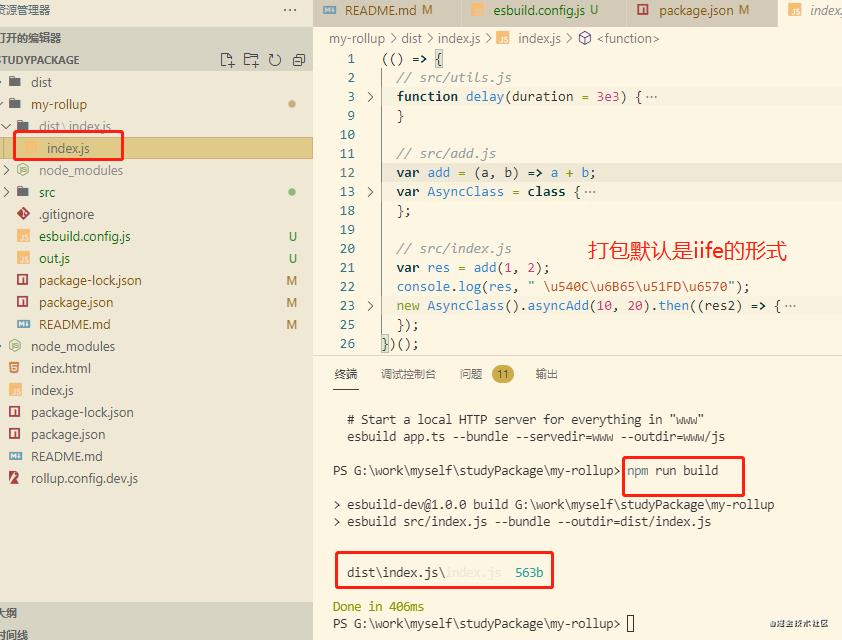
在 package.json中的script中添加以下一个脚本: "build": "esbuild src/index.js --bundle --outdir=dist/index.js"这句话的意思是说,使用esbuild 加载src/index.js 为入口,打包并且以dist/index.js为出口。
效果

方式二 使用api
在src中新建esbuild.config.js,这个js里面不是配置文件,而是使用api来调用的方式.
const esbuildConig = () => require('esbuild').buildSync({
  entryPoints: ['src/index.js'],
  bundle: true,
  outfile: 'out.js'
})

esbuildConig();
复制代码
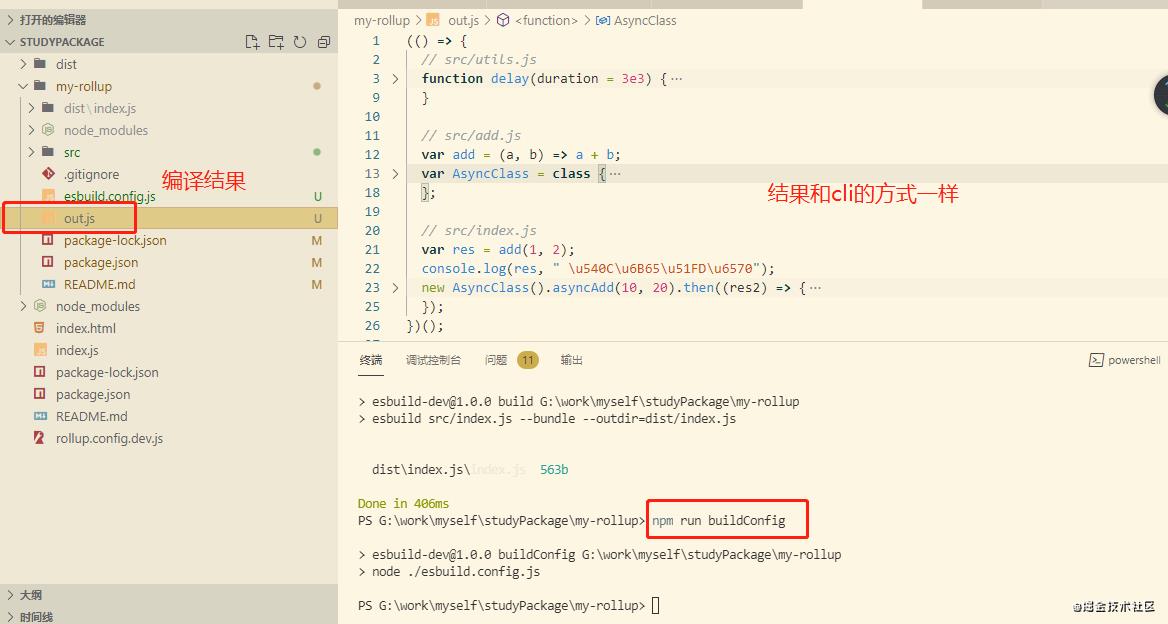
在package.json中的script新建脚本如下:
"buildConfig": "node ./esbuild.config.js" # 这里是node来执行那个js,然后通过api来进行打包,转译
复制代码
编译结果

启动开发服务
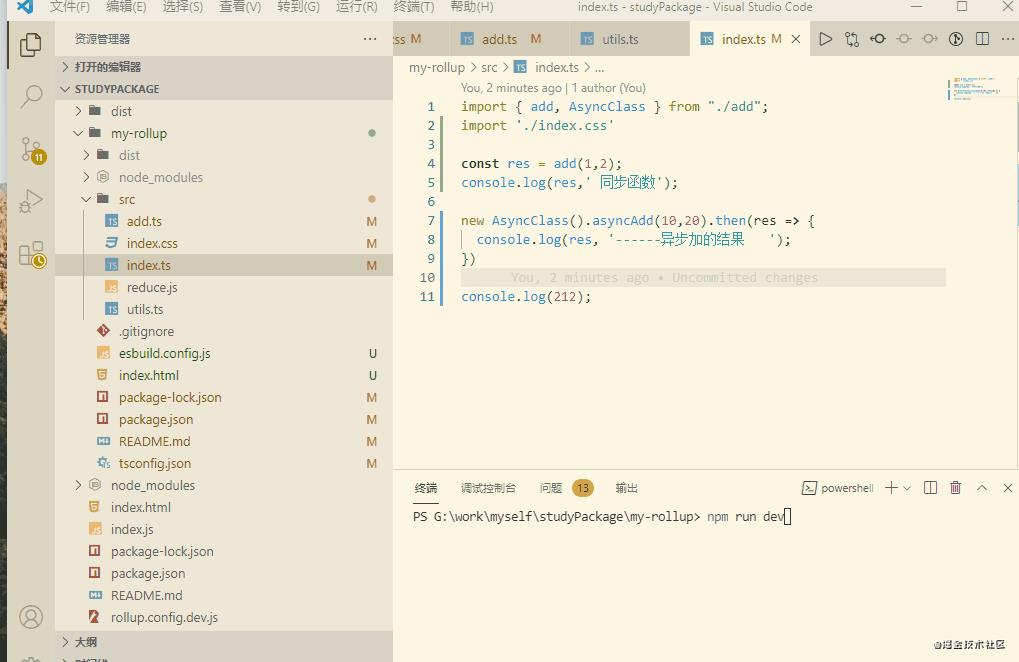
esbuil本身提供对外启动一个服务,但是我想直接编译,然后手动来启动一个静态资源的服务,实现代码改变后自动刷新浏览器,主要的文件是 ts 和 css文件。
效果如下
服务启动后:启动服务后可以访问我们的项目,然后当我们修改代码后面。自动更新浏览器。

服务暂停后:这个在服务断开后是不是很熟悉。

思路
esbuild的工作内容很简单,快速打包资源。对资源进行编译,有点babel的意思。用在开发阶段相当舒服。调试代码很轻松。
第一步 : 打包开发环境代码
esbuild 提供了几个关键转译函数,我们就使用build就好了,为了方便我们看到内容,所以把开发环境的代码也生成到本地(一般是不生成代码的,打包后代码从本地读写要花费时间,vite,webpack等都是把打包的结果放内存中的)
第二步 : 启动一个服务
esbuild 本身会对外可以提供服务,但是文档里面写的并不是很清楚,况且 vite 开发环境也是自己使用koa来提供服务的,所以咋们也来自己使用koa提供服务。并且方便生成 index.html文件绑定对应的 js 和 css等.
第二步 :监听文件变化,并且告知浏览器更新
这里要区分一个点,那就是vite, webpack 等实现的热更新是hmr(hot module reload),hrm 是保留当前状态,自动页面局部更新,不需要刷新整个页面,具体的思路查看。 而我们这里就不做那么复杂,只要修改代码我就给你刷新浏览器。体验esbuild的开发过程嘛.
核心代码如下
// esbuild.config.js文件
const esbuild = require('esbuild');
const serve = require('koa-static');
const Koa = require('koa');
const path = require('path');
const fse = require('fs-extra')
const app = new Koa();

// 启动编译好后自动刷新浏览器
const livereload = require('livereload');
const lrserver = livereload.createServer();
lrserver.watch(__dirname + "/dist");

// 使用静态服务
app.use(serve((path.join(__dirname + '/dist'))));

esbuild.build({
  // 入口
  entryPoints: ['src/index.ts'],
  // 启动sourcemap
  sourcemap: true,
  // 打包
  bundle: true,
  // 输出的目录
  outfile: 'dist/index.js',
  // 启动轮询的监听模式
  watch: {
    onRebuild(error, result) {
      if (error) console.error('watch build failed:', error)
      else {
        // 这里来自动打开浏览器并且更新浏览器
        console.log('\\x1B[36m%s\\x1B[39m', 'watch build succeeded')
      }
    },
  },
}).then(async res => {
  const fileName = path.join(__dirname + '/dist/index.html');
  // 创建文件,如果文件不存在直接创建,存在不做任何事情
  await fse.ensureFile(fileName);
  // 把下面内容写入dist中的index.html文件中
  await fse.writeFileSync(fileName, `
 <!DOCTYPE html>
 <html lang="en">
  <head>
    <meta charset="UTF-8">
    <meta http-equiv="X-UA-Compatible" content="IE=edge">
    <meta name="viewport" content="width=device-width, initial-scale=1.0">
    <title>测试esbuild</title>
    <link rel="stylesheet" href="./index.css">
  </head>
  <body>
    <h1>测试esbuild</h1>
    <div id="app">  APP </div>
  </body>
  <script type="module" src="./index.js"></script>
  <script>
    document.write('<script src="http://' + (location.host || 'localhost').split(':')[0] +
    ':35729/livereload.js?snipver=1"></' + 'script>')
  </script>
  </script>
 </html>
 `)
  // 启动一个koa静态资源服务
  app.listen(3000, () => {
    console.log(`> Local:    http://localhost:3000/`)
  })
})
复制代码
这里就只放一下关键代码和思路,具体查看:https://github.com/cll123456/myPackage/tree/esbuild-dev
其他指令
Simple options: # 基础配置
  --bundle              Bundle all dependencies into the output files #打包所有的依赖进输出文件
  --define:K=V          Substitute K with V while parsing # 在解析代码的时候用V替换K
  --external:M          Exclude module M from the bundle (can use * wildcards) # 从模块中排除M(可以使用*作为通配符)
  --format=...          Output format (iife | cjs | esm, no default when not
                        bundling, otherwise default is iife when platform
                        is browser and cjs when platform is node) #  输出的文件格式(iife | cjs | esm,不打包不默认,浏览器默认iife,node环境默认cjs)
  --loader:X=L          Use loader L to load file extension X, where L is
                        one of: js | jsx | ts | tsx | json | text | base64 |
                        file | dataurl | binary #当L是以下文件中的一个(js | jsx | ts | tsx | json | text | base64 |file | dataurl | binary)使用loader L来进行拓展X
  --minify              Minify the output (sets all --minify-* flags) # 代码压缩(设置所有使用 --minify-*)
  --outdir=...          The output directory (for multiple entry points) # 文件输出目录(对于多个入口点)
  --outfile=...         The output file (for one entry point) #文件输出名称(对于单个入口点)
  --platform=...        Platform target (browser | node | neutral,
                        default browser) #  编译的环境 (browser | node | neutral, 默认浏览器)
  --serve=...           Start a local HTTP server on this host:port for outputs # 在host:port的基础上开启一个http服务来输出文件
  --sourcemap           Emit a source map # 输出source map文件
  --splitting           Enable code splitting (currently only for esm) # 代码分割(当前仅限 esm模式)
  --target=...          Environment target (e.g. es2017, chrome58, firefox57,
                        safari11, edge16, node10, default esnext) # 代码打包结果的环境(e.g. es2017, chrome58, firefox57, safari11, edge16, node10, 默认esnext语法)
  --watch               Watch mode: rebuild on file system changes # 监听模式:  改变文件后重写编译

Advanced options: # 高级配置
  --allow-overwrite         Allow output files to overwrite input files # 是否允许输出的文件覆盖源文件
  --asset-names=...         Path template to use for "file" loader files
                            (default "[name]-[hash]") #  静态资源输出的文件名称(默认是名字加上hash)
  --banner:T=...            Text to be prepended to each output file of type T
                            where T is one of: css | js  # 在输出的 js, css文件中添加一段文本
  --charset=utf8            Do not escape UTF-8 code points # 代码字符集,不要做其他的转换,默认(utf-8)
  --chunk-names=...         Path template to use for code splitting chunks
                            (default "[name]-[hash]") # 分割chunks的名称(默认名字+hash)
  --color=...               Force use of color terminal escapes (true | false) # 终端输出是否带颜色
  --entry-names=...         Path template to use for entry point output paths
                            (default "[dir]/[name]", can also use "[hash]") # 入口点输出路径的路径模板(默认 dir/hash,  也可以是hash)
  --footer:T=...            Text to be appended to each output file of type T
                            where T is one of: css | js # # 在输出的 js, css文件中结尾添加一段文本
  --global-name=...         The name of the global for the IIFE format # 输出文件类型是  iife的全局名称
  --inject:F                Import the file F into all input files and
                            automatically replace matching globals with imports  # 将文件F导入所有输入文件,并用导入自动替换匹配的全局变量
  --jsx-factory=...         What to use for JSX instead of React.createElement # JSX使用什么代替React.createElement
  --jsx-fragment=...        What to use for JSX instead of React.Fragment # jsx  使用什么代替 React.Fragment
  --jsx=...                 Set to "preserve" to disable transforming JSX to JS #设置为“preserve”以禁用将JSX转换为JS
  --keep-names              Preserve "name" on functions and classes # 保留函数和类的名称
  --legal-comments=...      Where to place license comments (none | inline |
                            eof | linked | external, default eof when bundling
                            and inline otherwise) # 注释采用怎么的形式保留
  --log-level=...           Disable logging (verbose | debug | info | warning |
                            error | silent, default info) #  控制台log输出的形式
  --log-limit=...           Maximum message count or 0 to disable (default 10) #最大的消息数量
  --main-fields=...         Override the main file order in package.json
                            (default "browser,module,main" when platform is
                            browser and "main,module" when platform is node) #    覆盖package.json中的字段,根据不同的平台有不一样的覆盖方式
  --metafile=...            Write metadata about the build to a JSON file # 将元数据写入编译好的json文件中
  --minify-whitespace       Remove whitespace in output files #去除输出文件的空格
  --minify-identifiers      Shorten identifiers in output files #缩短输出文件中的标识符
  --minify-syntax           Use equivalent but shorter syntax in output files #在输出文件中使用等效但较短的语法
  --out-extension:.js=.mjs  Use a custom output extension instead of ".js" #使用自定义的后缀名来代替输出的js后缀
  --outbase=...             The base path used to determine entry point output
                            paths (for multiple entry points) # 输出文件的根路径(对于多入口点)
  --preserve-symlinks       Disable symlink resolution for module lookup #禁用模块查找的符号链接解析
  --public-path=...         Set the base URL for the "file" loader # 设置加载loader的跟路径
  --pure:N                  Mark the name N as a pure function for tree shaking # 将标记名字为N的纯函数用于tree shaking
  --resolve-extensions=...  A comma-separated list of implicit extensions
                            (default ".tsx,.ts,.jsx,.js,.css,.json") # 以逗号分隔的隐式扩展列表
  --servedir=...            What to serve in addition to generated output files # 服务额外生成文件的输出目录
  --source-root=...         Sets the "sourceRoot" field in generated source maps # 在生成的源映射中设置“sourceRoot”字段
  --sourcefile=...          Set the source file for the source map (for stdin) #设置源映射的源文件(对于stdin)
  --sourcemap=external      Do not link to the source map with a comment # 注释不需要链接到 source map
  --sourcemap=inline        Emit the source map with an inline data URL #使用内联数据URL生成源映射
  --sources-content=false   Omit "sourcesContent" in generated source maps # 在生成的源映射中省略“sourcesContent
  --tree-shaking=...        Set to "ignore-annotations" to work with packages
                            that have incorrect tree-shaking annotations #设置为“忽略注释”以处理具有不正确的tree-shaking注释的包
  --tsconfig=...            Use this tsconfig.json file instead of other ones # 使用此tsconfig.json文件而不是其他文件
  --version                 Print the current version (0.12.16) and exit #打印当前的版本并且退出
复制代码
学习一个知识点,需要输入和输出,这样自己来能掌握的更多,看文档是一个输入的过程,但是写博客是一个输出的过程,希望能够更多的人使用这种方法来学习,科技强国 ,加油!!!
以上是关于esbuild 配置开发环境的主要内容,如果未能解决你的问题,请参考以下文章