OpenCV + CPP 系列图像的加权混合 对比度与亮度
Posted SongpingWang
tags:
篇首语:本文由小常识网(cha138.com)小编为大家整理,主要介绍了OpenCV + CPP 系列图像的加权混合 对比度与亮度相关的知识,希望对你有一定的参考价值。
一、图像的加权混合
线性混合
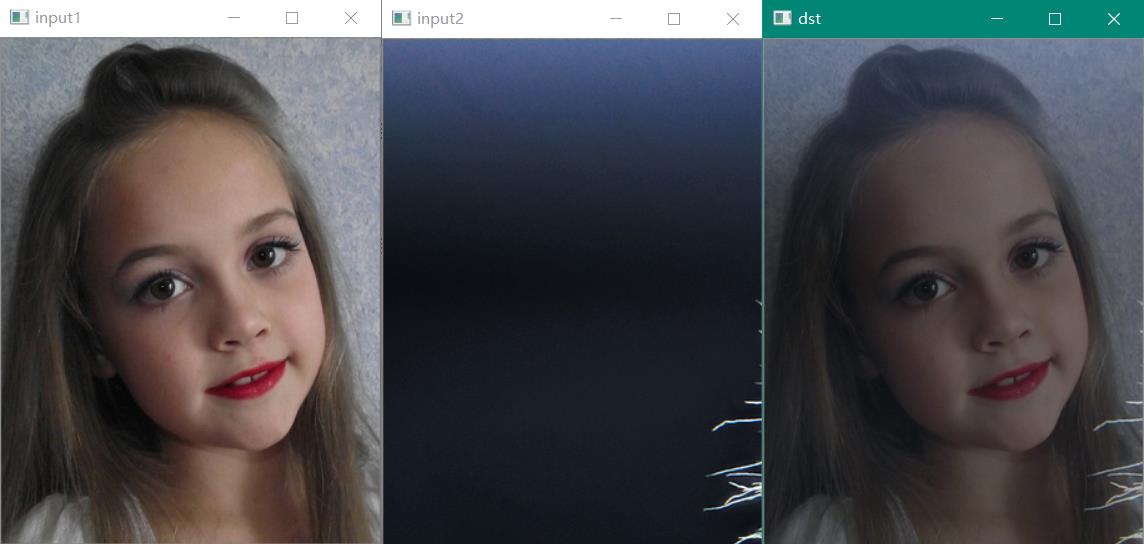
函数是将两张相同大小,相同类型的图片(叠加)线性融合的函数,可以实现图片的特效。
图像的线性混合: g ( x ) = ( 1 − α ) f 0 ( x ) + α f 1 ( x ) \\mathrm{g}(x) = (1- \\alpha)f_0(x)+ \\alpha f_1(x) g(x)=(1−α)f0(x)+αf1(x)
-
void addWeighted(
-
InputArray
src1, 原数组1
double alpha, 原数组1的权重值 : α \\alpha α
InputArray src2, 原数组2
double beta, 数组2 的权重值,( 1 − α 1-\\alpha 1−α)
double gamma, 加权和后的图像的偏移量(标量)
OutputArray dst, 输出的数组(公式如上)
int dtype = -1 输出阵列的深度,有默认值-1,即src1.depth()
);
头文件 quick_opencv.h:声明类与公共函数
#pragma once
#include <opencv2\\opencv.hpp>
using namespace cv;

class QuickDemo {
public:
	...
	void mix_image_Demo(Mat& image1, Mat& image2);  //新增方法
	void image_contrast_Demo(Mat& image1);

};
主函数调用该类的公共成员函数
#include <opencv2\\opencv.hpp>
#include <quick_opencv.h>
#include <iostream>
using namespace cv;


int main(int argc, char** argv) {
	Mat src1 = imread("D:\\\\Desktop\\\\ttt.png");
	Mat src2 = imread("D:\\\\Desktop\\\\uuu.png");
	if (src1.empty()) {
		printf("Could not load images1...\\n");
		return -1;
	}
	if (src2.empty()) {
		printf("Could not load images2...\\n");
		return -1;
	}
	imshow("input1", src1);
	imshow("input2", src2);

	QuickDemo qk;
	qk.mix_image_Demo(src1, src2);
	qk.image_contrast_Demo(src1);
	waitKey(0);
	destroyAllWindows();
	return 0;
}
源文件 quick_demo.cpp:实现类与公共函数
#include <quick_opencv.h>
#include <opencv2/dnn.hpp>
using namespace cv;
using namespace std;


void QuickDemo::mix_image_Demo(Mat& image1, Mat& image2) {
	double alpha = 0.5;
	if (image1.size() != image2.size()) {
		cout << "图像尺寸不匹配" << endl;
	}
	Mat dst;
	addWeighted(image1, alpha, image2, (1 - alpha), 0, dst, -1);
	imshow("dst", dst);
}

二、对比度增强
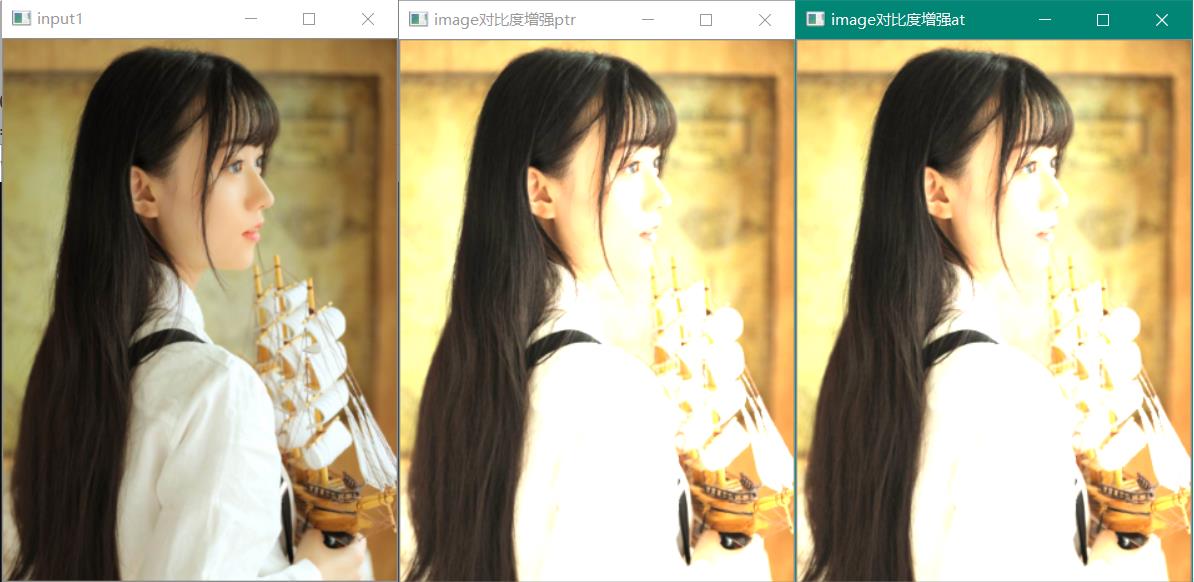
通过图像的像素变换(点操作)调整图像的亮度和对比度:
g
(
i
,
j
)
=
α
f
(
i
,
j
)
+
β
\\mathrm{g}(i,j) = \\alpha f(i,j)+ \\beta
g(i,j)=αf(i,j)+β 其中
β
\\beta
β 为增益变量
源文件 quick_demo.cpp:实现类与公共函数
void QuickDemo::image_contrast_Demo(Mat& image) {
	int width = image.cols;
	int height = image.rows;
	int channel = image.channels();
	Mat dst_at = Mat::zeros(image.size(), image.type());
	Mat dst_ptr = dst_at.clone();
	float alpha = 1.5;
	float beta = 10.0;

	//转成灰度图,浮点数图(计算精度更高)。
	Mat image32f,image8u;
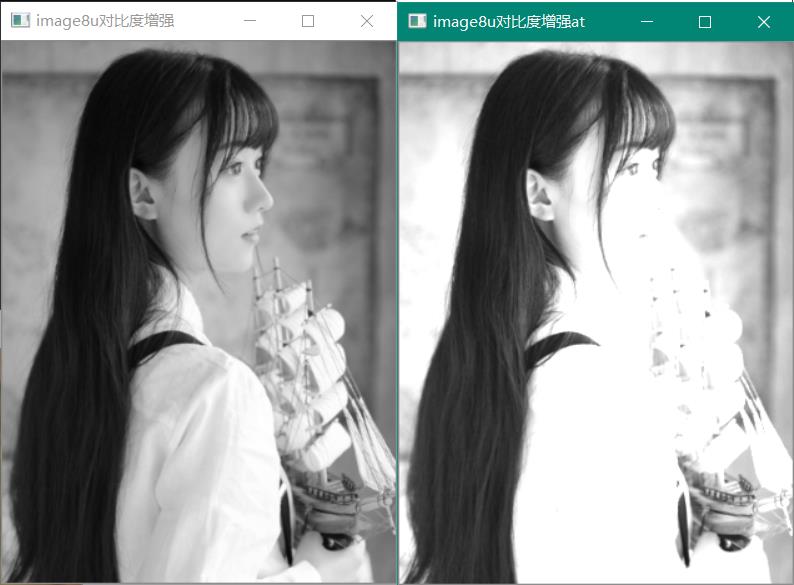
	cvtColor(image.clone(), image8u, COLOR_BGR2GRAY);
	image.convertTo(image32f, CV_32F);

	Mat dst_8u = Mat::zeros(image8u.size(), image8u.type());
	int channel8u = image8u.channels();
	if (channel8u == 1) {
		for (int h = 0; h < height; h++) {
			for (int w = 0; w < width; w++) {
				uchar v = image8u.at<uchar>(h, w);
				dst_8u.at<uchar>(h, w) = saturate_cast<uchar>(v * alpha + beta);
			}
		}
	}
	double time0 = static_cast<double>(getTickCount()); // 计时
	if (channel == 3) {
		for (int h = 0; h < height; h++) {
			for (int w = 0; w < width; w++) {
				dst_at.at<Vec3b>(h, w)[0] = saturate_cast<uchar>(image32f.at<Vec3f>(h, w)[0] * alpha + beta);
				dst_at.at<Vec3b>(h, w)[1] = saturate_cast<uchar>(image32f.at<Vec3f>(h, w)[1] * alpha + beta);
				dst_at.at<Vec3b>(h, w)[2] = saturate_cast<uchar>(image32f.at<Vec3f>(h, w)[2] * alpha + beta);
			}
		}
	}
	double time1 = static_cast<double>(getTickCount());  // 计时
	if (channel == 3) {
		for (int h = 0; h < height; h++) {
			float* current_row = image32f.ptr<float>(h);
			uchar* dst_current_row = dst_ptr.ptr<uchar>(h);
			for (int w = 0; w < width; w++) {
				*dst_current_row++ = saturate_cast<uchar>(*current_row++ * alpha + beta);
				*dst_current_row++ = saturate_cast<uchar>(*current_row++ * alpha + beta);
				*dst_current_row++ = saturate_cast<uchar>(*current_row++ * alpha + beta);
			}
		}
	}
	double time2 = static_cast<double>(getTickCount());  // 计时
	cout << "time1-time0=" << (time1 - time0)/getTickFrequency() << endl;
	cout << "time2-time1=" << (time2 - time1)/ getTickFrequency() << endl;
	imshow("image8u原图", image8u);
	imshow("image8u对比度增强at", dst_8u);
	imshow("image对比度增强at", dst_at);
	imshow("image对比度增强ptr", dst_ptr);
}
两种像素对比度增强,使用at与ptr两种像素遍历方式,ptr遍历方式速度大约快一半。(单位:秒)


关于手动调节 亮度与对比对。
以上是关于OpenCV + CPP 系列图像的加权混合 对比度与亮度的主要内容,如果未能解决你的问题,请参考以下文章
Python 大白从零开始 OpenCV 学习课-4.图像的叠加与混合
OpenCV 函数学习15-图像的加权加法(cv2.addWeight)