Shader+UGUI仿制Unity拾色器
Posted sdhexu
tags:
篇首语:本文由小常识网(cha138.com)小编为大家整理,主要介绍了Shader+UGUI仿制Unity拾色器相关的知识,希望对你有一定的参考价值。
Shader+UGUI仿制Unity拾色器
先上视频
使用Shader+UGUI仿制Unity环形拾色器
由于视频有点小,下面放个大图
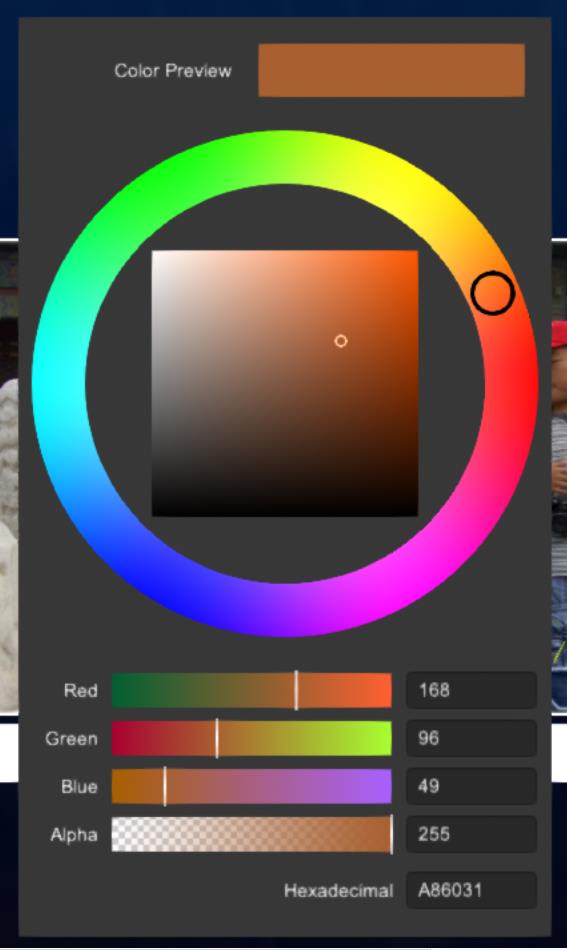
原理介绍
- Shader 着色
组件共使用了3个自定义Shader,对应了拾色器的不同组成部分,分别是:
- 选色调的色环Shader
其实很简单,首先根据UV图生成色调图,然后用一个环来lerp一下,然后在目标位置生成一个小圈圈。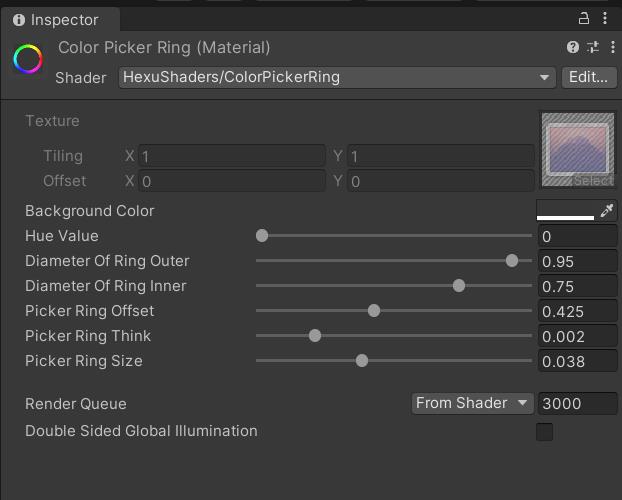
如上图所示,暴露很多参数供C#调整,有背景颜色、大圈圈大小、小圈圈的偏移、大小粗细等等,其中最重要的是Hue,这是就是色调了。。当我们选取了环上的颜色时,就要动态去设置该值,这样shader就能在正确的位置生成小圈圈。关键的代码如下:
float3 frag(v2f i) : SV_Target
{
	float2 uv = i.uv.xy;
	float2 toCenter = float2(0.5, 0.5) - uv;
	float angle = atan2(toCenter.y, toCenter.x);
	float radius = length(toCenter) * 2;
	float3 col = hsb2rgb(float3((angle / UNITY_TWO_PI) + 0.5, radius, 1.0));

	float ring = step(_RingInner, radius);
	ring = ring * ( 1 - step(_RingOuter, radius));
	col = lerp(_BackgroundColor,col, ring);

	float ang = -_Hue * UNITY_TWO_PI - UNITY_PI * 0.5;
	float2 pos = _PickerRingOffet * (float2(sin(ang), cos(ang)));

	float huering = _PickerRingThink / abs(length(toCenter - pos) - _PickerRingSize);
	col = lerp(col, float3(0, 0, 0), step(0.5, huering) * ring );

	return col;
}
- 选具体颜色的矩形Shader
矩形shader更简单了,直接用uv来生成矩形的色图。
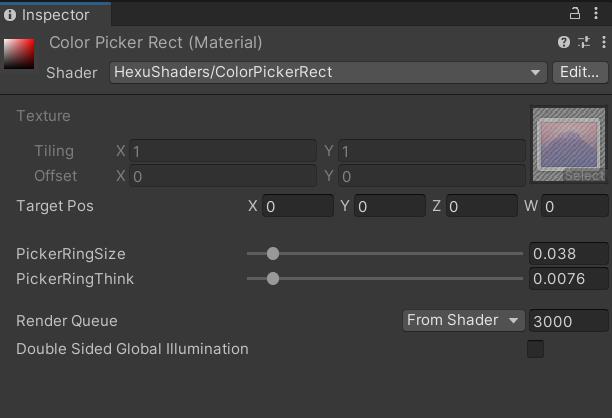
最重要的参数是TargetPos,xy分量用来表示小圈圈的位置,z分量用来表示色调(意义同环形shader)。
矩形的shader非常简单,5行代码搞定(不算return。。):
float3 frag(v2f i) : SV_Target
{
	float3 col = hsb2rgb(float3(_TargetPos.z, i.uv.x, i.uv.y));

	float2 st = i.uv.xy * 2.0 - 1.0;
	float rmpring = _PickerRingThink / abs(length(st - _TargetPos.xy) - _PickerRingSize);
	float3 rmprc = lerp(float3(0,0,0), float3(0.5,0.5,0.5), step( 1, rmpring));
	col += rmprc;

	return col;
}
- 选RGBA分量的Slider的Shader
当我们在环里选了色调,或者在矩形里选了具体的颜色,那么RGB每个分量的颜色都会有变化,表示在当前颜色下,如果改变各自的分量,将得到什么颜色。
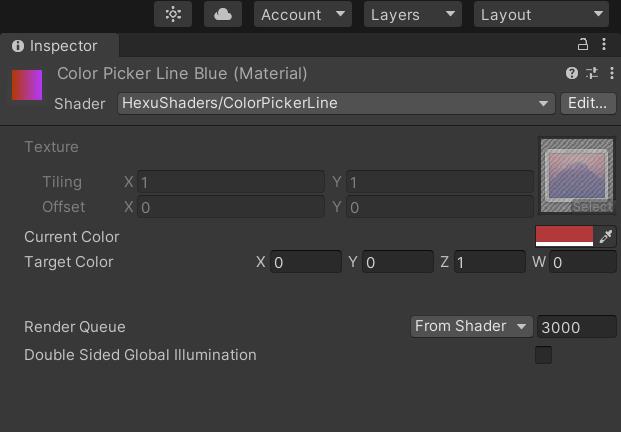
这里保留两个参数,一个是当前的颜色,另一个表示所属的分量。比如(1,0,0)表示红色,(0,1,0)表示绿色,(0,0,1)表示蓝色。w分量没有用到。
代码就更简单了(4行):
float3 frag(v2f i) : SV_Target
{
	float3 col;
	col.r = lerp( _CurrColor.r, i.uv.x, _TargetColor.x );
	col.g = lerp( _CurrColor.g, i.uv.x, _TargetColor.y );
	col.b = lerp( _CurrColor.b, i.uv.x, _TargetColor.z );
	return col;
}
- C#代码
先用UGUI摆好拾色器,做成预制体:
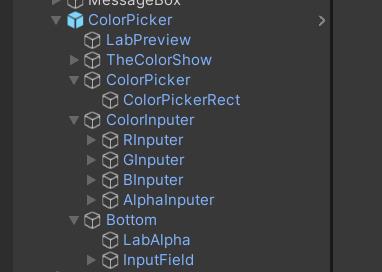
然后写封装一下代码:
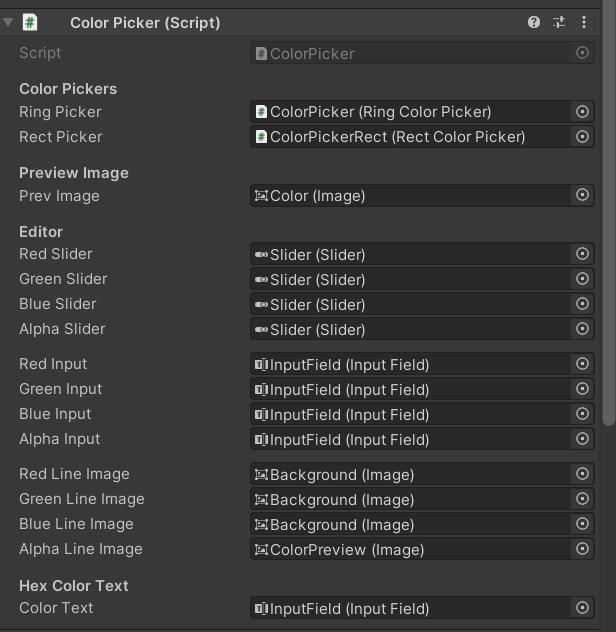
基本上就是各种组件的拖动而已。
封装好之后,可以通过OnColorChanged事件来获得当颜色被改变时的通知。也可以使用ColorValue变量来直接获取颜色,当然,也可以通过对这个变量的赋值,来让拾色器各个控件进行相应的更新。比如对这个变量赋值红色,那么环形拾色器、矩形拾色器还有各个分量的slider都会自动进行计算更新到红色的指示。
实际上C#代码没什么高深复杂的逻辑,只不过就是对这种控件的OnValueChanged事件进行监听,然后将各自的变化更新组件。
最核心的代码也许只有这些,感觉其余的都没啥必要贴。。太简单了。。
private void UpdateValueToUI( UpdateMode mode )
{
	prevImage.color = m_theColor;

	if ((mode & UpdateMode.UPDATE_PICKER) != 0)
	{
		rectPicker.SetColor(m_theColor, false);
		ringPicker.SetHue(rectPicker.Hue, false);
	}

	if ((mode & UpdateMode.UPDATE_SLIDER) != 0)
	{
		redSlider.SetValueWithoutNotify(m_theColor.r);
		greenSlider.SetValueWithoutNotify(m_theColor.g);
		blueSlider.SetValueWithoutNotify(m_theColor.b);
		alphaSlider.SetValueWithoutNotify(m_theColor.a);
	}

	redLineImage.material.SetColor(currColorId, m_theColor);
	greenLineImage.material.SetColor(currColorId, m_theColor);
	blueLineImage.material.SetColor(currColorId, m_theColor);
	alphaLineImage.color = m_theColor;

	if ((mode & UpdateMode.UPDATE_TEXT) != 0)
	{
		redInput.SetTextWithoutNotify(Mathf.RoundToInt(m_theColor.r * 255f).ToString("0"));
		greenInput.SetTextWithoutNotify(Mathf.RoundToInt(m_theColor.g * 255f).ToString("0"));
		blueInput.SetTextWithoutNotify(Mathf.RoundToInt(m_theColor.b * 255f).ToString("0"));
		alphaInput.SetTextWithoutNotify(Mathf.RoundToInt(m_theColor.a * 255f).ToString("0"));
	}

	if(( mode & UpdateMode.UPDATE_VALTXT ) != 0 )
		colorText.SetTextWithoutNotify(ColorUtility.TohtmlStringRGB(m_theColor));
}
工程下载链接
https://download.csdn.net/download/sdhexu/20463995
以上是关于Shader+UGUI仿制Unity拾色器的主要内容,如果未能解决你的问题,请参考以下文章