spring boot 2 - webrestfulCrud实验错误处理机制配置嵌入式Servlet容器
Posted 之墨_
tags:
篇首语:本文由小常识网(cha138.com)小编为大家整理,主要介绍了spring boot 2 - webrestfulCrud实验错误处理机制配置嵌入式Servlet容器相关的知识,希望对你有一定的参考价值。
spring boot 2 - web、restfulCrud实验、错误处理机制、配置嵌入式Servlet容器、注册Servlet三大组件
一、Web开发概略
1.使用SpringBoot
- 创建SpringBoot应用,选中我们需要的模块
- SpringBoot已经默认将这些场景配置好了,只需要在配置文件中指定少量配置就可以运行起来
- 自己编写业务代码
2.熟悉自动配置原理
- 这个场景SpringBoot帮我们配置了什么?
- 能不能修改?
- 能修改哪些配置?
- 能不能扩展?
- … … … …
3.示例
如我们在进行web开发时,在autoconfiguration导入的web包下:

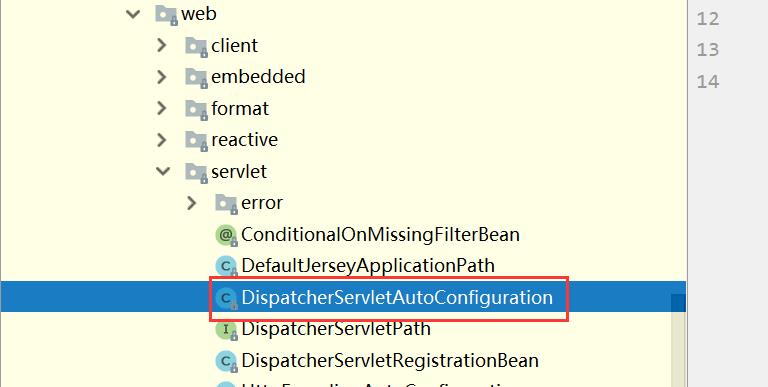
xxxxAutoConfiguration:帮我们给容器中自动配置组件;
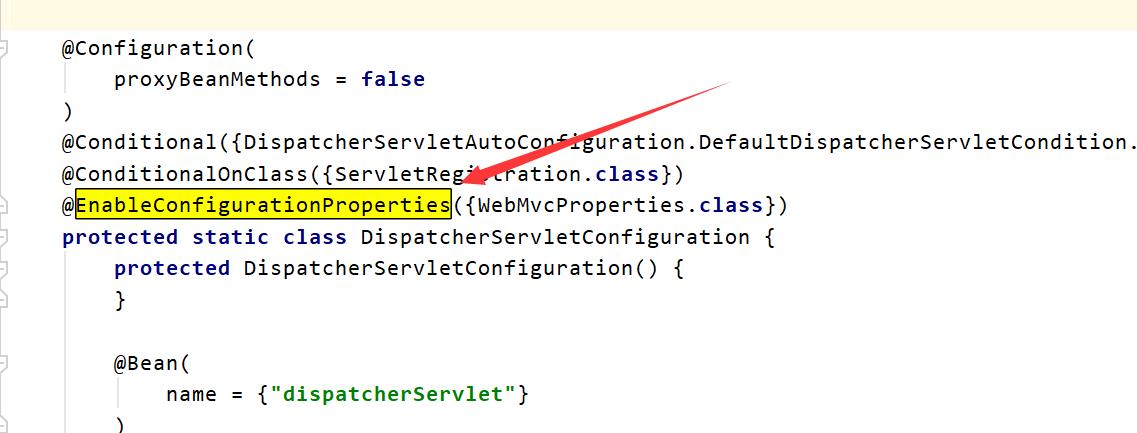
把SpringMVC的配置绑定到配置类
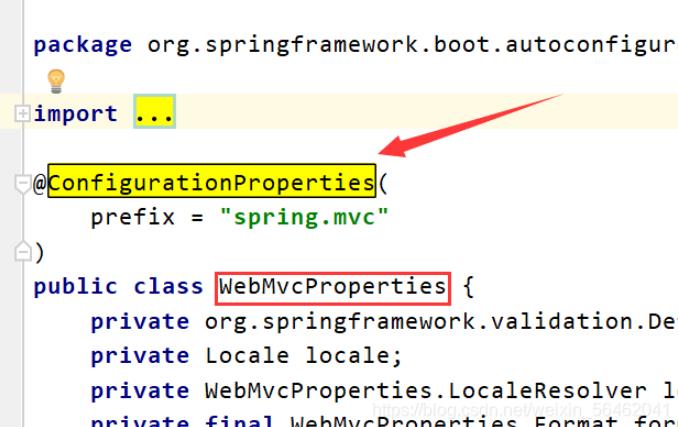
xxxxProperties:配置类来封装配置文件的内容;
二、RestfulCRUD实验
1.默认访问首页
//所有的WebMvcConfigurerAdapter组件都会一起起作用
@Bean //将组件注册在容器
public WebMvcConfigurerAdapter webMvcConfigurerAdapter(){
WebMvcConfigurerAdapter adapter = new WebMvcConfigurerAdapter() {
@Override
public void addViewControllers(ViewControllerRegistry registry) {
registry.addViewController("/").setViewName("login");
registry.addViewController("/index.html").setViewName("login");
}
};
return adapter;
}
}
2.国际化
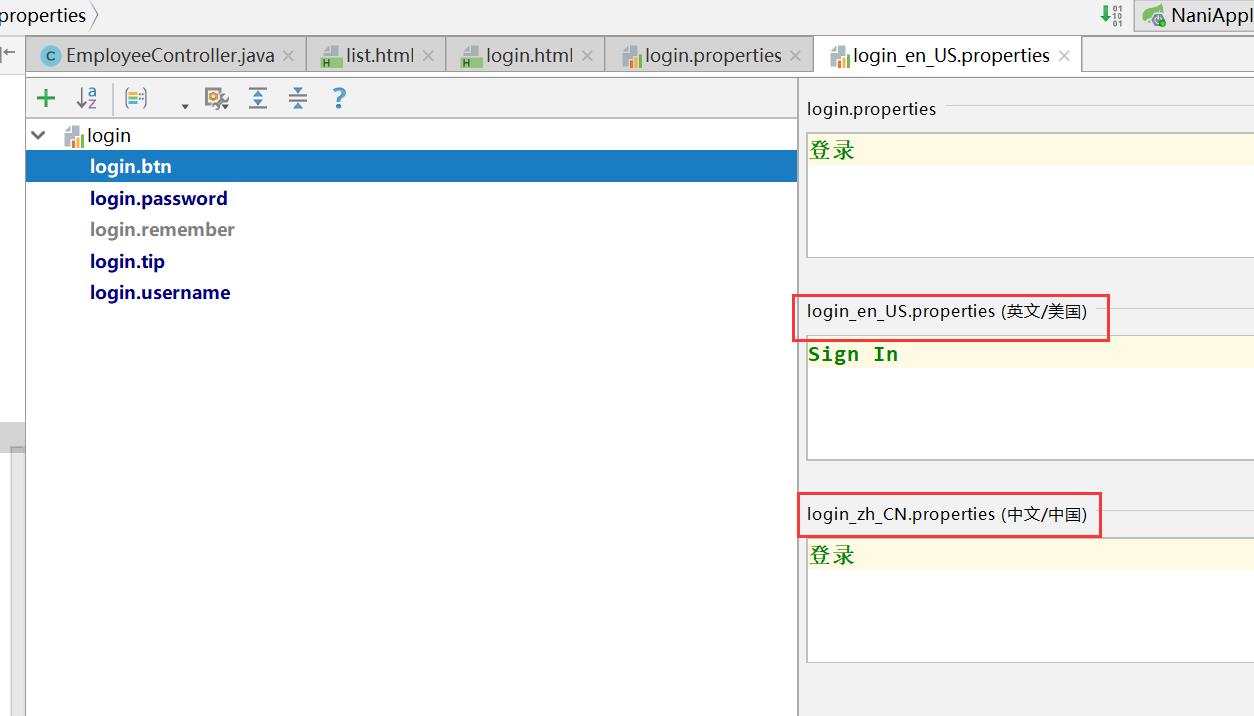
- 编写国际化配置文件;
- 使用ResourceBundleMessageSource管理国际化资源文件
- 在页面使用fmt:message取出国际化内容

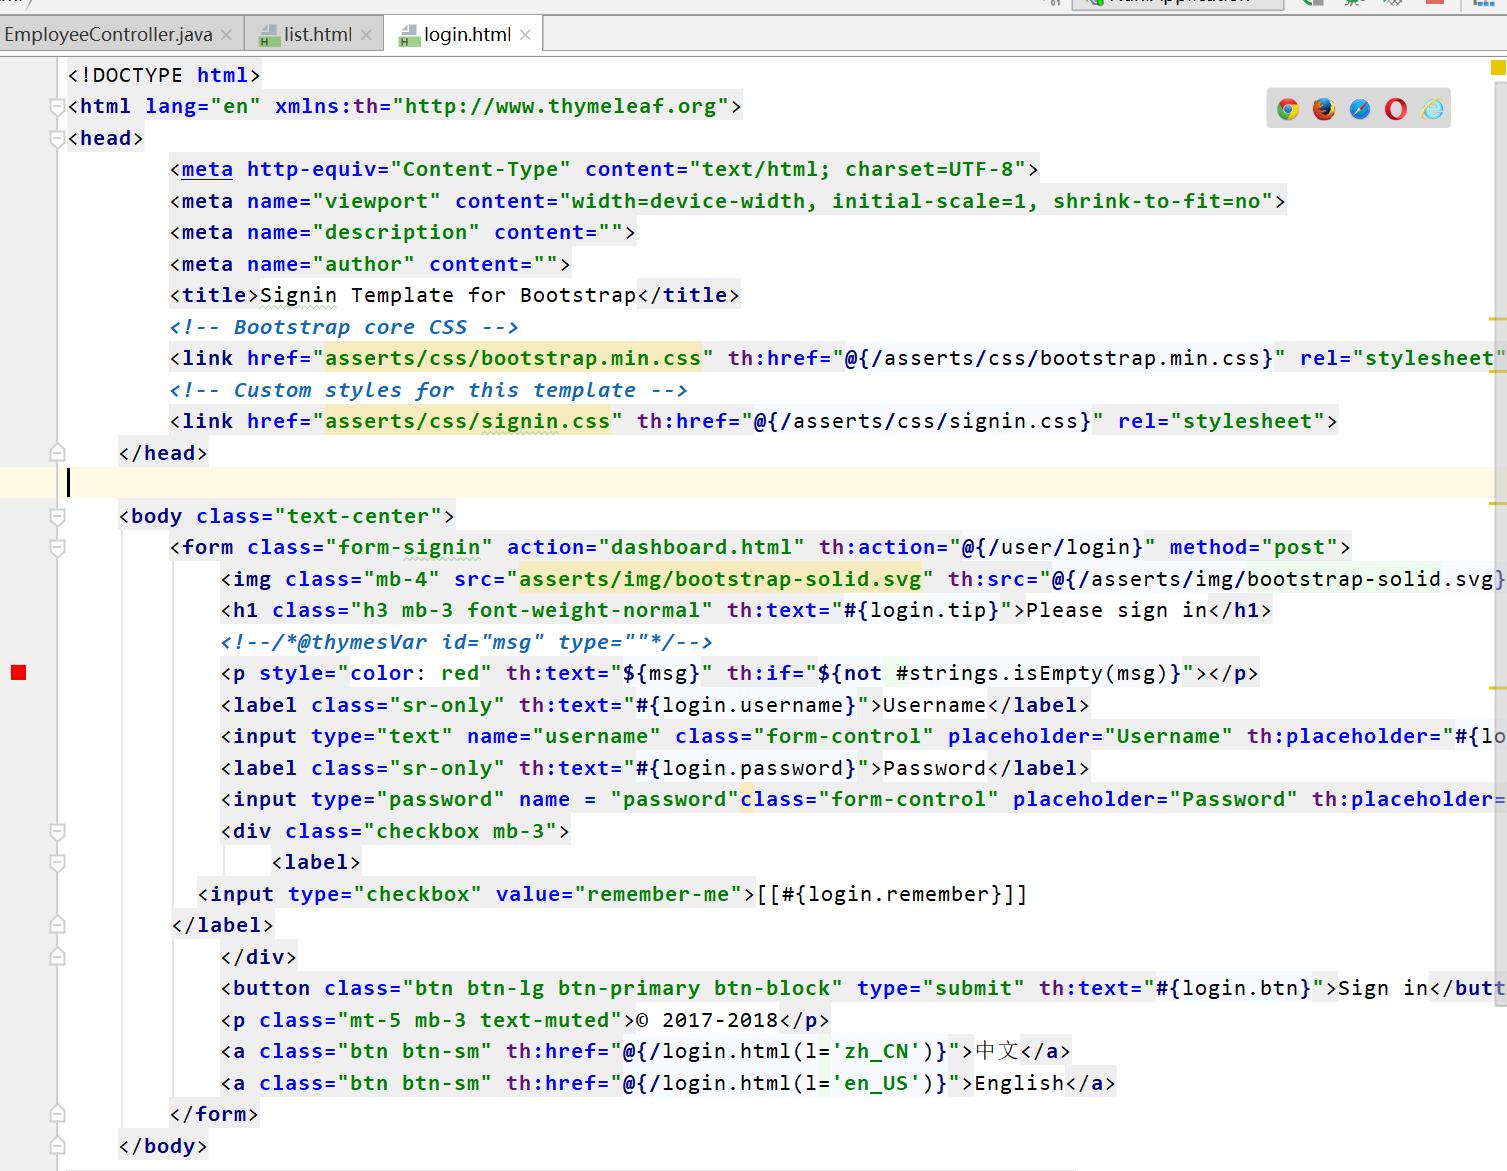
<a class="btn btn-sm" th:href="@{/login.html(l='zh_CN')}">中文</a>
<a class="btn btn-sm" th:href="@{/login.html(l='en_US')}">English</a>
<label class="sr-only" th:text="#{login.username}">Username</label>
<input type="text" name="username" class="form-control" placeholder="Username" th:placeholder="#{login.username}" required="" autofocus="">
<label class="sr-only" th:text="#{login.password}">Password</label>
<input type="password" name = "password"class="form-control" placeholder="Password" th:placeholder="#{login.password}" required="">
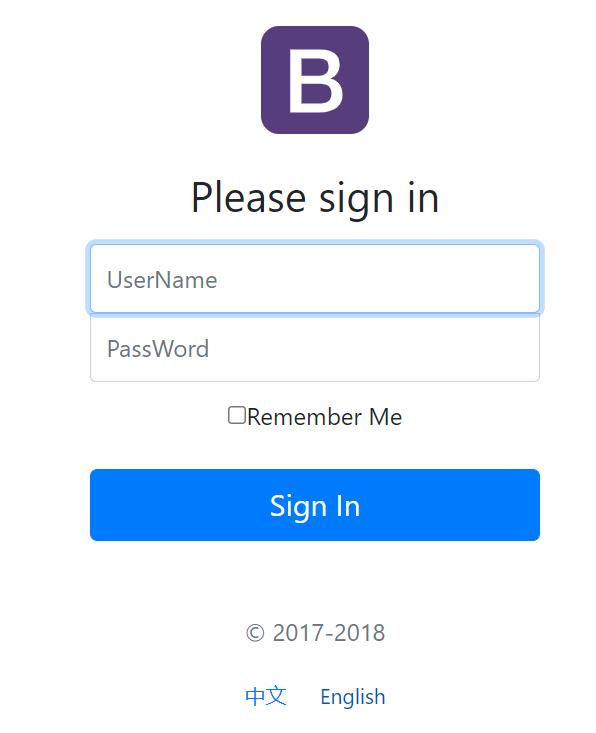
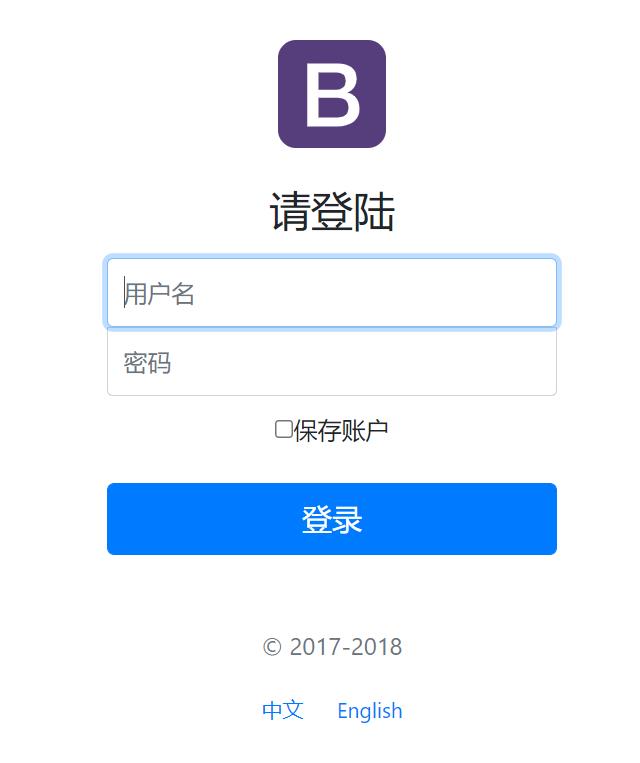
3.链接切换页面语言
 @Override
    public Locale resolveLocale(HttpServletRequest request) {
        String l = request.getParameter("l");
        Locale locale = Locale.getDefault();
        if(!StringUtils.isEmpty(l)){
            String[] split = l.split("_");
            locale = new Locale(split[0],split[1]);
        }
        return locale;
    }

    @Override
    public void setLocale(HttpServletRequest request, HttpServletResponse response, Locale locale) {

    }

    @Bean
    public LocaleResolver localeResolver(){
        return new MyLocaleResolver();
    }
4.CRUD-员工列表
4.1实验要求:
1. RestfulCRUD
CRUD满足Rest风格;
2. Uri格式
URI: /资源名称/资源标识 HTTP请求方式区分对资源CRUD操作
3. Restful风格
| 普通CRUD(uri来区分操作) | RestfulCRUD | |
|---|---|---|
| 查询 | getEmp | emp—GET |
| 添加 | addEmp?xxx | emp—POST |
| 修改 | updateEmp?id=xxx&xxx=xx | emp/{id}—PUT |
| 删除 | deleteEmp?id=1 | emp/{id}—DELETE |
4.2员工列表:
1.thymeleaf公共页面元素抽取
- 抽取公共片段
<div th:fragment="copy">
© 2011 The Good Thymes Virtual Grocery
</div>
- 引入公共片段
<div th:insert="~{footer :: copy}"></div>
~{templatename::selector}:模板名::选择器
~{templatename::fragmentname}:模板名::片段名
- 默认效果:
insert的公共片段在div标签中 如果使用th:insert等属性进行引入,
可以不用写~{}:
行内写法可以加上:[[~{}]];[(~{})];
2.三种引入公共片段的th属性:
th:insert:将公共片段整个插入到声明引入的元素中
th:replace:将声明引入的元素替换为公共片段
th:include:将被引入的片段的内容包含进这个标签中
三、CRUD-员工修改
1.控制器实现:
import ~
@Controller
public class EmployeeController {
    @Autowired
    EmployeeDao employeeDao;

    @Autowired
    DepartmentDao departmentDao;

    //查询所有员工返回列表页面
    @GetMapping("/emps")
    public String  list(Model model){
        Collection<Employee> employees = employeeDao.getAll();

        //放在请求域中
        model.addAttribute("emps",employees);
        // thymeleaf默认就会拼串
        // classpath:/templates/xxxx.html
        return "emp/list";
    }

    //来到员工添加页面
    @GetMapping("/emp")
    public String toAddPage(Model model){
        //来到添加页面,查出所有的部门,在页面显示
        Collection<Department> departments = departmentDao.getDepartments();
        model.addAttribute("depts",departments);
        return "emp/add";
    }

    //员工添加
    //SpringMVC自动将请求参数和入参对象的属性进行一一绑定;要求请求参数的名字和javaBean入参的对象里面的属性名是一样的
    @PostMapping("/emp")
    public String addEmp(Employee employee){
        //来到员工列表页面

        System.out.println("保存的员工信息:"+employee);
        //保存员工
        employeeDao.save(employee);
        // redirect: 表示重定向到一个地址  /代表当前项目路径
        // forward: 表示转发到一个地址
        return "redirect:/emps";
    }

    //来到修改页面,查出当前员工,在页面回显
    @GetMapping("/emp/{id}")
    public String toEditPage(@PathVariable("id") Integer id,Model model){
        Employee employee = employeeDao.get(id);
        model.addAttribute("emp",employee);

        //页面要显示所有的部门列表
        Collection<Department> departments = departmentDao.getDepartments();
        model.addAttribute("depts",departments);
        //回到修改页面(add是一个修改添加二合一的页面);
        return "emp/add";
    }

    //员工修改;需要提交员工id;
    @PutMapping("/emp")
    public String updateEmployee(Employee employee){
        System.out.println("修改的员工数据:"+employee);
        employeeDao.save(employee);
        return "redirect:/emps";
    }

    //员工删除
    @DeleteMapping("/emp/{id}")
    public String deleteEmployee(@PathVariable("id") Integer id){
        employeeDao.delete(id);
        return "redirect:/emps";
    }
}
<a class="btn btn-sm btn-primary" th:href="@{/emp/}+${emp.id}">编辑</a>
2.员工编辑与删除

<thead>
					<tr>
						<th>ID</th>
						<th>lastName</th>
						<th>E-mail</th>
						<th>Gender</th>
						<th>Department</th>
						<th>Birthday</th>
						<th>Operation</th>
					</tr>
						</thead>
						<tbody>
							<tr th:each="emp: ${emps}" >
				<td th:text="${emp.id}"></td>
				<td>[[${emp.lastName}]]</td>
				<td th:text="${emp.email}"></td>
				<td th:text="${emp.gender }== 0?'女':'男'"></td>
			<td th:text="${emp.department.departmentName}"></td>
			<td th:text="${#dates.format(emp.birth,'yyyy-MM-dd HH:mm')}"></td>
			<td>
			<a class="btn btn-sm btn-primary" th:href="@{/emp/}+${emp.id}">编辑</a>
           <button  class="btn btn-sm btn-danger deleteBtn" th:attr="del_uri=@{/emp/}+${emp.id}">删除</button>
							</td>
			</tr>
</tbody>
四、错误处理机制
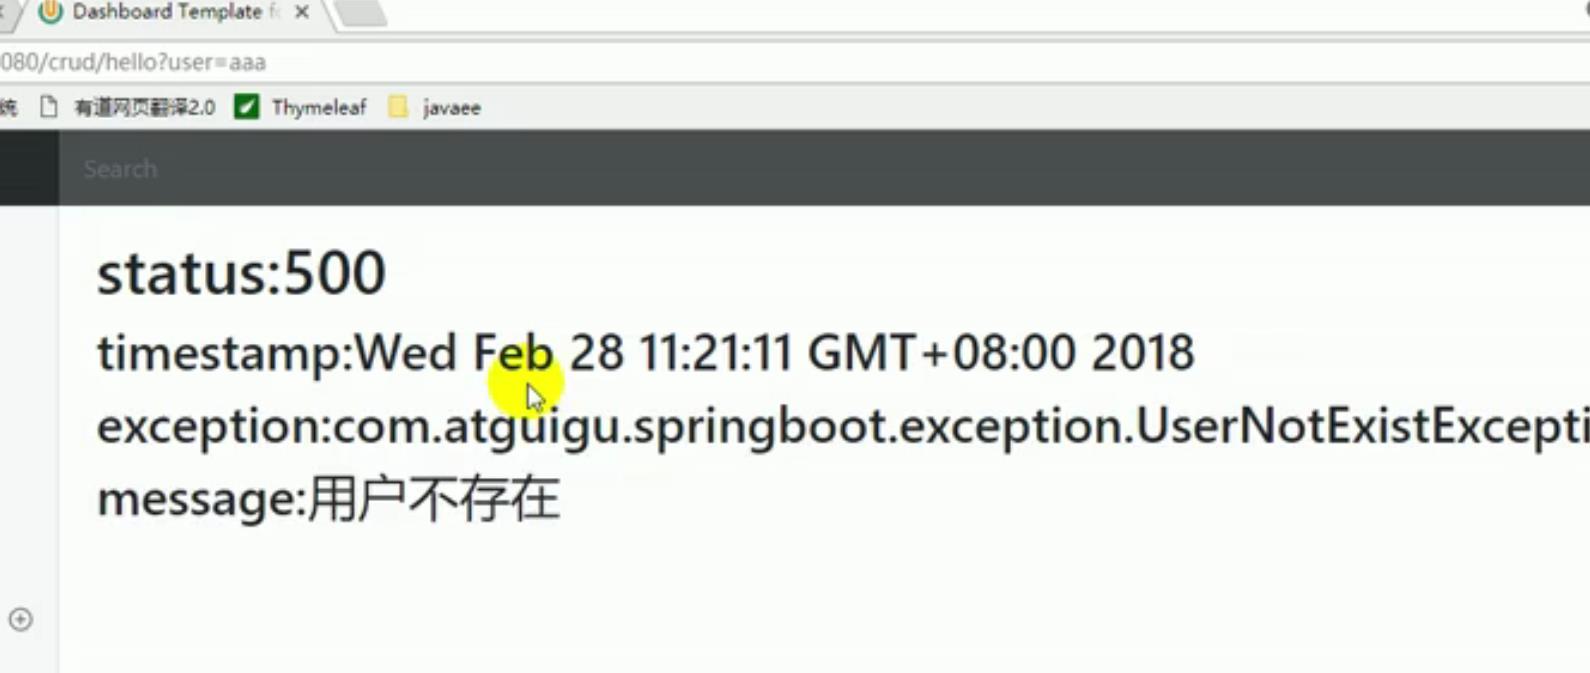
当我们的页面访问出错时,浏览器会默认跳转一个错误页面,例如404、500等,这个页面中,有时间,也有错误类型等信息
那为了更好的用户体验,我们是不是可以自定义一个错误友好界面?
1.原理
参照ErrorMvcAutoConfiguration;错误处理的自动配置;
1.1.ErrorPageCustomizer:
系统出现错误以后来到error请求进行处理;
@Value("${error.path:/error}")
private String path = "/error";(web.xml注册的错误页面规则)
1.2步骤
- 当系统出现4xx或者5xx之类的错误;
- ErrorPageCustomizer生效;(定制错误的响应规则)
- 来到/error请求;
- 被BasicErrorController处理;
- 跳转响应页面;(页面由DefaultErrorViewResolver解析得到)
2.自定义
1如何定制错误的页面;
1.1有模板引擎的情况下;
-
error/
状态码; 发生此状态码的错误就会来到 对应的页面
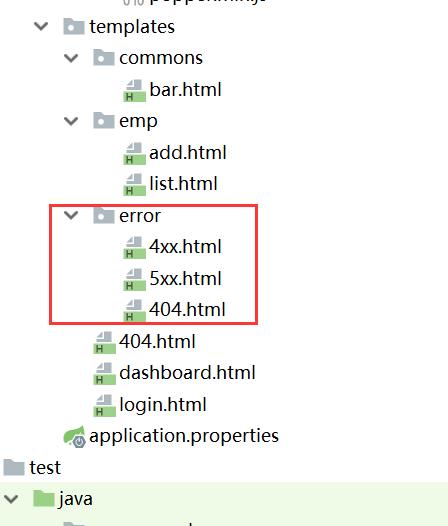
【将错误页面命名为 错误状态码.html 放在模板引擎文件夹里面的error文件夹下】 -
我们可以使用
4xx和5xx作为错误页面的文件名来匹配这种类型的所有错误,精确优先(优先寻找精确的状态码.html); -
页面能获取的信息;
| 名称 | 含义 |
|---|---|
| timestamp | 时间戳 |
| status | 状态码 |
| error | 错误提示 |
| exception | 异常对象 |
| message | 异常消息 |
| errors | JSR303数据校验的错误都在这里 |
- 没有模板引擎(模板引擎找不到这个错误页面),静态资源文件夹下找;
- 以上都没有错误页面,就是默认来到
SpringBoot默认的错误提示页面;
2 自定义异常处理&返回定制json数据
@ControllerAdvice
public class MyExceptionHandler {
@ResponseBody
@ExceptionHandler(UserNotExistException.class)
public Map<String,Object> handleException(Exception e){
Map<String,Object> map = new HashMap<>();
map.put("code","user.notexist");
map.put("message",e.getMessage());
return map;
}
}
//缺点:没有自适应效果… 浏览器与客户端返回的都是Jason数据
五、配置嵌入式Servlet容器
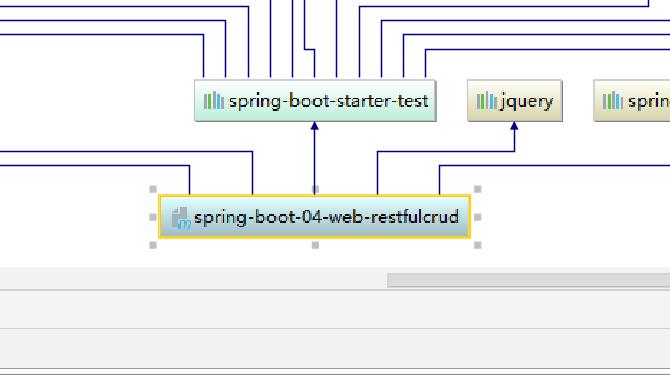
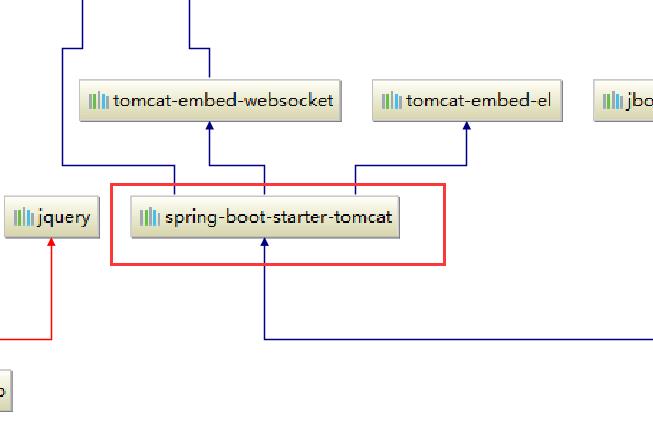
SpringBoot默认使用Tomcat作为嵌入式的Servlet容器;
1.自定义和修改Servlet容器的相关配置
1.1修改和server有关的配置
server.port=8081
server.context‐path=/crud
server.tomcat.uri‐encoding=UTF‐8
//通用的Servlet容器设置
server.xxx
//Tomcat的设置
server.tomcat.xxx
2.2编写一个嵌入式的Servlet容器的定制器
EmbeddedServletContainerCustomizer:修改Servlet容器的配置

2.2.1xxxCustomizer
在SpringBoot中会有很多的类似xxxCustomizer帮助我们进行自定义配置
六、注册Servlet三大组件
1.Servlet、Filter、Listener
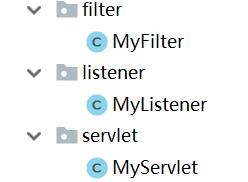
1.1ServletRegistrationBean

1.2FilterRegistrationBean

1.3ServletListenerRegistrationBean

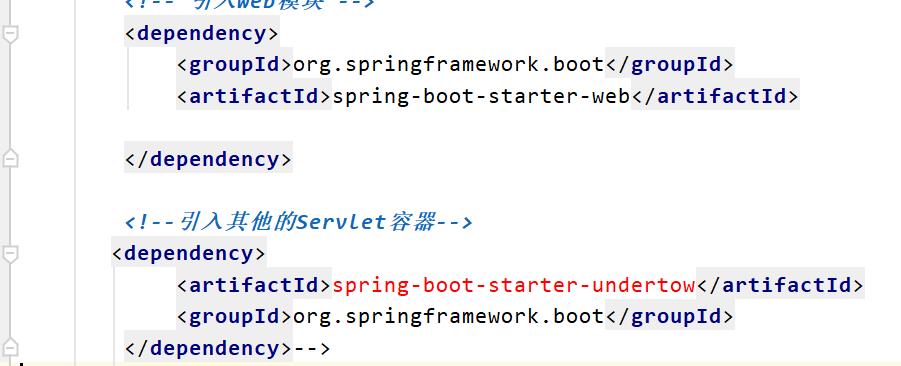
2.切换serverlet容器
2.1切换至 undertow、jetty,引入如下依赖:
以上是关于spring boot 2 - webrestfulCrud实验错误处理机制配置嵌入式Servlet容器的主要内容,如果未能解决你的问题,请参考以下文章
Spring Boot:管理的版本是 1.3.2.RELEASE 工件在 org.springframework.boot:spring-boot-dependencies:1.3.2.RELEASE
spring boot框架学习2-spring boot核心