Java SSM 项目实战 day07 SpringSecurity源码分析
Posted 蓝盒子bluebox
tags:
篇首语:本文由小常识网(cha138.com)小编为大家整理,主要介绍了Java SSM 项目实战 day07 SpringSecurity源码分析相关的知识,希望对你有一定的参考价值。
1、在web.xml文件当中配置
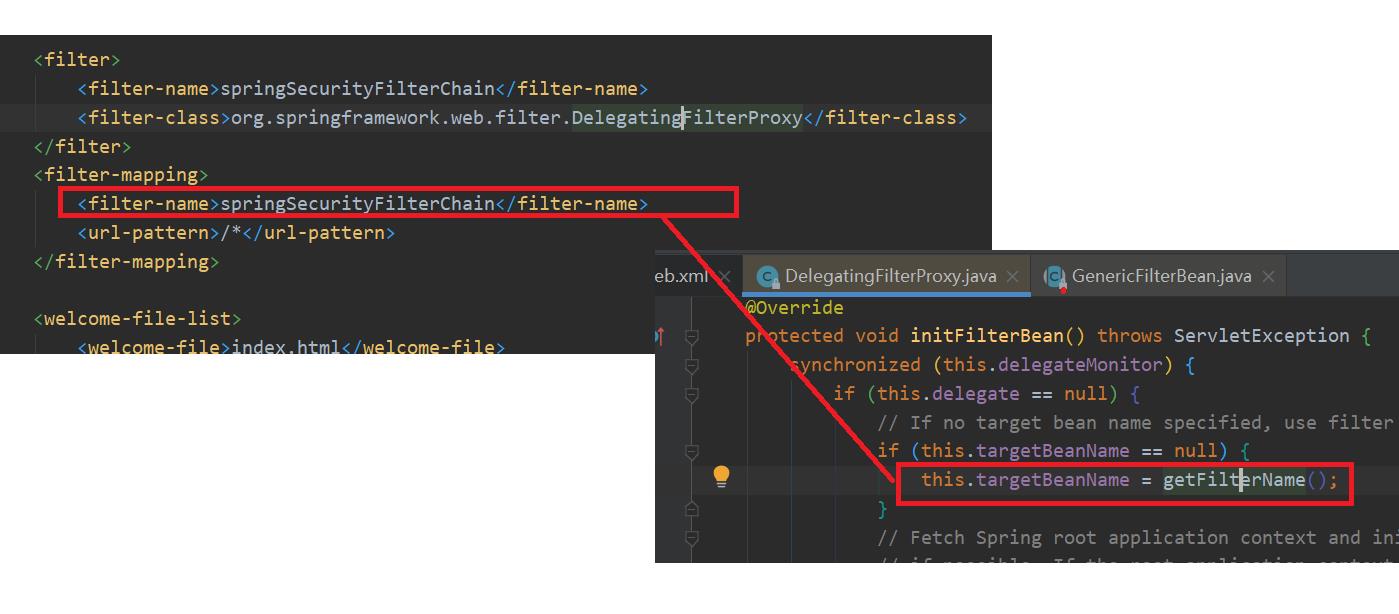
问题:为什么DelegatingFilterProxy的filter-name必须是springSecurityFilterChain?
<filter>
	<filter-name>springSecurityFilterChain</filter-name>
	<filter-class>org.springframework.web.filter.DelegatingFilterProxy</filter-class></filter>
<fi1ter-mapping>
	<filter-name>springSecurityFilterChain</filter-name>
	<ur1-pattern>/*/ur1-pattern>
</filter-mapping>

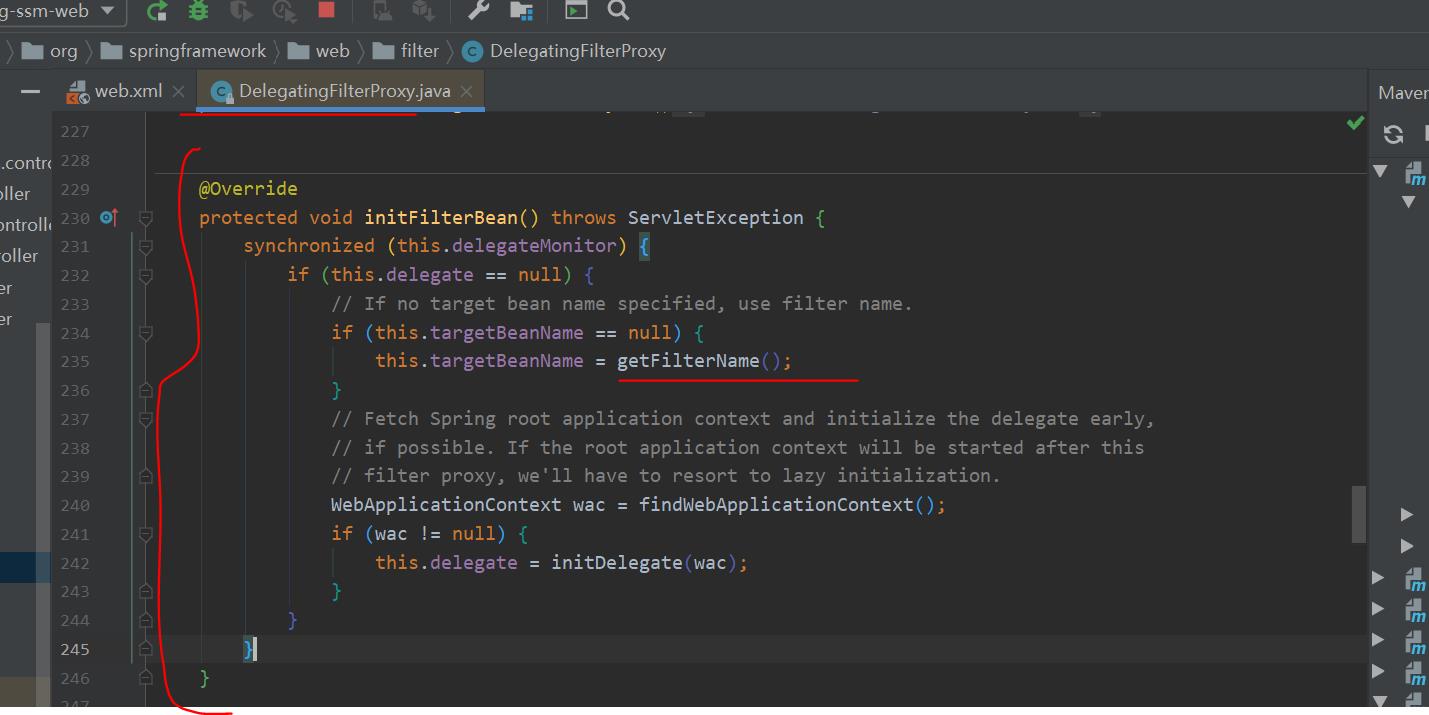
DelegatingFilterProxy并不是真正的Filter,在其initFilterBean方法中会从WebApplicationContext根据delegate来获取到
protected void initFilterBean() throws ServletException {
		synchronized (this.delegateMonitor) {
			if (this.delegate == null) {
				// If no target bean name specified, use filter name.
				if (this.targetBeanName == null) {
					this.targetBeanName = getFilterName();
				}
				// Fetch Spring root application context and initialize the delegate early,
				// if possible. If the root application context will be started after this
				// filter proxy, we'll have to resort to lazy initialization.
				WebApplicationContext wac = findWebApplicationContext();
				if (wac != null) {
					this.delegate = initDelegate(wac);
				}
			}
		}
	}


在上这代码中this.targetBeanName=getFilterName()就是获取名称叫做springSecurityFilterChain
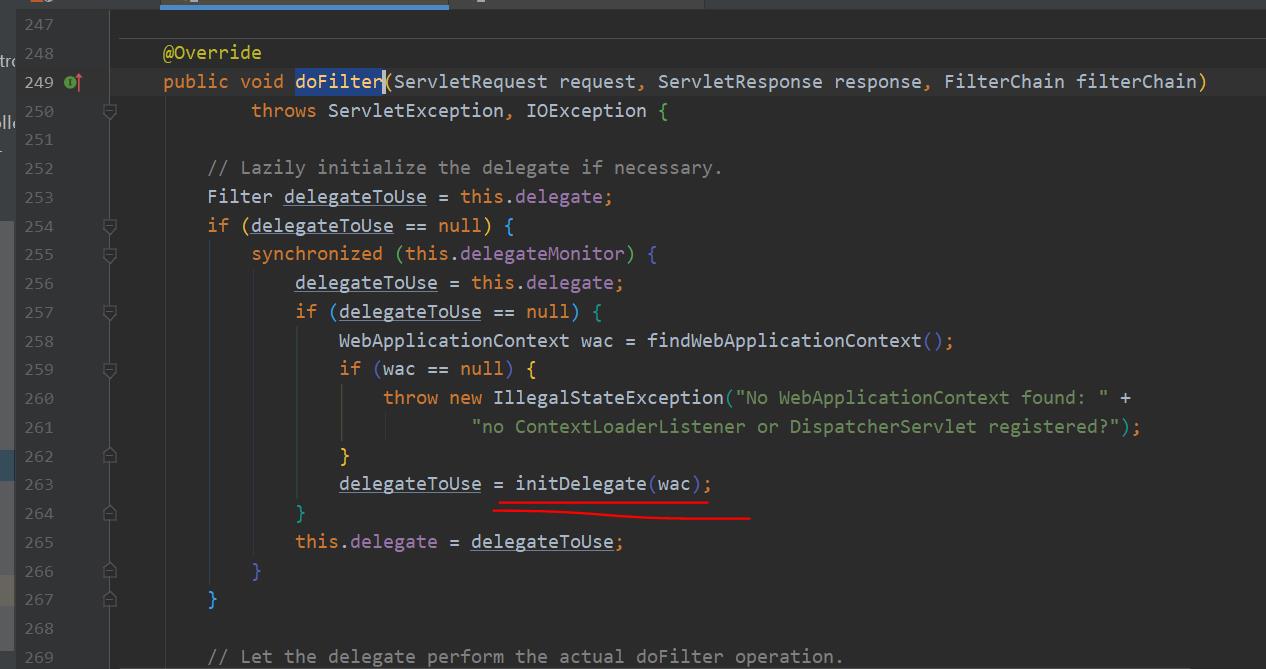
通过在doFilter就去中我们会发现真正干活的其实是delegate这个Filter
而delegate其实就是FilterChainProxy

	@Override
	public void doFilter(ServletRequest request, ServletResponse response, FilterChain filterChain)
			throws ServletException, IOException {

		// Lazily initialize the delegate if necessary.
		Filter delegateToUse = this.delegate;
		if (delegateToUse == null) {
			synchronized (this.delegateMonitor) {
				delegateToUse = this.delegate;
				if (delegateToUse == null) {
					WebApplicationContext wac = findWebApplicationContext();
					if (wac == null) {
						throw new IllegalStateException("No WebApplicationContext found: " +
								"no ContextLoaderListener or DispatcherServlet registered?");
					}
					delegateToUse = initDelegate(wac);
				}
				this.delegate = delegateToUse;
			}
		}
FilterChainProxy是spring在解析配置文件时装配到上下文中,并且beanName为springSecurityFilterChain,
因此在web.xml中需要配置filter-name为springSecurityFilterChain
2.在spring-security.xml文件中配置
在配置文件中我们主要使用标签来过多成配置
<security:http auto-config="true" use-expressions="false">
        <!-- 配置具体的拦截的规则 pattern="请求路径的规则" access="访问系统的人,必须有ROLE_USER的角色" -->
        <security:intercept-url pattern="/**" access="ROLE_USER,ROLE_ADMIN"/>
        <!-- 定义跳转的具体的页面 -->
        <security:form-login
                login-page="/login.jsp"
                login-processing-url="/login.do"
                default-target-url="/index.jsp"
                authentication-failure-url="/failer.jsp"
                authentication-success-forward-url="/pages/main.jsp"
        />
        <!-- 关闭跨域请求 -->
        <security:csrf disabled="true"/>
        <!-- 退出 -->
        <security:logout invalidate-session="true" logout-url="/logout.do" logout-success-url="/login.jsp" />
    </security:http>
http标签是自定义标签,我们可以在spring-security-config包中查看
http://www.springframework.org/schema/security=org.springframework.security.config.SecurityName spaceHandler
继续查看SecurityNamespaceHandler类,在其init方法

继续查看SecurityNamespaceHandler类,在其init方法
public void init()
{
	loadParsers();
}
在loadParsers()方法中,指定由HttpSecurityBeanDefinitionParser进行解析
parsers.put(Elements.HTTP, new HttpSecurityBeanDefinitionParser());
在HttpSecurityBeanDefinitionParser完成具体解析的parse方法中
registerFilterChainProxyIfNecessary(pc, pc.extractSource(element));
这里就是注册了名为springSecurityFilterChain的filterChainProxy类
接下我们在看一下注册一系列Filter的地方createFilterChain,在这个方法中我们重点关注
AuthenticationConfigBuilder authBldr =
new AuthenticationConfigBuilder(element, forceAutoConfig, pc, httpBldr.getSessionCreationPolicy(),
	httpBldr.getRequestCache(), authenticationManager, httpBldr.getSessionStrategy(),
	portMapper, portResolver, httpBldr.getCsrfLogoutHandler());
我们可以查看AuthenticationConfigBuilder创建代码
public AuthenticationConfigBuilder(Element element, boolean forceAutoConfig, ParserContext pc, SessionCreationPolicy sessionPolicy, BeanReference requestCache, BeanReference authenticationManager, BeanReference sessionStrategy, BeanReference portMapper, BeanReference portResolver, BeanMetadataElement csrfLogoutHandler)
{
	this.httpElt = element; this.pc = pc; this.requestCache = requestCache; autoConfig = forceAutoConfig | "true".equals(element.getAttribute(ATT_AUTO_CONFIG));

	this.allowSessionCreation = sessionPolicy != SessionCreationPolicy.NEVER && sessionPolicy != SessionCreationPolicy.STATELESS;

	 this.portMapper = portMapper;
	 this.portResolver = portResolver;
	 this.csrfLogoutHandler = csrfLogoutHandler;

	 createAnonymousFilter();
	 createRememberMeFilter(authenticationManager);
	 createBasicFilter(authenticationManager);
	 createFormLoginFilter(sessionStrategy, authenticationManager);

	 createOpenIDLoginFilter(sessionStrategy, authenticationManager);
	 createX509Filter(authenticationManager);
	 createJeeFilter(authenticationManager);
	 createLogoutFilter();
	 createLoginPageFilterIfNeeded();
	createUserDetailsServiceFactory();
	createExceptionTranslationFilter();
}
以上是关于Java SSM 项目实战 day07 SpringSecurity源码分析的主要内容,如果未能解决你的问题,请参考以下文章