SpringMvc入门
Posted 大忽悠爱忽悠
tags:
篇首语:本文由小常识网(cha138.com)小编为大家整理,主要介绍了SpringMvc入门相关的知识,希望对你有一定的参考价值。
SpringMvc入门
- 概述
- SpringMVC思想是一个前段控制器能拦截所有请求,并智能派发
- 这个前段控制器是一个servlet,应该在web.xml中配置这个servlet来拦截所有请求
- 快速入门
- 运行流程分析
- @RequestMapping分析
- 如果不在web.xml中指定配置文件位置的解决办法
- url-pattern的配置
- 使用@RequestMapping映射请求
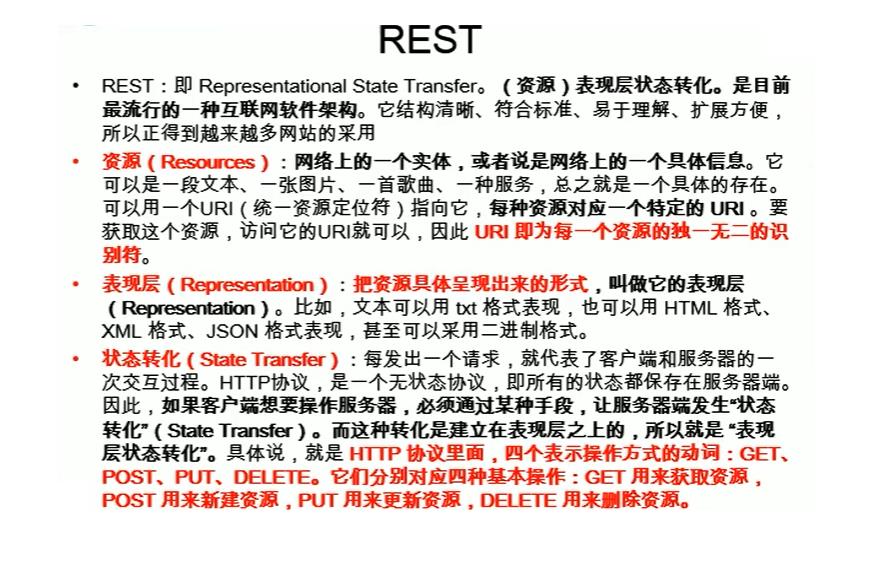
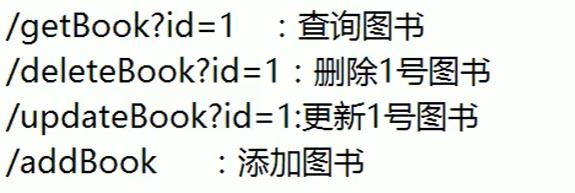
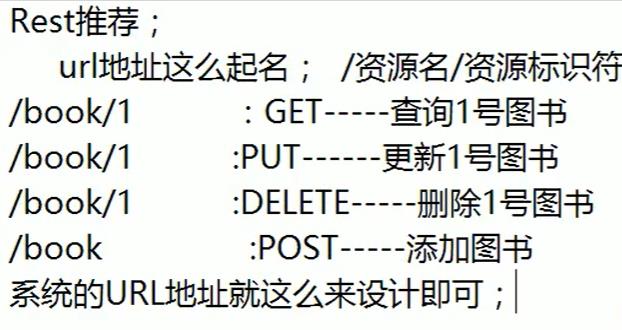
- REST风格的URL地址约束
- Rest风格增删改查搭建
- 获取请求参数
概述

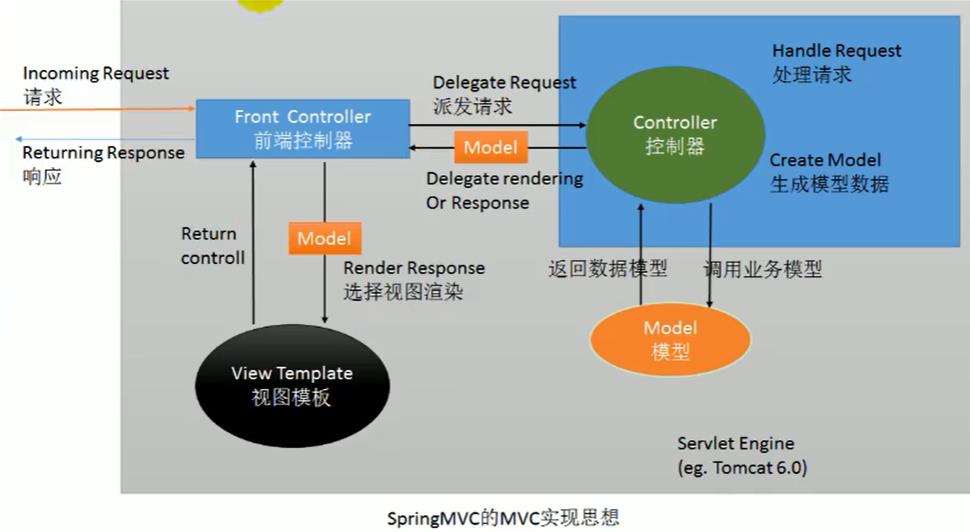
Spring的mvc实现思想
POJO
简单的Java对象(Plain Ordinary Java Objects)实际就是普通JavaBeans
SpringMVC思想是一个前段控制器能拦截所有请求,并智能派发
这个前段控制器是一个servlet,应该在web.xml中配置这个servlet来拦截所有请求
快速入门
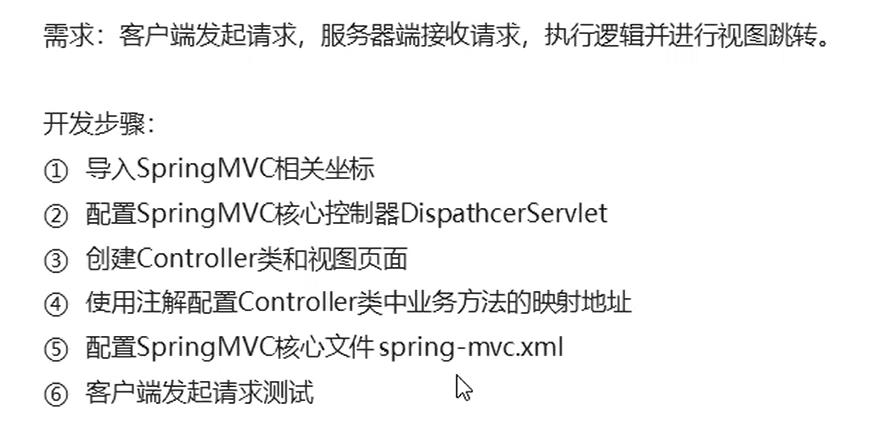
1.导入相关坐标
SpringMvc是SpringWeb模块,所有模块的运行都是依赖于核心模块(IOC模块)
核心模块相关坐标
spring坐标:
<!--导入spring的坐标-->
    <dependency>
      <groupId>org.springframework</groupId>
      <artifactId>spring-context</artifactId>
      <version>5.0.5.RELEASE</version>
    </dependency>
SpringWeb模块相关坐标
spring-web坐标:
    <dependency>
      <groupId>org.springframework</groupId>
      <artifactId>spring-web</artifactId>
      <version>5.2.9.RELEASE</version>
    </dependency>
spring-webmvc坐标:
    <dependency>
      <groupId>org.springframework</groupId>
      <artifactId>spring-webmvc</artifactId>
      <version>5.0.15.RELEASE</version>
    </dependency>
aop模块相关坐标
    <!--导入aspectj的坐标-->
    <dependency>
      <groupId>org.aspectj</groupId>
      <artifactId>aspectjweaver</artifactId>
      <version>1.8.4</version>
    </dependency>
2.配置springmvc的前段控制器—web.xml
<!--SpringMVC相关配置-->

  <!--配置springmcv的前段控制器-->
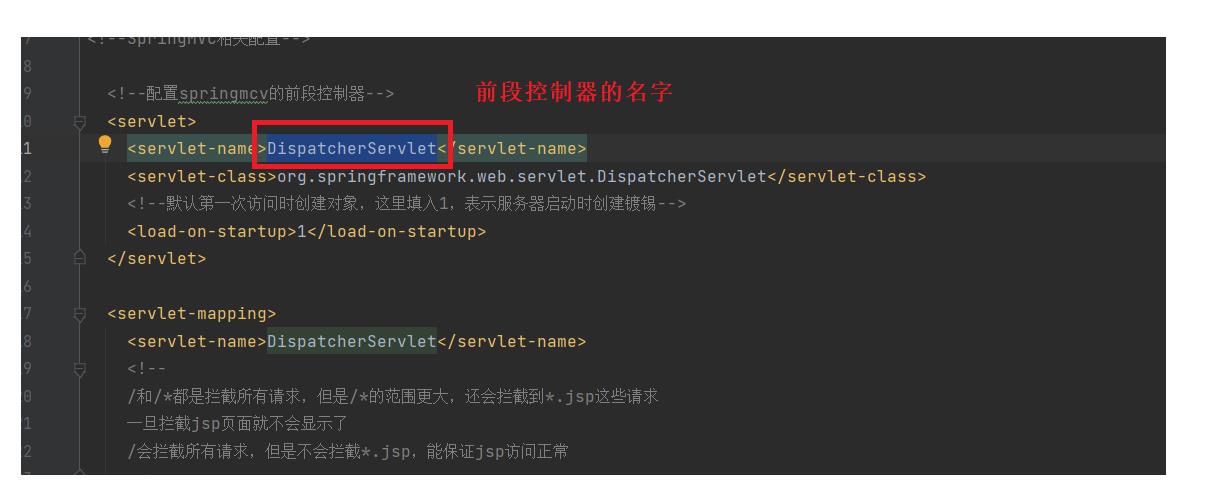
  <servlet>
    <servlet-name>DispatcherServlet</servlet-name>
    <servlet-class>org.springframework.web.servlet.DispatcherServlet</servlet-class>
    <!--SpringMvc.xml是前段控制器需要使用-->
    <!--sevlet的初始化参数-->
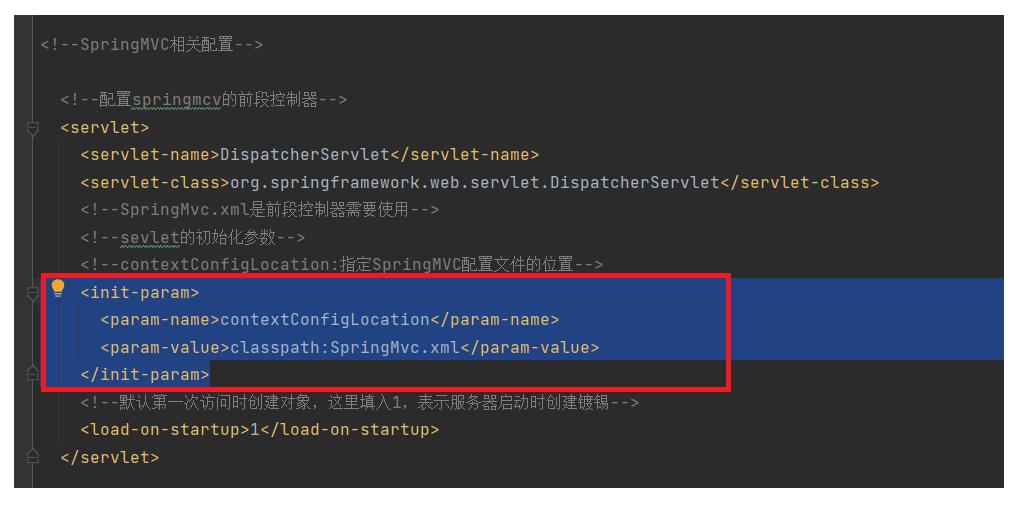
   <!--contextConfigLocation:指定SpringMVC配置文件的位置-->
    <init-param>
      <param-name>contextConfigLocation</param-name>
      <param-value>classpath:SpringMVC.xml</param-value>
    </init-param>
    <!--默认第一次访问时创建对象,这里填入1,表示服务器启动时创建镀锡-->
    <load-on-startup>1</load-on-startup>
  </servlet>

  <servlet-mapping>
    <servlet-name>DispatcherServlet</servlet-name>
    <!--
    /和/*都是拦截所有请求,但是/*的范围更大,还会拦截到*.jsp这些请求
    一旦拦截jsp页面就不会显示了
    /会拦截所有请求,但是不会拦截*.jsp,能保证jsp访问正常
    -->
    <url-pattern>/</url-pattern>
  </servlet-mapping>
3.配置SpringMvc.xml----组件扫描(注解配置)
<?xml version="1.0" encoding="UTF-8"?>
<beans xmlns="http://www.springframework.org/schema/beans"
       xmlns:context="http://www.springframework.org/schema/context"
       xmlns:xsi="http://www.w3.org/2001/XMLSchema-instance"
       xsi:schemaLocation="http://www.springframework.org/schema/beans http://www.springframework.org/schema/beans/spring-beans.xsd
            http://www.springframework.org/schema/context http://www.springframework.org/schema/context/spring-context.xsd">

    <!--context的组件扫描,需要引入context命名空间-->
    <!--组件扫描-->
    <context:component-scan base-package="com.SpringMvc"/>
</beans>
5.在web.xml中配置监听器,通过监听器的初始化方法,来加载applicationContext.xml配置文件
     <!--全局初始化参数-->
    <context-param>
        <param-name>contextConfigLocation</param-name>
        <param-value>classpath:applicationContext.xml</param-value>
    </context-param>
    <!--配置监听器-->
    <listener>
        <listener-class>org.springframework.web.context.ContextLoaderListener</listener-class>
    </listener>
7.userController类
/*
* 1.告诉SpringMvc这是一个处理器,可以处理请求
* @Controller:标识哪个组件是控制器,能够区分其他组件,这个注解不能乱加
* */
@Controller
public class userController {
    /*
    * /代表从当前项目开始
    * 处理当前项目下的hello请求
    * 请求映射
    * */
    @RequestMapping("/hello")
    public String show()
    {
        System.out.println("收到请求");
        return "Success.jsp";
    }

}
8.success.jsp
<%@ page contentType="text/html;charset=UTF-8" language="java" %>
<html>
<head>
    <title>Success</title>
</head>
<body>
<h1>Success!!!</h1>
</body>
</html>
9.index.jsp
<%@ page contentType="text/html;charset=UTF-8" language="java" %>
<html>
<head>
    <title>小朋友</title>
</head>
<body>
<h1>小朋友</h1>
<br>
<a href="hello">点击跳转页面</a>
</body>
</html>
10.配置视图解析器,帮助我们拼接页面地址
springmvc.xml:
    <!--视图解析器-->
    <bean class="org.springframework.web.servlet.view.InternalResourceViewResolver">
        <property name="prefix" value="/"/><!--前缀-->
        <property name="suffix" value=".jsp"/><!--后缀-->
    </bean>
/*
* 1.告诉SpringMvc这是一个处理器,可以处理请求
* @Controller:标识哪个组件是控制器
* */
@Controller
public class userController {
    /*
    * /代表从当前项目开始
    * 处理当前项目下的hello请求
    * 请求映射
    * */
    @RequestMapping("/hello")
    public String show()
    {
        System.out.println("收到请求");
        //视图解析器自动拼串
        //前缀+返回值+后缀
        return "Success";
    }
}
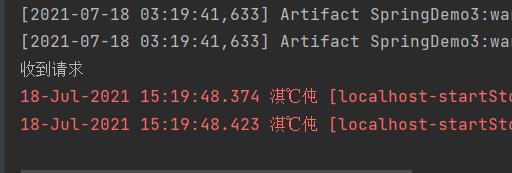
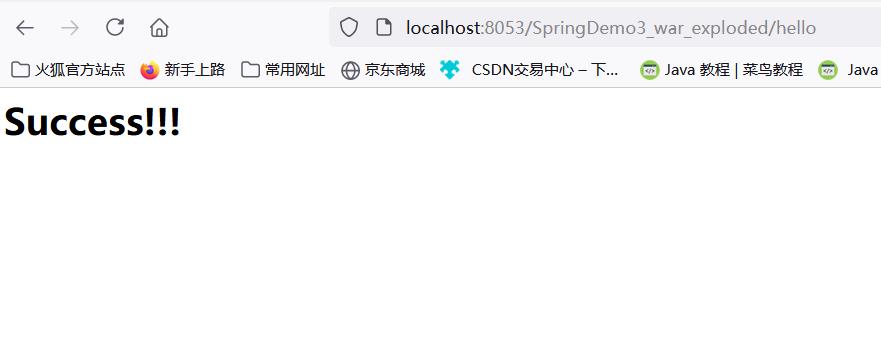
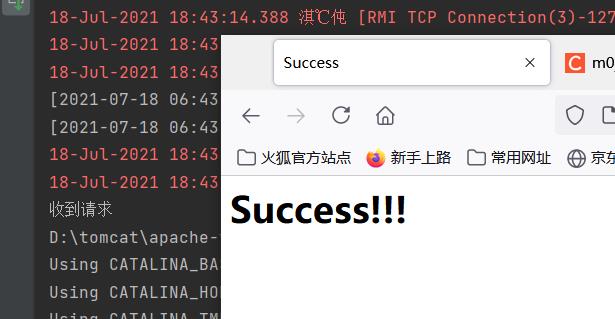
地址栏没变,说明这是一次转发操作
运行流程分析
1.客户端点击链接发送http://localhost:8080/springmvc/hello 请求
2.来到tomcat服务器
3.springmvc的前段控制器收到所有请求
4.查看请求地址和@RequestMapping标注的哪一个匹配,来找到到底使用哪个类的哪个方法来处理
5.前段控制器找到了目标处理器和目标方法,直接利用反射执行目标方法
6.方法执行完成以后,会有一个返回值,springmvc认为这个返回值就是要去的页面地址
7.拿到方法返回值以后,用视图解析器进行拼串得到完整的页面地址
8.拿到页面地址,前段控制器帮我妈转发到页面
@RequestMapping分析
作用:就是告诉SpringMvc这个方法用来处理什么请求
这里@RequestMapping("/hello")里面的/可以省略,即使省略了,也是默认从当前项目下开始,最好加上
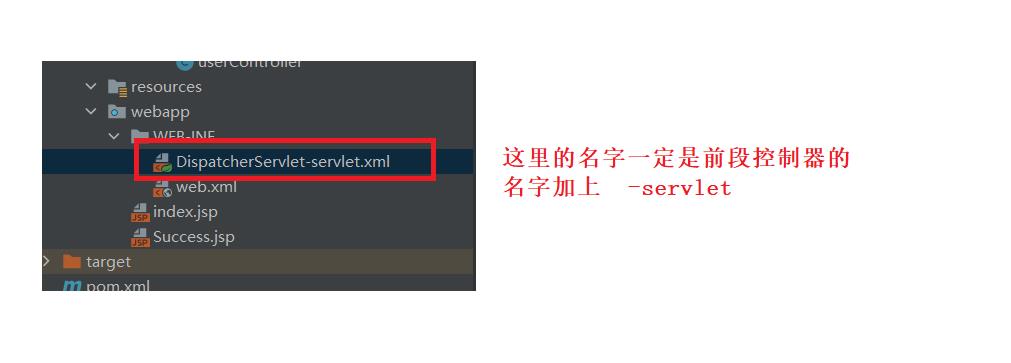
如果不在web.xml中指定配置文件位置的解决办法

url-pattern的配置
  <servlet-mapping>
    <servlet-name>DispatcherServlet</servlet-name>
    <!--
    /和/*都是拦截所有请求,但是/*的范围更大,还会拦截到*.jsp这些请求
    一旦拦截jsp页面就不会显示了
    /会拦截所有请求,但是不会拦截*.jsp,能保证jsp访问正常
    处理*.jsp是tomcat做的事情

DefaultServlet是tomcat中处理静态资源的
除了jsp和servlet外,剩下的都是静态资源
index.html:静态资源,tomcat会在服务器下找到这个资源并返回
我们前端控制器的/禁用了tomcat服务器中的DefaultServlet(相当于子类重写了父类的配置,那么就会隐藏父类的配置)
    1.服务器的大Web.xml中有一个DefaultServlet的url-pattern=/
    2.我们配置的前端控制器url-pattern=/
    静态资源会来到DefaultServlet(前端控制器)来看哪个方法的RequestMapping是这个index.html
    3.我们没有覆盖服务器中的JspServlet的配置
    4./*直接就是拦截所有请求,我们写/是为了迎合后来的Rest风格的URL地址
    -->
    <url-pattern>/</url-pattern>
  </servlet-mapping>
使用@RequestMapping映射请求
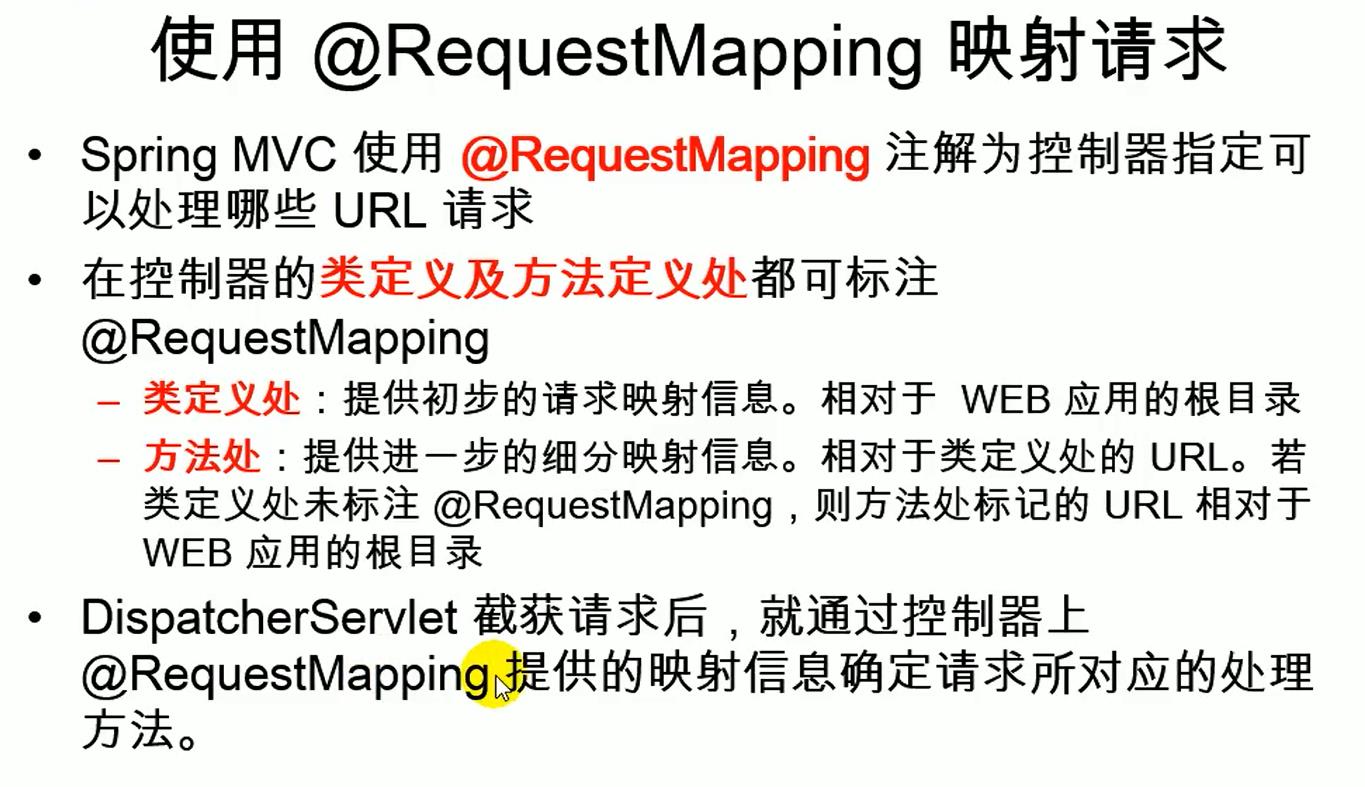
一个方法处理一个请求,不能两个方法处理一个请求,不然报错
类上加上注解,访问时的路径需要多加一层
/*
* 为当前类的所有的方法的请求地址指定了一个基准路径
* */
@Controller
@RequestMapping("/haha")
public class userController {
    /*
    * /代表从当前项目开始
    * 处理当前项目下的hello请求
    * 请求映射
    * */
    @RequestMapping("/hello")
    public String show()
    {
        System.out.println("收到请求");
        //视图解析器自动拼串
        //前缀+返回值+后缀
        return "Success";
    }

}

@RequestMapping注解的相关属性
method限定请求方式

@Controller
public class userController {
    /*
    * /代表从当前项目开始
    * 处理当前项目下的hello请求
    * 请求映射
    * */
    @RequestMapping(value = "/hello",method = RequestMethod.GET)
    public String show()
    {
        System.out.println("收到请求");
        //视图解析器自动拼串
        //前缀+返回值+后缀
        return "Success";
    }

}
params规定请求参数
建议看下面的这篇链接文章
@RequestMapping中的params(请求参数映射限定)
headers规定请求头
@RequestMapping中的headers(请求头数据映射限定)
/*
* 为当前类的所有的方法的请求地址指定了一个基准路径
* */
@Controller
public class userController {
 /*
 * user-agent: 浏览器信息
 * 实现让谷歌不能访问,火狐能访问
 * */
    @RequestMapping(value = "/hello",headers =
            {"User-Agent=User-Agent:Mozilla/5.0 (Windows NT 6.1; rv:2.0.1) Gecko/20100101 Firefox/4.0.1"})
    public String show()
    {
        System.out.println("收到请求");
        //视图解析器自动拼串
        //前缀+返回值+后缀
        return "Success";
    }

}
consumes:只接收内容类型是哪种的请求,规定请求头中的content-type
produces:告诉浏览器返回的内容类型是什么,给响应头中加上Content-Type:text/html;char
@RequestMapping中的consumes属性和produces属性
ant风格的URL----URL地址可以写模糊的通配符
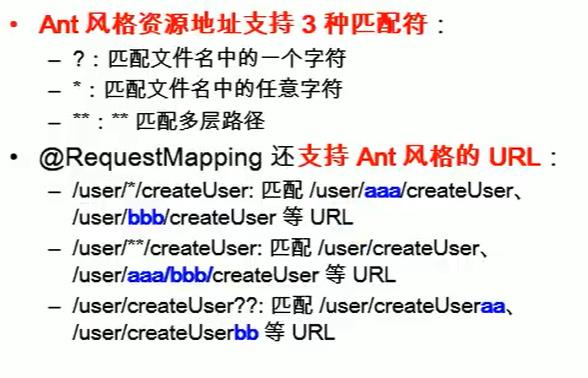


*号优先级比?号低
模糊和精确多个匹配情况下,精确优先
?代替一个字符:
/*
* 为当前类的所有的方法的请求地址指定了一个基准路径
* */
@Controller
public class userController {
    @RequestMapping("/antTest0?")
    public String show()
    {
        System.out.println("收到请求");
        //视图解析器自动拼串
        //前缀+返回值+后缀
        return "Success";
    }
}


*号匹配任意多个字符
@Controller
public class userController {
    @RequestMapping("/antTest0*")
    public String show()
    {
        System.out.println("收到请求");
        //视图解析器自动拼串
        //前缀+返回值+后缀
        return "Success";
    }
}

*号代替一层路径,只能代替一层路径
@Controller
public class userController {
    @RequestMapping("/*/antTest01")
    public String show()
    {
        System.out.println("收到请求");
        //视图解析器自动拼串
        //前缀+返回值+后缀
        return "Success";
    }
}

只能代替一层路径

**代替多层路径
@Controller
public class userController {
    @RequestMapping("/**/antTest01")
    public String show()
    {
        System.out.println("收到请求");
        //视图解析器自动拼串
        //前缀+返回值+后缀
        return "Success";
    }
}

路径上可以有占位符,占位符语法就是在任意路径的地方上写一个{变量名}
路径上的占位符只能占掉一层路径
@Controller
public class userController {
    @RequestMapping("/antTest01/{id}")
    public String show()
    {
        System.out.println("收到请求");
        //视图解析器自动拼串
        //前缀+返回值+后缀
        return "Success";
    }
}
获取路径上的占位符-----@PathVariable()
获取路径中的参数值——@PathVariable中的value
@Controller
public class userController {
    @RequestMapping("/antTest01/{id}")
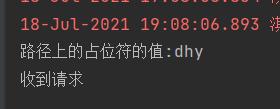
    public String show(@PathVariable("id")String id)
    {
        System.out.println("路径上的占位符的值:"+id);
        System.out.println("收到请求");
        //视图解析器自动拼串
        //前缀+返回值+后缀
        return "Success";
    }
}

获取路径上的多层占位符
@Controller
public class userController {
    @RequestMapping("/ant/{id1}/{id2}")
    public String show(@PathVariable("id1")String id1,@PathVariable("id2")String id2)
    {
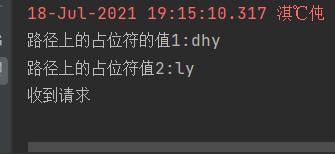
        System.out.println("路径上的占位符的值1:"+id1);
        System.out.println("路径上的占位符值2:"+id2);
        System.out.println("收到请求");
        //视图解析器自动拼串
        //前缀+返回值+后缀
        return "Success";
    }
}

REST风格的URL地址约束


Rest风格增删改查搭建