嵌入式AI周易 AIPU 算法部署仿真测试
Posted 极智视界
tags:
篇首语:本文由小常识网(cha138.com)小编为大家整理,主要介绍了嵌入式AI周易 AIPU 算法部署仿真测试相关的知识,希望对你有一定的参考价值。
本教程详细记录了使用周易 AIPU 进行算法部署仿真测试的方法,带大家尝尝鲜。
这里以 resnet_v1_101 为例(原谅我在边缘端用这么大的模型,这里纯粹就是为了跑通)。
文章目录
1、安装 docker 镜像环境
# pull 镜像
docker pull zepan/zhouyi

# run 容器
docker run -it zepan/zhouyi  /bin/bash

# 如果要vscode远程开发的话,可以加端口
docker run -it -p 9999:22 -v /path/to/container:/path/to/host zepan/zhouyi  /bin/bash
验证容器环境是否正常:
cd ~/demos/tflite

# 执行仿真
./run_sim.sh
# 验证结果
python3 quant_predict.py
2、准备模型文件
2.1 下载预训练模型:
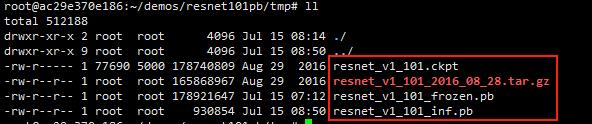
wget http://download.tensorflow.org/models/resnet_v1_101_2016_08_28.tar.gz
解压得到 resnet_v1_101.ckpt
tar zxvf resnet_v1_101_2016_08_28.tar.gz
2.2 export graph
vim export_graph.sh
加入以下内容
# export graph
python3 export_inference_graph.py \\
    --alsologtostderr \\
    --model_name=resnet_v1_101 \\
    --image_size=224 \\
    --labels_offset=1 \\
    --output_file=tmp/resnet_v1_101_inf.pb
执行 ./export_graph.sh 后将在 tmp文件夹下生成 resnet_v1_101_inf.pb
2.3 freeze graph
vim freeze_graph.sh
加入以下内容:
# freeze graph
python3 freeze_graph.py \\
    --input_graph=tmp/resnet_v1_101_inf.pb \\
    --input_checkpoint=tmp/resnet_v1_101.ckpt \\
    --input_binary=true --output_graph=tmp/resnet_v1_101_frozen.pb \\
    --output_node_names= resnet_v1_101/predictions/Reshape_1
执行 ./freeze_graph.sh 后将在 tmp 文件夹下生成 resnet_v1_101_frozen.pb
通过如上三步操作,将生成如下模型文件,最终推理会用到的只有 resnet_v1_101_frozen.pb。
3、准备量化校准数据集
我这里没有自己去做数据集,使用了镜像提供的图片和标签。
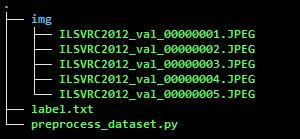
制作量化校准数据集:
python3 preprocess_dataset.py
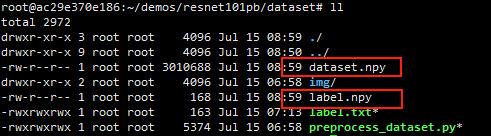
执行如上操作会生成 dataset.npy 和 label.npy
4、NN Compiler 配置
在有 resnet_v1_101_frozen.pb 和 校准数据集之后,就可以编辑 NN Compiler 配置文件了。
在 config 目录下创建 resnet_101_build.cfg 和 resnet_101_run.cfg 配置文件。
resnet_101_build.cfg 内容如下:
[Common]
mode=build

[Parser]
model_name = resnet_101
detection_postprocess =
model_domain = image_classification
output = resnet_v1_101/predictions/Reshape
input_model = ./tmp/resnet_v1_101_frozen.pb
input = input
input_shape = [1,224,224,3]

[AutoQuantizationTool]
model_name = resnet_101
quantize_method = SYMMETRIC
ops_per_channel = DepthwiseConv
calibration_data = ./dataset/dataset.npy
calibration_label = ./dataset/label.npy
preprocess_mode = normalize
quant_precision=int8
reverse_rgb = False
label_id_offset = 0

[GBuilder]
outputs=./aipu.bin
profile= True
target=Z1_0701
resnet_101_run.cfg 内容如下:
[Common]
mode=run

[Parser]
model_name = resnet_101
detection_postprocess =
model_domain = image_classification
output = resnet_v1_101/predictions/Reshape
input_model = ./tmp/resnet_v1_101_frozen.pb
input = input
input_shape = [1,224,224,3]
output_dir = ./

[AutoQuantizationTool]
model_name = resnet_101
quantize_method = SYMMETRIC
ops_per_channel = DepthwiseConv
calibration_data = ./dataset/dataset.npy
calibration_label = ./dataset/label.npy
preprocess_mode = normalize
quant_precision=int8
reverse_rgb = False
label_id_offset = 0

[GBuilder]
inputs=./model/input.bin
simulator=aipu_simulator_z1
outputs=output_resnet_101.bin
profile= True
target=Z1_0701
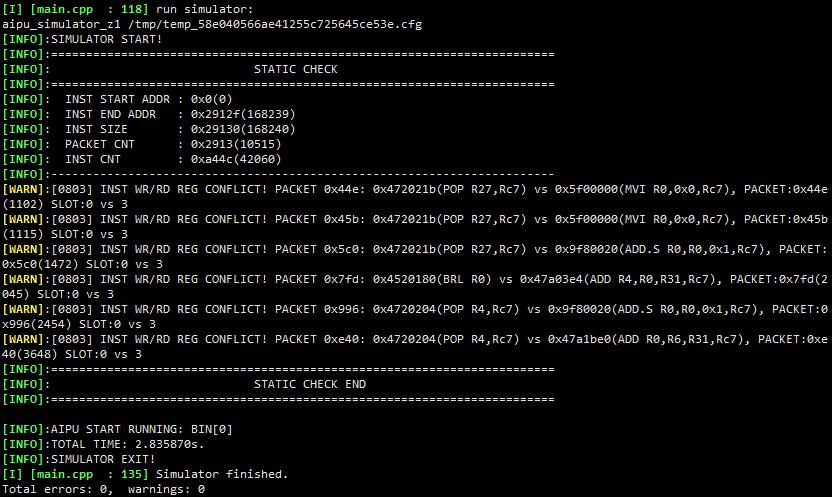
5、AIPU 仿真
执行build:
aipubuild confg/resnet_101_build.cfg
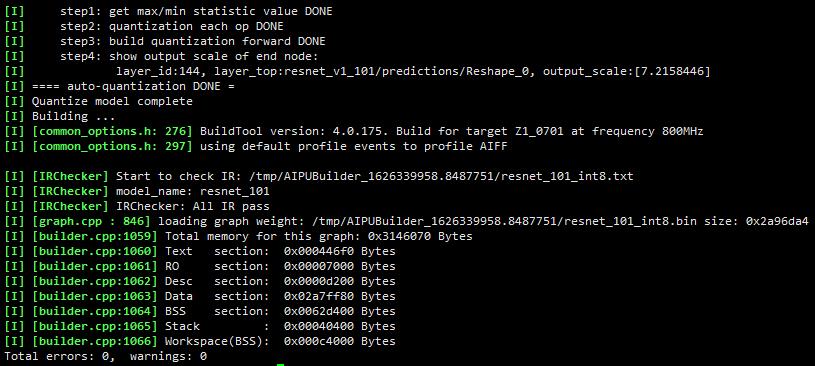
执行 run:
aipubuild config/resnet_101_run.cfg

得到存储模型输出数据的文件,后面验证模型数据结果会用到。

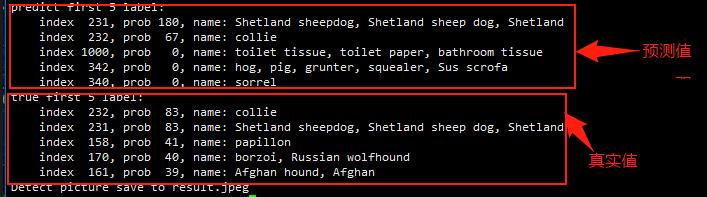
5、仿真结果比对
python3 quant_predict.py
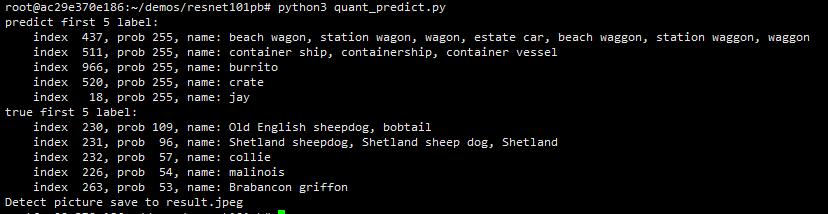
看结果,TOP1 已经可以对的上了,细节和更深的东西等拿到板子再好好研究,先跑通再优秀~
这篇先这样了,在我的 github上可以拿到我上述测试过程的代码,模型在这里,提取码:6666。
先收工了~
扫描下方二维码即可关注我的微信公众号【极智视界】,获取更多AI经验分享,让我们用极致+极客的心态来迎接AI !

以上是关于嵌入式AI周易 AIPU 算法部署仿真测试的主要内容,如果未能解决你的问题,请参考以下文章