Fragment切换效果
Posted 我想月薪过万
tags:
篇首语:本文由小常识网(cha138.com)小编为大家整理,主要介绍了Fragment切换效果相关的知识,希望对你有一定的参考价值。
Fragment切换效果 其实是 Android动画的使用——朴间动画 一次特殊实践,如果大家对一些基础知识还不是很熟悉,请先移步 Android动画的使用——朴间动画 。

设置方法
系统自带的动画切换效果系统自带的动画切换效果
FragmentTransaction fragmentTransaction = mFragmentManager
                .beginTransaction();

fragmentTransaction.setTransition(int transit);
// 通过setTransition(int transit)进行设置
// transit参数说明
// 1. FragmentTransaction.TRANSIT_NONE:无动画
// 2. FragmentTransaction.TRANSIT_FRAGMENT_OPEN:标准的打开动画效果
// 3. FragmentTransaction.TRANSIT_FRAGMENT_CLOSE:标准的关闭动画效果

// 标准动画设置好后,在Fragment添加和移除的时候都会有。
自定义动画效果
// 采用`FragmentTransavtion`的 `setCustomAnimations()`进行设置

FragmentTransaction fragmentTransaction = mFragmentManager
                .beginTransaction();

fragmentTransaction.setCustomAnimations(
                R.anim.enter,
                R.anim.exit);

// 此处的自定义动画效果同Activity,此处不再过多描述
代码实战
第一步:activity_main.xml 的编写
<?xml version="1.0" encoding="utf-8"?>
<LinearLayout xmlns:android="http://schemas.android.com/apk/res/android"
    xmlns:app="http://schemas.android.com/apk/res-auto"
    xmlns:tools="http://schemas.android.com/tools"
    android:layout_width="match_parent"
    android:layout_height="match_parent"
    tools:context=".MainActivity"
    android:orientation="vertical">

    <Button
        android:onClick="tiaozhuan"
        android:id="@+id/tv_hello_world"
        android:layout_width="wrap_content"
        android:layout_height="wrap_content"
        android:text="跳转Fragment"
        android:layout_gravity="center_horizontal"/>
    <FrameLayout
        android:id="@+id/fl_content"
        android:layout_width="match_parent"
        android:layout_height="400dp"/>
</LinearLayout>
第二步:fragment_one.xml 的准备
<?xml version="1.0" encoding="utf-8"?>
<LinearLayout xmlns:android="http://schemas.android.com/apk/res/android"
    android:orientation="vertical" android:layout_width="match_parent"
    android:layout_height="match_parent"
    android:gravity="center"
    android:background="@color/colorPrimary">
    <TextView
        android:layout_width="wrap_content"
        android:layout_height="wrap_content"
        android:text="我是第一个Fragment"/>
</LinearLayout>
第三步:fragment_two.xml的准备
<?xml version="1.0" encoding="utf-8"?>
<LinearLayout xmlns:android="http://schemas.android.com/apk/res/android"
    android:orientation="vertical" android:layout_width="match_parent"
    android:layout_height="match_parent"
    android:gravity="center"
    android:background="@color/colorAccent">
    <TextView
        android:layout_width="wrap_content"
        android:layout_height="wrap_content"
        android:text="我是第二个Fragment"/>
</LinearLayout>
第四步:OneFragment.java的准备
package com.wust.myanimation;

import android.os.Bundle;
import android.view.LayoutInflater;
import android.view.View;
import android.view.ViewGroup;

import androidx.annotation.NonNull;
import androidx.annotation.Nullable;
import androidx.fragment.app.Fragment;

/**
 * ClassName: OneFragment <br/>
 * Description: <br/>
 * date: 2021/7/18 15:37<br/>
 *
 * @author yiqi<br />
 * @QQ 1820762465
 * @微信 yiqiideallife
 * @技术交流QQ群 928023749
 */
public class OneFragment extends Fragment {
    @Nullable
    @Override
    public View onCreateView(@NonNull LayoutInflater inflater, @Nullable ViewGroup container, @Nullable Bundle savedInstanceState) {
        return getLayoutInflater().inflate(R.layout.fragment_one,null,false);
    }
}
第五步:TwoFragment.java的准备
package com.wust.myanimation;

import android.os.Bundle;
import android.view.LayoutInflater;
import android.view.View;
import android.view.ViewGroup;

import androidx.annotation.NonNull;
import androidx.annotation.Nullable;
import androidx.fragment.app.Fragment;

/**
 * ClassName: TwoFragment <br/>
 * Description: <br/>
 * date: 2021/7/18 15:37<br/>
 *
 * @author yiqi<br />
 * @QQ 1820762465
 * @微信 yiqiideallife
 * @技术交流QQ群 928023749
 */
public class TwoFragment extends Fragment {
    @Nullable
    @Override
    public View onCreateView(@NonNull LayoutInflater inflater, @Nullable ViewGroup container, @Nullable Bundle savedInstanceState) {
        return getLayoutInflater().inflate(R.layout.fragmet_two,null,false);
    }
}
第六步:MainActivity的准备
package com.wust.myanimation;

import androidx.fragment.app.FragmentActivity;
import androidx.fragment.app.FragmentTransaction;

import android.os.Bundle;
import android.view.View;

public class MainActivity extends FragmentActivity {

    private OneFragment oneFragment;
    private TwoFragment twoFragment;
    private int flag = 1;

    @Override
    protected void onCreate(Bundle savedInstanceState) {
        super.onCreate(savedInstanceState);
        setContentView(R.layout.activity_main);
        oneFragment = new OneFragment();
        twoFragment = new TwoFragment();
    }

    public void tiaozhuan(View view) {
        //开启 fragment事务
        FragmentTransaction transaction = getSupportFragmentManager().beginTransaction();
        //设置自定义动画
        transaction.setCustomAnimations(R.anim.enter,R.anim.exit);
        if (flag == 1){
            transaction.replace(R.id.fl_content,oneFragment,"one");
            //这个不能少,要不然 fragment 没效果
            transaction.commit();
            flag = 2;
        }else {
            transaction.replace(R.id.fl_content,twoFragment,"two");
            //这个不能少,要不然 fragment 没效果
            transaction.commit();
            flag = 1;
        }
    }

}
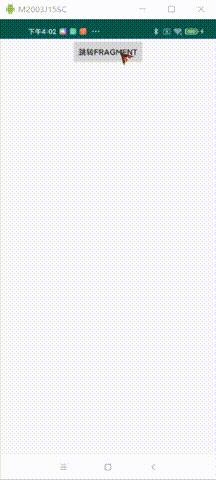
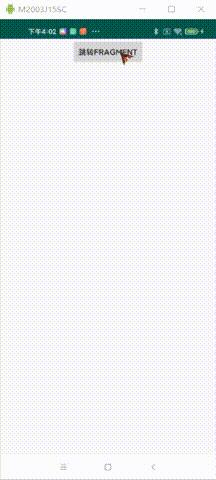
效果展示:

以上是关于Fragment切换效果的主要内容,如果未能解决你的问题,请参考以下文章