knife4j入门
Posted G_whang
tags:
篇首语:本文由小常识网(cha138.com)小编为大家整理,主要介绍了knife4j入门相关的知识,希望对你有一定的参考价值。
偶然在公众号看到大佬发的文章,看到了这个knife4j 感觉很不错,就上手尝试了下,果然非常好用,界面很好看,集中了postman和Swagger的一些优点,支持接口文档生成与导出,支持配置全局变量等等。。。
使用springboot集成knife4j
如果使用Knife4j2.0.6及以上的版本,Spring Boot的版本必须大于等于2.2.x
所以本次演示使用了2.2.1版本的spring Boot
pom引入
  <!--使用Knife4j2.0.6及以上的版本,Spring Boot的版本必须大于等于2.2.x 不然会有jar包冲突-->
        <dependency>
            <groupId>com.github.xiaoymin</groupId>
            <artifactId>knife4j-spring-boot-starter</artifactId>
            <version>2.0.9</version>
        </dependency>
配置文件
knife4j:
  # 开启增加配置
  enable: true
  # 开启生产环境屏蔽
  production: false
  # 开启Swagger的Basic认证功能,默认是false
  basic:
    enable: true
    # Basic认证用户名
    username: test
    # Basic认证密码
    password: 123
配置类
import com.github.xiaoymin.knife4j.core.util.CollectionUtils;
import org.springframework.context.annotation.Bean;
import org.springframework.context.annotation.Configuration;
import springfox.documentation.builders.ApiInfoBuilder;
import springfox.documentation.builders.OAuthBuilder;
import springfox.documentation.builders.PathSelectors;
import springfox.documentation.builders.RequestHandlerSelectors;
import springfox.documentation.service.*;
import springfox.documentation.spi.DocumentationType;
import springfox.documentation.spi.service.contexts.SecurityContext;
import springfox.documentation.spring.web.plugins.Docket;
import springfox.documentation.swagger2.annotations.EnableSwagger2WebMvc;

import java.util.ArrayList;
import java.util.List;

@Configuration
@EnableSwagger2WebMvc
public class Knife4jConfiguration {

    @Bean(value = "defaultApi2")
    public Docket defaultApi2() {
        //schema
        List<GrantType> grantTypes=new ArrayList<>();
        //密码模式
        String passwordTokenUrl="http://192.168.1.10:8080/oauth/token";
        ResourceOwnerPasswordCredentialsGrant resourceOwnerPasswordCredentialsGrant=new ResourceOwnerPasswordCredentialsGrant(passwordTokenUrl);
        grantTypes.add(resourceOwnerPasswordCredentialsGrant);

        OAuth oAuth=new OAuthBuilder().name("oauth2")
                .grantTypes(grantTypes).build();
        //context
        //scope方位
        List<AuthorizationScope> scopes=new ArrayList<>();
        scopes.add(new AuthorizationScope("read","read all resources"));
        SecurityReference securityReference=new SecurityReference("oauth2",scopes.toArray(new AuthorizationScope[]{}));
        SecurityContext securityContext=new SecurityContext(CollectionUtils.newArrayList(securityReference),PathSelectors.ant("/api/**"));
        //schemas
        List<SecurityScheme> securitySchemes=CollectionUtils.newArrayList(oAuth);
        //securyContext
        List<SecurityContext> securityContexts=CollectionUtils.newArrayList(securityContext);

        Docket docket=new Docket(DocumentationType.SWAGGER_2)
                .apiInfo(new ApiInfoBuilder()
                        .title("swagger-bootstrap-ui-demo RESTful APIs")
                        .description("# swagger-bootstrap-ui-demo RESTful APIs")
                        //.termsOfServiceUrl("http://www.xx.com/")
                        .contact("gwh@qq.com")
                        .version("1.0")
                        .build())
                //分组名称
                .groupName("2.1版本")
                .select()
                //这里指定Controller扫描包路径
                .apis(RequestHandlerSelectors.basePackage("com.example.knife4jspringbootfastdemo.controller"))
                .paths(PathSelectors.any())
                .build();
        return docket;
    }

    @Bean(value = "defaultApi1")
    public Docket defaultApi1() {
        Docket docket=new Docket(DocumentationType.SWAGGER_2)
                .apiInfo(new ApiInfoBuilder()
                        .title("swagger-bootstrap-ui-demo RESTful APIs")
                        .description("# swagger-bootstrap-ui-demo RESTful APIs")
                        //.termsOfServiceUrl("http://www.xx.com/")
                        .contact("gwh@qq.com")
                        .version("1.0")
                        .build())
                //分组名称
                .groupName("2.2版本")
                .select()
                //这里指定Controller扫描包路径
                .apis(RequestHandlerSelectors.basePackage("com.example.knife4jspringbootfastdemo.controller"))
                .paths(PathSelectors.any())
                .build();
        return docket;
    }

}
测试类
import com.example.knife4jspringbootfastdemo.pojo.User;
import com.github.xiaoymin.knife4j.annotations.ApiOperationSupport;
import io.swagger.annotations.Api;
import io.swagger.annotations.ApiImplicitParam;
import io.swagger.annotations.ApiOperation;
import org.springframework.http.ResponseEntity;
import org.springframework.web.bind.annotation.*;


@Api(tags = "测试1")
@RestController
public class IndexController {

    // 传递参数校验
    @ApiImplicitParam(name = "name",value = "姓名",required = true)
    // 可加接口开发作者, 加排序
    @ApiOperationSupport(author = "gwh",order = 1)
    // 方法描述
    @ApiOperation(value = "向客人问好")
    @GetMapping("/sayHi")
    public ResponseEntity<String> sayHi(@RequestParam(value = "name")String name){
        return ResponseEntity.ok("Hi:"+name);
    }

    @ApiImplicitParam(name = "name",value = "姓名",required = true)
    @ApiOperationSupport(author = "gwh",order = 2)
    @ApiOperation(value = "向客人挥手")
    @GetMapping("/byebye")
    public ResponseEntity<String> byebye(@RequestParam(value = "name")String name){
        return ResponseEntity.ok("bye-bye:"+name);
    }

    // 使用自定义增强注解ApiOperationSupport中的ignoreParameters属性,可以强制忽略要显示的参数.
    // 例如新增接口时,某实体类不需要显示Id,即可使用该属性对参数进行忽略.ignoreParameters={"id"}
    // 如果存在多个层次的参数过滤,则使用名称.属性的方式,例如 ignoreParameters={"uptModel.id","uptModel.uptPo.id"},其中uptModel是实体对象参数名称,id为其属性,uptPo为实体类,作为uptModel类的属性名称
    // 如果参数层级只是一级的情况下,并且参数是实体类的情况下,不需要设置参数名称,直接给定属性值名称即可
    // 如果是JSON 请求的话需要加上一级参数名
    @ApiOperationSupport(author = "gwh",order = 3,ignoreParameters={"user.number"})
    @ApiOperation("获取用户数据")
    @PostMapping("/getUser")
    public User getUser(@RequestBody User user){
        return user;
    }
    // 使用自定义增强注解ApiOperationSupport中的includeParameters属性,可以强制包含要显示的参数.去除多余的参数显示
    // 新增接口时,某实体类不需要显示Id,即可使用该属性对参数进行忽略.includeParameters={"id"}
    // 如果是JSON请求的话 需要把一级参数名称带上
    @ApiOperationSupport(author = "gwh",order = 5,includeParameters = {"user.number"})
    @ApiOperation("获取用户数据")
    @PostMapping("/getUser1")
    public User getUser1(@RequestBody User user){
        return user;
    }
}
启动项目
访问http://localhost:8080/doc.html
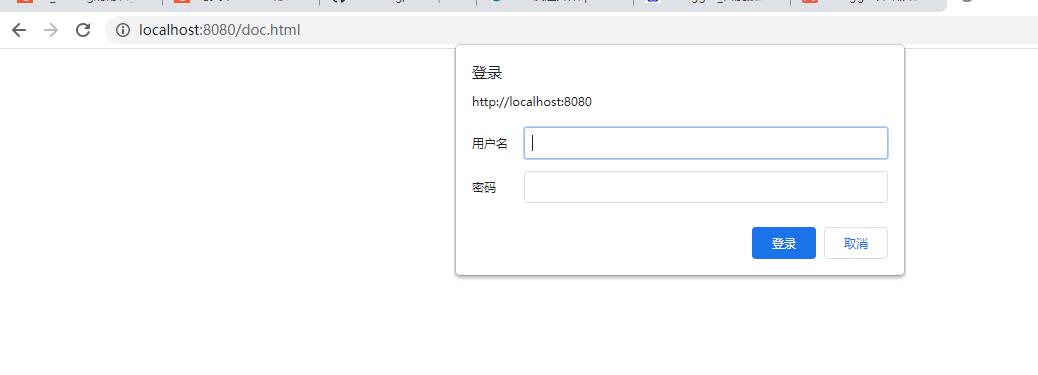
因为有配置Basic认证 所以需要输入认证的账号和密码
登录成功可以看到首界面
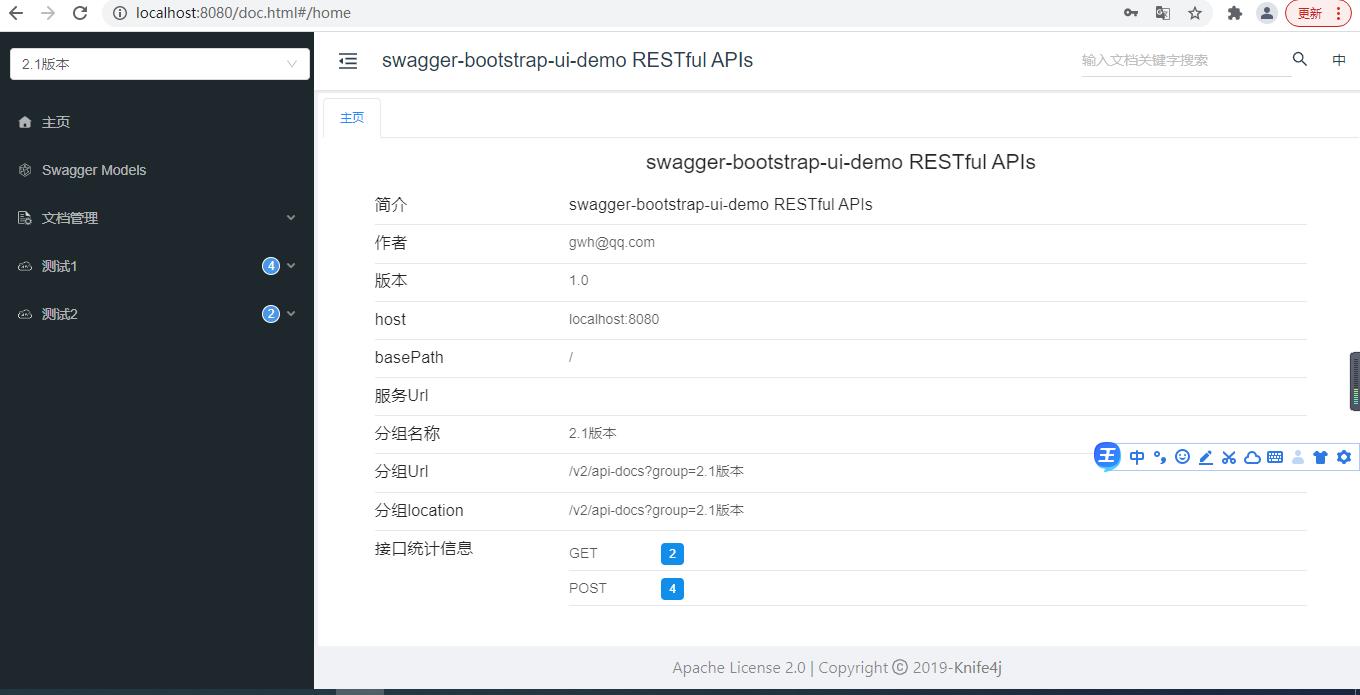
查看应用中的实体类

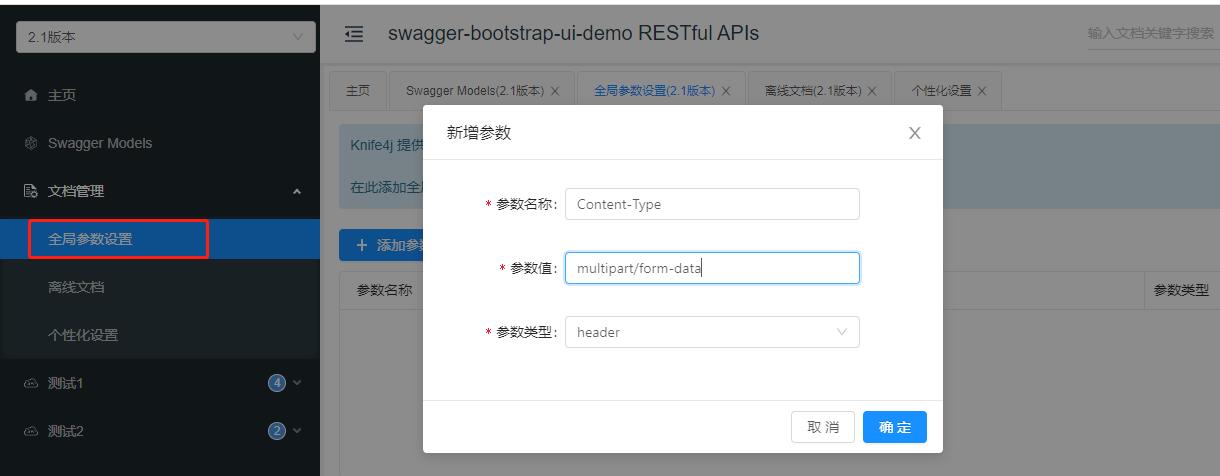
可以配置全局参数
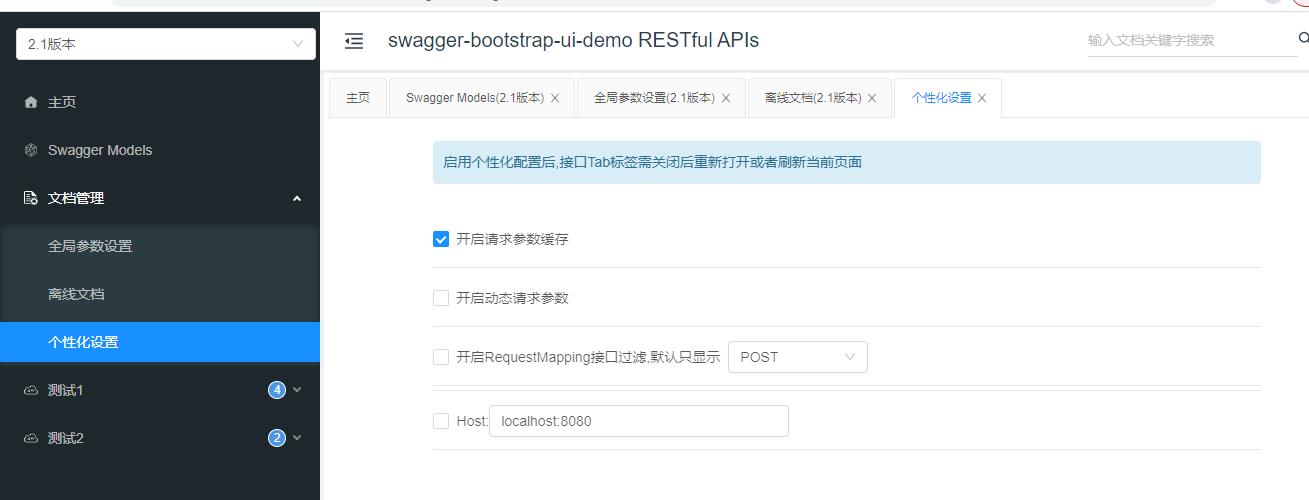
可以下载各种格式的文档

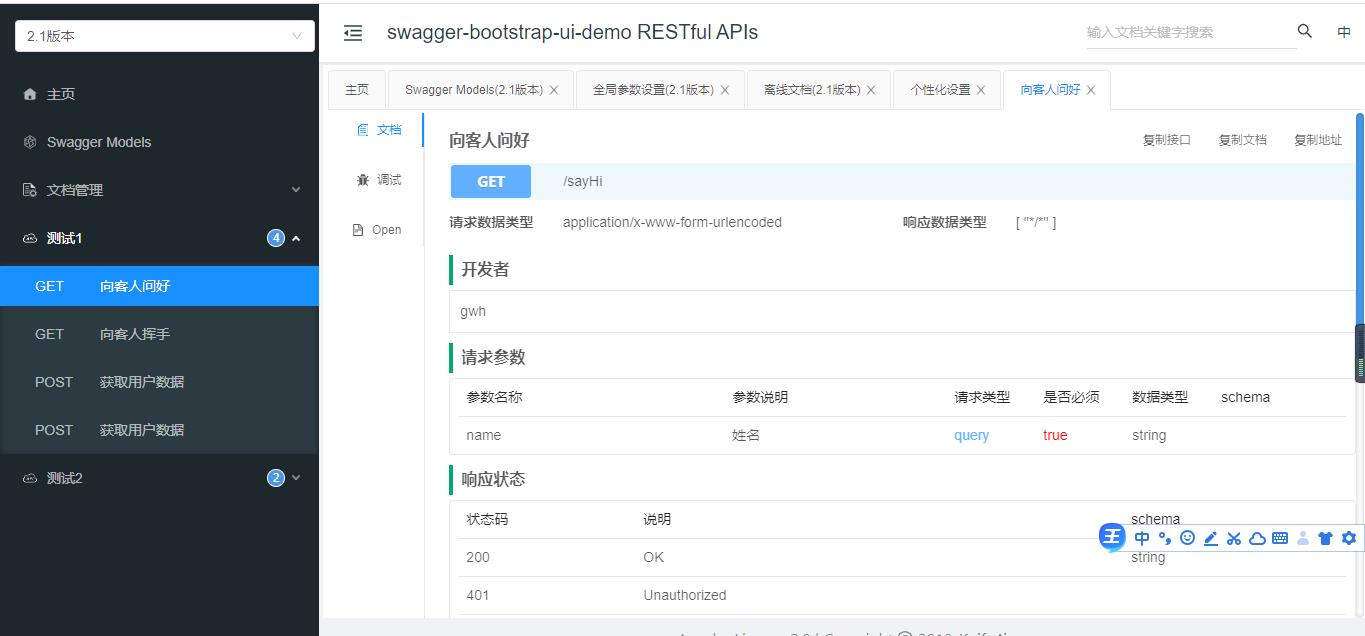
接口调试
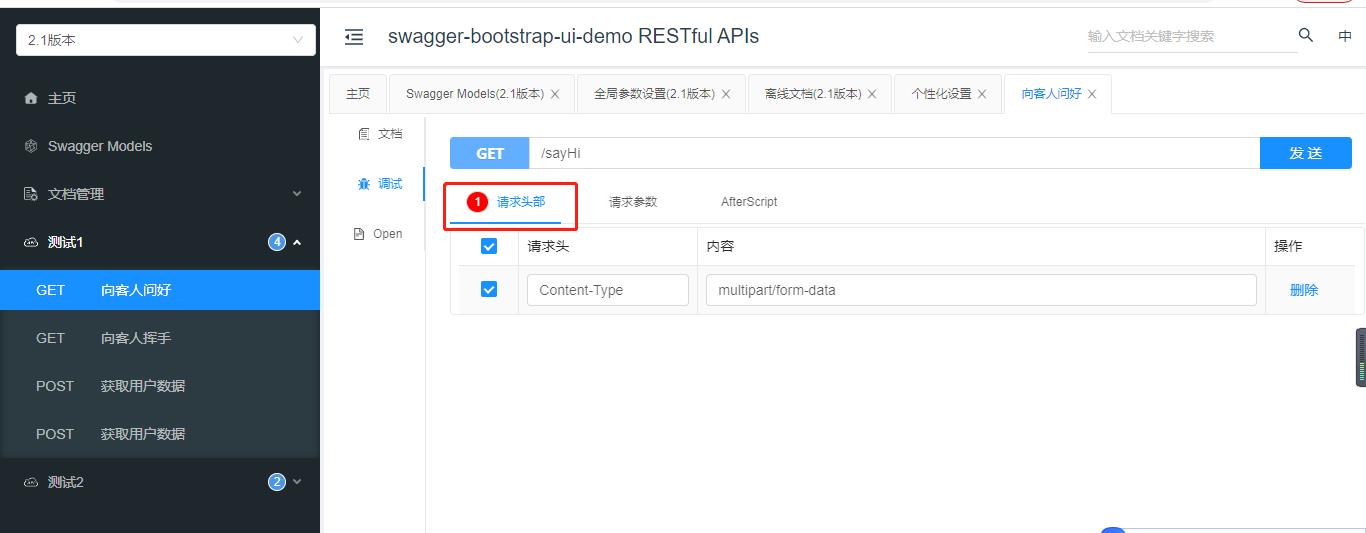
点击调试按钮 因为本请求用不到刚才增加全局变量设置的头部配置,所以把该参数去掉
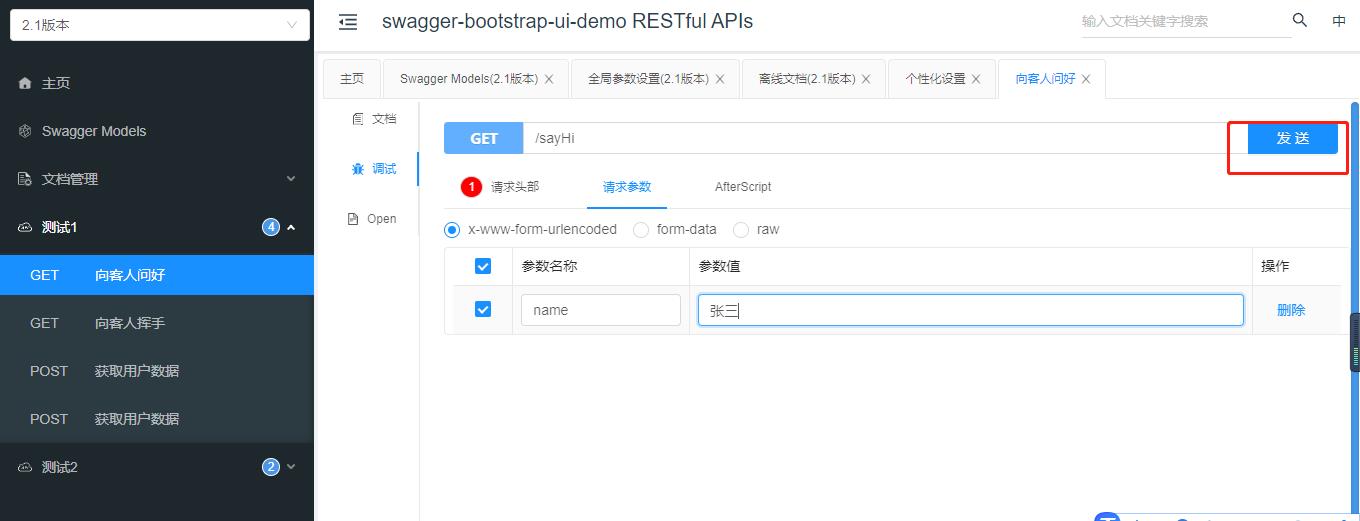
设置参数,点击发送即可
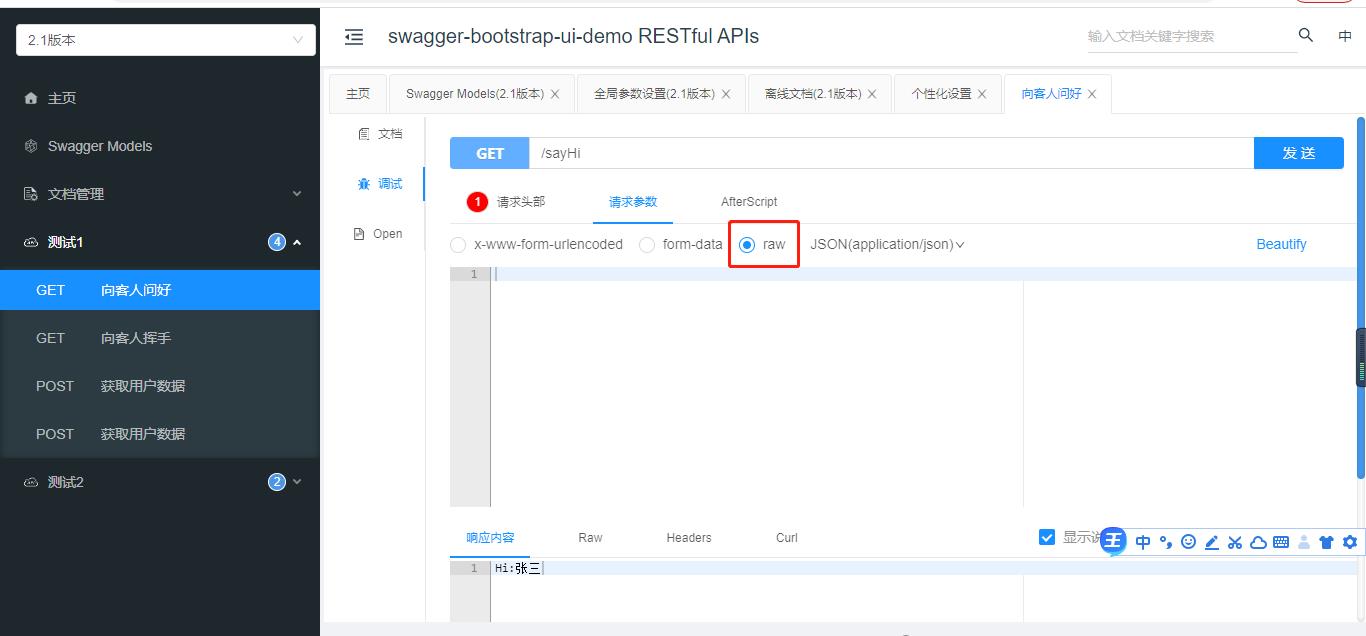
相信会使用swagger的肯定可以立马上手
如果是post请求的话还可以设置参数为json
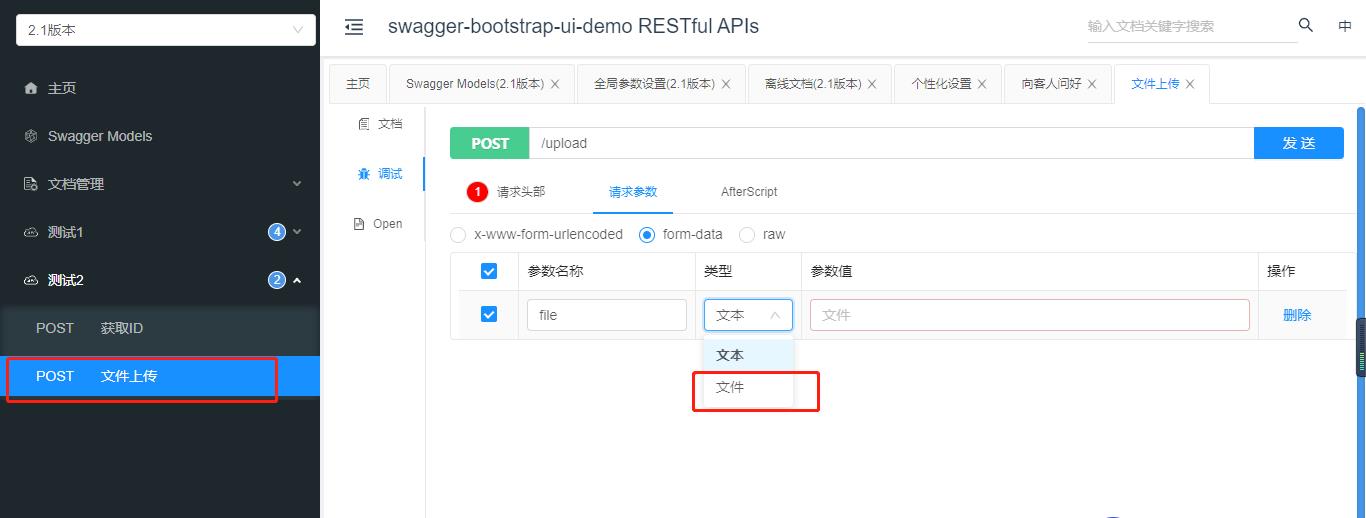
也支持文件类型参数调试
完整测试代码
https://github.com/Gwhang/knife4j-spring-boot-fast-demo
knife4j 官方文档
https://doc.xiaominfo.com/knife4j/documentation/
以上是关于knife4j入门的主要内容,如果未能解决你的问题,请参考以下文章