CoordinatorLayout/AppbarLayout/CollapsingToolbarLayout的配合使用,Toolbar特效
Posted guangdeshishe
tags:
篇首语:本文由小常识网(cha138.com)小编为大家整理,主要介绍了CoordinatorLayout/AppbarLayout/CollapsingToolbarLayout的配合使用,Toolbar特效相关的知识,希望对你有一定的参考价值。
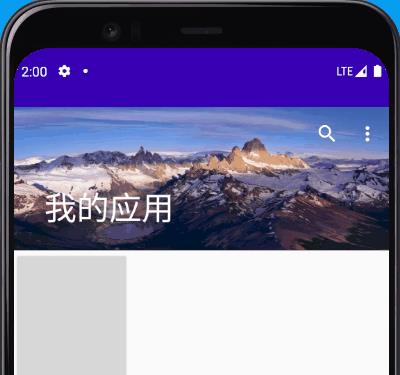
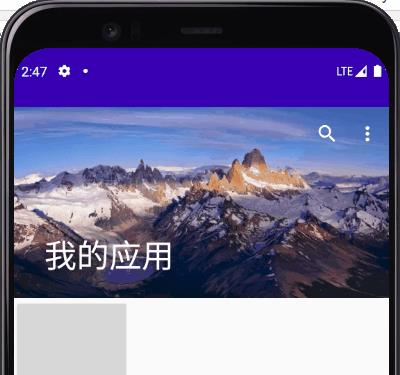
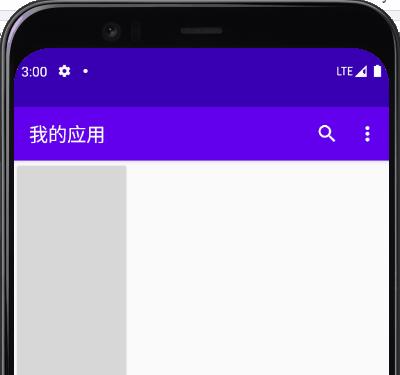
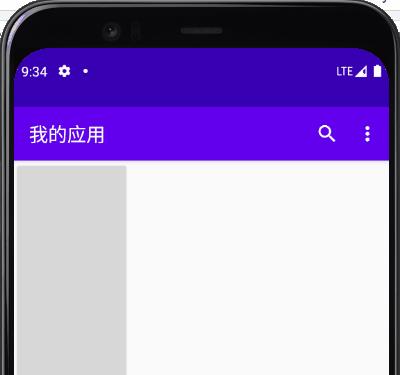
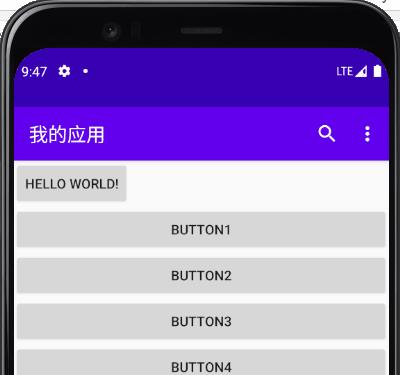
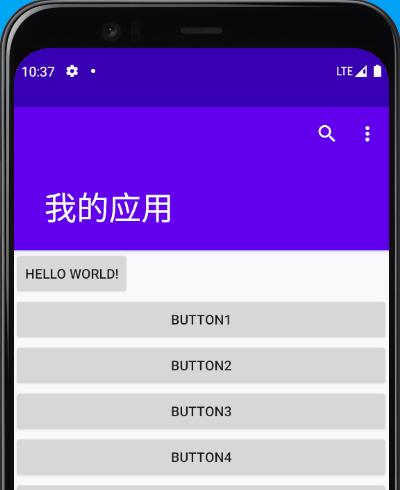
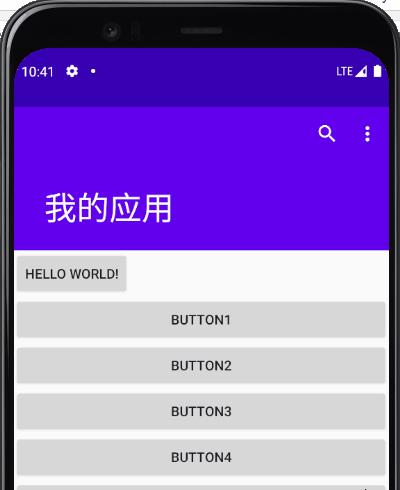
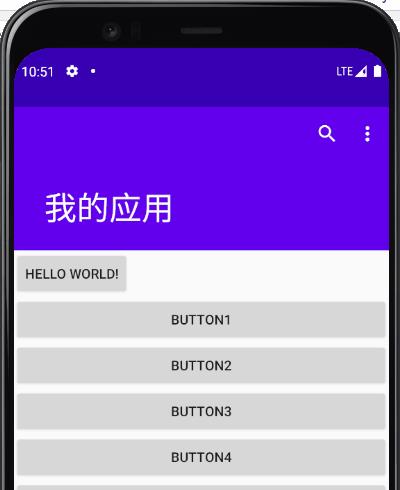
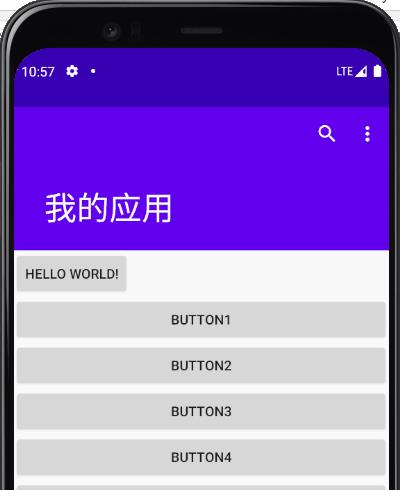
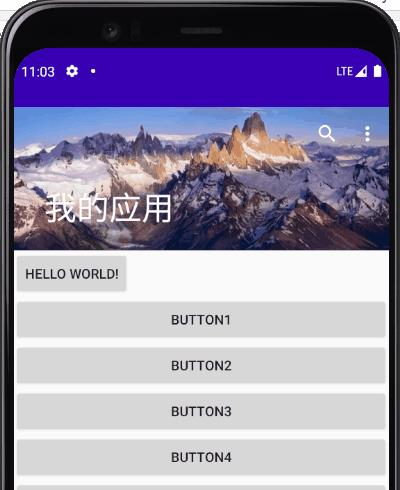
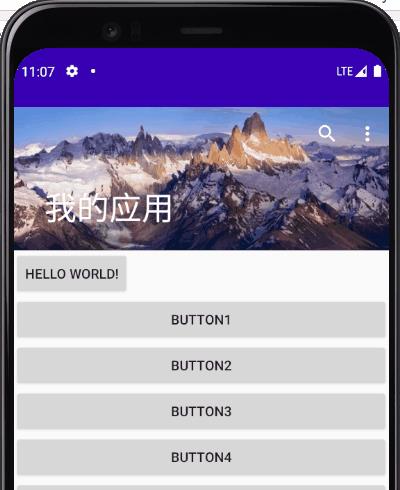
上面这个特效就是Toolbar与CoordinatorLayout/AppbarLayout/CollapsingToolbarLayout配合后的效果;这几个View单独使用没什么效果,一般都是要互相配合才行。
简介
- CoordinatorLayout: Coordinator的翻译后意思是【协调者】,它主要用于协调处理子View如何响应滚动事件,一般与NestedScrollView配合,协调子View滚动事件的处理
- AppbarLayout:是一种支持响应滚动手势的App Bar布局,继承自LinearLayout,子View通过app:layout_scrollFlags控制行为;它的第一个子View必须设置【app:layout_scrollFlags=“scroll”】,不然其他子View也无法联动滚动
- app:layout_scrollFlags=“scroll”:跟手势随滚动,直到消失不可见
- app:layout_scrollFlags=“scroll|snap”:带有吸附效果,滑动距离超过view的一半则自动隐藏或者显示
- app:layout_scrollFlags=“scroll|enterAlways”:跟随手势滚动,直到消失不可见,并且任何时候手势下拉时显示
- app:layout_scrollFlags=“scroll|enterAlways|enterAlwaysCollapsed”:跟随手势滚动,直到消失不可见,并且任何时候手势下拉时显示Toolbar折叠时的状态,需要与【CollapsingToolbarLayout】配合使用
- app:layout_scrollFlags=“scroll|exitUntilCollapsed”: 跟随手势滚动,一直到CollapsingToolbarLayout折叠起来为止,也就是Toolbar一直顶部可见,需要与【CollapsingToolbarLayout】配合使用
- CollapsingToolbarLayout:与Toolbar配合,支持折叠/展开Toolbar
- app:layout_collapseMode=“parallax”:Toolbar上的Menu在折叠后不显示,仅显示Title
- app:layout_collapseMode=“pin”: Toolbar上的Menu在折叠后依然显示
- app:contentScrim="?attr/colorPrimary":Toolbar折叠时,显示的Toolbar背景色
- Toolbar:
- android:background="?attr/colorPrimary"
- android:theme="@style/ThemeOverlay.AppCompat.Dark.ActionBar"
- app:layout_scrollFlags=“scroll”
- app:popupTheme="@style/ThemeOverlay.AppCompat.Light"
- app:title=“我的应用”
- NestedScrollView:Nested翻译后的意思是【嵌套的】,它是支持嵌套滑动的ScrollView,这意味这它会自动处理滑动冲突问题
- app:layout_behavior="@string/appbar_scrolling_view_behavior":当滚动时通过CoordinatorLayout协调,联动AppbarLayout的子View
联动效果
下面将由浅入深看看不同联动效果如何实现的
效果1:
随着主界面的往上滚动,Toolbar会慢慢的隐藏起来;当主界面往下滚动到最顶部时,Toolbar又逐渐显示出来
<?xml version="1.0" encoding="utf-8"?>
<androidx.coordinatorlayout.widget.CoordinatorLayout xmlns:android="http://schemas.android.com/apk/res/android"
    xmlns:app="http://schemas.android.com/apk/res-auto"
    xmlns:tools="http://schemas.android.com/tools"
    android:layout_width="match_parent"
    android:layout_height="match_parent"
    tools:context=".MainActivity">

    <com.google.android.material.appbar.AppBarLayout
        android:layout_width="match_parent"
        android:layout_height="wrap_content">

        <androidx.appcompat.widget.Toolbar
            android:layout_width="match_parent"
            android:layout_height="?attr/actionBarSize"
            android:background="?attr/colorPrimary"
            android:theme="@style/ThemeOverlay.AppCompat.Dark.ActionBar"
            app:layout_scrollFlags="scroll"
            app:menu="@menu/main_menu"
            app:popupTheme="@style/ThemeOverlay.AppCompat.Light"
            app:title="我的应用" />


    </com.google.android.material.appbar.AppBarLayout>

    <androidx.core.widget.NestedScrollView
        android:layout_width="match_parent"
        android:layout_height="match_parent"
        app:layout_behavior="@string/appbar_scrolling_view_behavior">

        <LinearLayout
            android:layout_width="match_parent"
            android:layout_height="match_parent">

            <Button
                android:id="@+id/mClickButton"
                android:layout_width="wrap_content"
                android:layout_height="1000dp"
                android:text="Hello World!"
                app:layout_constraintLeft_toLeftOf="parent"
                app:layout_constraintTop_toTopOf="parent" />
        </LinearLayout>

    </androidx.core.widget.NestedScrollView>

</androidx.coordinatorlayout.widget.CoordinatorLayout>
简单理解上面布局:当触摸产生滚动事件时,NestedScrollView由于配置了【app:layout_behavior="@string/appbar_scrolling_view_behavior"】,CoordinatorLayout 会协调NestedScrollView,在适当时机将滚动事件传递给AppBarLayout,而AppBarLayout则根据子View(Toolbar)的【app:layout_scrollFlags=“scroll”】属性来决定如何响应滚动事件,【scroll】表示当滚动事件产生时,子View(Toolbar)也跟随滚动
效果2
在【效果1】Toolbar跟随手势滚动的基础上,Toolbar带有吸附效果,也就是Toolbar的高度隐藏或者显示超过一半并停止滚动时,会自动完全显示/隐藏
<androidx.appcompat.widget.Toolbar
    android:layout_width="match_parent"
    android:layout_height="?attr/actionBarSize"
    android:background="?attr/colorPrimary"
    android:theme="@style/ThemeOverlay.AppCompat.Dark.ActionBar"
    app:layout_scrollFlags="scroll|snap"
    app:menu="@menu/main_menu"
    app:popupTheme="@style/ThemeOverlay.AppCompat.Light"
    app:title="我的应用" />
关键代码:【app:layout_scrollFlags=“scroll|snap”】,表示跟随滚动并且带有吸附效果
效果3
在【效果2】的基础上,不管【NestedScrollView】滚动到任何位置,当手势往下拉的时候,Toolbar总是显示出来;而【效果2】只有当【NestedScrollView】滚动到顶部继续下拉时才会显示Toolbar
关键代码:【app:layout_scrollFlags=“scroll|snap|enterAlways”】,表示【跟随滚动】【带吸附效果】【不管滚动到任何位置都下拉显示】
效果4:与CollapsingToolbarLayout一起使用
【Collapsing】是折叠的意思,与Toolbar配套使用可以使得Toolbar具有折叠/展开的效果,需要注意以下几点:
- CollapsingToolbarLayout必须要指定具体的高度,不能是【wrap_content】,否则会出现【app:title】无法显示的问题
- 【app:layout_scrollFlags】属性要加在【CollapsingToolbarLayout】上而不是【Toolbar】上了
<com.google.android.material.appbar.AppBarLayout
	android:layout_width="match_parent"
	android:layout_height="wrap_content">

	<com.google.android.material.appbar.CollapsingToolbarLayout
		android:layout_width="match_parent"
		android:layout_height="150dp"
		android:theme="@style/ThemeOverlay.AppCompat.Dark.ActionBar"
		app:layout_scrollFlags="scroll|snap|enterAlways">

		<androidx.appcompat.widget.Toolbar
			android:layout_width="match_parent"
			android:layout_height="?attr/actionBarSize"
			android:background="?attr/colorPrimary"
			android:theme="@style/ThemeOverlay.AppCompat.Dark.ActionBar"
			app:menu="@menu/main_menu"
			app:popupTheme="@style/ThemeOverlay.AppCompat.Light"
			app:title="我的应用" />
	</com.google.android.material.appbar.CollapsingToolbarLayout>

</com.google.android.material.appbar.AppBarLayout>
效果5
在【效果4】的基础上,任意位置下拉时,Toolbar只显示折叠后的高度,只有滚动到最顶端继续下拉时才会完全显示出来
关键代码【app:layout_scrollFlags=“scroll|snap|enterAlways|enterAlwaysCollapsed”】;【enterAlwaysCollapsed】表示总是以折叠状态进入,需要与【CollapsingToolbarLayout】一起使用才有意义;
效果6
【效果5】可以看到折叠后的Toolbar不显示【Menu】了,解决这个问题需要在Toolbar上加上另一个属性【app:layout_collapseMode=“pin”】
<androidx.appcompat.widget.Toolbar
    app:layout_collapseMode="pin"
    android:layout_width="match_parent"
    android:layout_height="?attr/actionBarSize"
    android:background="?attr/colorPrimary"
    android:theme="@style/ThemeOverlay.AppCompat.Dark.ActionBar"
    app:menu="@menu/main_menu"
    app:popupTheme="@style/ThemeOverlay.AppCompat.Light"
    app:title="我的应用" />
效果7
如果在【效果6】的基础上,往上拖动时不想Toolbar完全隐藏,而是始终显示折叠状态下的Toolbar怎么做呢?
- 修改【CollapsingToolbarLayout】的属性为【app:layout_scrollFlags=“scroll|exitUntilCollapsed”】就可以了
- 【exitUntilCollapsed】的意思是滚动到Toolbar折叠起来就结束
<com.google.android.material.appbar.AppBarLayout
	android:layout_width="match_parent"
	android:layout_height="wrap_content">

	<com.google.android.material.appbar.CollapsingToolbarLayout
		android:layout_width="match_parent"
		android:layout_height="150dp"
		android:theme="@style/ThemeOverlay.AppCompat.Dark.ActionBar"
		app:layout_scrollFlags="scroll|exitUntilCollapsed">

		<androidx.appcompat.widget.Toolbar
			app:layout_collapseMode="pin"
			android:layout_width="match_parent"
			android:layout_height="?attr/actionBarSize"
			android:background="?attr/colorPrimary"
			android:theme="@style/ThemeOverlay.AppCompat.Dark.ActionBar"
			app:menu="@menu/main_menu"
			app:popupTheme="@style/ThemeOverlay.AppCompat.Light"
			app:title="我的应用" />
	</com.google.android.material.appbar.CollapsingToolbarLayout>

</com.google.android.material.appbar.AppBarLayout>
效果8:给Toolbar加个漂亮的背景
由于【CollapsingToolbarLayout】是继承自【FrameLayout】,所以除了Toolbar,还可以添加其他View的,给Toolbar加背景,其实也就是在Toolbar上面加多一个【ImageView】就可以了
<com.google.android.material.appbar.CollapsingToolbarLayout
	android:layout_width="match_parent"
	android:layout_height="150dp"
	android:theme="@style/ThemeOverlay.AppCompat.Dark.ActionBar"
	app:layout_scrollFlags="scroll|exitUntilCollapsed">

	<ImageView
		android:layout_width="match_parent"
		android:layout_height="match_parent"
		android:scaleType="centerCrop"
		android:src="@drawable/ic_snow_mountain"/>

	<androidx.appcompat.widget.Toolbar
		app:layout_collapseMode="pin"
		android:layout_width="match_parent"
		android:layout_height="?attr/actionBarSize"
		android:theme="@style/ThemeOverlay.AppCompat.Dark.ActionBar"
		app:menu="@menu/main_menu"
		app:popupTheme="@style/ThemeOverlay.AppCompat.Light"
		app:title="我的应用" />
</com.google.android.material.appbar.CollapsingToolbarLayout>
效果9:折叠后Toolbar显示纯色背景
可以看到【效果8】加个背景色虽然漂亮,但是有时候我们希望Toolba折叠后显示纯色背景,展开后才显示图片背景
- 只要在【CollapsingToolbarLayout】上加多一个属性【app:contentScrim】指定Toolbar折叠后的背景色就可以了
完整布局文件代码:
<?xml version="1.0" encoding="utf-8"?>
<androidx.coordinatorlayout.widget.CoordinatorLayout xmlns:android="http://schemas.android.com/apk/res/android"
    xmlns:app="http://schemas.android.com/apk/res-auto"
    xmlns:tools="http://schemas.android.com/tools"
    android:layout_width="match_parent"
    android:layout_height="match_parent"
    tools:context=".MainActivity">

    <com.google.android.material.appbar.AppBarLayout
        android:layout_width="match_parent"
        android:layout_height="wrap_content">

        <com.google.android.material.appbar.CollapsingToolbarLayout
            android:layout_width="match_parent"
            android:layout_height="150dp"
            android:theme="@style/ThemeOverlay.AppCompat.Dark.ActionBar"
            app:contentScrim="?attr/colorPrimary"
            app:layout_scrollFlags="scroll|exitUntilCollapsed">

            <ImageView
                android:layout_width="match_parent"
                android:layout_height="match_parent"
                android:scaleType="centerCrop"
                android:src="@drawable/ic_snow_mountain" />

            <androidx.appcompat.widget.Toolbar
                android:layout_width="match_parent"
                android:layout_height="?attr/actionBarSize"
                android:theme="@style/ThemeOverlay.AppCompat.Dark.ActionBar"
                app:layout_collapseMode="pin"
                app:menu="@menu/main_menu"
                app:popupTheme="@style/ThemeOverlay.AppCompat.Light"
                app:title="我的应用" />
        </com.google.android.material.appbar.CollapsingToolbarLayout>

    </com.google.android.material.appbar.AppBarLayout>

    <androidx.core.widget.NestedScrollView
        android:layout_width="match_parent"
        android:layout_height="match_parent"
        app:layout_behavior="@string/appbar_scrolling_view_behavior">

        <LinearLayout
            android:id="@+id/mMainContentView"
            android:layout_width="match_parent"
            android:layout_height="match_parent"
            android:orientation="vertical">

            <Button
                android:id="@+id/mClickButton"
                android:layout_width="wrap_content"
                android:layout_height="wrap_content"
                android:text="Hello World!" />

        </LinearLayout>
    </androidx.core.widget.NestedScrollView>
</androidx.coordinatorlayout.widget.CoordinatorLayout>
以上是关于CoordinatorLayout/AppbarLayout/CollapsingToolbarLayout的配合使用,Toolbar特效的主要内容,如果未能解决你的问题,请参考以下文章
