Docker 的 安装使用
Posted IronMenPHP
tags:
篇首语:本文由小常识网(cha138.com)小编为大家整理,主要介绍了Docker 的 安装使用相关的知识,希望对你有一定的参考价值。
一.Docker介绍
Docker 是一个开源的应用容器引擎,基于 Go 语言 并遵从 Apache2.0 协议开源。
Docker 可以让开发者打包他们的应用以及依赖包到一个轻量级、可移植的容器中,然后发布到任何流行的 Linux 机器上,也可以实现虚拟化。
容器是完全使用沙箱机制,相互之间不会有任何接口(类似 iPhone 的 app),更重要的是容器性能开销极低。
Docker 从 17.03 版本之后分为 CE(Community Edition: 社区版) 和 EE(Enterprise Edition: 企业版)。sdn.net/lqpf199681/article/details/110518692
二.安装docke
注意:此方法仅适用于 Windows 10 操作系统专业版、企业版、教育版和部分家庭版!
安装完docker 部分电脑会提醒你要下载 wls2
三.进去docker 容器
docker
四.在docker 拉取镜像
建议参考 教程
列:
这里是 拉取了 kafka的 镜像
$ docker pull sheepkiller/kafka-manager
zhangfangbo@LAPTOP-APPSGGS7 MINGW64 ~/Desktop


$ docker pull sheepkiller/kafka-manager


Using default tag: latest
latest: Pulling from sheepkiller/kafka-manager
469cfcc7a4b3: Pulling fs layer
4458b033eac3: Pulling fs layer
838a0ff6e24f: Pulling fs layer
0128a98dafdb: Pulling fs layer
4458b033eac3: Waiting
469cfcc7a4b3: Waiting
838a0ff6e24f: Waiting
0128a98dafdb: Waiting
error pulling image configuration: Get https://production.cloudflare.docker.com/registry-v2/docker/registry/v2/blobs/sha256/4e/4e4a8c5dababf7737524c7299a627bd3c7b2715d4060a0b8ca94186317a39c47/data?verify=1625821615-8aqBBT0froobS8WN2XmnparmGSQ%3D: dial tcp 104.18.125.25:443: i/o timeout
默认是安装最新版本
查看镜像是否安装成功
$ docker images
五,Nginx+PHP 部署
这里我也是根据菜鸟教程进行 部署
前提需要 启动php
创建 ~/nginx/conf/conf.d 目录:
在该目录下添加 ~/nginx/conf/conf.d/runoob-test-php.conf 文件,内容如下:
server {
    listen       80;
    server_name  localhost;

    location / {
        root   /usr/share/nginx/html;
        index  index.html index.htm index.php;
    }

    error_page   500 502 503 504  /50x.html;
    location = /50x.html {
        root   /usr/share/nginx/html;
    }

    location ~ \\.php$ {
        fastcgi_pass   php:9000;
        fastcgi_index  index.php;
        fastcgi_param  SCRIPT_FILENAME  /www/$fastcgi_script_name;
        include        fastcgi_params;
    }
}
配置文件说明:
- php:9000: 表示 php-fpm 服务的 URL,下面我们会具体说明。
- /www/: 是 myphp-fpm 中 php 文件的存储路径,映射到本地的 ~/nginx/www 目录。
启动 nginx:
docker run --name runoob-php-nginx -p 8083:80 -d \\
    -v ~/nginx/www:/usr/share/nginx/html:ro \\
    -v ~/nginx/conf/conf.d:/etc/nginx/conf.d:ro \\
    --link myphp-fpm:php \\
nginx- -p 8083:80: 端口映射,把 nginx 中的 80 映射到本地的 8083 端口。
- ~/nginx/www: 是本地 html 文件的存储目录,/usr/share/nginx/html 是容器内 html 文件的存储目录。
- ~/nginx/conf/conf.d: 是本地 nginx 配置文件的存储目录,/etc/nginx/conf.d 是容器内 nginx 配置文件的存储目录。
- --link myphp-fpm:php: 把 myphp-fpm 的网络并入 nginx,并通过修改 nginx 的 /etc/hosts,把域名 php 映射成 127.0.0.1,让 nginx 通过 php:9000 访问 php-fpm。
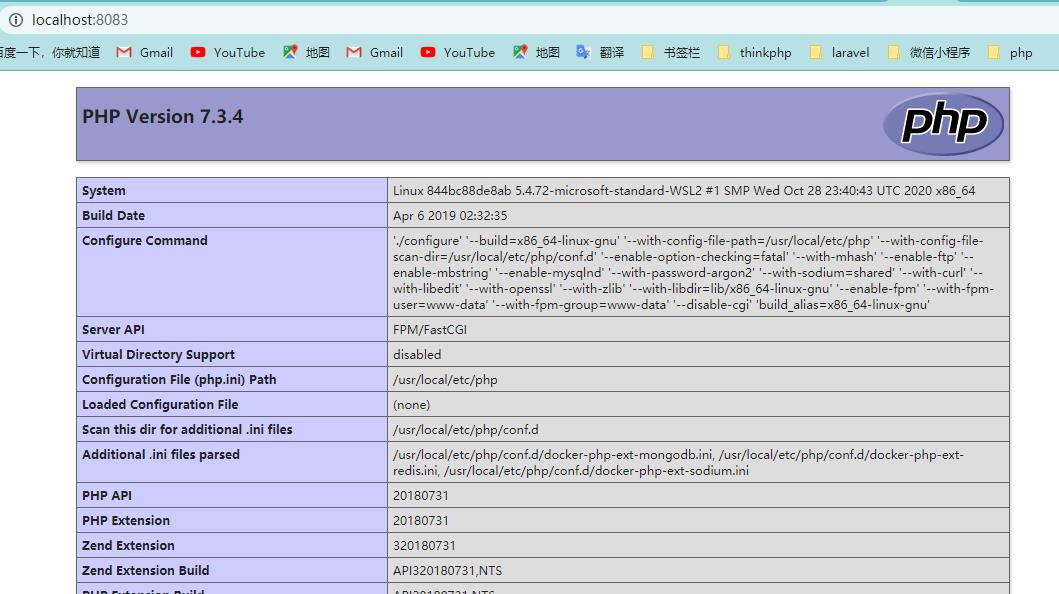
接下来我们在 ~/nginx/www 目录下创建 index.php,代码如下:
<?php
echo phpinfo();
?>
六.在php 安装扩展
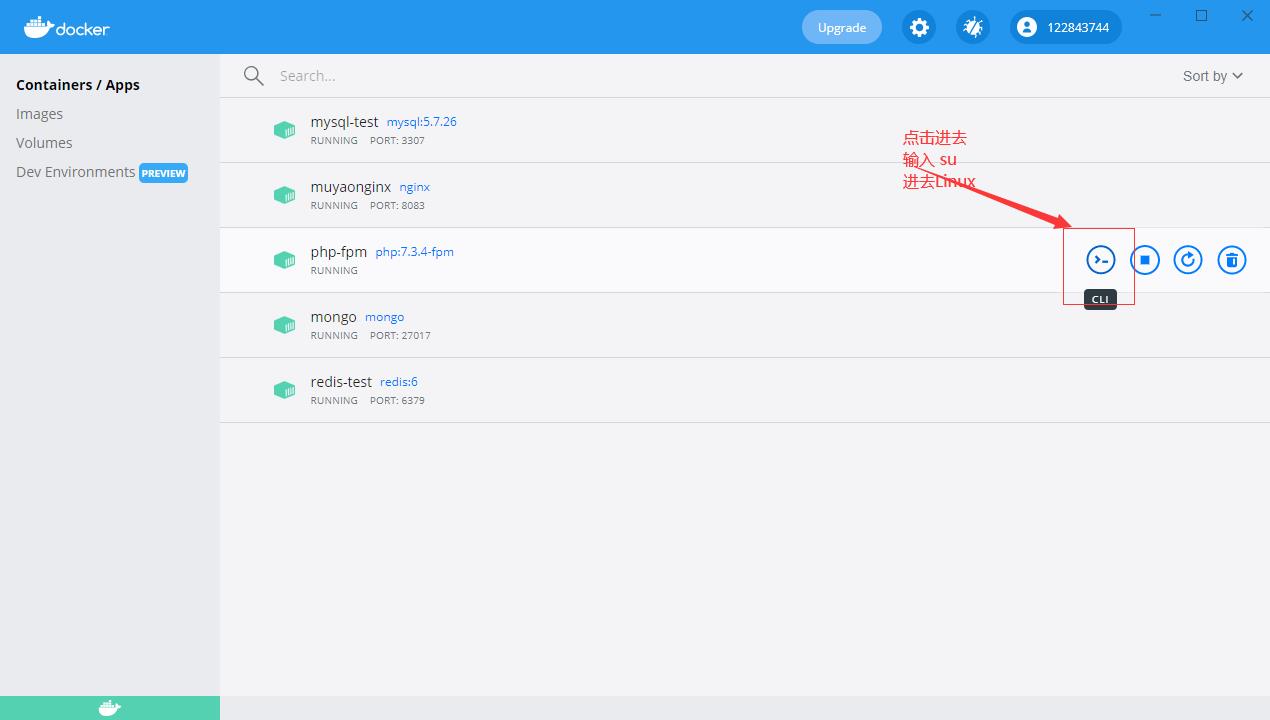
在docker 中 是 使用的 debian 操作系统 跟 Linux 有所区别 这里建议 使用 apt-get 安装 Linux 相关命令 列子 :
apt-get install wget 这里拿 mongoDB 举个例子 :
安装:
wget https://pecl.php.net/get/mongodb-1.9.1.tgz解压:
tar -zxvf mongodb-1.9.1.tgz复制mongodb到容器内,假设容器名为
cp mongodb-1.9.1 /usr/src/php/ext/mongod进入php容器
cd /usr/src/php/ext/mondb

docker-php-ext-configure mongodb --with-php-config=php-config

docker-php-ext-install mongodb
重启一下 php 就ok了
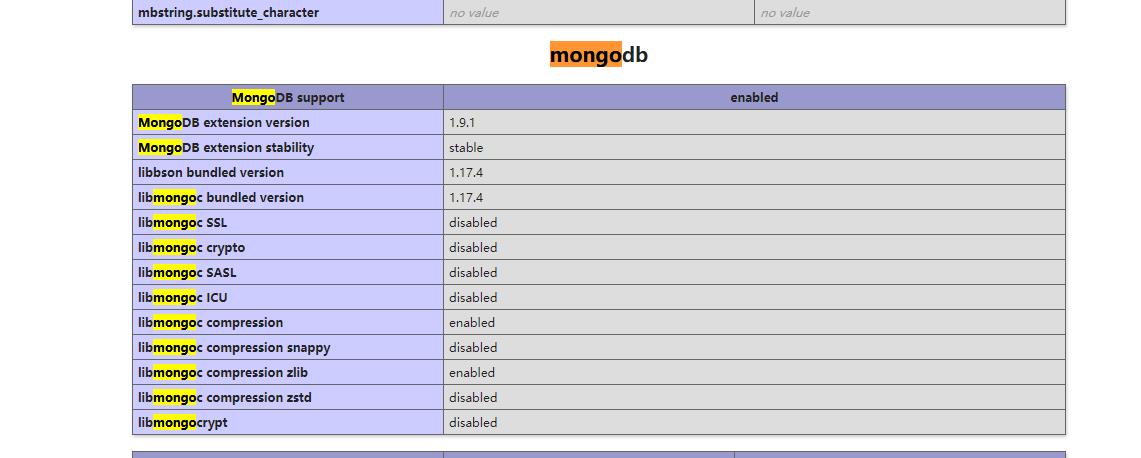
七.部署框架
这里 部署一个 laravel8 框架
1.给框架创建站点
server {
    listen       80;
    server_name  laravel8.com;

    location / {
        root   /usr/share/nginx/html/laravel8/public;
        index  index.html index.htm index.php;
    }

    error_page   500 502 503 504  /50x.html;
    location = /50x.html {
        root   /usr/share/nginx/html;
    }

    location ~ \\.php(.*)$ {
        fastcgi_pass  127.0.0.1:9000;
        fastcgi_index  index.php;
        fastcgi_param  SCRIPT_FILENAME  /usr/share/nginx/html/laravel8/public/$fastcgi_script_name;
        include        fastcgi_params;
    }
}
2.把域名存放在 hosts
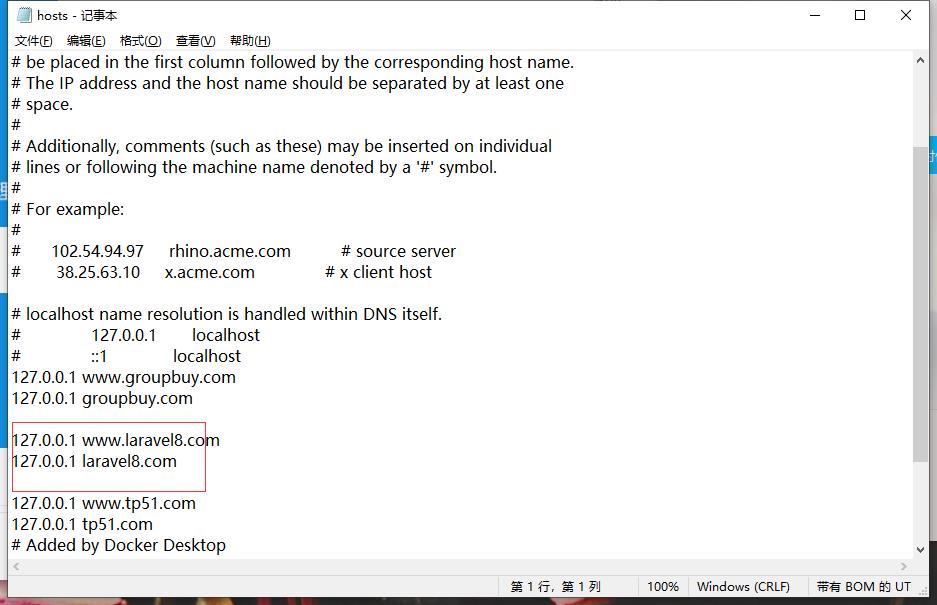
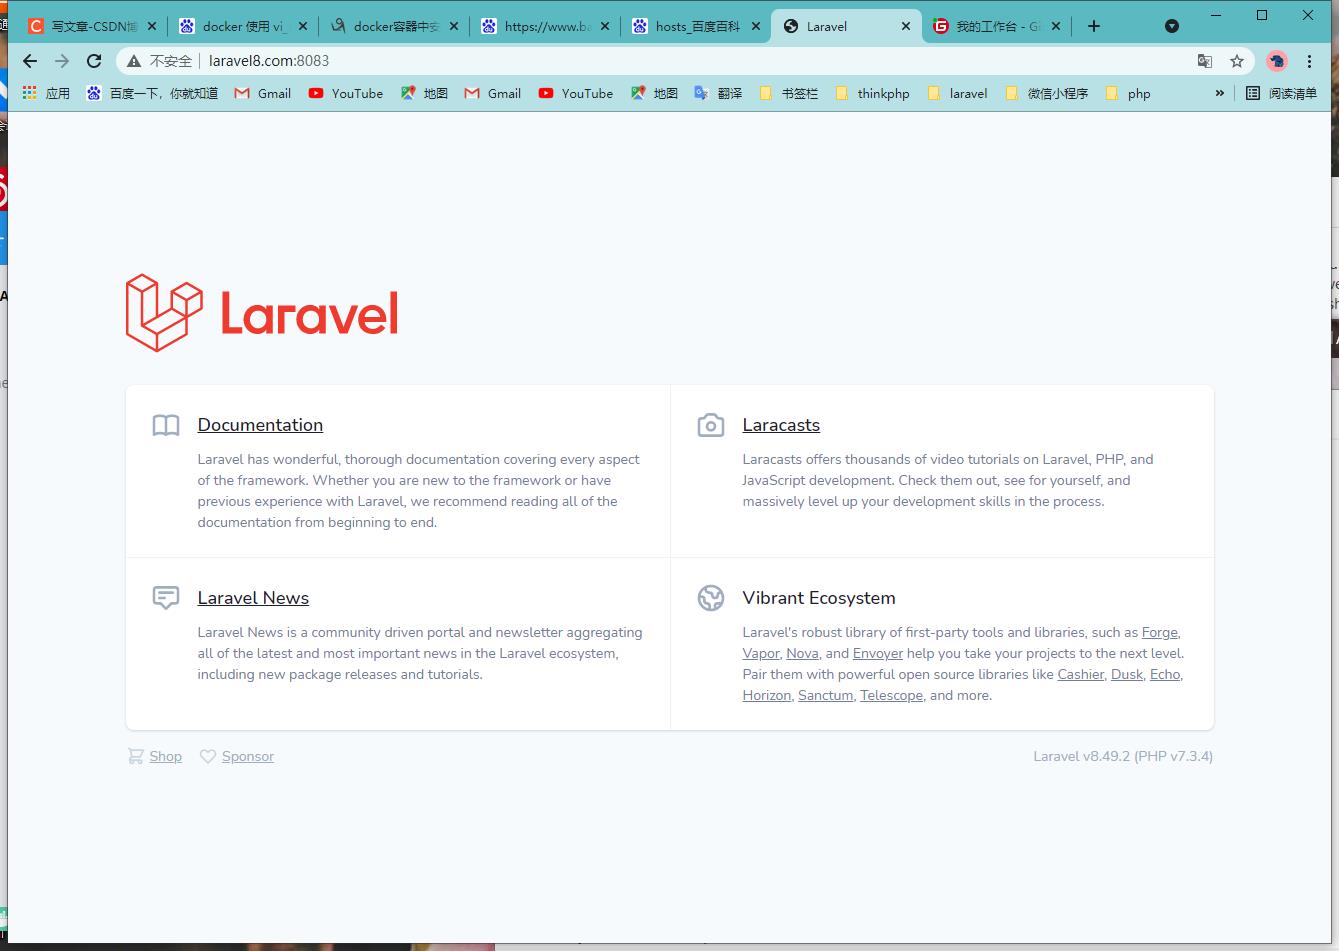
这就搭建好了,有问题可以私信呀
以上是关于Docker 的 安装使用的主要内容,如果未能解决你的问题,请参考以下文章