Python,OpenCV鼠标事件进行矩形圆形的绘制(随机颜色随机半径)
Posted 程序媛一枚~
tags:
篇首语:本文由小常识网(cha138.com)小编为大家整理,主要介绍了Python,OpenCV鼠标事件进行矩形圆形的绘制(随机颜色随机半径)相关的知识,希望对你有一定的参考价值。
这篇博客将介绍鼠标事件,并介绍鼠标事件矩形、圆形的绘制;
- 所有的鼠标事件(左键按下、左键释放、右键按下、右键释放、左键双击等);
- 绘制随机半径、随机颜色圆形;
- 绘制矩形、切换按键绘制圆形;
1. 效果图
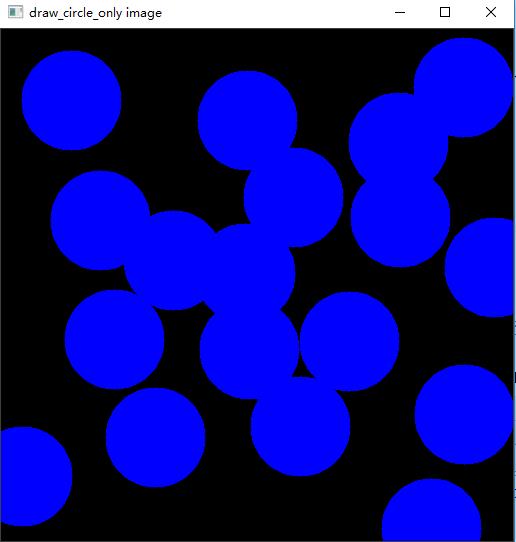
鼠标事件,双击左键绘制圆形效果图如下:

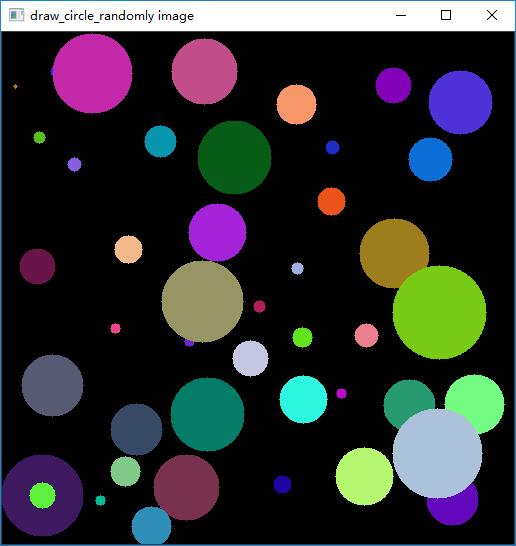
鼠标事件,双击左键绘制随机颜色、随机半径的圆形效果图如下:

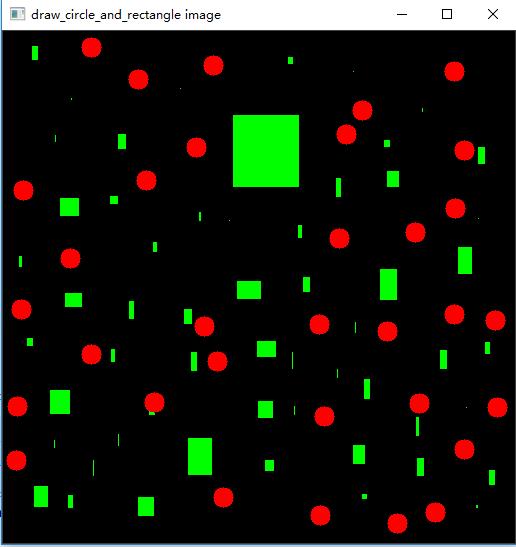
鼠标事件,双击左键绘制矩形,m键切换,双击左键绘制圆形效果图如下:

2. 源码
# Python,OpenCV鼠标事件进行矩形、圆形的绘制(随机颜色、随机半径)
# USAGE
# python mouse_as_paint_brush

import cv2
import numpy as np

# 查看所有鼠标事件
events = [i for i in dir(cv2) if 'EVENT' in i]
print(events)

img = None

drawing = False  # true if mouse is pressed
mode = True  # if True, draw rectangle. Press 'm' to toggle to curve
ix, iy = -1, -1


# 定义鼠标回调函数,绘制填充的蓝色圆
def draw_circle(event, x, y, flags, param):
    if event == cv2.EVENT_LBUTTONDBLCLK:  # 鼠标左键双击事件
        cv2.circle(img, (x, y), 50, (255, 0, 0), -1)


# 定义鼠标回调函数,绘制随机颜色随机半径的填充圆
def draw_random_circle(event, x, y, flags, param):
    if event == cv2.EVENT_LBUTTONDBLCLK:  # 鼠标左键双击事件
        radius = np.random.randint(1, high=50)
        color = np.random.randint(0, high=256, size=(3,)).tolist()
        # print('radius: ', radius, type(radius))
        # print('color: ', color, type(color))
        cv2.circle(img, (x, y), radius, color, -1)


# 定义鼠标回调函数,绘制填充红色圆,或者绿色填充矩形
def draw_circle_rectangle(event, x, y, flags, param):
    global ix, iy, drawing, mode

    if event == cv2.EVENT_LBUTTONDOWN:
        drawing = True
        ix, iy = x, y

    elif event == cv2.EVENT_MOUSEMOVE:
        if drawing == True:
            if mode == True:
                cv2.rectangle(img, (ix, iy), (x, y), (0, 255, 0), -1)
            else:
                cv2.circle(img, (x, y), 10, (0, 0, 255), -1)

    elif event == cv2.EVENT_LBUTTONUP:
        drawing = False
        if mode == True:
            cv2.rectangle(img, (ix, iy), (x, y), (0, 255, 0), -1)
        else:
            cv2.circle(img, (x, y), 10, (0, 0, 255), -1)


def draw_circle_only():
    # 创建一个黑色背景图,并绑定鼠标回调事件
    global img  # 标明为全局变量
    img = np.zeros((512, 512, 3), np.uint8)
    cv2.namedWindow('draw_circle_only image')
    cv2.setMouseCallback('draw_circle_only image', draw_circle)

    while (1):
        cv2.imshow('draw_circle_only image', img)
        # 按下ESC键退出
        if cv2.waitKey(20) & 0xFF == 27:
            break
    cv2.destroyAllWindows()


def draw_circle_randomly():
    # 创建一个黑色背景图,并绑定鼠标回调事件
    global img  # 标明为全局变量
    img = np.zeros((512, 512, 3), np.uint8)
    cv2.namedWindow('draw_circle_randomly image')
    cv2.setMouseCallback('draw_circle_randomly image', draw_random_circle)

    while (1):
        cv2.imshow('draw_circle_randomly image', img)
        # 按下ESC键退出
        if cv2.waitKey(20) & 0xFF == 27:
            break
    cv2.destroyAllWindows()


# 通过拖动鼠标来绘制矩形或圆形,鼠标回调函数有两部分,一是画矩形,二是画圆。
# 这个具体的例子将非常有助于创建和理解一些交互式应用程序,如对象跟踪、图像分割等。
# 按下左键拖动鼠标绘制矩形。按m键切换绘制圆形
def draw_circle_and_rectangle():
    global img
    img = np.zeros((512, 512, 3), np.uint8)
    cv2.namedWindow('draw_circle_and_rectangle image')
    cv2.setMouseCallback('draw_circle_and_rectangle image', draw_circle_rectangle)

    while (1):
        cv2.imshow('draw_circle_and_rectangle image', img)
        k = cv2.waitKey(1) & 0xFF
        if k == ord('m'):
            global mode
            mode = False
        elif k == 27:
            break

    cv2.destroyAllWindows()


draw_circle_only()
draw_circle_randomly()
draw_circle_and_rectangle()
参考
以上是关于Python,OpenCV鼠标事件进行矩形圆形的绘制(随机颜色随机半径)的主要内容,如果未能解决你的问题,请参考以下文章