使用AOP实现一个接口监视器
Posted 寒冰护狐
tags:
篇首语:本文由小常识网(cha138.com)小编为大家整理,主要介绍了使用AOP实现一个接口监视器相关的知识,希望对你有一定的参考价值。
使用AOP实现一个接口监视器
一、背景
在接口调试的过程中,很多时候会出现接口bug,在生产环境很难找到具体接口的参数,返回值,以及异常信息,此时我们就需要一个接口日志监听器,来保证我们接口调试过程中的便利性
二、开发思路
编写接口信息监听器,我们可以采用filter与spring所提供的AOP,AOP相比filter更灵活一些,而且可以直接结合spring的其他方法来使用,扩展性也强
三、AOP
- AOP即面向切面编程,简单的来说就是在普通的顺序执行的代码中,创造一个切点,然后在对切点进行前置通知,后置通知代码的描述,
- @Aspect 声明切面,可以在类、接口、枚举中使用
- @Pointcut 声明切点,用于关联切点,可使用表达式
- @Before 前置通知,在切点执行之前运行
- @After 后置通知,在切点执行之后运行
- @AfterReturning 增强后置通知,可以获取切点的返回值
- @AfterThrowing 异常通知,当接口发生错误时,进入异常通知,但是如果异常被捕获,则不会进入异常通知
- @Around 环绕通知,会在切点执行前后分别执行,环绕通知的优先级大于前置通知以及后置通知
四、实现步骤
- 第一步创建切面
@Aspect
@Component
public class UrlAspect {
	// 创建一个线程空间,来存放接口执行的开始毫秒数
    private ThreadLocal<Long> threadLocal = new ThreadLocal<>();
}
- 第二步创建切点以及需要扫描的控制器
    @Pointcut("execution(* com.xc..controller.MonitorController.*(..))")
    public void logCut() {
    }
- 第三步创建前置通知
    @Before("logCut()")
    public void beforeLog(JoinPoint joinPoint) throws IOException {、
    	// 保存接口开始执行的时间
        long startTime = System.currentTimeMillis();
        threadLocal.set(startTime);
    }
- 第四步创建增强后置通知
    @AfterReturning(value = "logCut()", returning = "result")
    public void returningLog(JoinPoint joinPoint, Object result) {
    	// 获取HttpServletRequest对象
        HttpServletRequest request = ((ServletRequestAttributes) RequestContextHolder.getRequestAttributes()).getRequest();
        // 获取HttpServletResponse对象
        HttpServletResponse response = ((ServletRequestAttributes) RequestContextHolder.getRequestAttributes()).getResponse();

		// 通过线程空间存储的接口开始时间计算接口耗时
        Long startTime = threadLocal.get();
        long endTime = System.currentTimeMillis();

		// 获取接口参数
        Object[] args = joinPoint.getArgs();

		// 将接口的请求响应信息存储到数据库中
        LogBean logBean = new LogBean();
        logBean.setRequestUrl(request.getRequestURL().toString())
                .setRequestType(request.getMethod())
                .setRequestParmeter(Arrays.stream(args).map(Object::toString).collect(Collectors.joining(",")))
                .setResponseStatus(String.valueOf(response.getStatus()))
                .setResponseResult(result.toString())
                .setResponseTime(String.valueOf(endTime - startTime));
        logService.addLog(logBean);
    }
- 第五步创建异常通知
    @AfterThrowing(value = "logCut()", throwing = "exception")
    public void throwingLog(JoinPoint joinPoint, Throwable exception) {
    	// 获取HttpServletRequest对象
        HttpServletRequest request = ((ServletRequestAttributes) RequestContextHolder.getRequestAttributes()).getRequest();
        // 获取HttpServletResponse对象
        HttpServletResponse response = ((ServletRequestAttributes) RequestContextHolder.getRequestAttributes()).getResponse();

		// 通过线程空间存储的接口开始时间计算接口耗时
        Long startTime = threadLocal.get();
        long endTime = System.currentTimeMillis();

		// 获取接口参数
        Object[] args = joinPoint.getArgs();

		// 将接口的请求响应信息存储到数据库中
        LogBean logBean = new LogBean();
        logBean.setRequestUrl(request.getRequestURL().toString())
                .setRequestType(request.getMethod())
                .setRequestParmeter(Arrays.stream(args).map(Object::toString).collect(Collectors.joining(",")))
                .setResponseStatus(String.valueOf(response.getStatus()))
                .setResponseResult(exception.getMessage())
                .setResponseTime(String.valueOf(endTime - startTime));
        logService.addLog(logBean);
    }
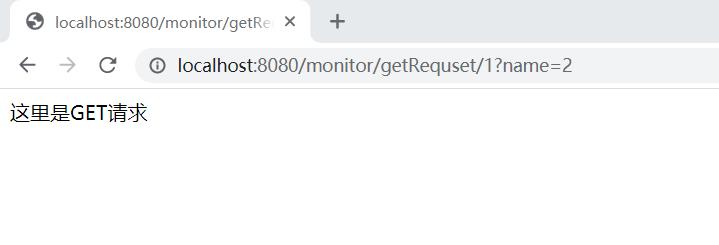
- 第六步创建控制器查看监听器的调用结果
@RestController
@RequestMapping("/monitor")
public class MonitorController {

    @GetMapping("/getRequset/{id}")
    public String getRequset(String name, @PathVariable("id") String id) {
        return "这里是GET请求";
    }

    @PutMapping("/putRequset")
    public String putRequset() {
        return "这里是PUT请求";
    }

    @PostMapping("/postRequset")
    public String postRequset() {
        return "这里是POST请求";
    }

    @DeleteMapping("/deleteRequset")
    public String deleteRequset() {
        return "这里是DELETE请求";
    }

}


五、总结
不知不觉已经毕业两年了,工作了这么久,才开始用这些面试经常用到的技术,略微有些惭愧,但是好过不学,现在还是需要保持经常学习的态度,我的技术还有待提高,我的目标是能开发出高可用的接口,拒绝死代码
需要该完整代码的小伙伴可以访问https://github.com/bugMakker/myWorkSpace/tree/xc
以上是关于使用AOP实现一个接口监视器的主要内容,如果未能解决你的问题,请参考以下文章