react-native-Art动画基础
Posted time_iter
tags:
篇首语:本文由小常识网(cha138.com)小编为大家整理,主要介绍了react-native-Art动画基础相关的知识,希望对你有一定的参考价值。
一:基础:
ART:暴露了七个组件:
● Surface - 一个矩形可渲染的区域,是其他元素的容器!
● Group - 可容纳多个形状、文本和其他的分组
● Shape - 形状定义,可填充
● Text - 文本形状定义
props
● Surface
○ width : 渲染区域的宽
○ height : 定义渲染区域的高
● Shape
○ d : 定义绘制路径
○ stroke : 描边颜色
○ strokeWidth : 描边宽度
○ strokeDash : 定义虚线
○ fill : 填充颜色
● Text
○ funt : 字体样式,定义字体、大小、是否加粗 如: bold 35px Heiti SC
● Path
○ moveTo(x,y) : 移动到坐标(x,y)
○ lineTo(x,y) : 连线到(x,y)
○ arc() : 绘制弧线
○ close() : 封闭空间
二:实例
● 绘制直线:
import  React,Component from 'react';
import
 ART,
 View,
 StyleSheet,
 from 'react-native';

var
  Surface,
  Group,
  Shape,
  Path
 = ART;

export default class  Note extends Component
    render()
         const path = Path()
            .moveTo(1,1)//移动起始点
            .lineTo(300,1);//绘制结束后的坐标点
        return(
            <View style=styles.container>
                <Surface width=300 height=2>
                    <Shape d=path stroke="#000000" strokeWidth=1 />
                </Surface>
            </View>
        )


var styles = StyleSheet.create(
  container:
    paddingTop: 20,

);
注意Surface的宽高,就是视图能绘制的宽高
● 绘制虚线:
export default class  Note extends Component
    render()
         const path = Path()
            .moveTo(1,1)//移动起始点
            .lineTo(300,1);//绘制结束后的坐标点
        return(
           <View style=styles.container>
                <Surface width=300 height=2>
                    <Shape d=path stroke="#000000" strokeWidth=2 strokeDash=[10,50]/>
                </Surface>
            </View>
        )
注意:strokeDash=[10,50]表示:先绘制10像素的实线然后绘制50像素的虚线!
● 绘制矩形:
export default class  Note extends Component
    render()
         const path = new Path()
            .moveTo(1,1)
            .lineTo(1,99)
            .lineTo(99,99)
            .lineTo(99,1)
            .close();
        return(
           <View style=styles.container>
                <Surface width=100 height=100>
                  <Shape d=path stroke="#000000" fill="#892265" strokeWidth=1 />
                </Surface>
            </View>
        )
注意:close的意思是创建一个密闭的路径,首先通过linrTo绘制三条边,然后使用close链接第四条边。使用fill设置里面的填充色。
● 绘制圆形:
export default class  Note extends Component
    render()
         const path = new Path()
            .moveTo(50,1)
            .arc(0,99,25)
            .arc(0,-99,25)
            .close();

        return(
           <View style=styles.container>
                <Surface width=100 height=100>
                 <Shape d=path stroke="#000000" strokeWidth=1/>
                </Surface>
            </View>
        )
注意:acr(x,y,radius)终点坐标距离起始点的相对距离
● 绘制字体:
export default class  Note extends Component
    render()
        const   path=new Path()
        .moveTo(40,40)
        .lineTo(99,10);

        return(
           <View style=styles.container>
                <Surface width=100 height=100>
                   <Text strokeWidth=1 stroke="#000" font="bold 35px Heiti SC" path=path >Swipe</Text>
                </Surface>
            </View>
        )
注意:font的使用
● 绘制扇形:
const Surface = ART;
import Wedge from './Wedge'

export default class  Note extends Component
    render()
        const  path=new Path()
        .moveTo(40,40)
        .lineTo(99,10);

        return(
           <View style=styles.container>
                 <Surface width=100 height=100>
                    <Wedge
                     outerRadius=50
                     startAngle=0
                     endAngle=60
                     originX=50
                     originY=50
                     fill="blue"/>

                </Surface>
            </View>
        )
注意:使用了一个React.art封装的一个组件Wedge;
● 图层叠加:
const Surface, Shape,Text, Path,Group = ART;
export default class  Note extends Component
    render()

        const pathRect = new Path()
            .moveTo(1,1)
            .lineTo(1,99)
            .lineTo(99,99)
            .lineTo(99,1)
            .close();

        const pathCircle = new Path()
            .moveTo(50,1)
            .arc(0,99,25)
            .arc(0,-99,25)
            .close();

        const pathText = new Path()
            .moveTo(40,5)
            .lineTo(40,99);


        return(
            <View style=styles.container>
                <Surface width=100 height=100>
                    <Group>
                        <Shape d=pathRect stroke="#000000" fill="#000000" strokeWidth=1/>
                        <Shape d=pathCircle stroke="#FFFFFF" fill="#FFFFFF" strokeWidth=1/>
                        <Text strokeWidth=1 strokeDash=[2,1,2,1] stroke="#000" font="bold 30px Heiti SC" path=pathText >Swipe</Text>
                    </Group>
                </Surface>
            </View>
        )
注意:图层叠加,上一层的会覆盖下一层的,类似于安卓的帧布局!
三:高级例子:
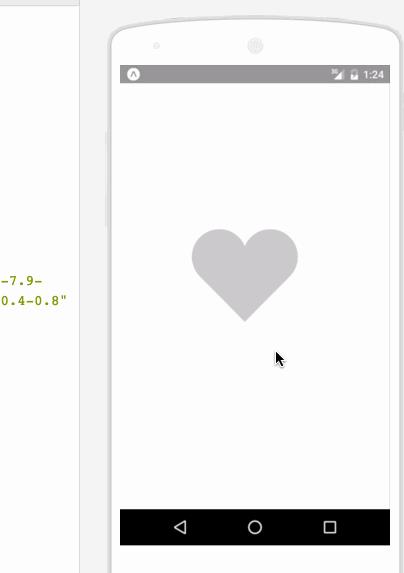
效果图:

import React ,
    Component
from 'react';
import
  ART as Art,
  StyleSheet,
  View,
  Dimensions,
  TouchableWithoutFeedback,
  Animated
 from 'react-native';

var HEART_SVG = "M130.4-0.8c25.4 0 46 20.6 46 46.1 0 13.1-5.5 24.9-14.2 33.3L88 153.6 12.5 77.3c-7.9-8.3-12.8-19.6-12.8-31.9 0-25.5 20.6-46.1 46-46.2 19.1 0 35.5 11.7 42.4 28.4C94.9 11 111.3-0.8 130.4-0.8"
var HEART_COLOR = 'rgb(226,38,77,1)';
var GRAY_HEART_COLOR = "rgb(204,204,204,1)";

var FILL_COLORS = [
  'rgba(221,70,136,1)',
  'rgba(212,106,191,1)',
  'rgba(204,142,245,1)',
  'rgba(204,142,245,1)',
  'rgba(204,142,245,1)',
  'rgba(0,0,0,0)'
];

var PARTICLE_COLORS = [
  'rgb(158, 202, 250)',
  'rgb(161, 235, 206)',
  'rgb(208, 148, 246)',
  'rgb(244, 141, 166)',
  'rgb(234, 171, 104)',
  'rgb(170, 163, 186)'
]

 getXYParticle=(total, i, radius)=>
  var angle = ( (2*Math.PI) / total ) * i;

  var x = Math.round((radius*2) * Math.cos(angle - (Math.PI/2)));
  var y = Math.round((radius*2) * Math.sin(angle - (Math.PI/2)));
  return
    x: x,
    y: y,


 getRandomInt=(min, max)=>
  return Math.floor(Math.random() * (max - min)) + min;


 shuffleArray=(array)=>
    for (var i = array.length - 1; i > 0; i--)
        var j = Math.floor(Math.random() * (i + 1));
        var temp = array[i];
        array[i] = array[j];
        array[j] = temp;

    return array;


var
  Surface,
  Group,
  Shape,
  Path
 = Art;

//使用Animated.createAnimatedComponent对其他组件创建对话
//创建一个灰色的新型图片
var AnimatedShape = Animated.createAnimatedComponent(Shape);

var
  width: deviceWidth,
  height: deviceHeight
 = Dimensions.get('window');

export default  class Key extends  Component
  constructor(props)
    super(props);

    this.state =
       animation: new Animated.Value(0)
    ;


  explode=()=>
    Animated.timing(this.state.animation,
      duration: 1500,
      toValue: 28
    ).start(() =>
      this.state.animation.setValue(0);
      this.forceUpdate();
    );


  getSmallExplosions=(radius, offset)=>
    return [0,1,2,3,4,5,6].map((v, i, t) =>

      var scaleOut = this.state.animation.interpolate(
        inputRange: [0, 5.99, 6, 13.99, 14, 21],
        outputRange: [0, 0, 1, 1, 1, 0],
        extrapolate: 'clamp'
      );

      var moveUp = this.state.animation.interpolate(
        inputRange: [0, 5.99, 14],
        outputRange: [0, 0, -15],
        extrapolate: 'clamp'
      );

      var moveDown = this.state.animation.interpolate(
        inputRange: [0, 5.99, 14],
        outputRange: [0, 0, 15],
        extrapolate: 'clamp'
      );

      var color_top_particle = this.state.animation.interpolate(
        inputRange: [6, 8, 10, 12, 17, 21],
        outputRange: shuffleArray(PARTICLE_COLORS)
      )

      var color_bottom_particle = this.state.animation.interpolate(
        inputRange: [6, 8, 10, 12, 17, 21],
        outputRange: shuffleArray(PARTICLE_COLORS)
      )

      var position = getXYParticle(7, i, radius)

      return (
        <Group
          x=position.x + offset.x
          y=position.y + offset.y
          rotation=getRandomInt(0, 40) * i
        >
          <AnimatedCircle
            x=moveUp
            y=moveUp
            radius=15
            scale=scaleOut
            fill=color_top_particle
          />
          <AnimatedCircle
            x=moveDown
            y=moveDown
            radius=8
            scale=scaleOut
            fill=color_bottom_particle
          />
        </Group>
      )
    , this)

  render()
    var heart_scale = this.state.animation.interpolate(
      inputRange: [0, .01, 6, 10, 12, 18, 28],
      outputRange: [1, 0, .1, 1, 1.2, 1, 1],
      extrapolate: 'clamp'
    );

    var heart_fill = this.state.animation.interpolate(
      inputRange: [0, 2],
      outputRange: [GRAY_HEART_COLOR, HEART_COLOR],
      extrapolate: 'clamp'
    )

    var heart_x = heart_scale.interpolate(
      inputRange: [0, 1],
      outputRange: [90, 0],
    )

    var heart_y = heart_scale.interpolate(
      inputRange: [0, 1],
      outputRange: [75, 0],
    )

    var circle_scale = this.state.animation.interpolate(
      inputRange: [0, 1, 4],
      outputRange: [0, .3, 1],
      extrapolate: 'clamp'
    );

    var circle_stroke_width = this.state.animation.interpolate(
      inputRange: [0, 5.99, 6, 7, 10],
      outputRange: [0, 0, 15, 8, 0],
      extrapolate: 'clamp'
    );

    var circle_fill_colors = this.state.animation.interpolate(
      inputRange: [1, 2, 3, 4, 4.99, 5],
      outputRange: FILL_COLORS,
      extrapolate: 'clamp'
    )

    var circle_opacity = this.state.animation.interpolate(
      inputRange: [1,9.99, 10],
      outputRange: [1, 1, 0],
      extrapolate: 'clamp'
    )


    return (
      <View style=styles.container>
        <TouchableWithoutFeedback onPress=this.explode style=styles.container>
          <View style=transform: [scale: .8]>
            <Surface width=deviceWidth height=deviceHeight>
              <Group x=75 y=200>
             //是一个心形的图像
                <AnimatedShape
                  d=HEART_SVG
                  x=heart_x
                  y=heart_y
                  scale=heart_scale
                  fill=heart_fill
                />
                <AnimatedCircle
                  x=89
                  y=75
                  radius=150
                  scale=circle_scale
                  strokeWidth=circle_stroke_width
                  stroke=FILL_COLORS[2]
                  fill=circle_fill_colors
                  opacity=circle_opacity
                />

                this.getSmallExplosions(75, x:89, y:75)
              </Group>
            </Surface>
          </View>
        </TouchableWithoutFeedback>
      </View>
    );

;

class  AnimatedCircle  extends  Component
  render()
     var radius = this.props.radius;
    var path = Path().moveTo(0, -radius)
        .arc(0, radius * 2, radius)
        .arc(0, radius * -2, radius)
        .close();
    return  React.createElement(AnimatedShape, React.__spread(,  this.props, d: path));


var styles = StyleSheet.create(
  container:
    flex: 1,

);
以上是关于react-native-Art动画基础的主要内容,如果未能解决你的问题,请参考以下文章