缓冲流的使用:BufferedInputStreamBufferedOutputStreamBufferedReaderBufferedWriter
Posted 呱呱呱?
tags:
篇首语:本文由小常识网(cha138.com)小编为大家整理,主要介绍了缓冲流的使用:BufferedInputStreamBufferedOutputStreamBufferedReaderBufferedWriter相关的知识,希望对你有一定的参考价值。
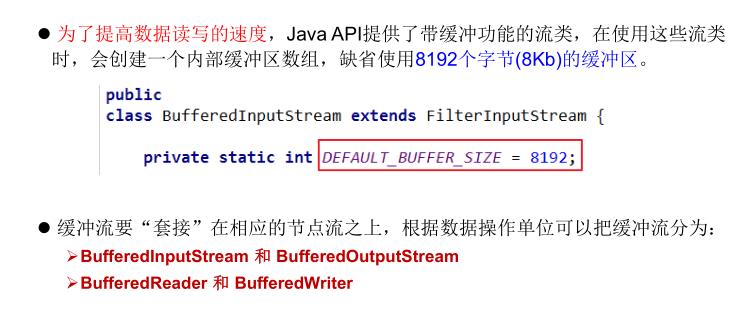
处理流之一 :缓冲流

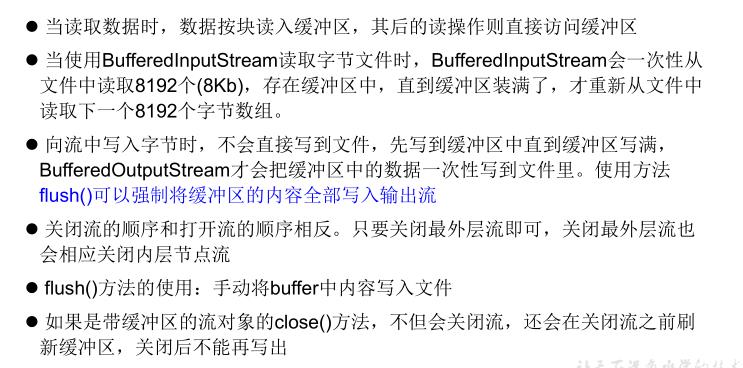
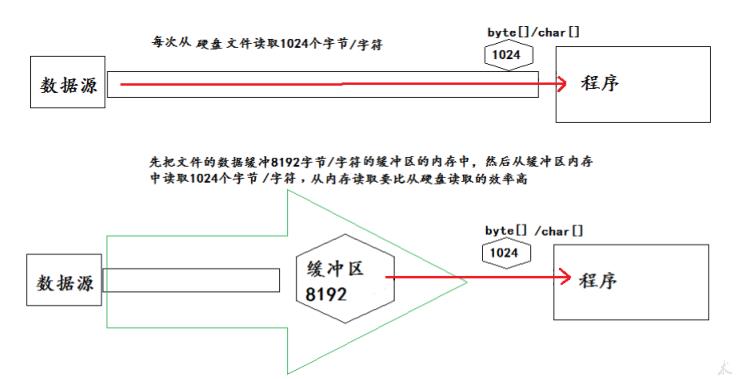
当读取数据时,数据按块读入缓冲区,其后的读操作则直接访问缓冲区
当使用BufferedInputStream读取字节文件时,BufferedInputStream会一次性从
文件中读取8192个(8Kb),存在缓冲区中,直到缓冲区装满了,才重新从文件中
读取下一个8192个字节数组。
向流中写入字节时,不会直接写到文件,先写到缓冲区中直到缓冲区写满,
BufferedOutputStream才会把缓冲区中的数据一次性写到文件里。使用方法
flush()可以强制将缓冲区的内容全部写入输出流
关闭流的顺序和打开流的顺序相反。只要关闭最外层流即可,关闭最外层流也
会相应关闭内层节点流
flush()方法的使用:手动将buffer中内容写入文件
如果是带缓冲区的流对象的close()方法,不但会关闭流,还会在关闭流之前刷
新缓冲区,关闭后不能再写出


/**
 * 处理流之一:缓冲流的使用
 *
 * 1.缓冲流:
 * BufferedInputStream
 * BufferedOutputStream
 * BufferedReader
 * BufferedWriter
 *
 * 2.作用:提供流的读取、写入的速度
 *   提高读写速度的原因:内部提供了一个缓冲区
 *
 * 3. 处理流,就是“套接”在已有的流的基础上。
 *
 * @author CH
 * @create 2021 下午 2:44
 */
/*
    实现非文本文件的复制
     */
    @Test
    public void BufferedStreamTest() throws FileNotFoundException {
        BufferedInputStream bis = null;
        BufferedOutputStream bos = null;

        try {
            //1.造文件
            File srcFile = new File("爱情与友情.jpg");
            File destFile = new File("爱情与友情3.jpg");
            //2.造流
            //2.1 造节点流
            FileInputStream fis = new FileInputStream((srcFile));
            FileOutputStream fos = new FileOutputStream(destFile);
            //2.2 造缓冲流
            bis = new BufferedInputStream(fis);
            bos = new BufferedOutputStream(fos);

            //3.复制的细节:读取、写入
            byte[] buffer = new byte[10];
            int len;
            while((len = bis.read(buffer)) != -1){
                bos.write(buffer,0,len);

//                bos.flush();//刷新缓冲区

            }
        } catch (IOException e) {
            e.printStackTrace();
        } finally {
            //4.资源关闭
            //要求:先关闭外层的流,再关闭内层的流
            if(bos != null){
                try {
                    bos.close();
                } catch (IOException e) {
                    e.printStackTrace();
                }

            }
            if(bis != null){
                try {
                    bis.close();
                } catch (IOException e) {
                    e.printStackTrace();
                }

            }
            //说明:关闭外层流的同时,内层流也会自动的进行关闭。关于内层流的关闭,我们可以省略.
//        fos.close();
//        fis.close();
        }


    }
//实现文件复制的方法
    public void copyFileWithBuffered(String srcPath,String destPath){
        BufferedInputStream bis = null;
        BufferedOutputStream bos = null;

        try {
            //1.造文件
            File srcFile = new File(srcPath);
            File destFile = new File(destPath);
            //2.造流
            //2.1 造节点流
            FileInputStream fis = new FileInputStream((srcFile));
            FileOutputStream fos = new FileOutputStream(destFile);
            //2.2 造缓冲流
            bis = new BufferedInputStream(fis);
            bos = new BufferedOutputStream(fos);

            //3.复制的细节:读取、写入
            byte[] buffer = new byte[1024];
            int len;
            while((len = bis.read(buffer)) != -1){
                bos.write(buffer,0,len);
            }
        } catch (IOException e) {
            e.printStackTrace();
        } finally {
            //4.资源关闭
            //要求:先关闭外层的流,再关闭内层的流
            if(bos != null){
                try {
                    bos.close();
                } catch (IOException e) {
                    e.printStackTrace();
                }

            }
            if(bis != null){
                try {
                    bis.close();
                } catch (IOException e) {
                    e.printStackTrace();
                }

            }
            //说明:关闭外层流的同时,内层流也会自动的进行关闭。关于内层流的关闭,我们可以省略.
//        fos.close();
//        fis.close();
        }
    }

    @Test
    public void testCopyFileWithBuffered(){
        long start = System.currentTimeMillis();

        String srcPath = "C:\\\\Users\\\\Administrator\\\\Desktop\\\\01-视频.avi";
        String destPath = "C:\\\\Users\\\\Administrator\\\\Desktop\\\\03-视频.avi";


        copyFileWithBuffered(srcPath,destPath);


        long end = System.currentTimeMillis();

        System.out.println("复制操作花费的时间为:" + (end - start));//618 - 176
    }

/*
    使用BufferedReader和BufferedWriter实现文本文件的复制

     */
    @Test
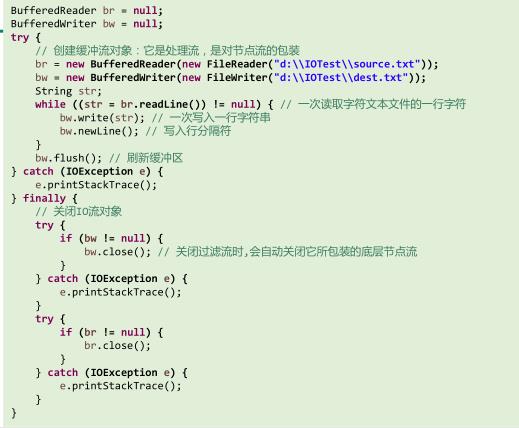
    public void testBufferedReaderBufferedWriter(){
        BufferedReader br = null;
        BufferedWriter bw = null;
        try {
            //创建文件和相应的流
            br = new BufferedReader(new FileReader(new File("dbcp.txt")));
            bw = new BufferedWriter(new FileWriter(new File("dbcp1.txt")));

            //读写操作
            //方式一:使用char[]数组
//            char[] cbuf = new char[1024];
//            int len;
//            while((len = br.read(cbuf)) != -1){
//                bw.write(cbuf,0,len);
//    //            bw.flush();
//            }

            //方式二:使用String
            String data;
            while((data = br.readLine()) != null){
                //方法一:
//                bw.write(data + "\\n");//data中不包含换行符
                //方法二:
                bw.write(data);//data中不包含换行符
                bw.newLine();//提供换行的操作

            }


        } catch (IOException e) {
            e.printStackTrace();
        } finally {
            //关闭资源
            if(bw != null){

                try {
                    bw.close();
                } catch (IOException e) {
                    e.printStackTrace();
                }
            }
            if(br != null){
                try {
                    br.close();
                } catch (IOException e) {
                    e.printStackTrace();
                }

            }
        }

    }
以上是关于缓冲流的使用:BufferedInputStreamBufferedOutputStreamBufferedReaderBufferedWriter的主要内容,如果未能解决你的问题,请参考以下文章