2.1初识神经网络
Posted 欢迎来到我的世界
tags:
篇首语:本文由小常识网(cha138.com)小编为大家整理,主要介绍了2.1初识神经网络相关的知识,希望对你有一定的参考价值。
1.关于类和标签的说明
在机器学习中,分类问题中的某个类别叫做类(class)。数据点叫做样本(sample)。某个样本对应的类叫做标签(label)。

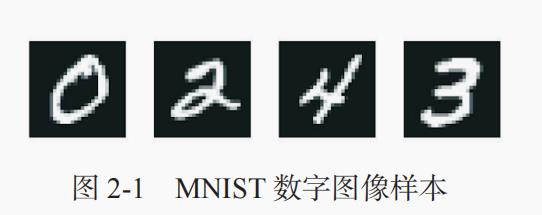
2.加载keras中的MNIST数据集
from keras.datasets import mnist
(train_images, train_labels), (test_images, test_labels) = minst.load_data()
训练集(training set):train_images and train_labels
测试集(test set):test_images and test_labels
注:图像被编码为Numpy数组,而标签是数字数组,取值为0~9。图像与标签一一对应。
训练数据:

测试数据:

完整代码:
from keras.datasets import mnist
(train_images, train_labels), (test_images, test_labels) = mnist.load_data()

#查看训练数据
print(train_images.shape)
print(len(train_labels))
print(train_labels)

#查看测试数据
print(test_images.shape)
print(len(test_labels))
print(test_labels)
接下来的工作流程:

3.构建网络
from keras import models
from keras import layers

network = models.Sequential()

#两个Dense层,密集连接(全连接)的神经层
network.add(layers.Dense(512, activation=\'relu\', input_shape=(28 * 28,)))

#10路softmax层,返回一个由10个概率值(总和为1)组成的数组
network.add(layers.Dense(10, activation=\'softmax\'))
网络核心组件是层,它是一种数据处理模块,相当于数据过滤器。大多数深度学习只是将一些简单的层连接起来,从而实现渐进式的数据蒸馏。
想要训练网络,需要选择编译步骤的三个参数:
损失函数(loss function):网络如何衡量在训练数据中的性能,即网络如何朝着正确的方向前进
优化器(optimizer):基于训练数据和损失函数来更新网络的机制
监控指标(metric):比如精度,正确分类图像所占比例
3.编译步骤
network.compile(optimizer=\'rmsprop\',
                loss=\'categorical_crossentropy\',
                metrics=[\'accuracy\'])
在开始训练之前,将对数据进行预处理,将其变换到网络要求的形状,并缩放所有值都在[0,1]区间。比如,之前训练图像保存在一个unit8类型的数组中,其形状为(60000,28,28),取值为[0,255]。我们需要将其变换为一个float32数组,其形状为(60000,28*28),取值范围为[0,1].
4.准备图像数据
train_images = train_images.reshape((60000, 28*28))
train_images = train_images.astype(\'float32\')/255

test_images = test_images.reshape((10000, 28*28))
test_images = test_images.astype(\'float32\')/255
5.准备标签
from keras.utils import to_categorical

train_labels = to_categorical(train_labels)
test_labels = to_categorical(test_labels)
6.训练数据
在keras中是通过调用网络中的fit方法来完成的,在训练数据中拟合(fit)模型
print(network.fit(train_images, train_labels, epochs=5, batch_size=128))

7.检查在测试集上的性能
test_loss, test_acc = network.evaluate(test_images, test_labels)
print(\'test_loss:\', test_loss)
print(\'test_acc:\', test_acc)

完整代码:
# -*- coding = utf-8 -*-
# @Time : 2021/5/14
# @Author : pistachio
# @File : 21.py
# @Software : PyCharm

from keras.datasets import mnist
from keras import models
from keras import layers
from keras.utils import to_categorical

(train_images, train_labels), (test_images, test_labels) = mnist.load_data()

network = models.Sequential()
network.add(layers.Dense(512, activation=\'relu\', input_shape=(28 * 28,)))
network.add(layers.Dense(10, activation=\'softmax\'))

network.compile(optimizer=\'rmsprop\',
                loss=\'categorical_crossentropy\',
                metrics=[\'accuracy\'])

train_images = train_images.reshape((60000, 28*28))
train_images = train_images.astype(\'float32\')/255

test_images = test_images.reshape((10000, 28*28))
test_images = test_images.astype(\'float32\')/255

train_labels = to_categorical(train_labels)
test_labels = to_categorical(test_labels)

print(network.fit(train_images, train_labels, epochs=5, batch_size=128))

test_loss, test_acc = network.evaluate(test_images, test_labels)
print(\'test_loss:\', test_loss)
print(\'test_acc:\', test_acc)
测试精度为98%,比训练精度99%少不少。训练精度和测试精度这种差距是过拟合造成的
以上是关于2.1初识神经网络的主要内容,如果未能解决你的问题,请参考以下文章