记树莓派的一个项目_RGB1602的实际使用
Posted 轩_雨
tags:
篇首语:本文由小常识网(cha138.com)小编为大家整理,主要介绍了记树莓派的一个项目_RGB1602的实际使用相关的知识,希望对你有一定的参考价值。
概述
功能:使树莓派可以利用RGB1602(LCD1602扩展板,I2C Interface 16*2 LCD PI Plate With KeyPad With RGB LED)显示时间和其它信息
语言:python
设备:
- 树莓派:树莓派4B (操作系统: Raspbian)
- RGB1602:MCP23017 + RGB三色灯 + 五个按键 + LCD1602
展示:(肉眼看的效果会比拍照效果好)
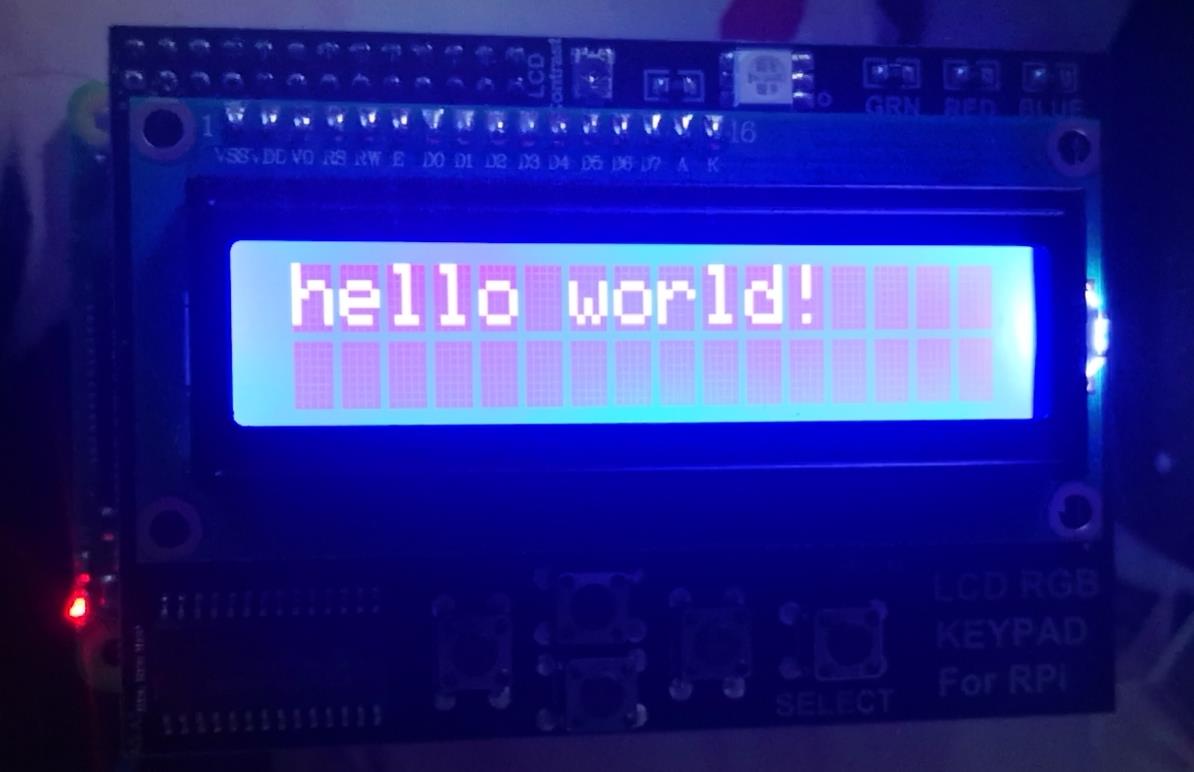
代码:https://gitee.com/xuanyusan/raspberrypi_rgb1602.git
写在最前
如果你还没有入手这个模块,建议不要从淘宝入手。或者可以选取其它的LCD1602液晶屏转接扩展板,具体可以参照这篇文章。
RGB1602的简介
1、简介
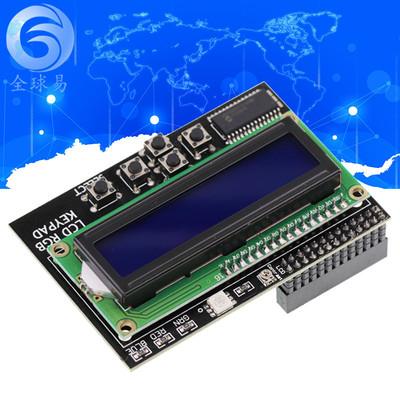
这个应该是2015年52PI推出的一个模块,主要是解决了LCD1602占用GPIO接口过多的问题。官方的具体资料里面还是说得比较详细。
然后上文提到的建议不要从淘宝入手的第一个理由就是因为我怀疑淘宝卖的部分RGB1602是盗版的(也不能这么说,毕竟也确实没写是RGB1602)。比如,RGB1602官方文档说的是“显示模块可以单独取出和面包板搭配使用,避免了浪费”,但是淘宝购买的模块LCD1602是焊si的,不可以取下。再比如,RGB1602的LCD多彩显示,到了淘宝购买到的模块就变成“With RGB LED”。而且在淘宝购买的时候,很多卖家只会提供LCD1602的原理图和使用资料,不提供RGB1602的,并且也不提供技术咨询。
在原理图和官方文档不匹配的情况下进行使用基本是寸步难行,所以这篇博客也是想要分享这次填坑的经历。
2、原理图
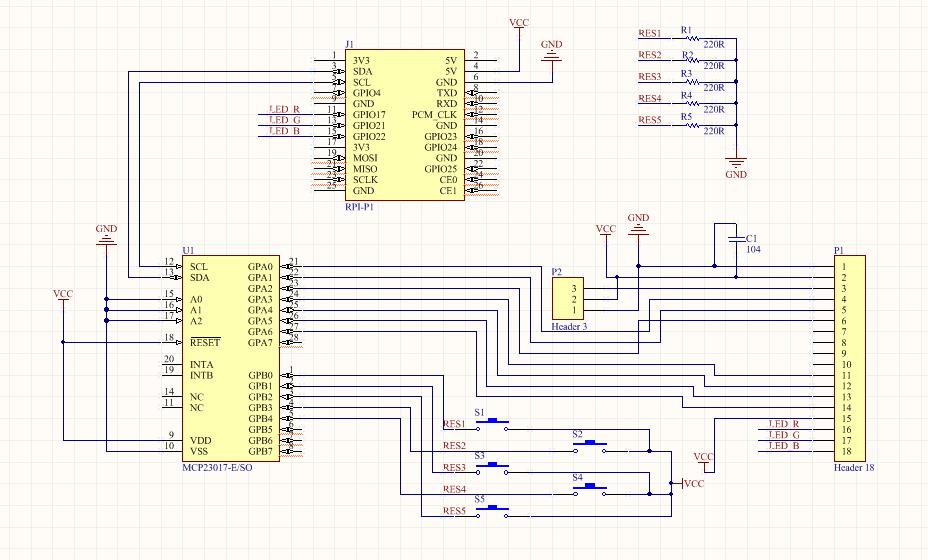
上图是官方的原理图,但我实际购买的模块和它差别还是蛮大的。只能说是借用一些不太准确的资料进行一些推理、假设和验证。
首先大的方面是可以搞清楚的,该模块是利用I2C进行串并转换,主要的元件是MCP23017。也就是通过树莓派传入的部分串行数据最后会通过MCP23017的GPA0~7、GPB0~7进行输出,反之也可以进行输入。所以只需要搞清楚GPA0~7、GPB0~7跟LCD1602的对应关系即可。这个可以通过写入数据,然后利用其它GPIO接口的IN模式进行测试来确认对应关系。
最后我得出的原理图如下。
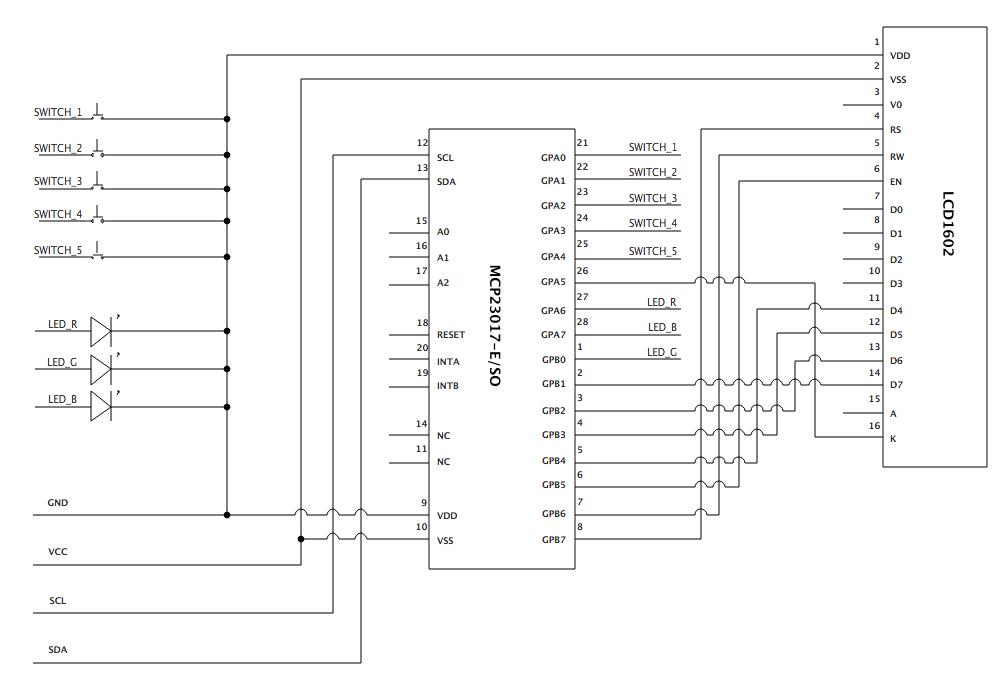
最后得出的原理图也是我建议不要从淘宝入手的第二个理由。因为它这个数据位的对应太迷了,LCD1602的高位对应MCP23017的低位,这我还要在编写代码的时候按字节进行二进制的倒位,非常别扭。
然后除了原理图,实物图和原理图的接口对应如下。
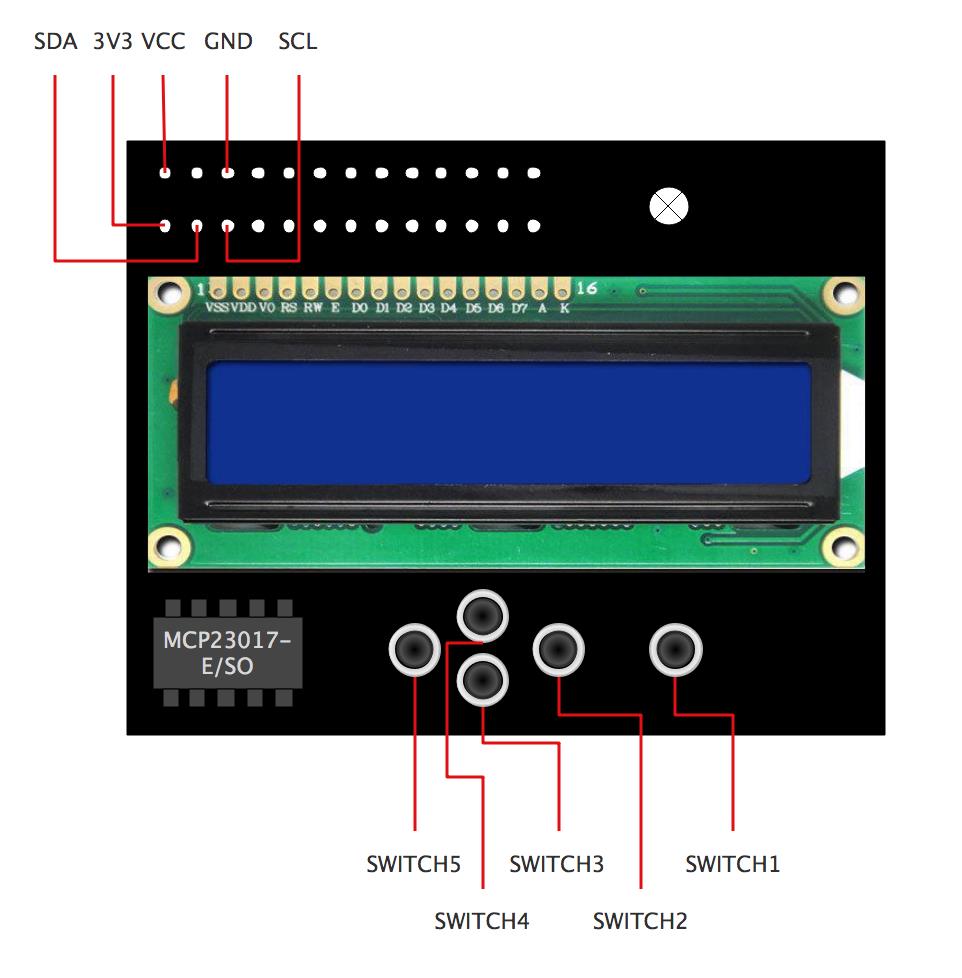
3、各模块学习资料
事前准备
1、打开树莓派I2C接口
$ sudo raspi-config
选择Interfacing Options,选择I2C,确定enabled。
2、查找设备地址
一般情况下,MCP23017对应的地址如下表。而且RGB1602默认A2、A1、A0接地,所以设备地址位0x20。
| A2 (BIN) | A1 (BIN) | A0 (BIN) | Addr(hex) |
|---|---|---|---|
| 1 | 1 | 1 | 0x27 |
| 1 | 1 | 0 | 0x26 |
| 1 | 0 | 1 | 0x25 |
| 1 | 0 | 0 | 0x24 |
| 0 | 1 | 1 | 0x23 |
| 0 | 1 | 0 | 0x22 |
| 0 | 0 | 1 | 0x21 |
| 0 | 0 | 0 | 0x20 |
如果情况特殊,可以使用如下指令查找设备。
ls /dev/i2c-*
一般来说,SDA1,SCL1对应的I2C设备就为i2c-1。如下指令可以查找设备地址。
sudo i2cdetect -y 1 # 如果I2C设备为i2c-0,则为-y 0
代码编写
1、项目结构
|-config.py              # 配置文件
|-MCP23017.py            # MCP输入文件,提供给LCD1602模块输入命令和输入数据等接口函数
|-LCD1602_time.py        # 打印时间的主入口文件
|-LCD1602_ip.py          # 打印IP地址的主入口文件
|-LCD1602_weather.py     # 打印天气的主入口文件
2、代码
config.py
# MCP23017 GPA口配置/输入/输出相关寄存器地址
MCP23017_IODIRA = 0x00
MCP23017_IPOLA  = 0x02
MCP23017_GPINTENA = 0x04
MCP23017_DEFVALA = 0x06
MCP23017_INTCONA = 0x08
MCP23017_IOCONA = 0x0A
MCP23017_GPPUA = 0x0C
MCP23017_INTFA = 0x0E
MCP23017_INTCAPA = 0x10
MCP23017_GPIOA = 0x12
MCP23017_OLATA = 0x14
# MCP23017 GPB口配置/输入/输出相关寄存器地址
MCP23017_IODIRB = 0x01
MCP23017_IPOLB = 0x03
MCP23017_GPINTENB = 0x05
MCP23017_DEFVALB = 0x07
MCP23017_INTCONB = 0x09
MCP23017_IOCONB = 0x0B
MCP23017_GPPUB = 0x0D
MCP23017_INTFB = 0x0F
MCP23017_INTCAPB = 0x11
MCP23017_GPIOB = 0x13
MCP23017_OLATB = 0x15
# LCD1602 数据读写掩码
DATA_MASK = 0x1E
WRITE_CMD_MASK = 0x20
WRITE_DATA_MASK = 0xA0
WRITE_EN = 0xDF
READ_MASK = 0x1F
# RGB 三色灯掩码
LIGHT_G = 0x01
LIGHT_B = 0x80
LIGHT_R = 0x40
# LCD1602 背光掩码
LIGHT_K = 0x20
# LCD1602 数据倒位表
DRMAP = [0x0, 0x8, 0x4, 0xC, 0x2, 0xA, 0x6, 0xE, 0x1, 0x9, 0x5, 0xD, 0x3, 0xB, 0x7, 0xF]
# I2C 设备号
MCP23017_ID = 1
# I2C 设备地址
MCP23017_ADDRESS = 0x20
MCP23017.py
import smbus
import time
from config import *

bus = smbus.SMBus(MCP23017_ID)

# 对寄存器的数据进行初始化
for addr in range(22):
    if (addr == 0) or (addr == 1):
        bus.write_byte_data(MCP23017_ADDRESS, addr, 0xFF)
    else:
        bus.write_byte_data(MCP23017_ADDRESS, addr, 0x00)

# MCP23017对应LCD1602的输出输入
# MCP23017GP -- LCD1602  -- in/out
# B7         -- RS       -- out
# B6         -- RW       -- out
# B5         -- E        -- out
# B4-B1      -- D4-D7    -- out
# B0         -- G        -- out
# A7         -- B        -- out
# A6         -- R        -- out
# A5         -- K        -- out
# A4-A0      -- keyboard -- in

# 设置B7-B0输出
bus.write_byte_data(MCP23017_ADDRESS,MCP23017_IODIRB,0x00)

# 设置A7-A5输出,A4-A0输入
bus.write_byte_data(MCP23017_ADDRESS,MCP23017_IODIRA,0x1F)
bus.write_byte_data(MCP23017_ADDRESS,MCP23017_GPPUA,0x1F)

print("----------------设置输入输出完毕----------------")

def send_bit8(bits:int, mode:str)->None:
    if mode == "data":
      	write_mask = WRITE_DATA_MASK
    elif mode == "cmd":
      	write_mask = WRITE_CMD_MASK
    else:
        return None
    # 数据倒位
    bits = DRMAP[bits//16]*16+DRMAP[bits%16]
    # 输送B高4位
    buf = (bits >> 3) & DATA_MASK
    buf |= write_mask | LIGHT_G     # RS = 0, RW = 0, EN = 1
    bus.write_byte_data(MCP23017_ADDRESS, MCP23017_GPIOB, buf)
    time.sleep(0.002)
    buf &= WRITE_EN       # Make EN = 0
    bus.write_byte_data(MCP23017_ADDRESS, MCP23017_GPIOB, buf)
    # 输送B低4位
    buf = (bits << 1) & DATA_MASK
    buf |= write_mask | LIGHT_G     # RS = 0, RW = 0, EN = 1
    bus.write_byte_data(MCP23017_ADDRESS, MCP23017_GPIOB, buf)
    time.sleep(0.002)
    buf &= WRITE_EN       # Make EN = 0
    bus.write_byte_data(MCP23017_ADDRESS, MCP23017_GPIOB, buf)
    # 输送A高4位
    buf = LIGHT_R | LIGHT_B | LIGHT_K
    bus.write_byte_data(MCP23017_ADDRESS, MCP23017_GPIOA, buf)
    time.sleep(0.002)
    buf &= WRITE_EN       # Make EN = 0
    bus.write_byte_data(MCP23017_ADDRESS, MCP23017_GPIOA, buf)

def send_command(comm:int)->None:
    send_bit8(comm, "cmd")

def send_data(data:int)->None:
    send_bit8(data, "data")

def clear_lcd():
    time.sleep(0.005)
    send_command(0x01) # Clear Screen

def init_lcd():
    try:
        send_command(0x33) # Must initialize to 8-line mode at first
        time.sleep(0.005)
        send_command(0x32) # Then initialize to 4-line mode
        time.sleep(0.005)
        send_command(0x28) # 2 Lines & 5*7 dots
        time.sleep(0.005)
        send_command(0x0C) # Enable display without cursor
        time.sleep(0.005)
        send_command(0x01) # Clear Screen
    except:
        return False
    else:
        return True

def print_lcd(x:int, y:int, string:str)->None:
    x = 0 if x<0 else 0x0F if x>0x0F else x
    y = 0 if y<0 else 0x01 if y>0x01 else y
    # 定位
    addr = 0x80 | 0x40 * y | x
    send_command(addr)
    # 写数据
    for char in string:
        send_data(ord(char))

def scan_lcd()->int:
    data = bus.read_byte_data(MCP23017_ADDRESS, MCP23017_GPIOA) & READ_MASK
    # print(data)
    return 0 if data&1==0 else 1 if data&2==0 else 2 if data&4==0 else 3 if data&8==0 else 4 if data&16==0 else -1

def setColor(color:"red|green|blue|yellow|negenta|cyan|white")->None:
    global LIGHT_G, LIGHT_B, LIGHT_R
    LIGHT_G = 0x01
    LIGHT_B = 0x80
    LIGHT_R = 0x40
    LIGHT_R = 0
    if color=="red" or color=="yellow" or color=="negenta" or color=="white":
        LIGHT_R = 0
    if color=="green" or color=="yellow" or color=="cyan" or color=="white":
        LIGHT_G = 0
    if color=="blue" or color=="negenta" or color=="cyan" or color=="white":
        LIGHT_B = 0

color = ["red","green","blue","yellow","negenta","cyan","white"]

if __name__ == "__main__":
    init_lcd()
    print_lcd(0, 0, "Hello world!")
    """ 输入测试
    while True:
        print(scan_lcd())
        time.sleep(1)
    """
    """ 输出测试
    cnt = 0
    while True:
        setColor(color[cnt])
        print_lcd(0, 0, "Hello world!")
        cnt = (cnt+1)%7
        time.sleep(3)
    """
LCD1602_time.py
from MCP23017 import print_lcd, init_lcd
import time

init_lcd()

def print_time():
    d = time.strftime("%Y-%m-%d", time.localtime())
    t = time.strftime("%H:%M:%S", time.localtime())
    print_lcd(0, 0, d)
    print_lcd(0, 1, t)

if __name__ == "__main__":
    while True:
        print_time()
        time.sleep(0.1)
LCD1602_weather.py(这里不提供天气接口)
from MCP23017 import print_lcd, init_lcd, clear_lcd, scan_lcd
import time
import requests

init_lcd()

location = ["GD Chaozhou", "BJ Beijing"]
cityname = ["chaozhou",    "beijing"   ]

def print_weather(cid):
    req = requests.get("https://api.seniverse.com/v3/weather/now.json?key={key}&location="+cityname[cid]+"&language=en&unit=c") # 这里可以去申请一下这个免费接口,其他的接口也可以
    # print(req.json())
    data = req.json()["results"][0]["now"]
    temperature = data["temperature"]
    weather = data["text"]
    clear_lcd()
    print_lcd(0, 0, location[cid])
    print_lcd(0, 1, weather+\' \'+temperature+chr(0xDF)+\'C\')

if __name__ == "__main__":
    count = 0
    cid = 0
    print_weather(cid)
    while True:
        if count == 600:
	    count = 0
	    print_weather(cid)
        time.sleep(0.1)
        op = scan_lcd()
        if op == 4:
	    cid = cid-1 if cid>0 else 0
	    print_weather(cid)
        if op == 1:
	    cid = cid+1 if cid<1 else 1
	    print_weather(cid)
        count += 1
LCD1602_ip.py
from MCP23017 import print_lcd, init_lcd
import time
import socket

def get_host_ip():
    ip = ""
    try:
        s = socket.socket(socket.AF_INET, socket.SOCK_DGRAM)
        s.connect((\'8.8.8.8\', 80))
        ip = s.getsockname()[0]
    finally:
        s.close()
    return ip

hostname = socket.gethostname()
ip = get_host_ip()

init_lcd()

def print_ip():
    print_lcd(0, 0, hostname)
    print_lcd(0, 1, ip)

if __name__ == "__main__":
    print_ip()
运行效果
-
时间
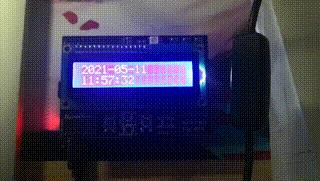
-
天气
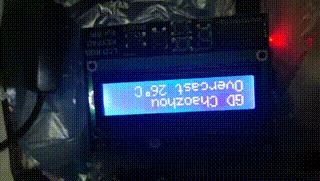
-
IP地址
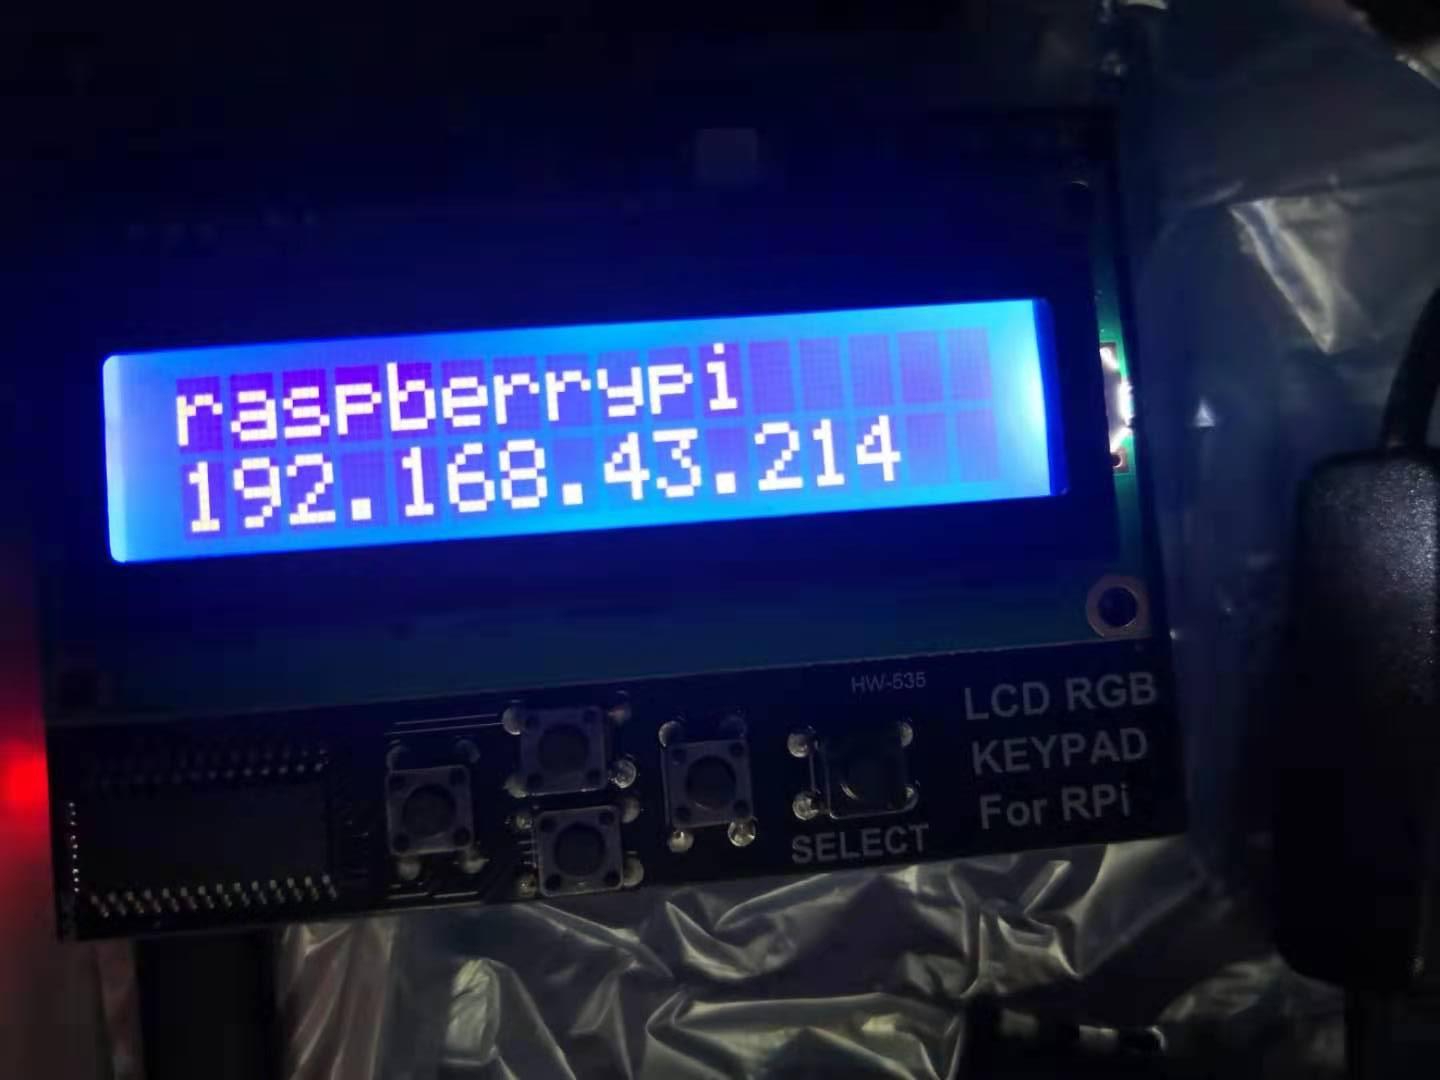
以上是关于记树莓派的一个项目_RGB1602的实际使用的主要内容,如果未能解决你的问题,请参考以下文章