一、nginx介绍
1、nginx简介
Nginx是一个高性能的HTTP和反向代理web服务器,同时也提供了IMAP/POP3/SMTP 服务。Nginx 是由伊戈尔·赛索耶夫为俄罗斯访问量第二的 Rambler.ru 站点开发的,第一个公开版本 0.1.0 发布于 2004 年 10 月 4 日。 Nginx 是一款轻量级的 Web 服务器/反向代理服务器及电子邮件(IMAP/POP3)代理服务器,在 BSD-like 协议下发行。其特点是占有内存少,并发能力强。
2、nginx 工作模式
nginx 有两种工作模式: master-worker 模式和单进程模式。在 master-worker 模式下,有一个 master 进程 和至少一个的 worker 进程,单进程模式顾名思义只有一个进程。
master-worker 模式
该模式下,nginx 启动成功后,会有一个 master 进程和至少一个的 worker 进程。master 进程负责处理系统信号,加载配置,管理 worker 进程(启动,杀死,监控,发送消息/信号等)。worker 进程负责 处理具体的业务逻辑,也就是说,对外部来说,真正提供服务的是 worker 进程。生产环境下一般使用 这种模式,因为这种模式有以下优点:
- 稳定性高,只要还有 worker 进程存活,就能够提供服务,并且一个 worker 进程挂掉 master 进程会 立即启动一个新的 worker 进程,保证 worker 进程数量不变,降低服务中断的概率。
- 配合 linux 的 cpu 亲和性配置,可以充分利用多核 cpu 的优势,提升性能 3. 处理信号/配置重新加载/升级时可以做到尽可能少或者不中断服务(热重启)
单进程模式
单进程模式下,nginx 启动后只有一个进程,nginx 的所有工作都由这个进程负责。由于只有一个进程, 因此可以很方便地利用 gdb 等工具进行调试。该模式不支持 nginx 的平滑升级功能,任何的信号处理 都可能造成服务中断,并且由于是单进程,进程挂掉后,在没有外部监控的情况下,无法重启服务。 因此,该模式一般只在开发阶段和调试时使用,生产环境下不会使用
3、配置文件简介
user nginx; #该程序用户。
worker_processes 1; #启动进程,指定 nginx 启动的工作进程数量,建议按照 cpu 数目来指定。
error_log  logs/error.log; #启用错误日志。

pid        logs/nginx.pid; #主进程 PID 保存文件
events {
use epoll;   #使用 epoll 模型,对于 2.6 以上的内核,建议使用 epoll 模型以提高性能
worker_connections 51200;    #工作进程的最大连接数量
}
http{  #网站优化参数
    server {    #具体的某一网站的配置信息
        listen 80;     #监听端口
        server_name  localhost; #服务器域名
        access_log logs/access.log; #访问日志保存位置
        location / { #默认匹配
            root   html; 网页根目录(/usr/local/nginx/html)
            index   index.php index.html index.htm; #默认加载页面
        }
        location (.*)\\.php$ {
            #用正则匹配具体的访问对象;
        }
    }
}
二、nginx相关实验
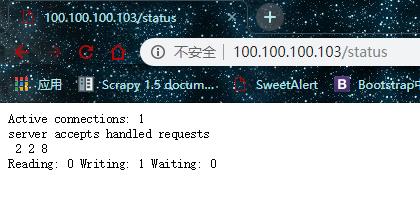
1、nginx状态统计
编辑主配置文件,加入如下匹配规则
        location /status {
                stub_status on;
                access_log  off;
                }
热重启nginx
[root@centos ~]# /usr/local/nginx/sbin/nginx -s reload

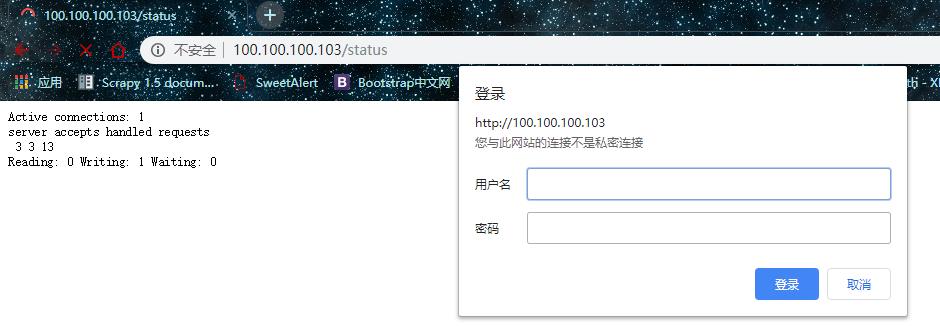
2、目录保护
在状态统计的 location 中添加:
        location /status {
                stub_status on;
                access_log  off;
                auth_basic "Welcome to nginx_status!";
                auth_basic_user_file /usr/local/nginx/html/htpasswd.nginx;
                }
生成密码文件
[root@centos ~]# cd /usr/local/nginx/html/
[root@centos html]# htpasswd -c /usr/local/nginx/html/htpasswd.nginx nginx  (登录名为 nginx)
New password:
Re-type new password:
Adding password for user nginx
重启nginx
[root@centos html]# /usr/local/nginx/sbin/nginx -s reload

3、基于IP的访问控制
在主配置文件相应位置加入如下代码(根据加入的位置不同,相应控制的权限也不同)
    server {
        listen       80;
        server_name  localhost;
        charset utf-8;
        allow 100.100.100.103;(加入位置,在这里,可以控制该虚拟主机所用的访问连接。)
        deny 100.100.100.1;
        location / {
            root   html;
            index   index.php index.html index.htm;
        }
重启访问测试

4、多虚拟主机实验
修改主配置文件
    server {
        listen 80;
        server_name www.qq.com;
        index index.html index.htm index.php;
        root  html/qq;
        access_log  logs/bbs-access.log  main;
        }
    server {
        listen 80;
        server_name www.bb.com;
        index index.html index.htm index.php;
        root  html/bb;
        access_log  logs/bbs-access.log  main;
        }
创建对应家目录和文件
[root@centos ~]# mkdir /usr/local/nginx/html/{qq,bb}
[root@centos ~]# echo "this is qq.com" >/usr/local/nginx/html/qq/index.html
[root@centos ~]# echo "this is bb.com" >/usr/local/nginx/html/bb/idnex.html
重启分别访问
[root@centos ~]# /usr/local/nginx/sbin/nginx -s reload
#记得修改host文件


5、nginx 反向代理
代理与反向代理
- 代理 : 代理客户端
- 反向代理 : 代理服务器
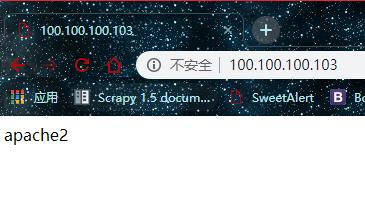
在这里,我们使用nginx作为反向代理服务器代理 apache 服务器,在另一台机器,启动apache服务器。
修改主配置文件
        location / {
                proxy_pass http://100.100.100.105:80;
        }
重启访问
[root@centos ~]# /usr/local/nginx/sbin/nginx -s reload

6、nginx、负载均衡
在访问量过大时,使用一台服务器则不能则不能满足要求,此时,我们可以开启多台apache服务器来分摊压力,在这其中,nginx充当负载均衡服务器角色,将请求分发到不同apache服务器上。
编辑主配置文件
    upstream test {
        server 100.100.100.105:80;
        server 100.100.100.106:80;        }
    server {
        listen       80;
        server_name  localhost;
        charset utf-8;
        location / {
                proxy_pass http://test;
                proxy_set_header Host $host;
        }
重启nginx,访问测试
[root@centos ~]# /usr/local/nginx/sbin/nginx -s reload


7、nginx 实现https访问
安装 nginx 时,需要将--with-http_ssl_module 模块开启
编辑主配置文件
    server {
        listen       443 ssl;
        server_name  localhost;

        ssl_certificate      cert.crt;
        ssl_certificate_key  cert.key;

        ssl_session_cache    shared:SSL:1m;
        ssl_session_timeout  5m;

        ssl_ciphers  "EECDH+CHACHA20:EECDH+CHACHA20-draft:EECDH+AES128:RSA+AES128:EECDH+AES2 56:RSA+AES256:EECDH+3DES:RSA+3DES:!MD5";
        ssl_prefer_server_ciphers  on;

        location / {
            root   html;
            index  index.html index.htm;
        }
    }
切换到目录,生成对应密钥和证书文件
[root@centos ~]# cd /usr/local/nginx/conf/
[root@centos conf]# openssl genrsa -out cert.key 1024 #生成私钥
[root@centos conf]# openssl req -new -key cert.key -out cert.csr #生成证书请求文件
[root@centos conf]# openssl x509 -req -days 365 -sha256 -in cert.csr -signkey cert.key -out cert.crt #生成证书
重启nginx,访问测试
[root@centos conf]# /usr/local/nginx/sbin/nginx -t
nginx: the configuration file /usr/local/nginx/conf/nginx.conf syntax is ok
nginx: configuration file /usr/local/nginx/conf/nginx.conf test is successful
[root@centos conf]# /usr/local/nginx/sbin/nginx -s reload

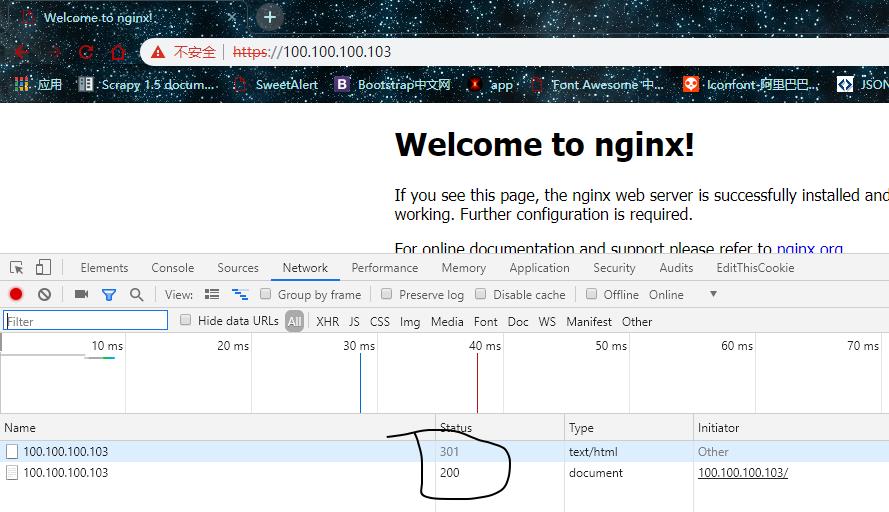
8、http 跳转 https
编辑主配置文件
直接写在server下,则该虚拟主机所有的请求,都将重新跳转。
如果是写在,某条匹配规则下,仅仅当匹配该规则,才进行跳转
    server {
        listen       80;
        server_name  localhost;
        charset utf-8;
        rewrite ^(.*)$ https://100.100.100.103 permanent;   #这里我直接写在server下,则该虚拟主机所有的请求,都将重新跳转到https
        location / {
        .....
        }
重启服务,访问测试
