TPOT网络蜜罐安装——保姆级教程(一个人的血泪史)
Posted ChuckieZhu
tags:
篇首语:本文由小常识网(cha138.com)小编为大家整理,主要介绍了TPOT网络蜜罐安装——保姆级教程(一个人的血泪史)相关的知识,希望对你有一定的参考价值。
前言:
最近需要安装一个TPOT网络蜜罐,看网上教程太少或者我使用了不可行,受了俩星期的折磨后,由于不可抗因素需要重新安装,记录一下,防止后来人踩坑。
我的环境:
WINDOWS10 VMware Workstation 16 Player Debian10.10 XSHELL
如果有需要的东西,我会放入百度网盘,供大家下载。
安装过程:
环境准备:
VMware Workstation 16 Player安装:
不需要破解,官网有免费版的,直接去官网下载正版VM即可。(如果你关闭了Windows自动更新,假设16年以后就没更新过了,最好下载17年及以前的版本,否则不可用)
免费VM下载链接:点击跳转
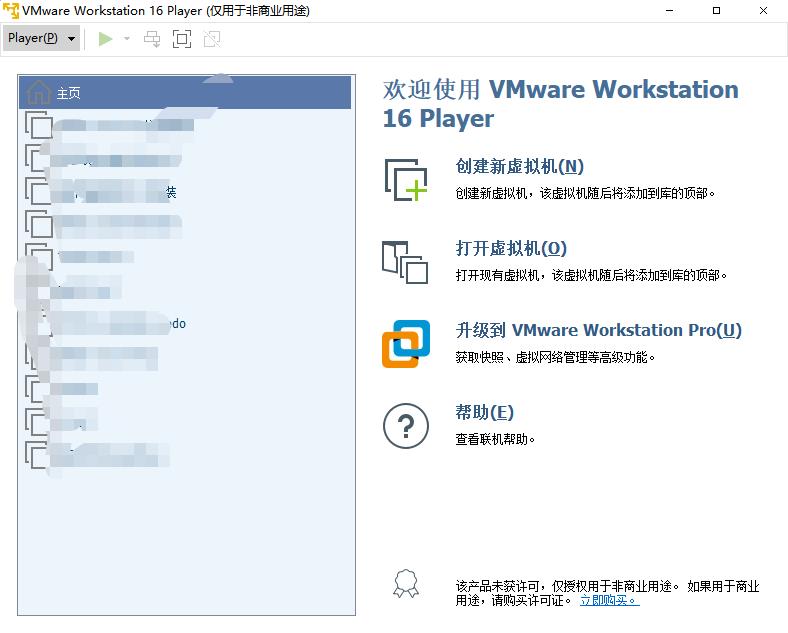
这个安装是可以选择个人免费使用的,安装后如图:
Debian镜像下载:
去官网下载即可,免费下载。切忌去乱七八糟的地方下载。
XSHELL下载安装:(注意,百度第一条不是xhell官网,xshellcn.com是xshell官网)
有学生/个人免费版,需简单邮箱认证,下载连接:点击跳转
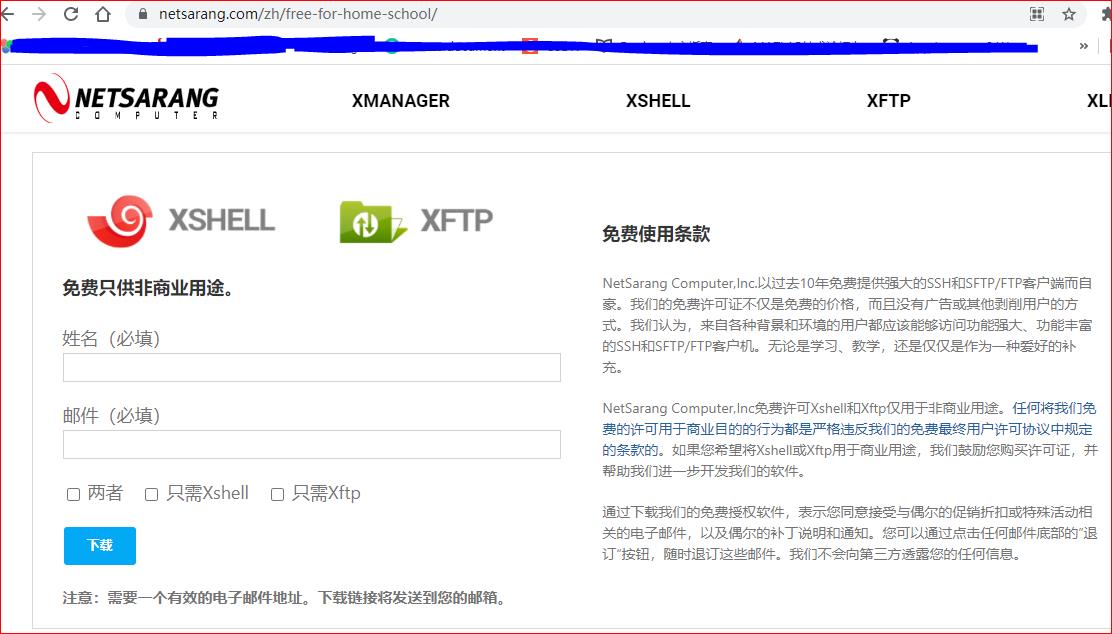
然后会给你发送邮箱,点击邮箱链接下载即可,虽然限制开启的终端数量,但是够了。
开始安装虚拟机:
创建新的虚拟机:
选择自己的镜像文件
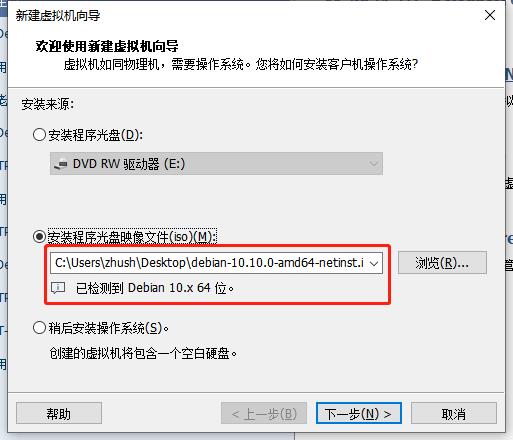
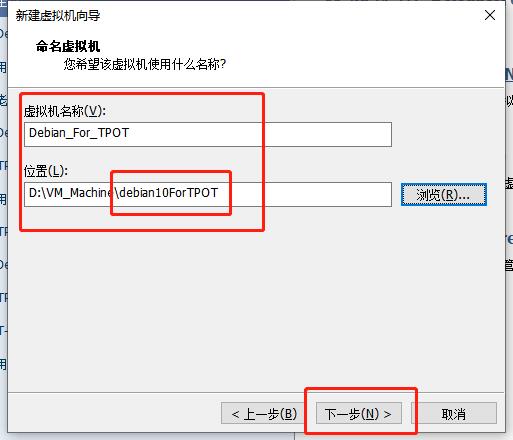
起名字、选择安装位置:
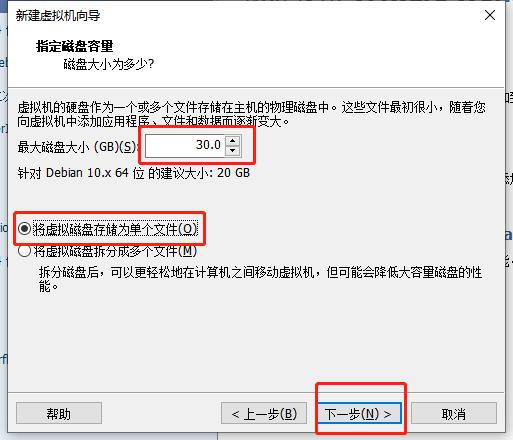
选择磁盘容量:(由于之前安装成功过,知道机器崩溃,大概使用了12+G的空间,所以这里给30G用于学习应该够用了):
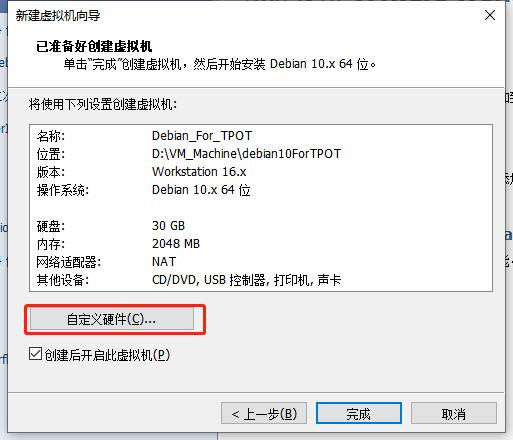
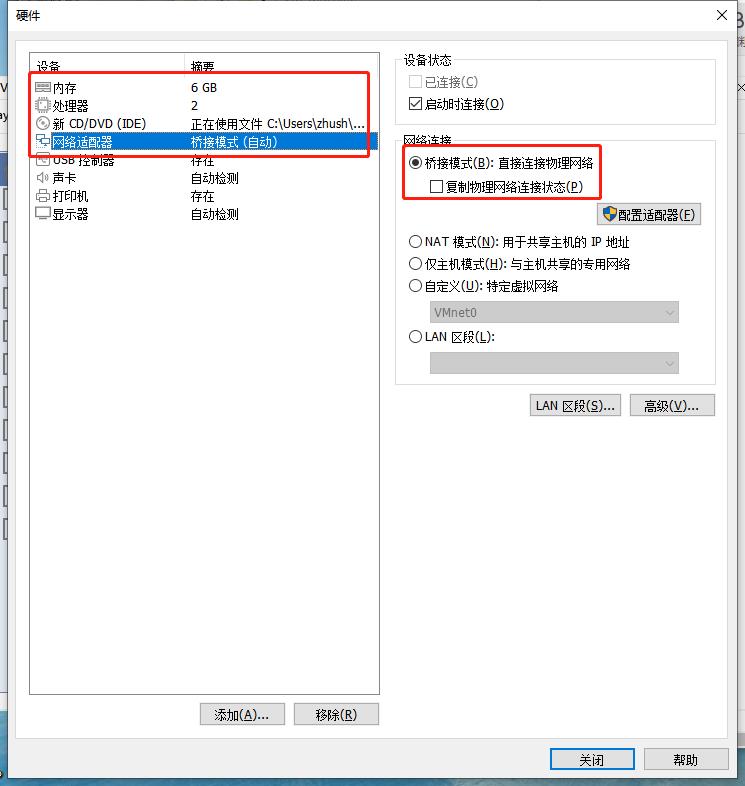
自定义硬件:(内存一定要足够,我之前4G内存使用,总是内存溢出,但是电脑总共才8G内存,奈何只能给6G,我也不知道6G够不够,建议大家给8G)
虚拟机安装:
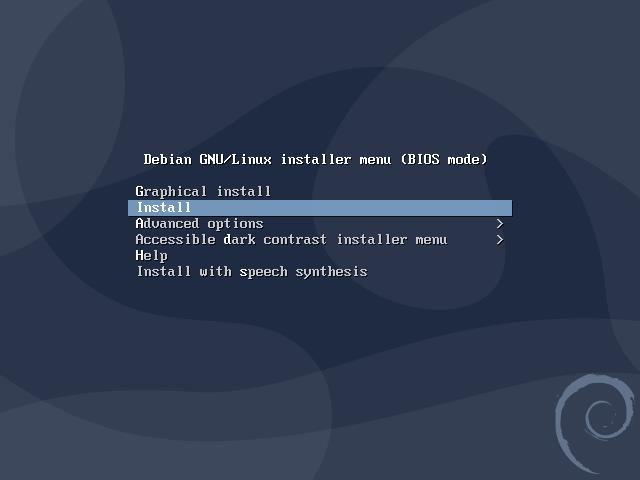
选择安装方式(第一个是图形化安装,我个人喜欢命令行一点,见仁见智吧)
选择语言键盘等:(建议这里选择中文,否则可能会一系列问题。选择英文的,后面的中国在 other->asia->China)
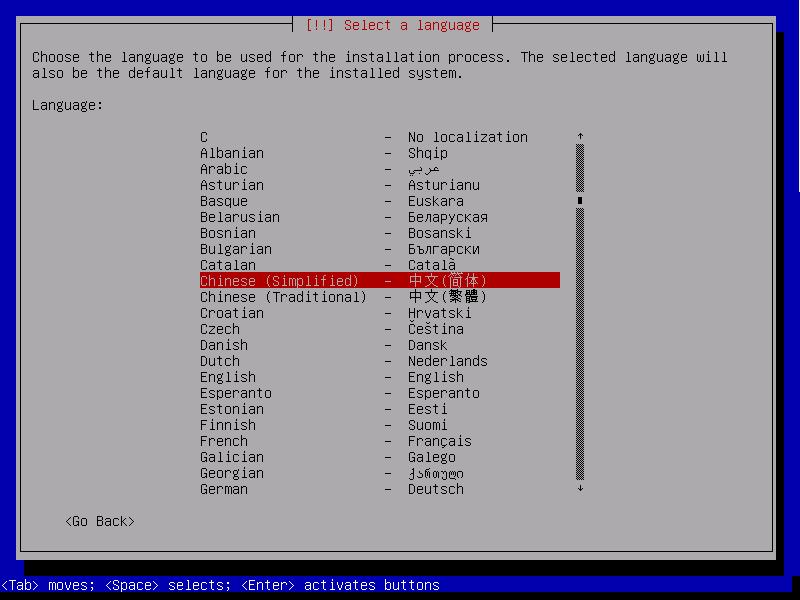
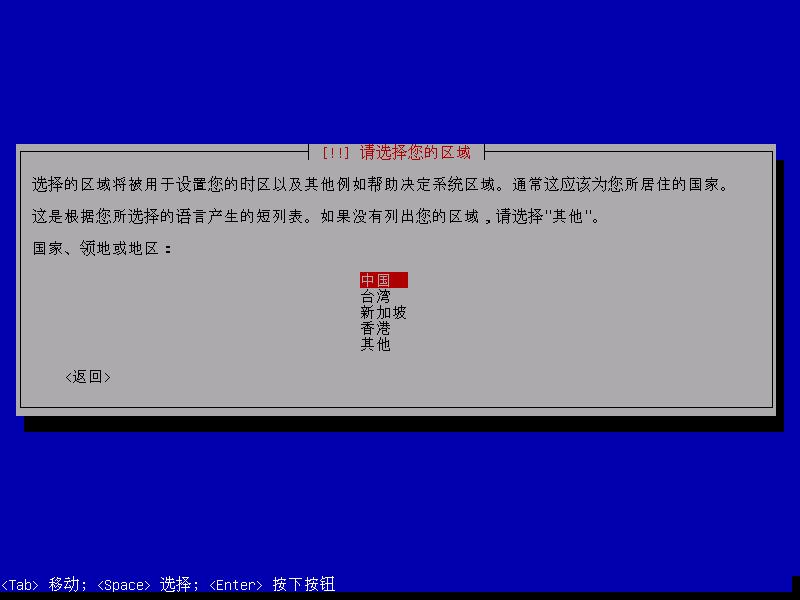

主机名和网址选择(除非有特殊需求,一般咱们直接跳过,使用默认的,上下左右键移动光标选择继续,空格确认)
输入root的密码,我这里使用r6
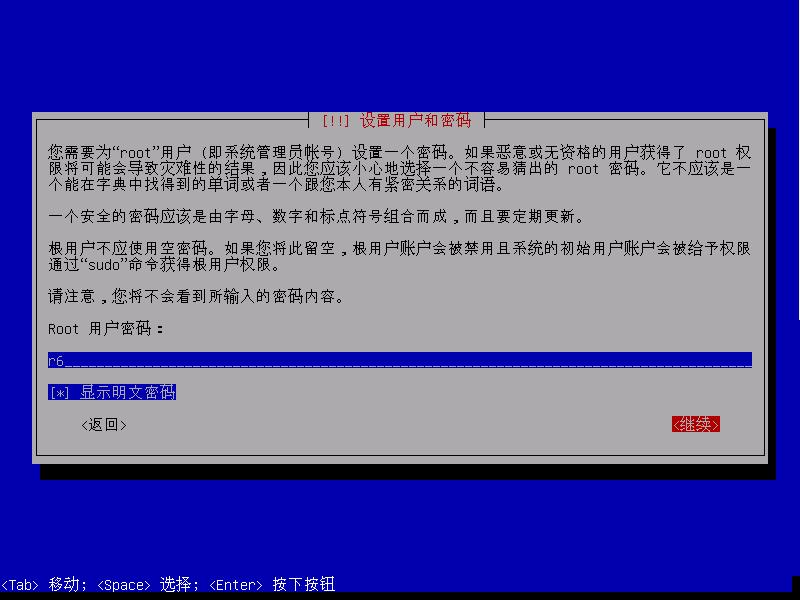
输入用户名,我这里使用chuckiezhu
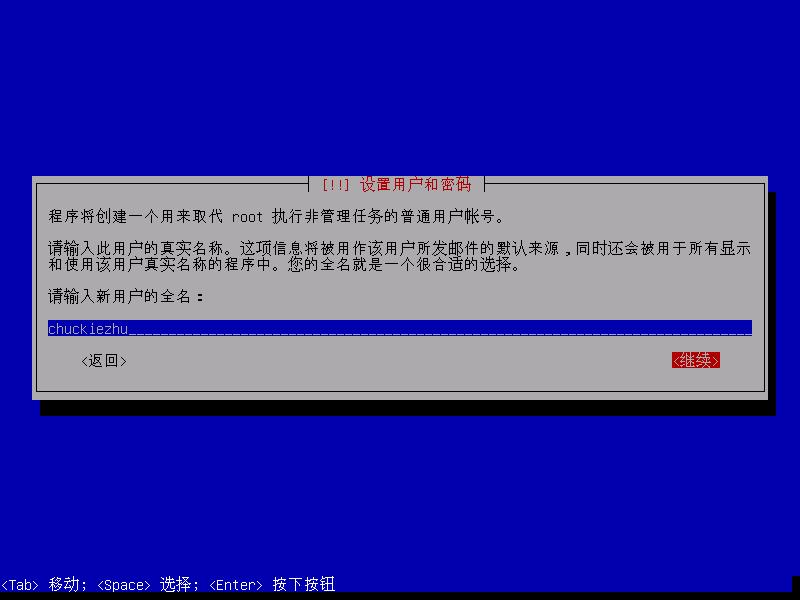
密码我是用6
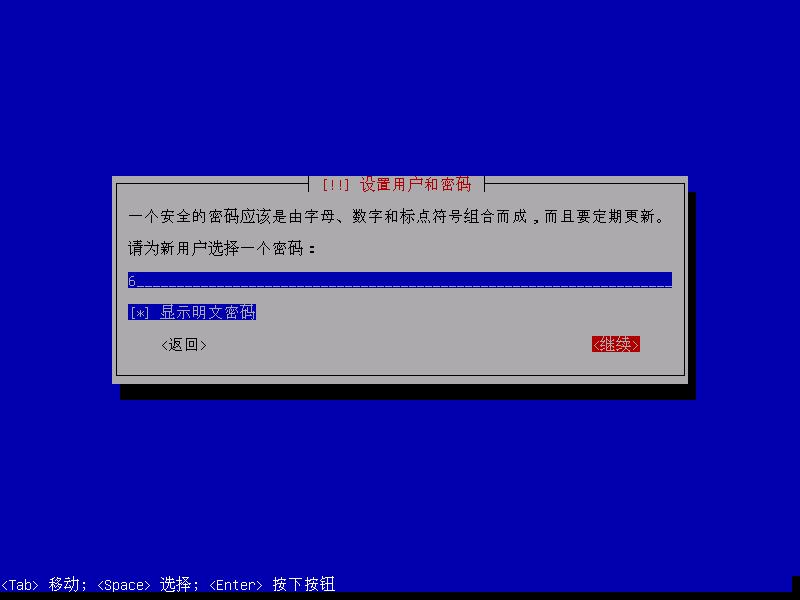
磁盘分区:我这里选择向导-使用整个磁盘(有特殊需求的自己设置),回车确认
要分区的磁盘,默认的这个即可。回车确认。
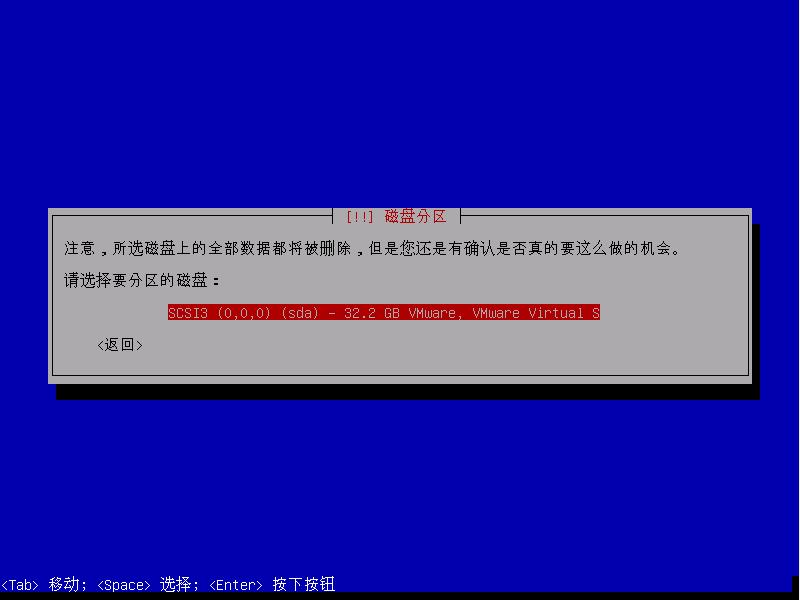
分区方案:我选择将所有文件放在同一个分区中,回车确认。
确认更改:回车确认
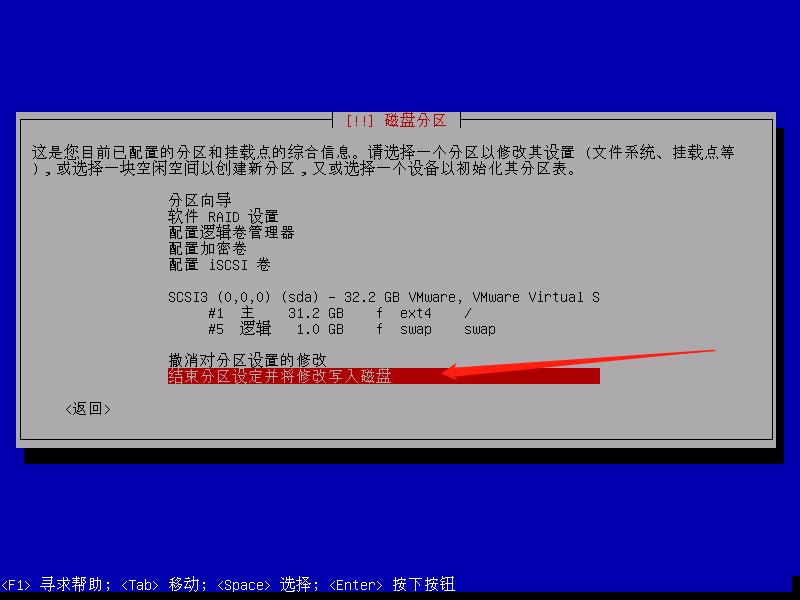
再次确认:(选择是,回车确认)
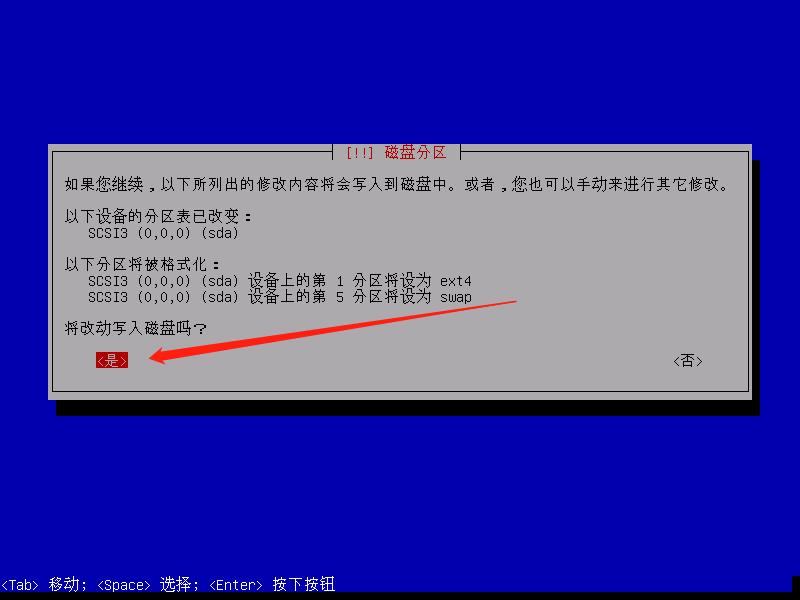
是否扫描其他CD/DVD: 选择否
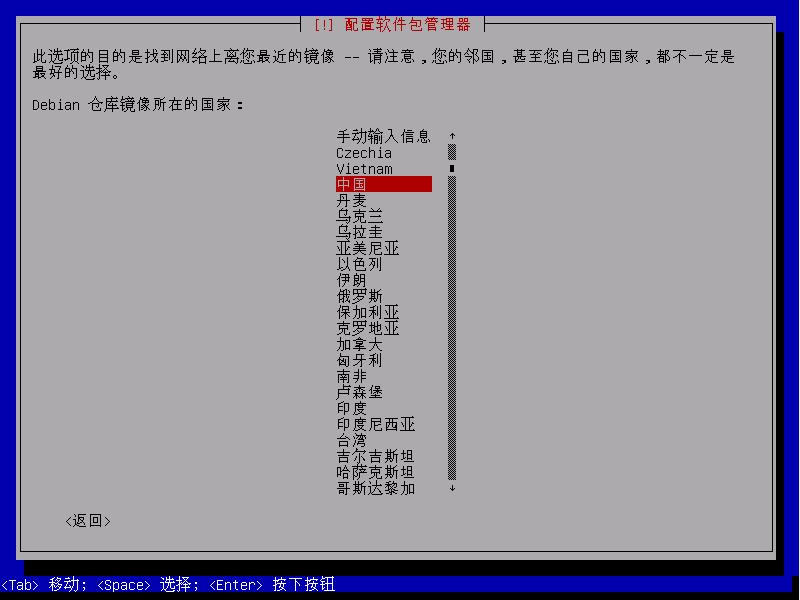
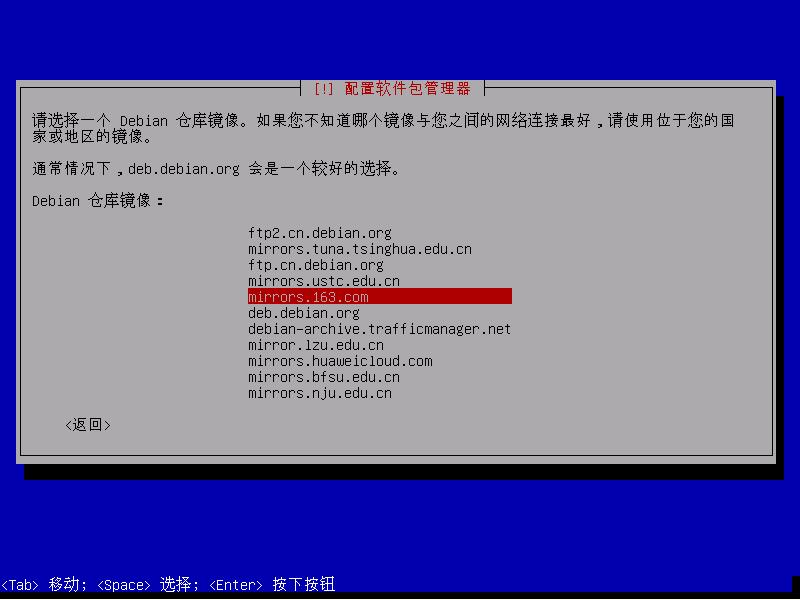
配置软件包管理器:(我选择的是中国->163,当然大家可以选自己的,这个无大碍,回车确认)
http代理:我没有,我留空,大家视自己情况而定。
是否参与调查:我选的否
软件选择:(SSH一定要选,要不然再安装还得费事,,如果使用命令行,不需要安装第一个桌面环境,我下面示例就未安装)回车确认。

将GRUB安装至硬盘:选择是
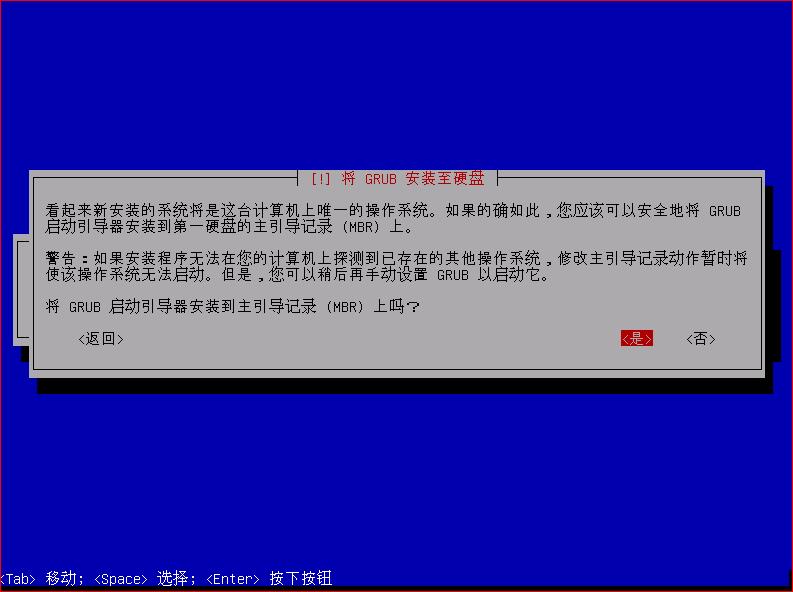

结束安装:选择继续,系统自动重启。

简易配置虚拟机,做安装TPOT的准备工作:
登入虚拟机:
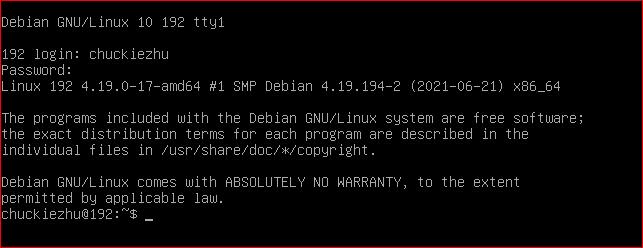
使用这个命令查看虚拟机的ip地址:
ip addr show
使用xshell链接:
需要做三个设置:
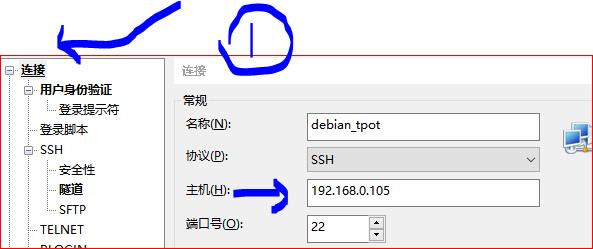
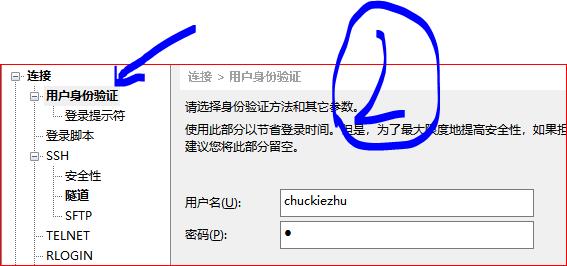
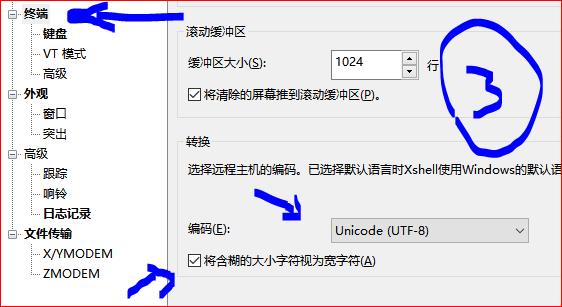
然后点击确定,出来之后,连接()
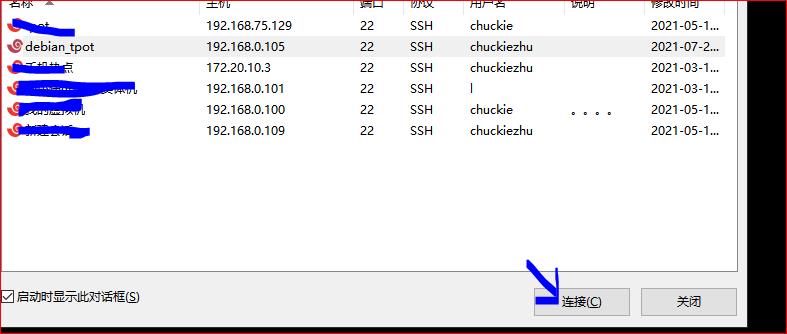
这就连接成功了。
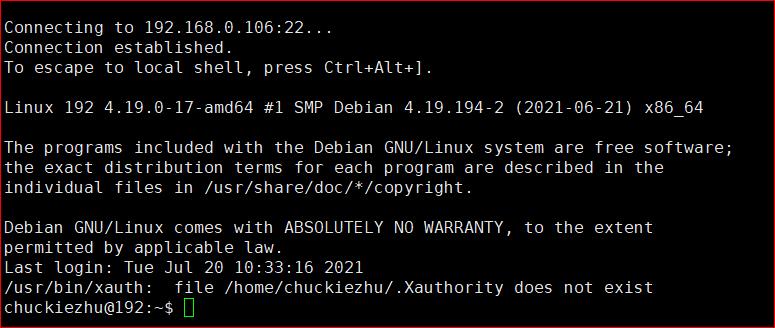
用下面命令切换至root用户(下面都是root的操作)
su -注意:su 和 su -是不一样的,su -才能成功切换到root用户,输入的密码是root用户的密码 r6
更新:
apt-get update
apt-get upgrade
安装VIM,用于编辑文档。
apt-get install vim简易vim配置:
vim ~/.vimrcfiletype on
filetype plugin indent on
set completeopt=longest,menu
set noswapfile
set iskeyword+=_,@,%,#,-,$
set whichwrap+=<,>,h,l
syntax on
set nocompatible
set backspace=2
set nocompatible
"display line number
set nu
set scrolloff=4
set smarttab
set tabstop=4
set softtabstop=4
set shiftwidth=4
set expandtab
set cindent
set nobackup
highlight WhitespaceEOL ctermbg=red guibg=red
match WhitespaceEOL /\\s\\+$/
set cursorline
set ruler
set ignorecase smartcase
set nowrapscan
set incsearch
set hlsearch
set encoding=utf-8
set noerrorbells
set novisualbell
set showmatch
set matchtime=2
set hidden
set backspace=indent,eol,start
set cmdheight=1
set laststatus=2
set statusline=\\ %<%F[%1*%M%*%n%R%H]%=\\ %y\\ %0(%&fileformat\\ %&encoding\\ %c:%l/%L%)\\
set termencoding=utf-8
set formatoptions+=mM
set fencs=utf-8,gbk
set guifont=Bitstream\\ Vera\\ Sans\\ Mono\\ 18安装git
apt-get install git安装apt-fast (可选,如果不安装,只需要后面的 apt-fast 替换为 apt-get 即可)
注意:一定要先检查 github.com 和 hub.fastgit.org哪个能访问,然后替换下面命令,后面同,不要直接执行,要做修改。
# install apt-fast manually
apt-get install aria2 -y
# true git :github.com
# ping the hub.fastgit.org before execute the cmd below
git clone https://hub.fastgit.org/ilikenwf/apt-fast.git
cd apt-fast
cp apt-fast /usr/bin/
chmod +x /usr/bin/apt-fast
cp apt-fast.cfast /etc/
cd ~
# back to home of root
安装后再次更新:
apt-fast update
apt-fast upgrade
apt-fast update -y使用apt-fast install -y 包名安装下面这些包
aria2 apache2-utils cracklib-runtime curl dialog figlet fuse grc libcrack2 libpq-dev lsb-release net-tools software-properties-common toilet安装docker
这里有教程(教程中的sudo命令不用复制,我是用此处安装,这里是安装docker):点击跳转
安装docker-compose(访问不了fastgit的,记得把hub.fastgit.org 改为 github.com )
curl -L "https://hub.fastgit.org/docker/compose/releases/download/1.24.1/docker-compose-$(uname -s)-$(uname -m)" -o /usr/local/bin/docker-compose
这就安装完成了,可以使用 ls /usr/local/bin/docker-compose 检查是否下载成功

使用下面命令给可执行的权限以及做一个符号链接
chmod +x /usr/local/bin/docker-compose

ln -s /usr/local/bin/docker-compose /usr/bin/docker-compose
然后写一些docker的daemon.json文件,路径在这里 :/etc/docker/daemon.json
但是,估计docker拉镜像还是拉不了,一会儿我给解决办法。
    "registry-mirrors": ["https://registry.docker-cn.com","http://hub-mirror.c.163.com"],
    "live-restore": true
先安装下面的包:
aria2 apache2-utils apparmor apt-transport-https aufs-tools bash-completion build-essential ca-certificates cgroupfs-mount cockpit cockpit-docker console-setup console-setup-linux cracklib-runtime curl debconf-utils dialog dnsutils ethtool fail2ban figlet genisoimage git glances grc haveged html2text htop iptables iw jq kbd libcrack2 libltdl7 libpam-google-authenticator man mosh multitail net-tools nodejs npm ntp openssh-server openssl pass pigz prips software-properties-common syslinux psmisc pv python3-pip toilet unattended-upgrades unzip vim wget wireless-tools wpasupplicant然后移除一些东西
apt-fast -y purge exim4-base mailutils pcp cockpit-pcp elasticsearch-curator
apt-fast -y autoremove
apt-mark hold exim4-base mailutils pcp cockpit-pcp elasticsearch-curator
创建用户:(记得修改为自己的用户名和密码)
mkdir -p /data/nginx/conf
htpasswd -b -c /data/nginx/conf/nginxpasswd "chuckiezhu" "12345678"
还记得自己的IP吗?我的是(192.168.0.106)
执行下面两条命令,记得改自己的IP地址
mkdir -p /data/nginx/cert
openssl req \\
        -nodes \\
        -x509 \\
        -sha512 \\
        -newkey rsa:8192 \\
        -keyout "/data/nginx/cert/nginx.key" \\
        -out "/data/nginx/cert/nginx.crt" \\
        -days 3650 \\
        -subj '/C=AU/ST=Some-State/O=Internet Widgits Pty Ltd' \\
        -addext "subjectAltName = IP:192.168.0.106"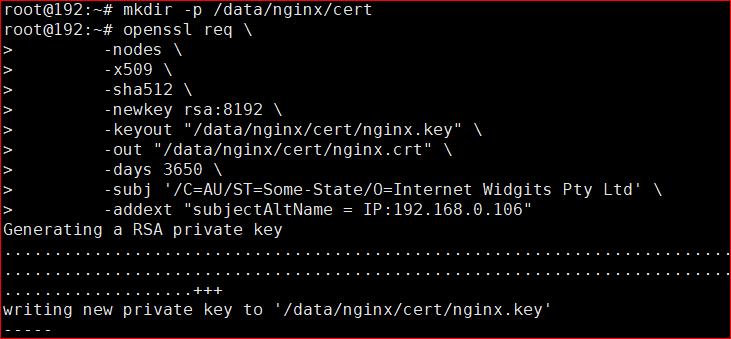
这算是添加了ssl的一个自签名证书。
关闭ssh漫游(我不知道为啥关闭)
echo "UseRoaming no" | tee -a /etc/ssh/ssh_config然后是一串关于npm的配置
# Installing elasticdump, elasticsearch-curator, yq
npm config set registry https://registry.npm.taobao.org

# warning occur since this command
npm config rm proxy
npm config rm https-proxy
# use commands above to fix npm's problem : cb() never called
再下载一个cnpm
npm install -g npm
# this command wouldn't work if use npm config .......
npm install -g cnpm
下载elasticdump
cnpm install elasticdump -g
# All packages installed (114 packages installed from npm registry, used 7s(network 6s), speed 2.85MB/s, json 106(377.18KB), tarball 17.3MB)
这四个我也不知有没有问题

然后下载一个python包
pip3 install elasticsearch-curator yq
# try to alter source if cannot install
hash -r
开始安装TPOT:
# Cloning T-Pot from GitHub
git clone https://hub.fastgit.org/telekom-security/tpotce /opt/tpot
# ping hub.fastgit.org and github.com
# use the better site
为tpot添加组和用户:(提示无法创建主目录,无所谓的,因为 --no-create-home就是不创建主目录)
addgroup --gid 2000 tpot
adduser --system --no-create-home --uid 2000 --disabled-password --disabled-login --gid 2000 tpot
做一个脚本:(我命名为 install.sh)
#!/bin/bash
# Let's set the hostname
myTPOT_DEPLOYMENT_TYPE="user"

# set the t-pot edition
# there are 6 options:
#    "STANDARD" "Honeypots, ELK, NSM & Tools" \\
#    "SENSOR" "Just Honeypots, EWS Poster & NSM" \\
#    "INDUSTRIAL" "Conpot, RDPY, Vnclowpot, ELK, NSM & Tools" \\
#    "COLLECTOR" "Heralding, ELK, NSM & Tools" \\
#    "NEXTGEN" "NextGen (Glutton, HoneyPy)" \\
#    "MEDICAL" "Dicompot, Medpot, ELK, NSM & Tools" 3>&1 1>&2 2>&3 3>&-)
myCONF_TPOT_FLAVOR="STANDARD"
# standard installation, use this to choose standard.yml

export DEBIAN_FRONTEND=noninteractive

function fuRANDOMWORD
    local myWORDFILE="$1"
    local myLINES=$(cat $myWORDFILE | wc -l)
    local myRANDOM=$((RANDOM % $myLINES))
    local myNUM=$((myRANDOM * myRANDOM % $myLINES + 1))
    echo -n $(sed -n "$myNUM p" $myWORDFILE | tr -d \\' | tr A-Z a-z)

a=$(fuRANDOMWORD /opt/tpot/host/usr/share/dict/a.txt)
n=$(fuRANDOMWORD /opt/tpot/host/usr/share/dict/n.txt)
myHOST=$a$n
hostnamectl set-hostname $myHOST
sed -i 's#127.0.1.1.*#127.0.1.1\\t'"$myHOST"'#g' /etc/hosts

if [ -f '/etc/cloud/cloud.cfg' ]; then
    sed -i 's/preserve_hostname.*/preserve_hostname: true/g' /etc/cloud/cloud.cfg
fi

# Let's patch cockpit.socket, sshd_config
myCOCKPIT_SOCKET="[Socket]
ListenStream=
ListenStream=64294
"
mySSHPORT="
Port 64295
"

mkdir -p /etc/systemd/system/cockpit.socket.d
echo "$myCOCKPIT_SOCKET" | tee /etc/systemd/system/cockpit.socket.d/listen.conf
sed -i '/^port/Id' /etc/ssh/sshd_config
echo "$mySSHPORT" | tee -a /etc/ssh/sshd_config

# Do not allow root login for cockpit
sed -i '2i\\auth requisite pam_succeed_if.so uid >= 1000' /etc/pam.d/cockpit

# there is no tpot.yml, so use standard instead
myTPOTCOMPOSE="/opt/tpot/etc/tpot.yml"
# this is a default compose
case $myCONF_TPOT_FLAVOR in
    STANDARD)
        ln -s /opt/tpot/etc/compose/standard.yml $myTPOTCOMPOSE
    ;;
    SENSOR)
        ln -s /opt/tpot/etc/compose/sensor.yml $myTPOTCOMPOSE
    ;;
    INDUSTRIAL)
        ln -s /opt/tpot/etc/compose/industrial.yml $myTPOTCOMPOSE
    ;;
    COLLECTOR)
        ln -s /opt/tpot/etc/compose/collector.yml $myTPOTCOMPOSE
    ;;
    NEXTGEN)
        ln -s /opt/tpot/etc/compose/nextgen.yml $myTPOTCOMPOSE
    ;;
    MEDICAL)
        ln -s /opt/tpot/etc/compose/medical.yml $myTPOTCOMPOSE
    ;;
esac
给这个脚本可执行权限:
chmod 744 install.sh
然后执行这个脚本:
./install.sh下面就要拉取docker镜像了,两个方案:
方案一:
使用下面的命令附加到上面脚本后面再执行一遍,需要能连接到docker服务器,否则下载很慢:
# Let's load docker images
for name in $(cat $myTPOTCOMPOSE | grep -v '#' | grep image | cut -d'"' -f2 | uniq)
  do
    docker pull $name
done
方案二:
我已经下载好了,去百度云下载,传输到虚拟机中,百度云连接:
链接:https://pan.baidu.com/s/1UMhPVIJLL_4EK7E078YunQ
提取码:sxnv
复制这段内容后打开百度网盘手机App,操作更方便哦
下载好之后,在虚拟机下载这个东西:
apt-get install lrzsz在xshell中使用这个命令:(一定在xshell中,其他的有可能不能使用)
rz -oby选择下载好的镜像文件。把下载到的百度云的东西全部下载了即可。
把所有的镜像加载进docker中:(下面的脚本要给可执行权限 chmod 744 文件名)
#!/bin/bash
for singleImage in $(ls *.tar)
do
    docker load < $singleImage
done
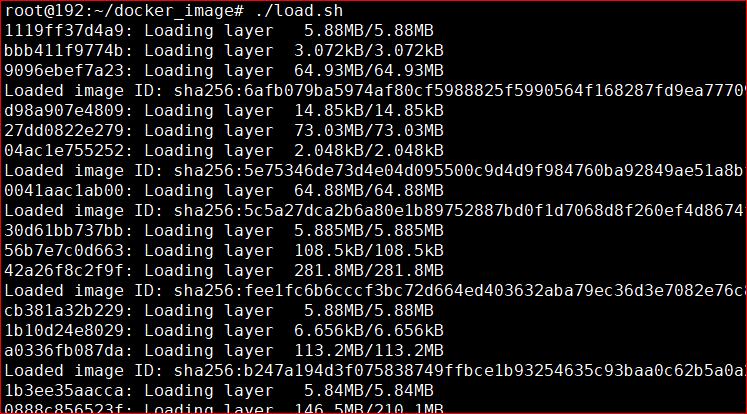
等到全部加载完毕后,要给这些镜像重命名,使用docker image ls查看已经有的镜像
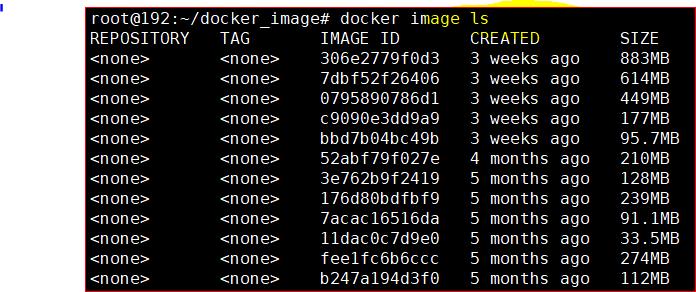
可见这里前面都是none,这时候需要给他们命名,即打tag。(对应关系在docker_image_list.sh中查看)
docker tag 镜像id dtagdevsec/名字:2006如:
#!/bin/bash
docker tag 306e2779f0d3 dtagdevsec/kibana:2006
docker tag 7dbf52f26406 dtagdevsec/logstash:2006
docker tag 0795890786d1 dtagdevsec/elasticsearch:2006
docker tag c9090e3dd9a9 dtagdevsec/head:2006
docker tag bbd7b04bc49b dtagdevsec/ewsposter:2006
docker tag 52abf79f027e dtagdevsec/honeytrap:2006
docker tag 3e762b9f2419 dtagdevsec/snare:2006
docker tag 176d80bdfbf9 dtagdevsec/tanner:2006
docker tag 7acac16516da dtagdevsec/phpox:2006
docker tag 11dac0c7d9e0 dtagdevsec/redis:2006
docker tag fee1fc6b6ccc dtagdevsec/conpot:2006
docker tag b247a194d3f0 dtagdevsec/cowrie:2006
docker tag 0896fd17df4c dtagdevsec/suricata:2006
docker tag 2aa6edcaacb4 dtagdevsec/dionaea:2006
docker tag ad9e03a50a43 dtagdevsec/heralding:2006
docker tag 8861e910b7c1 dtagdevsec/fatt:2006
docker tag 10c7ec726cb2 dtagdevsec/spiderfoot:2006
docker tag 2c5e67135d72 dtagdevsec/honeysap:2006
docker tag 14e04c93d917 dtagdevsec/p0f:2006
docker tag 124d8785a9f8 dtagdevsec/medpot:2006
docker tag 5de129dc0d1e dtagdevsec/dicompot:2006
docker tag 20ac9d38290b dtagdevsec/rdpy:2006
docker tag 68692bd8b62e dtagdevsec/mailoney:2006
docker tag 74077c1d6cca dtagdevsec/elasticpot:2006
docker tag 5e75346de73d dtagdevsec/ciscoasa:2006
docker tag 5c5a27dca2b6 dtagdevsec/citrixhoneypot:2006
docker tag 7fea9d0cb0fe dtagdevsec/nginx:2006
docker tag 67ed9a9c98e9 dtagdevsec/cyberchef:2006
docker tag 6afb079ba597 dtagdevsec/adbhoney:2006
然后执行上面的命令:
再使用docker image ls 查看是否打了tag
然后就是后面一揽子命令,我也没看,反正能直接执行:
myUPDATECHECK="APT::Periodic::Update-Package-Lists \\"1\\";
APT::Periodic::Download-Upgradeable-Packages \\"0\\";
APT::Periodic::AutocleanInterval \\"7\\";
"
echo "$myUPDATECHECK" | tee /etc/apt/apt.conf.d/10periodic

# Let's make sure to reboot the system after a kernel panic
mySYSCTLCONF="
# Reboot after kernel panic, check via /proc/sys/kernel/panic[_on_oops]
# Set required map count for ELK
kernel.panic = 1
kernel.panic_on_oops = 1
vm.max_map_count = 262144
net.ipv6.conf.all.disable_ipv6 = 1
net.ipv6.conf.default.disable_ipv6 = 1
net.ipv6.conf.lo.disable_ipv6 = 1
"
echo "$mySYSCTLCONF" | tee -a /etc/sysctl.conf

# Let's setup fail2ban config
myFAIL2BANCONF="[DEFAULT]
ignore-ip = 127.0.0.1/8
bantime = 3600
findtime = 600
maxretry = 5

[nginx-http-auth]
enabled  = true
filter   = nginx-http-auth
port     = 64297
logpath  = /data/nginx/log/error.log

[pam-generic]
enabled = true
port    = 64294
filter  = pam-generic
logpath = /var/log/auth.log

[sshd]
enabled = true
port    = 64295
filter  = sshd
logpath = /var/log/auth.log
"
echo "$myFAIL2BANCONF" | tee /etc/fail2ban/jail.d/tpot.conf

# Fix systemd error https://github.com/systemd/systemd/issues/3374
mySYSTEMDFIX="[Link]
NamePolicy=kernel database onboard slot path
MACAddressPolicy=none
"
echo "$mySYSTEMDFIX" | tee /etc/systemd/network/99-default.link

# Let's add some cronjobs
myRANDOM_HOUR=$(shuf -i 2-22 -n 1)
myRANDOM_MINUTE=$(shuf -i 0-59 -n 1)
myDEL_HOUR=$(($myRANDOM_HOUR+1))
myPULL_HOUR=$(($myRANDOM_HOUR-2))
myCRONJOBS="
# Check if updated images are available and download them
$myRANDOM_MINUTE $myPULL_HOUR * * *      root    docker-compose -f /opt/tpot/etc/tpot.yml pull

# Delete elasticsearch logstash indices older than 90 days
$myRANDOM_MINUTE $myDEL_HOUR * * *      root    curator --config /opt/tpot/etc/curator/curator.yml /opt/tpot/etc/curator/actions.yml

# Uploaded binaries are not supposed to be downloaded
*/1 * * * *     root    mv --backup=numbered /data/dionaea/roots/ftp/* /data/dionaea/binaries/

# Daily reboot
$myRANDOM_MINUTE $myRANDOM_HOUR * * 1-6      root    systemctl stop tpot && docker stop \\$(docker ps -aq) || docker rm \\$(docker ps -aq) || reboot

# Check for updated packages every sunday, upgrade and reboot
$myRANDOM_MINUTE $myRANDOM_HOUR * * 0     root    apt-fast autoclean -y && apt-fast autoremove -y && apt-fast update -y && apt-fast upgrade -y && sleep 10 && reboot
"
echo "$myCRONJOBS" | tee -a /etc/crontab

# Let's create some files and folders
fuBANNER "Files & folders"
mkdir -vp /data/adbhoney/downloads,log \\
         /data/ciscoasa/log \\
         /data/conpot/log \\
         /data/citrixhoneypot/logs \\
         /data/cowrie/downloads,keys,misc,log,log/tty \\
	 /data/dicompot/images,log \\
         /data/dionaea/log,bistreams,binaries,rtp,roots,roots/ftp,roots/tftp,roots/www,roots/upnp \\
         /data/elasticpot/log \\
         /data/elk/data,log \\
         /data/fatt/log \\
         /data/honeytrap/log,attacks,downloads \\
         /data/glutton/log \\
         /data/heralding/log \\
         /data/honeypy/log \\
         /data/honeysap/log \\
	 /data/ipphoney/log \\
         /data/mailoney/log \\
         /data/medpot/log \\
         /data/nginx/log,heimdall \\
         /data/emobility/log \\
         /data/ews/conf \\
         /data/rdpy/log \\
         /data/spiderfoot \\
         /data/suricata/log \\
         /data/tanner/log,files \\
         /data/p0f/log \\
         /home/tsec/.ssh/
touch /data/spiderfoot/spiderfoot.db
touch /data/nginx/log/error.log

# Let's copy some files
tar xvfz /opt/tpot/etc/objects/elkbase.tgz -C /
cp /opt/tpot/host/etc/systemd/* /etc/systemd/system/
systemctl enable tpot

# Let's take care of some files and permissions
chmod 770 -R /data
chown tpot:tpot -R /data
chmod 644 -R /data/nginx/conf
chmod 644 -R /data/nginx/cert

# Let's replace "quiet splash" options, set a console font for more screen canvas and update grub
sed -i 's#GRUB_CMDLINE_LINUX_DEFAULT="quiet"#GRUB_CMDLINE_LINUX_DEFAULT="quiet consoleblank=0"#' /etc/default/grub
sed -i 's#GRUB_CMDLINE_LINUX=""#GRUB_CMDLINE_LINUX="cgroup_enable=memory swapaccount=1"#' /etc/default/grub
update-grub

cp /usr/share/consolefonts/Uni2-Terminus12x6.psf.gz /etc/console-setup/
gunzip /etc/console-setup/Uni2-Terminus12x6.psf.gz
sed -i 's#FONTFACE=".*#FONTFACE="Terminus"#' /etc/default/console-setup
sed -i 's#FONTSIZE=".*#FONTSIZE="12x6"#' /etc/default/console-setup
update-initramfs -u
sed -i 's#After=.*#After=systemd-tmpfiles-setup.service console-screen.service kbd.service local-fs.target#' /etc/systemd/system/multi-user.target.wants/console-setup.service

# Let's enable a color prompt and add /opt/tpot/bin to path
mySHELLCHECK='[[ $- == *i* ]] || return'
myROOTPROMPT='PS1="\\[\\033[38;5;8m\\][\\[$(tput sgr0)\\]\\[\\033[38;5;1m\\]\\u\\[$(tput sgr0)\\]\\[\\033[38;5;6m\\]@\\[$(tput sgr0)\\]\\[\\033[38;5;4m\\]\\h\\[$(tput sgr0)\\]\\[\\033[38;5;6m\\]:\\[$(tput sgr0)\\]\\[\\033[38;5;5m\\]\\w\\[$(tput sgr0)\\]\\[\\033[38;5;8m\\]]\\[$(tput sgr0)\\]\\[\\033[38;5;1m\\]\\\\$\\[$(tput sgr0)\\]\\[\\033[38;5;15m\\] \\[$(tput sgr0)\\]"'
myUSERPROMPT='PS1="\\[\\033[38;5;8m\\][\\[$(tput sgr0)\\]\\[\\033[38;5;2m\\]\\u\\[$(tput sgr0)\\]\\[\\033[38;5;6m\\]@\\[$(tput sgr0)\\]\\[\\033[38;5;4m\\]\\h\\[$(tput sgr0)\\]\\[\\033[38;5;6m\\]:\\[$(tput sgr0)\\]\\[\\033[38;5;5m\\]\\w\\[$(tput sgr0)\\]\\[\\033[38;5;8m\\]]\\[$(tput sgr0)\\]\\[\\033[38;5;2m\\]\\\\$\\[$(tput sgr0)\\]\\[\\033[38;5;15m\\] \\[$(tput sgr0)\\]"'
myROOTCOLORS="export LS_OPTIONS='--color=auto'
eval \\"\\`dircolors\\`\\"
alias ls='ls \\$LS_OPTIONS'
alias ll='ls \\$LS_OPTIONS -l'
alias l='ls \\$LS_OPTIONS -lA'"

tee -a /root/.bashrc <<EOF
$mySHELLCHECK
$myROOTPROMPT
$myROOTCOLORS
PATH="$PATH:/opt/tpot/bin"
EOF
for i in $(ls -d /home/*/)
  do
tee -a $i.bashrc <<EOF
$mySHELLCHECK
$myUSERPROMPT
PATH="$PATH:/opt/tpot/bin"
EOF
done

# Let's create ews.ip before reboot and prevent race condition for first start
/opt/tpot/bin/updateip.sh

# Let's clean up apt
apt-fast autoclean -y
apt-fast autoremove -y

# Final steps
cp /opt/tpot/host/etc/rc.local /etc/rc.local && \\
rm -rf /root/installer && \\
rm -rf /etc/issue.d/cockpit.issue && \\
rm -rf /etc/motd.d/cockpit && \\
rm -rf /etc/issue.net && \\
rm -rf /etc/motd && \\
systemctl restart console-setup.service
然后重启虚拟机。
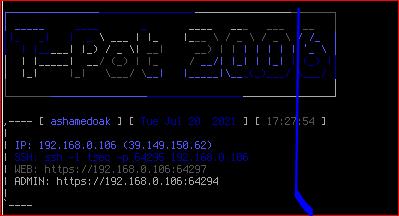
这就装好了。
测试访问正常:
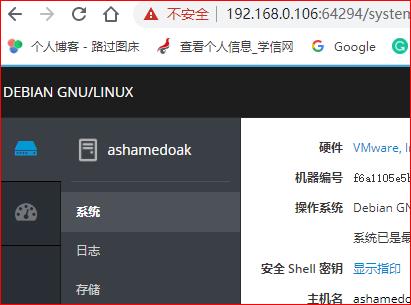
64294的容器处无法访问。
64297无法访问,正在寻求解决办法。寻求之后更新。
以上是关于TPOT网络蜜罐安装——保姆级教程(一个人的血泪史)的主要内容,如果未能解决你的问题,请参考以下文章