使用VS2022编译Telegram桌面端(tdesktop)
Posted 草上爬
tags:
篇首语:本文由小常识网(cha138.com)小编为大家整理,主要介绍了使用VS2022编译Telegram桌面端(tdesktop)相关的知识,希望对你有一定的参考价值。
2018年的时候参考Telegram桌面端(tdesktop)编译方法成功编译过tdesktop,后来比较忙,就没管它了
这段时间正好在研究IM,就把当年的Telegram工程找出来,依然能正常编译,但是无法登录了,提示需要升级
为了调试方便,只能参考官编译方指导用最新的源码再编译一遍,编译工具已经换成了VS2022,可以确定的是,参考官方编译指导可以编译成功(前提是能科学上网)
因为工作用得是VS2017,so,为了稳妥起见,还是在虚拟机里试试VS2022吧
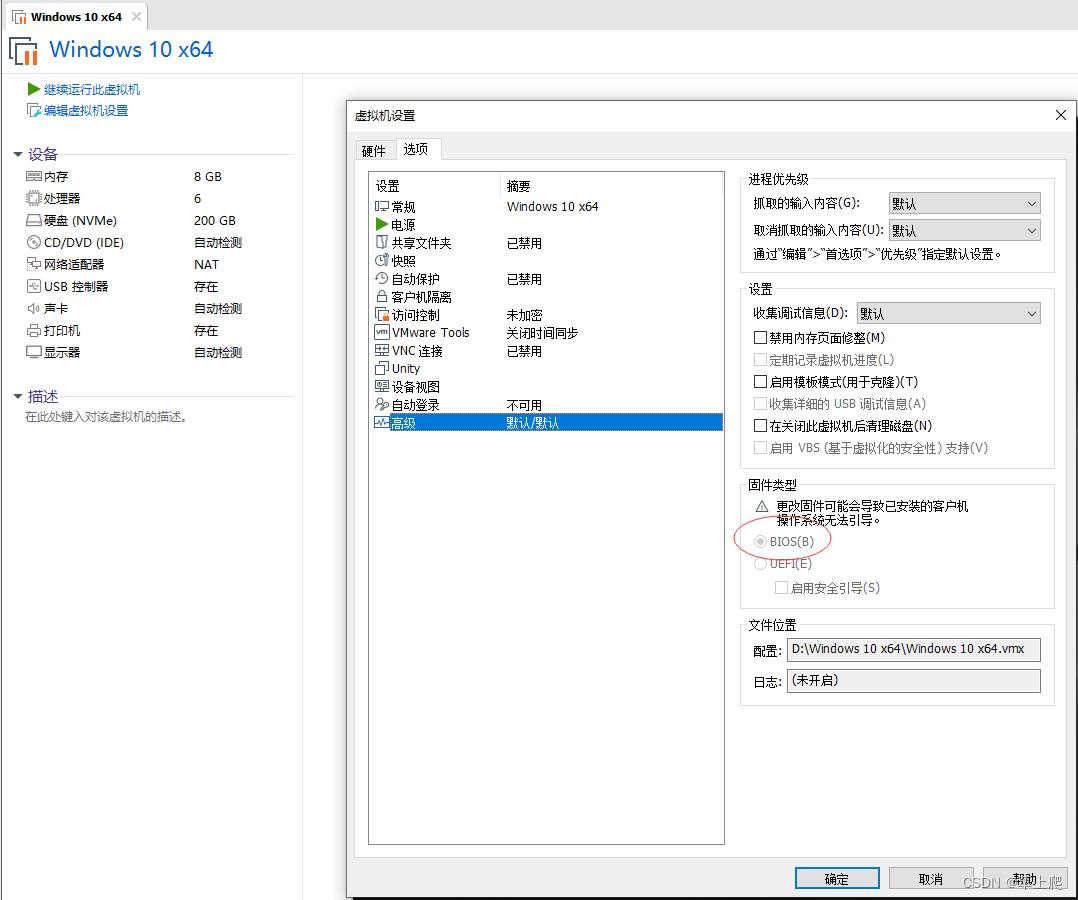
在VMware® Workstation 16 Pro里安装Windows 10有个地方要注意,在创建虚拟机时不要指定ISO映像文件,等虚拟机创建完成后,需要在“虚拟机设置”的“选项”页里“固件类型”中选择“Bios”,然后再加载ISO映像,否则ISO映像无法识别
一.编译
Prepare folder
The build is done in Visual Studio 2022 with 10.0.22000.0 SDK version.
注释:安装的VS2012的时候选择10.0.22000.0 SDK
Choose an empty folder for the future build, for example D:\\TBuild. It will be named BuildPath in the rest of this document. Create two folders there, BuildPath\\ThirdParty and BuildPath\\Libraries.
All commands (if not stated otherwise) will be launched from x86 Native Tools Command Prompt for VS 2022.bat (should be in Start Menu > Visual Studio 2022 menu folder). Pay attention not to use any other Command Prompt.
Install third party software
1.Download Strawberry Perl installer from http://strawberryperl.com/ and install to BuildPath\\ThirdParty\\Strawberry
2.Download NASM installer from http://www.nasm.us and install to BuildPath\\ThirdParty\\NASM
3.Download Yasm executable from http://yasm.tortall.net/Download.html, rename to yasm.exe and put to BuildPath\\ThirdParty\\yasm
4.Download MSYS2 installer from http://www.msys2.org/ and install to BuildPath\\ThirdParty\\msys64
5.Download jom archive from http://download.qt.io/official_releases/jom/jom.zip and unpack to BuildPath\\ThirdParty\\jom
6.Download Python 3.9 installer from https://www.python.org/downloads/ and install to BuildPath\\ThirdParty\\Python39
7.Download CMake 3.21 or later installer from https://cmake.org/download/ and install to BuildPath\\ThirdParty\\cmake
8.Download Ninja executable from https://github.com/ninja-build/ninja/releases/download/v1.7.2/ninja-win.zip and unpack to BuildPath\\ThirdParty\\Ninja
9.Download Git installer from https://git-scm.com/download/win and install it.
10.Download NuGet executable from https://dist.nuget.org/win-x86-commandline/latest/nuget.exe and put to BuildPath\\ThirdParty\\NuGet
Add Python 3.9 and NuGet to your PATH:
1.Open Control Panel -> System -> Advanced system settings.
2.Press Environment Variables....
3.Select Path.
4.Press Edit.
5.Add BuildPath\\ThirdParty\\Python39 value.
6.Add BuildPath\\ThirdParty\\NuGet value.
Open x86 Native Tools Command Prompt for VS 2022.bat, go to BuildPath and run
注释:我编译的是32位,所以打开的是 x86 Native Tools Command Prompt for VS 2022.bat
python -m pip install pywin32
注释:安装python的时一定要勾选pip
Clone source code and prepare libraries
Open x86 Native Tools Command Prompt for VS 2022.bat, go to BuildPath and run
git clone --recursive https://github.com/telegramdesktop/tdesktop.git
注释:这时如果你发现网速慢,不要在github上直接下载源码,再解压。因为它是一个递归clone。--recursive,除了telegram以外,它会clone一些telegram以外的仓库,即子仓库。
实操过程中,clone子创库时会出现443 timeout错误,此时需要用命令行设置代理(设置到环境变量中也行)
git config --global http.proxy http://127.0.0.1:7890
git config --global https.proxy https://127.0.0.1:7890
这里的端口号7890需根据自己的科学上网工具修改
印象中还有个OpenSSL SSL_read: Connection was reset, errno 10054的错误,参考下列文章一顿操作猛如虎,也不知是哪条指令起了作用
https://blog.csdn.net/m0_51269961/article/details/123709195
继续拉取子模块:git submodule update
tdesktop\\Telegram\\build\\prepare\\win.bat
Build the project
Go to BuildPath\\tdesktop\\Telegram and run
configure.bat -D TDESKTOP_API_ID=YOUR_API_ID -D TDESKTOP_API_HASH=YOUR_API_HASH -D DESKTOP_APP_USE_PACKAGED=OFF -D DESKTOP_APP_DISABLE_CRASH_REPORTS=OFF
注释:这里的YOUR_API_ID和YOUR_API_HASH 要替换成自己的api id和api hash,通过https://my.telegram.org/auth获取,手机号前要加+86
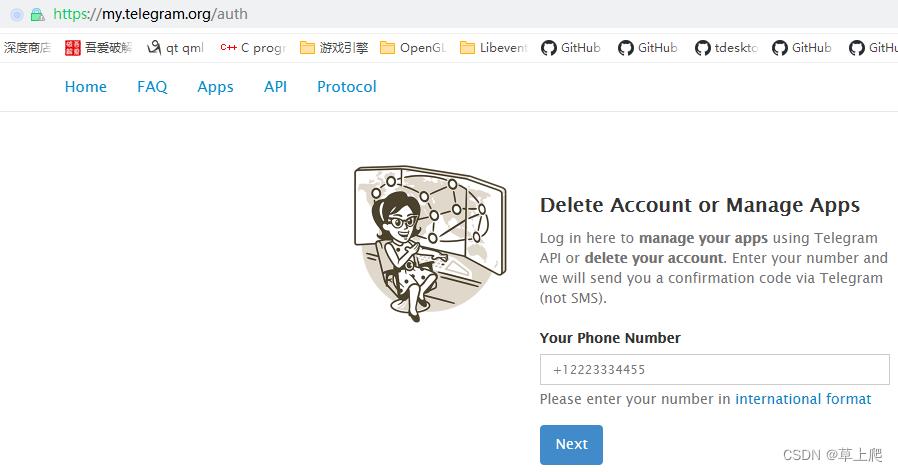
如果自己不是调用Telegram API来开发第三方应用,只是想测试玩玩,可以用官方提供的测试api id和api hash。
api_id: 17349
api_hash: 344583e45741c457fe1862106095a5eb
服务器对该测试api id和api hash用很多限制,但是实测自己的桌面端给移动端发消息没问题,上面的指令变为(我用得就是这个)
configure.bat -D TDESKTOP_API_ID=17349 -D TDESKTOP_API_HASH=344583e45741c457fe1862106095a5eb -D DESKTOP_APP_USE_PACKAGED=OFF -D DESKTOP_APP_DISABLE_CRASH_REPORTS=OFFOpen BuildPath\\tdesktop\\out\\Telegram.sln in Visual Studio 2022
Select Telegram project and press Build > Build Telegram (Debug and Release configurations)
The result Telegram.exe will be located in D:\\TBuild\\tdesktop\\out\\Debug (and Release)
二.运行
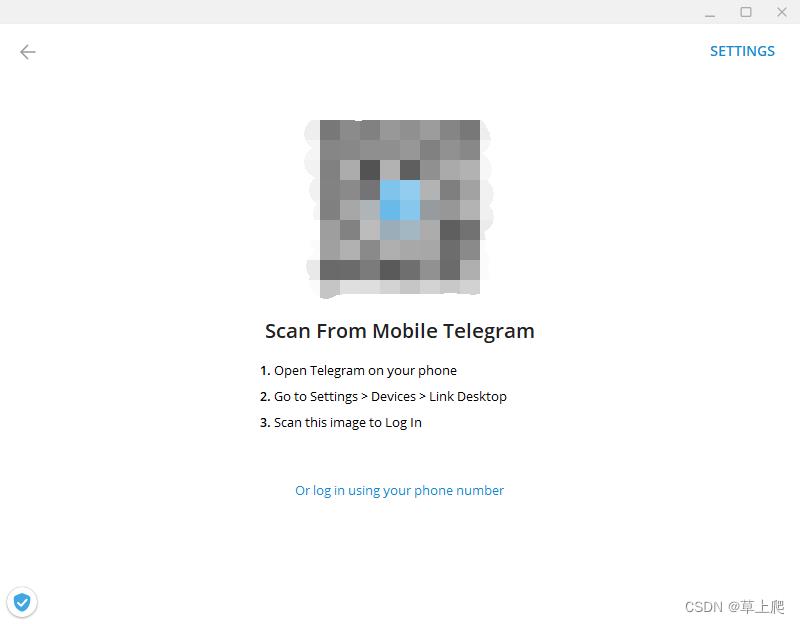
最新的telegram桌面端得用移动端扫码登录,类似微信。移动端注册很方便,当然前提也是能科学上网。下图是二维码界面,详细说明了如何用移动端telegram扫码。
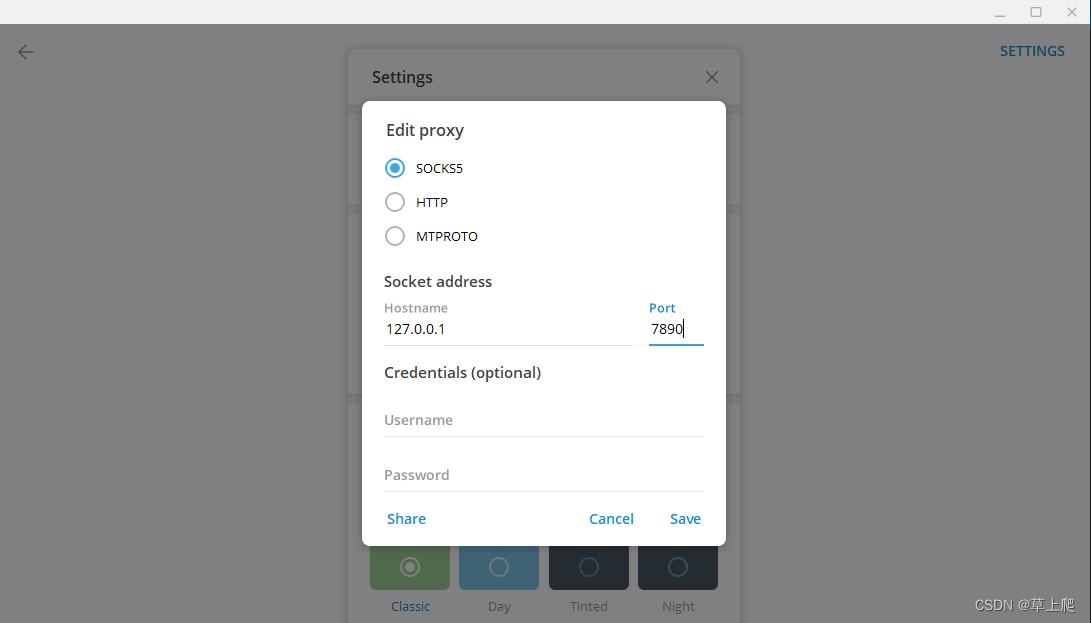
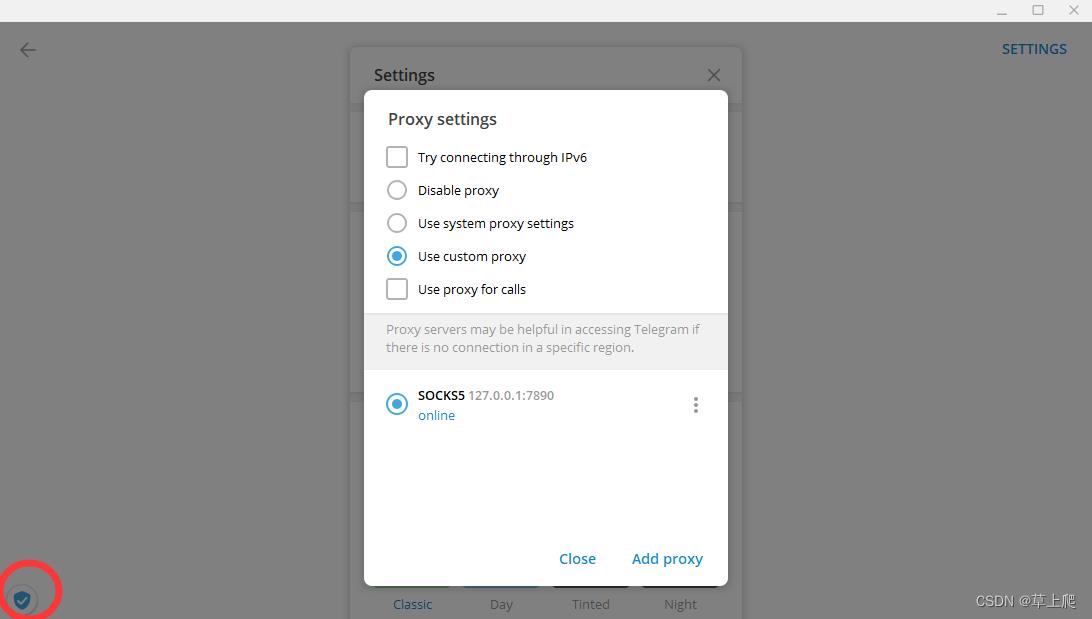
如果桌面端登录不上,可以设置代理后再试试,点击右上角“SETTINGS”,在弹窗中选择“use custom proxy”
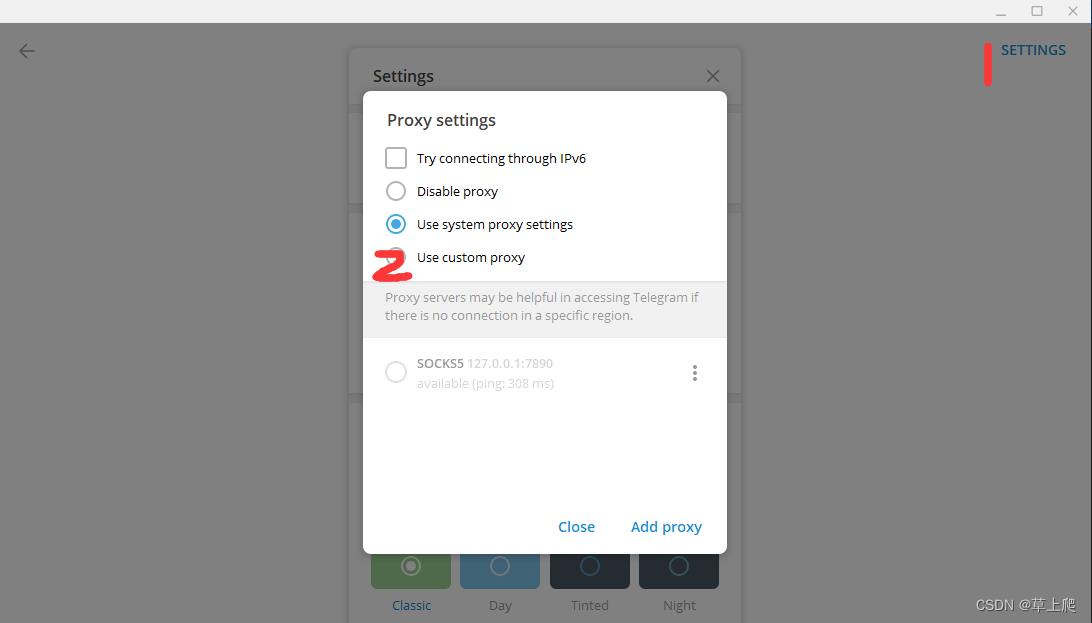
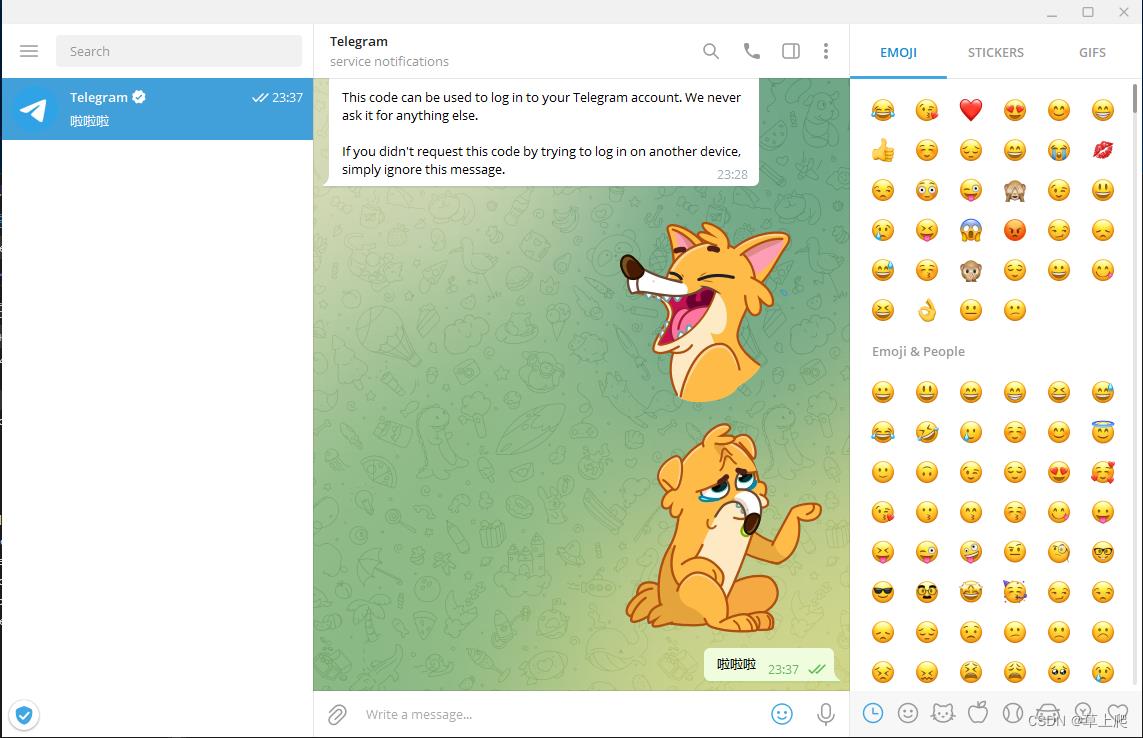
代理设置成功后,左下角的小盾牌会点亮,该小盾牌是与服务器的连接状态
原文链接:https://blog.csdn.net/caoshangpa/article/details/125382685
以上是关于使用VS2022编译Telegram桌面端(tdesktop)的主要内容,如果未能解决你的问题,请参考以下文章