ONNX基本操作
Posted 洪流之源
tags:
篇首语:本文由小常识网(cha138.com)小编为大家整理,主要介绍了ONNX基本操作相关的知识,希望对你有一定的参考价值。
1. Pytorch导出ONNX
如下代码,定义了一个包含卷积层、relu激活层的网络,将该网络导出onnx模型,设置了输入、输出的batch、height、width3个维度是动态的
import torch
import torch.nn as nn
import torch.onnx
import os

class Model(torch.nn.Module):
    def __init__(self):
        super().__init__()

        self.conv = nn.Conv2d(1, 1, 3, padding=1)
        self.relu = nn.ReLU()
        self.conv.weight.data.fill_(1)
        self.conv.bias.data.fill_(0)

    def forward(self, x):
        x = self.conv(x)
        x = self.relu(x)
        return x


print("对应opset文件夹代码在这里:", os.path.dirname(torch.onnx.__file__))

model = Model()
dummy = torch.zeros(1, 1, 3, 3)
torch.onnx.export(
    model,

    # 这里的args,是指输入给model的参数,需要传递tuple,因此用括号
    (dummy,),

    # 储存的文件路径
    "demo.onnx",

    # 打印详细信息
    verbose=True,

    # 为输入和输出节点指定名称,方便后面查看或者操作
    input_names=["image"],
    output_names=["output"],

    # 这里的opset,指各类算子以何种方式导出,对应于symbolic_opset11
    opset_version=11,

    # 设置batch、height、width3个维度是动态的,
    # 在onnx中会将其维度赋值为-1,
    # 通常,我们只设置batch为动态,其它的避免动态
    dynamic_axes=
        "image": 0: "batch", 2: "height", 3: "width",
        "output": 0: "batch", 2: "height", 3: "width",

)

print("Done.!")
2. netron可视化
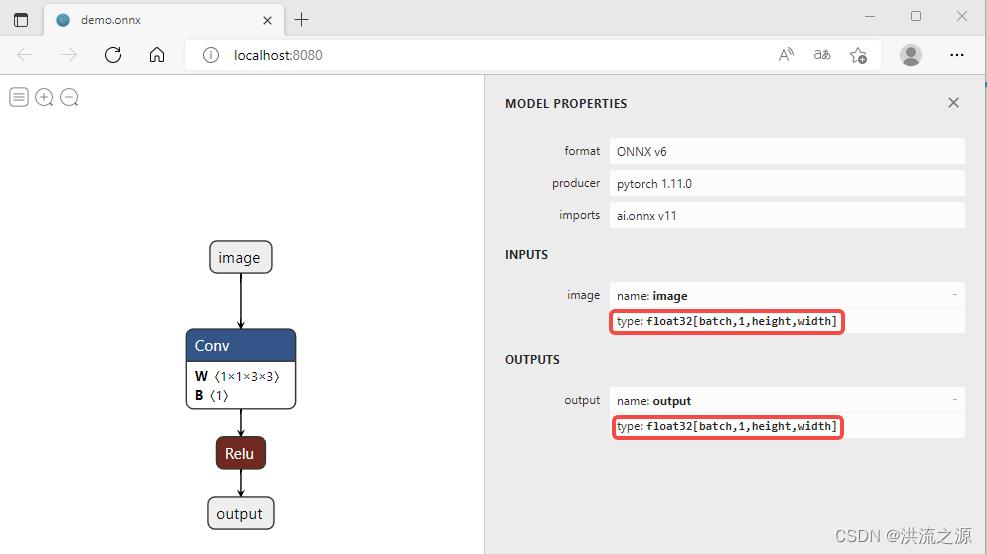
netron可视化可以看到网络输入层为image,输出层为output,这些层名都是在onnx导出时指定的,另外红色框标注处,显示batch、height、width三个维度为动态的。
以上是关于ONNX基本操作的主要内容,如果未能解决你的问题,请参考以下文章