嘿从零开始基于SpringBoot 打造在线聊天室(4.4W字最长博文)
Posted Huterox
tags:
篇首语:本文由小常识网(cha138.com)小编为大家整理,主要介绍了嘿从零开始基于SpringBoot 打造在线聊天室(4.4W字最长博文)相关的知识,希望对你有一定的参考价值。
文章目录
前言
失踪人口回归兄弟们,差不多连续5天没有发布博文了,许久不见。当然也是最近确实不在状态而且比较忙,所以就没有去更新博文,加上最近作业时真的多,各种大作业顶不住。
那么今天也是给大家展示一个小dome,基于SpringBoot + mybatis + websocket 做的在线聊天器。本来是要做在线群聊的,但是这个前端我是真的不想调了,本来是想嫖的页面的,结果怎么说,还是自己做吧,可控。
代码也比较简单,后端搭建写起来其实也就两三个小时,主要是前端,那玩意零零散散花了两天,然后还有这个调试,总体代码从星期一开始写,到星期三写完了,后面没空不想写,于是拖到今天调测完,砍了不少功能。
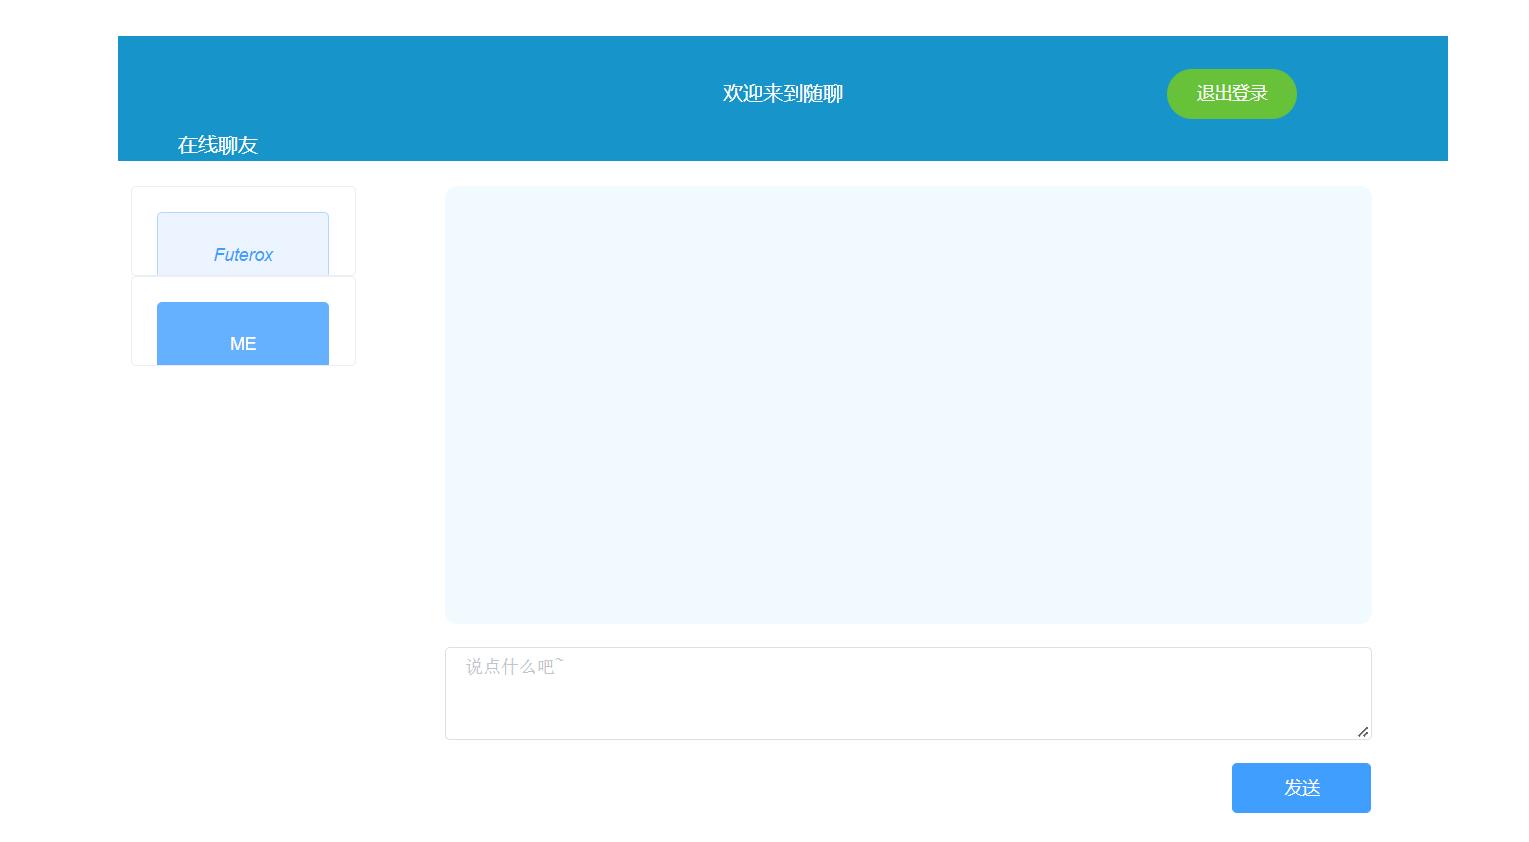
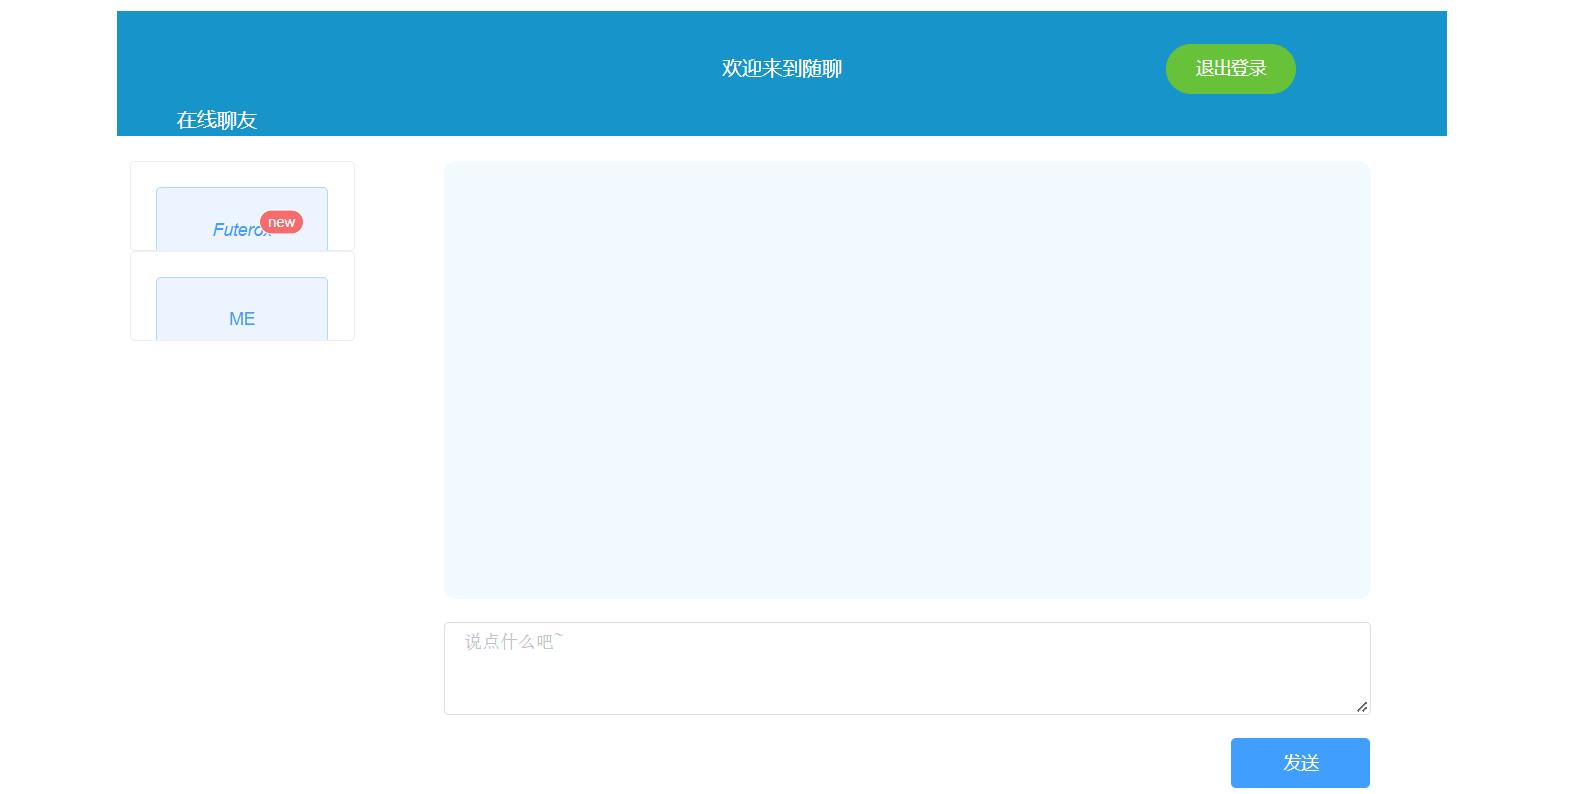
ok,我们先来看看这个效果图哈。
效果
主页面
消息提示
聊天页面
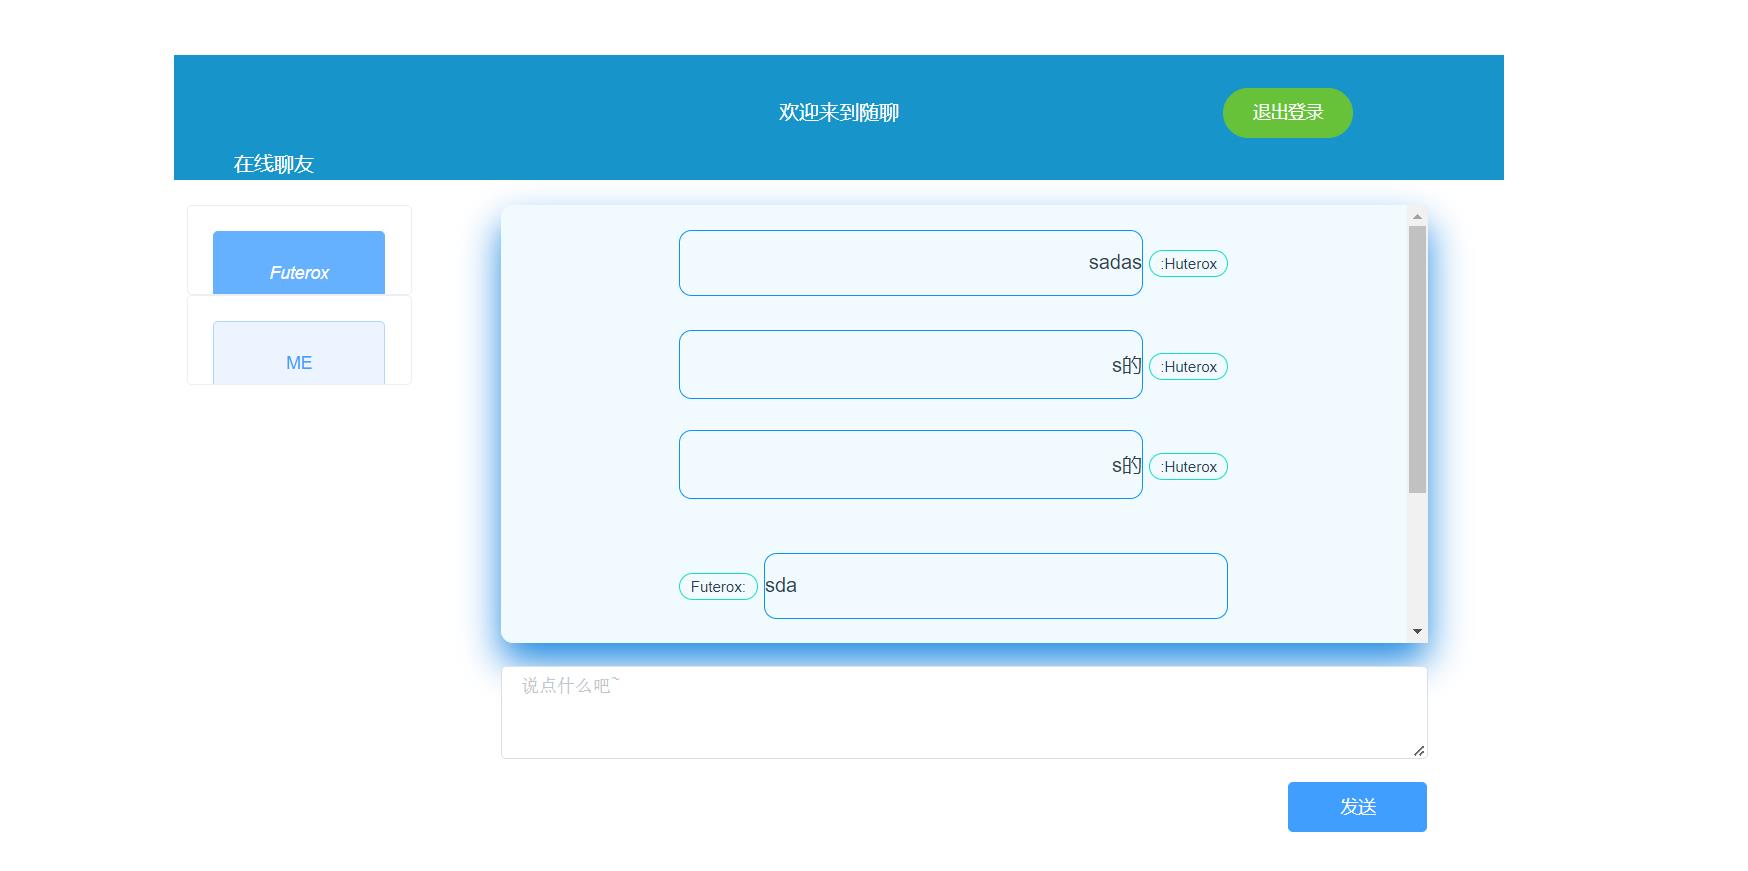
大概就这样,当然还有登录,注册。
登录注册


大概的话就是这个样子。
OK,现在呢,咱们就进入到这个代码阶段。
前端
首先我们先看到前端。
项目构建
既然是从0开始,那么我们就从o开始说。咱们这个是使用vue2 + elementui 写的,为什么是vue2,简单,我没升级嘛。能跑就行,我也不是专门写前端的。
首先省略 使用 vue-cli 开始项目哈。
依赖
我这里就说我这里使用到的依赖。
elementUI
axios
websocket
就这几个主要的。
项目结构
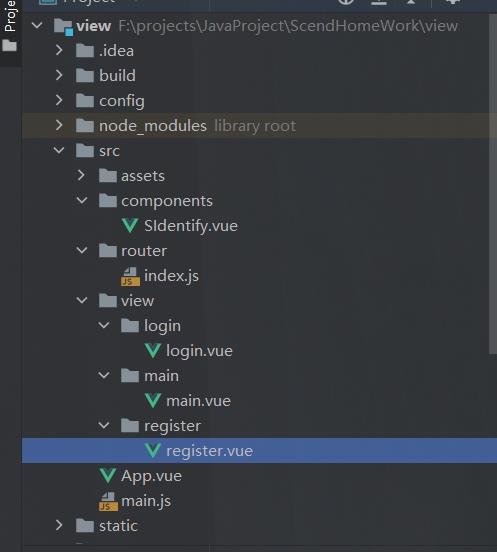
这里其实就三个页面。
登录注册
在此之前,我们先来看看这个路由设计哈。
 routes: [

      path: '/',
      name: 'mian',
      component: main
    ,

      path: '/login',
      name: 'login',
      component: login
    ,

      path: '/register',
      name: 'register',
      component: register

  ],
  mode: "history"
就非常的简单哈。
验证码部分
在这里我们先来说说,这个验证码部分吧。
这个呢,是由前端生成的。是这个组件在干活

<template>
  <div class="s-canvas">
    <canvas id="s-canvas" :width="contentWidth" :height="contentHeight"></canvas>
  </div>
</template>

<script>
export default
  name: "SIdentify",
  props:
    identifyCode:
      type: String,
      default: '1234'
    ,
    fontSizeMin:
      type: Number,
      default: 25
    ,
    fontSizeMax:
      type: Number,
      default: 30
    ,
    backgroundColorMin:
      type: Number,
      default: 255
    ,
    backgroundColorMax:
      type: Number,
      default: 255
    ,
    colorMin:
      type: Number,
      default: 0
    ,
    colorMax:
      type: Number,
      default: 160
    ,
    lineColorMin:
      type: Number,
      default: 100
    ,lineColorMax:
      type: Number,
      default: 255
    ,
    dotColorMin:
      type: Number,
      default: 0
    ,
    dotColorMax:
      type: Number,
      default: 255
    ,
    contentWidth:
      type: Number,
      default: 112
    ,
    contentHeight:
      type: Number,
      default: 31

  ,
  methods:
    // 生成一个随机数
    randomNum(min, max)
      return Math.floor(Math.random() * (max - min) + min)
    ,
    // 生成一个随机的颜色
    randomColor(min, max)
      let r = this.randomNum(min, max)
      let g = this.randomNum(min, max)
      let b = this.randomNum(min, max)
      return 'rgb(' + r + ',' + g + ',' + b + ')'
    ,
    drawPic()
      let canvas = document.getElementById('s-canvas')
      let ctx = canvas.getContext('2d')
      ctx.textBaseline = 'bottom'
      // 绘制背景
      ctx.fillStyle = this.randomColor(this.backgroundColorMin, this.backgroundColorMax)
      ctx.fillRect(0, 0, this.contentWidth, this.contentHeight)
      // 绘制文字
      for (let i = 0; i < this.identifyCode.length; i++)
        this.drawText(ctx, this.identifyCode[i], i)

      this.drawLine(ctx)
      this.drawDot(ctx)
    ,
    drawText(ctx, txt, i)
      ctx.fillStyle = this.randomColor(this.colorMin, this.colorMax)
      ctx.font = this.randomNum(this.fontSizeMin, this.fontSizeMax) + 'px SimHei'
      let x = (i + 1) * (this.contentWidth / (this.identifyCode.length + 1))
      let y = this.randomNum(this.fontSizeMax, this.contentHeight - 5)
      var deg = this.randomNum(-45, 45)
      // 修改坐标原点和旋转角度
      ctx.translate(x, y)
      ctx.rotate(deg * Math.PI / 180)
      ctx.fillText(txt, 0, 0)
      // 恢复坐标原点和旋转角度
      ctx.rotate(-deg * Math.PI / 180)
      ctx.translate(-x, -y)
    ,
    drawLine(ctx)
      // 绘制干扰线
      for (let i = 0; i < 5; i++)
        ctx.strokeStyle = this.randomColor(this.lineColorMin, this.lineColorMax)
        ctx.beginPath()
        ctx.moveTo(this.randomNum(0, this.contentWidth), this.randomNum(0, this.contentHeight))
        ctx.lineTo(this.randomNum(0, this.contentWidth), this.randomNum(0, this.contentHeight))
        ctx.stroke()

    ,
    drawDot(ctx)
      // 绘制干扰点
      for (let i = 0; i < 80; i++)
        ctx.fillStyle = this.randomColor(0, 255)
        ctx.beginPath()
        ctx.arc(this.randomNum(0, this.contentWidth), this.randomNum(0, this.contentHeight), 1, 0, 2 * Math.PI)
        ctx.fill()


  ,
  watch:
    identifyCode()
      this.drawPic()

  ,
  mounted()
    this.drawPic()


</script>

<style scoped>
.s-canvas
  height: 38px;


.s-canvas canvas
  margin-top: 1px;
  margin-left: 8px;

</style>
之后就是引用,这个是很简单的。

登录页面
在开始之前,我还要说一下这个代理转发,这个代理我是直接在前端做的,我的原则是压力给到前端~
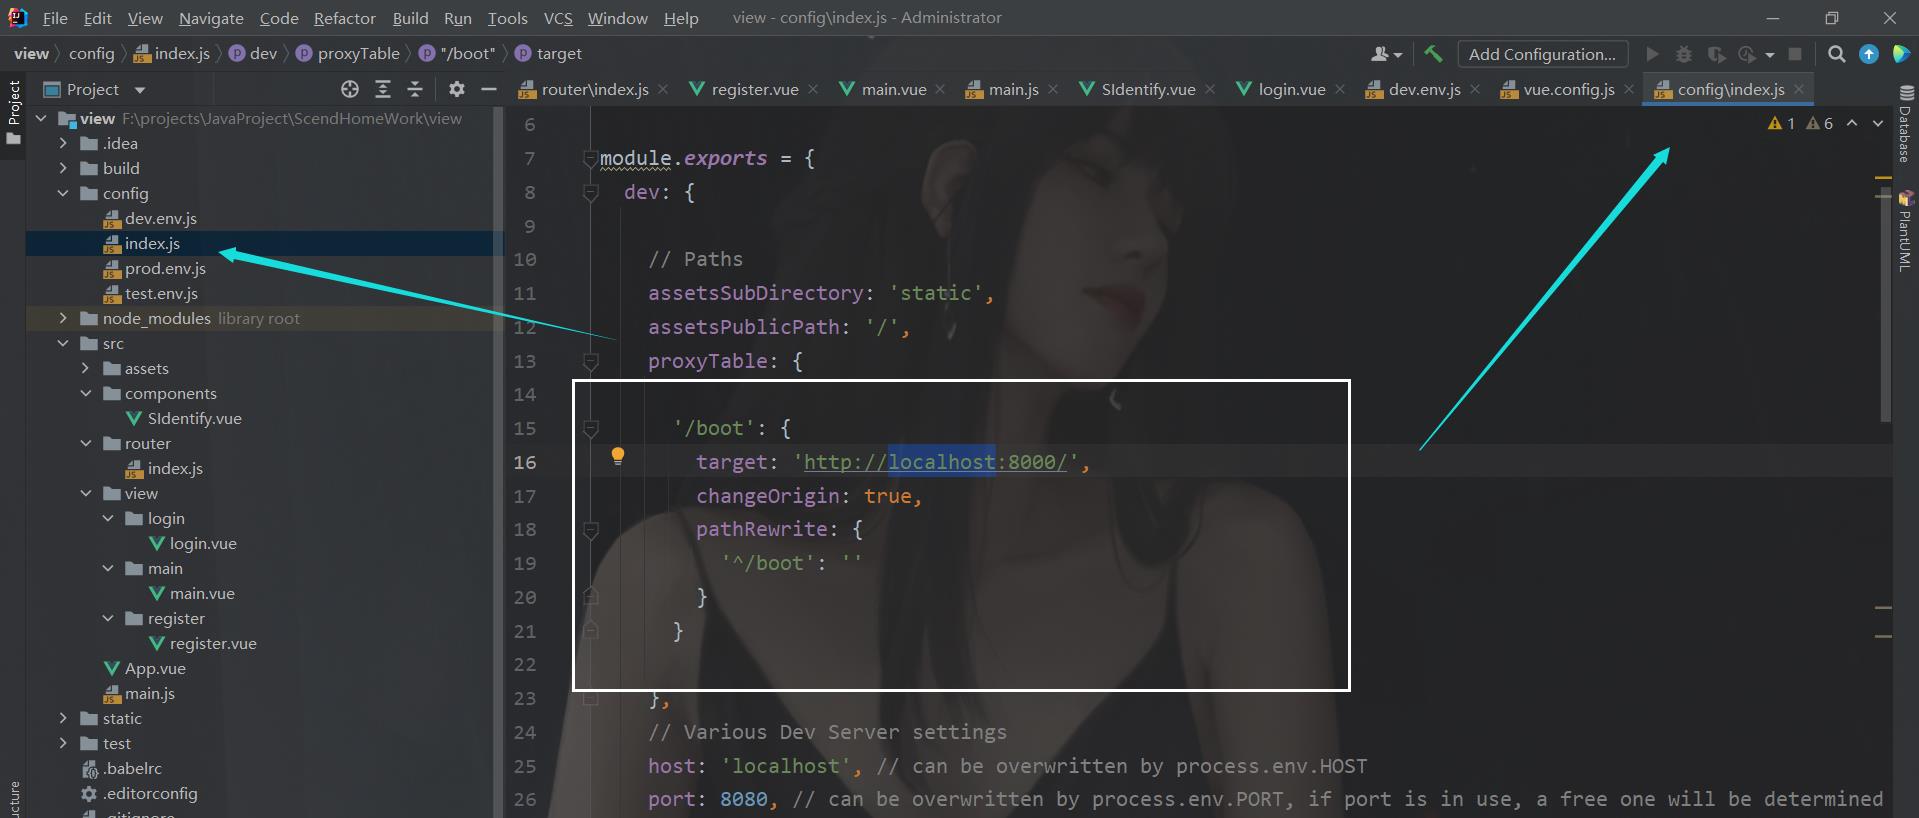
ok ,到这里咱们就能够放代码了
<template>
<div>
<el-form :model="formLogin" :rules="rules" ref="ruleForm" label-width="0px" class="login-bok">
<el-form-item prop="account">
<el-input v-model="formLogin.account" placeholder="账号">
<i slot="prepend" class="el-icon-s-custom"/>
</el-input>
</el-form-item>
<el-form-item prop="password">
<el-input type="password" placeholder="密码" v-model="formLogin.password">
<i slot="prepend" class="el-icon-lock"/>
</el-input>
</el-form-item>
<el-form-item prop="code">
<el-row :span="24">
<el-col :span="12">
<el-input v-model="formLogin.code" auto-complete="off" placeholder="请输入验证码" size=""></el-input>
</el-col>
<el-col :span="12">
<div class="login-code" @click="refreshCode">
<!--验证码组件-->
<s-identify :identifyCode="identifyCode"></s-identify>
</div>
</el-col>
</el-row>
</el-form-item>
<el-form-item>
<div class="login-btn">
<el-button type="primary" @click="goregist()" style="margin-left: auto;width: 35%" >注册</el-button>
<el-button type="primary" @click="submitForm()" style="margin-left: 27%;width: 35%">登录</el-button>
</div>
</el-form-item>
</el-form>
</div>
</template>
<script>
import SIdentify from "../../components/SIdentify";
export default
name: "login",
components: SIdentify ,
data()
return
formLogin:
account: "",
password: "",
code: "",
token: '',
success: '',
,
identifyCodes: '1234567890abcdefjhijklinopqrsduvwxyz',//随机串内容
identifyCode: '',
// 校验
rules:
account:
[
required: true, message: "请输入用户名", trigger: "blur"
],
password: [ required: true, message: "请输入密码", trigger: "blur" ],
code: [ required: true, message: "请输入验证码", trigger: "blur" ]
,
mounted ()
// 初始化验证码
this.identifyCode = ''
this.makeCode(this.identifyCodes, 4)
,
methods:
refreshCode ()
this.identifyCode = ''
this.makeCode(this.identifyCodes, 4)
,
makeCode (o, l)
for (let i = 0; i < l; i++)
this.identifyCode += this.identifyCodes[this.randomNum(0, this.identifyCodes.length)]
,
randomNum (min, max)
return Math.floor(Math.random() * (max - min) + min)
,
goregist()
this.$router.push("/register")
,
logincount()
this.axios(
url: "/boot/login",
method: 'post',
headers: "type": "hello" ,
data:
account: this.formLogin.account,
password: this.formLogin.password.toLowerCase(),