SpringBoot.03.SpringBoot集成jsp
Posted 潮汐先生
tags:
篇首语:本文由小常识网(cha138.com)小编为大家整理,主要介绍了SpringBoot.03.SpringBoot集成jsp相关的知识,希望对你有一定的参考价值。
SpringBoot.03.SpringBoot集成jsp
前言
在SpringBoot中默认推荐使用的模板引擎是Thymeleaf,但是作为传统Web开发的王者jsp在现在的一些企业中仍然被广泛使用。所以对于在SpringBoot中如何使用jsp还是需要有所了解。
现在广泛被推崇的是前后端分离,大有替代传统web开发的趋势。而前后端分离模式中VUE对于前端至关重要。所以对于VUE的学习也是必须的。
准备工作
由于本次演示SpringBoot.03.SpringBoot集成jsp模板,我们需要jsp页面。这里我们来新建一个jsp模板。
依次选择File->settings->Editor->File and Code Templates,然后选中Files;在name和Extension中键入jsp,将以下内容填到文本框中
<%@ page pageEncoding="UTF-8" language="java" contentType="text/html; UTF-8" %>
<!doctype html>
<html lang="en">
  <head>
      <meta charset="UTF-8">
      <meta name="viewport" content="width=device-width, user-scalable=no, initial-scale=1.0, maximum-scale=1.0, minimum-scale=1.0">
      <meta http-equiv="X-UA-Compatible" content="ie=edge">
      <title>这是jsp页面的标题</title>
  </head>

  <body>
      <h1>Hello jsp!</h1>
  </body>
</html>
最后点击Apply->OK;如下图所示:
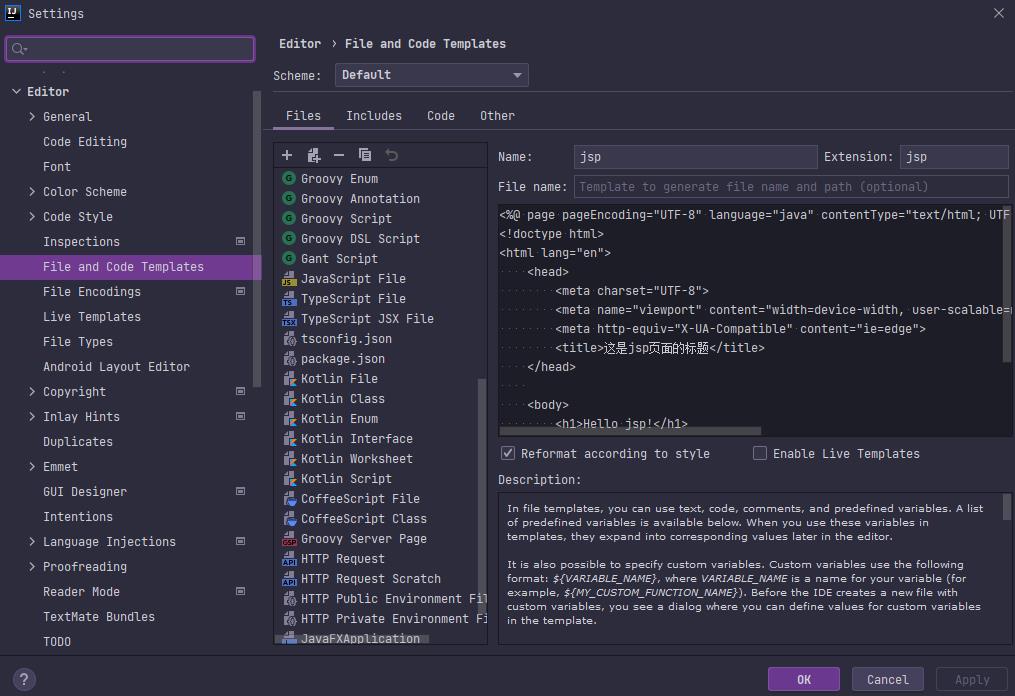
jsp集成案例
集成步骤
1.新建Module
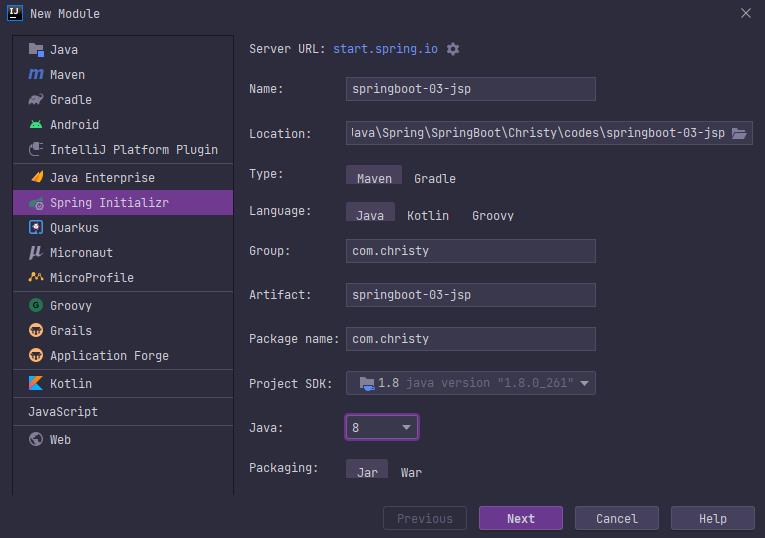
我们选择Spring Initializr的方式新建一个Module,按照下图填写信息后点击Next
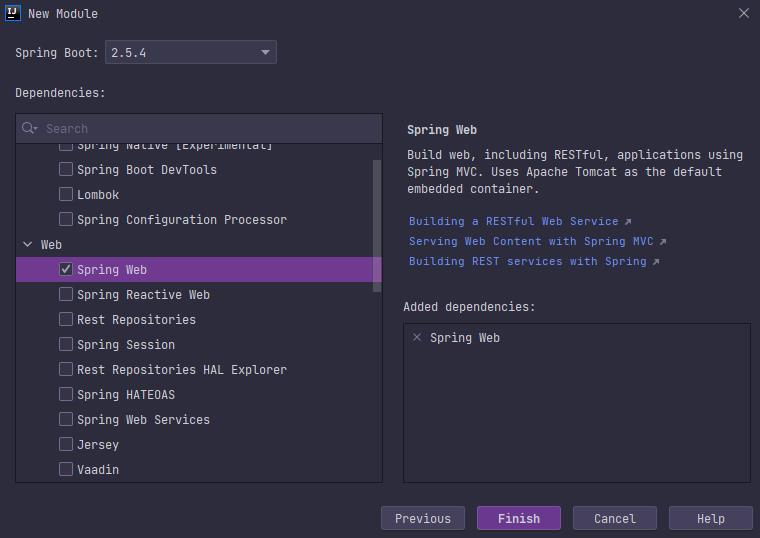
在Dependencies中选择Spring Web,点击Finish,如下图所示:
2.pom.xml
<?xml version="1.0" encoding="UTF-8"?>
<project xmlns="http://maven.apache.org/POM/4.0.0" xmlns:xsi="http://www.w3.org/2001/XMLSchema-instance"
         xsi:schemaLocation="http://maven.apache.org/POM/4.0.0 https://maven.apache.org/xsd/maven-4.0.0.xsd">
    <modelVersion>4.0.0</modelVersion>
    <parent>
        <groupId>org.springframework.boot</groupId>
        <artifactId>spring-boot-starter-parent</artifactId>
        <version>2.5.4</version>
        <relativePath/>
    </parent>

    <groupId>com.christy</groupId>
    <artifactId>springboot-03-jsp</artifactId>
    <version>0.0.1-SNAPSHOT</version>
    <name>springboot-03-jsp</name>
    <description>Demo project for Spring Boot</description>

    <properties>
        <java.version>1.8</java.version>
    </properties>

    <dependencies>
        <!-- spring-boot-starter-web -->
        <dependency>
            <groupId>org.springframework.boot</groupId>
            <artifactId>spring-boot-starter-web</artifactId>
        </dependency>

        <!-- spring-boot-starter-test -->
        <dependency>
            <groupId>org.springframework.boot</groupId>
            <artifactId>spring-boot-starter-test</artifactId>
            <!-- scope为test说明该依赖只在测试时有用,打包时不会打进来 -->
            <scope>test</scope>
        </dependency>

        <!-- c标签库 -->
        <dependency>
            <groupId>jstl</groupId>
            <artifactId>jstl</artifactId>
            <version>1.2</version>
        </dependency>

        <!-- 让内嵌tomcat具有解析jsp功能 -->
        <dependency>
            <groupId>org.apache.tomcat.embed</groupId>
            <artifactId>tomcat-embed-jasper</artifactId>
        </dependency>
    </dependencies>

    <build>
        <plugins>
            <!-- spring-boot-maven-plugin 该插件是SpringBoot官方集成的maven插件,
            除了能保证正确执行java -jar来启动项目
            另外还能是项目正常加载jsp页面
            -->
            <plugin>
                <groupId>org.springframework.boot</groupId>
                <artifactId>spring-boot-maven-plugin</artifactId>
            </plugin>
        </plugins>
    </build>
</project>
3.Springboot03JspApplication.java
import org.springframework.boot.SpringApplication;
import org.springframework.boot.autoconfigure.SpringBootApplication;

@SpringBootApplication
public class Springboot03JspApplication

    public static void main(String[] args)
        SpringApplication.run(Springboot03JspApplication.class, args);
4.application.yml
server:
  port: 8803

# 配置视图解析器
spring:
  mvc:
    view:
      prefix: /
      suffix: .jsp
5.index.jsp
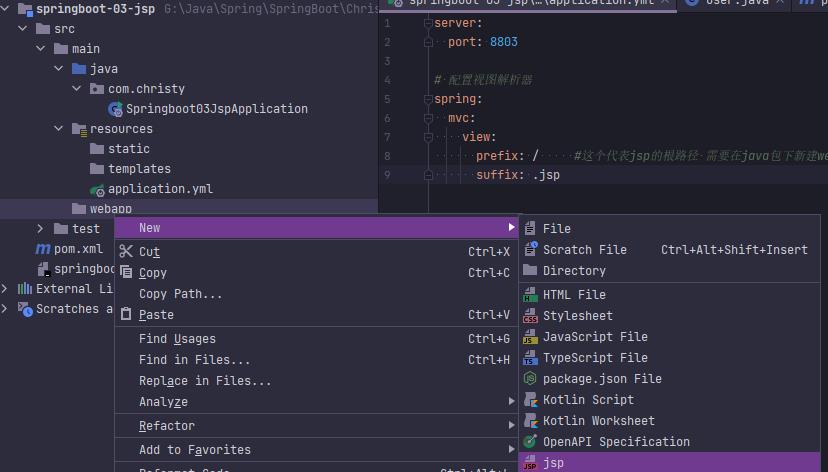
我们在webapp目录右键选择新建index.jsp页面,如下图所示:
修改jsp页面内容如下:
<%@ page pageEncoding="UTF-8" language="java" contentType="text/html; UTF-8" %>
<!doctype html>
<html lang="en">
    <head>
        <meta charset="UTF-8">
        <meta name="viewport" content="width=device-width, user-scalable=no, initial-scale=1.0, maximum-scale=1.0, minimum-scale=1.0">
        <meta http-equiv="X-UA-Compatible" content="ie=edge">
        <title>这是jsp页面的标题</title>
    </head>

    <body>
        <h1>Hello SpringBoot!</h1>
    </body>
</html>
6.JspController.java
import org.slf4j.Logger;
import org.slf4j.LoggerFactory;
import org.springframework.stereotype.Controller;
import org.springframework.web.bind.annotation.RequestMapping;

/**
 * @Author Christy
 * @Date 2021/9/2 10:02
 * @Controller 这里不能使用@RestController注解,否则无法跳转页面只能输出字符串
 **/
@Controller
@RequestMapping("jsp")
public class JspController

    private static final Logger log = LoggerFactory.getLogger(JspController.class);

    @RequestMapping("hello")
    public String sayHello()
        log.info("Hello Spring Boot!");
        // 由于我们配置了视图解析器,返回的index会被重定向为url地址:http://localhost:8803/index.jsp
        return "index";
7.测试
我们启动项目,浏览器访问http://localhost:8803/jsp/hello,结果如下:
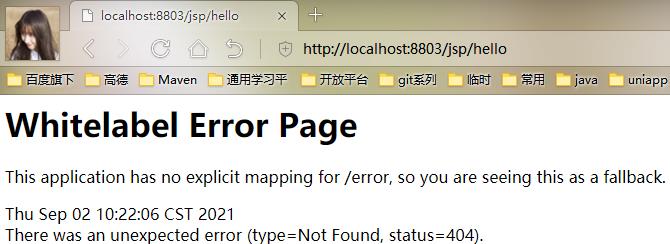
一脸懵逼有没有?按理说配置啥的都没有错啊!为啥会404呢?
问题分析
之所以出现404原因就是项目并没有找到webapp这个目录,至于更深层次的原因我也不知道。如果哪位大牛能解释这个问题麻烦告知一下。
解决方案
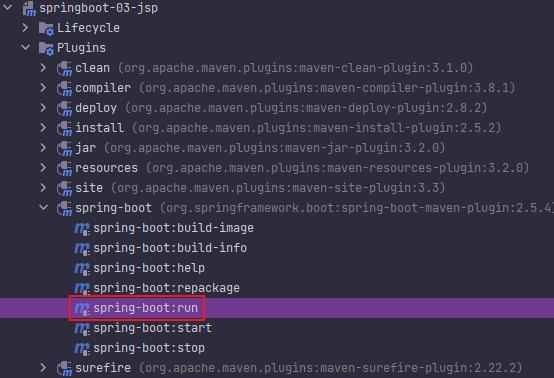
1.springboot:run
在pom.xml文件中我们集成另外SpringBoot官方的maven插件,那么在右侧边栏maven中找到Plugins下的springboot:run命令运行项目。如下图所示:
项目重启后浏览器访问http://localhost:8803/jsp/hello,结果如下:

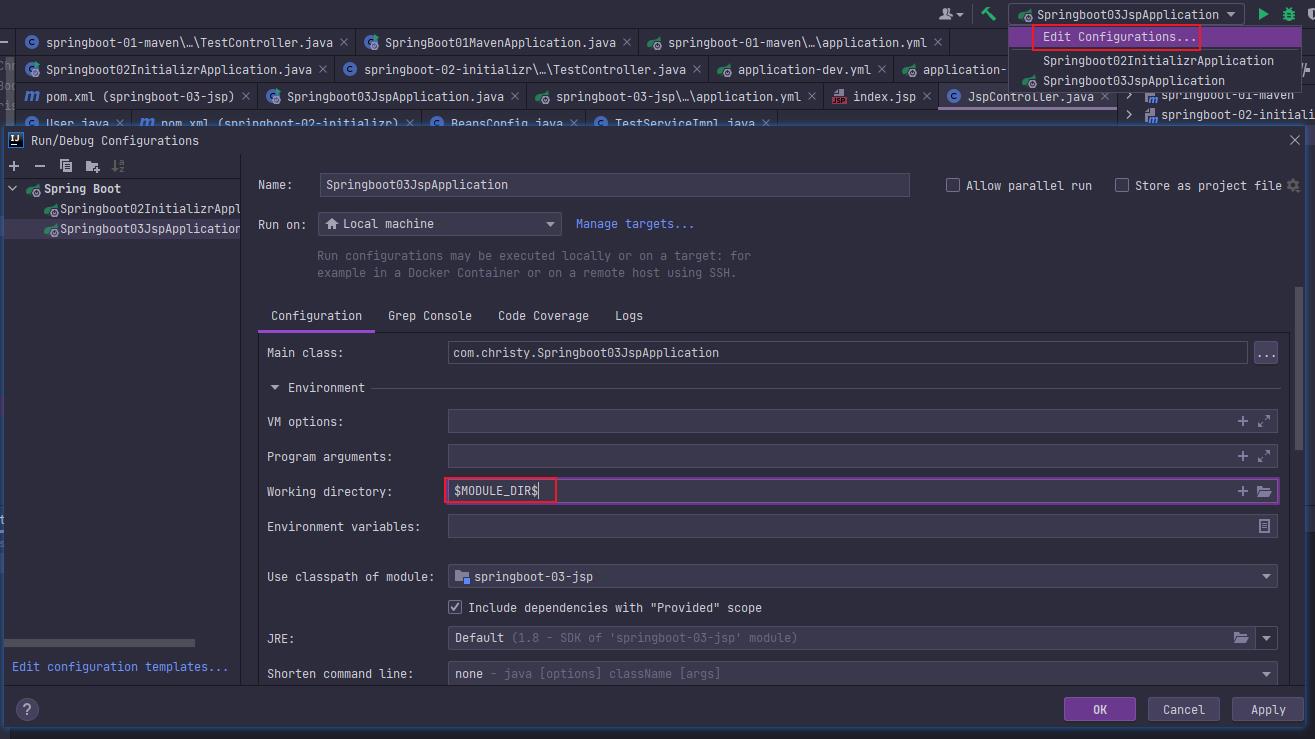
2.设置Working directory
我们选择Edit Configuration,在Working directory中选择MODULE_DIR。如下图所示:
项目再次重启后浏览器访问http://localhost:8803/jsp/hello,结果如下:

如果出现访问页面是变成了页面下载,说明jsp页面没有被正确编译和解析。请刷新一下maven重新加载一下依赖;
修改jsp无须重启应用
在实际开发过程中页面调试是非常繁琐的,在更改了相应程序之后需要同步刷新页面数据,这就需要频繁的重启应用。对于jsp的集成,SpringBoot提供了一种方法在更改程序或者数据后不需要重启应用,只需要重新刷新页面就可以了。
我们打开配置文件,加上以下代码,内容如下:
server:
  port: 8803
  servlet:
    jsp:
      init-parameters:
        development: true

# 配置视图解析器
spring:
  mvc:
    view:
      prefix: /     #这个代表jsp的根路径 需要在java包下新建webapp目录
      suffix: .jsp
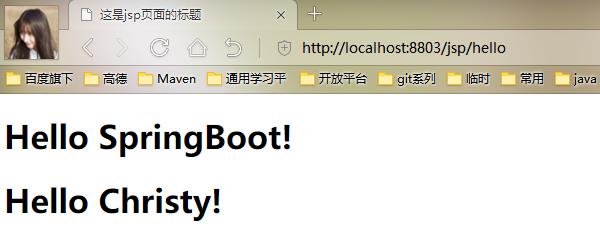
我们重启应用,访问http://localhost:8803/jsp/hello,页面还是显示Hello SpringBoot!,然后我们在jsp页面中新增<h1>Hello Christy!</h1>,然后刷新页面。结果如下:
以上是关于SpringBoot.03.SpringBoot集成jsp的主要内容,如果未能解决你的问题,请参考以下文章