微服务设计指导-纠正目前网上近90%以上错误的对于“API跨域”问题的所谓指导
Posted TGITCIC
tags:
篇首语:本文由小常识网(cha138.com)小编为大家整理,主要介绍了微服务设计指导-纠正目前网上近90%以上错误的对于“API跨域”问题的所谓指导相关的知识,希望对你有一定的参考价值。
背景
- 因为我们是前后台分离的写法;
- 因为我们用的是VUE/Angelar;
- 因为我们在开发这套东西时,存在上述两个问题,而Spring Boot2默认是不允许跨域。因此我们开发时经常会发生这样的情况:
我们有一个spring boot controller如下
/**
 * 系统项目名称 org.sky.demo.redisdemo.controller RedisDemoController.java
 *
 * Jan 15, 2021-2:55:10 PM 2021XX公司-版权所有
 *
 */
package org.mk.demo.mvc1.api;
import org.mk.demo.mvc1.bean.Student;
import org.slf4j.Logger;
import org.slf4j.LoggerFactory;
import org.springframework.web.bind.annotation.PostMapping;
import org.springframework.web.bind.annotation.RequestBody;
import org.springframework.web.bind.annotation.RequestMapping;
import org.springframework.web.bind.annotation.ResponseBody;
import org.springframework.web.bind.annotation.RestController;

import io.swagger.annotations.Api;
import io.swagger.annotations.ApiOperation;

/**
 *
 * RedisDemoController
 *
 *
 * Jan 15, 2021 2:55:10 PM
 *
 * @version 1.0.0
 *
 */
@RestController
@RequestMapping("/demo")
@Api(tags = "demo mvc1")
public class ApiController
    private Logger logger = LoggerFactory.getLogger(this.getClass());

    @ApiOperation(value = "修改学生信息接口", notes = "返回success或者是fail")
    @PostMapping(value = "/updStudent", produces = "application/json")
    @ResponseBody
    public String updStudent(@RequestBody  Student std)
        logger.info(">>>>>>intp mvc1->updStudent");
        logger.info(">>>>>>name->" + std.getName() + "  age->" + std.getAge());
        return "success";
我们有一个vue端的axios提交如下:
/src/utils/request.js
import axios from 'axios'

axios.interceptors.response.use(
  response =>
    const data = response.data
    console.log(data)
  ,
  error =>
    console.log('error', error)

)
export const request = axios
HelloWorld.vue
<template>
  <div class="hello">
  <button v-on:click="updateStudent()">跨域访问</button>
  </div>
</template>

<script>
import request from '@/utils/request.js'
export default
  name: 'HelloWorld',
  methods:
    updateStudent ()
      request.post('http://localhost:9081/demo/updStudent',
        'name': 'abc',
        'age': 10
      )


</script>
运行后,我们点了一下这个“按钮”,然后我们在浏览器的web console得到了如下这样的“跨域不允许”的报错
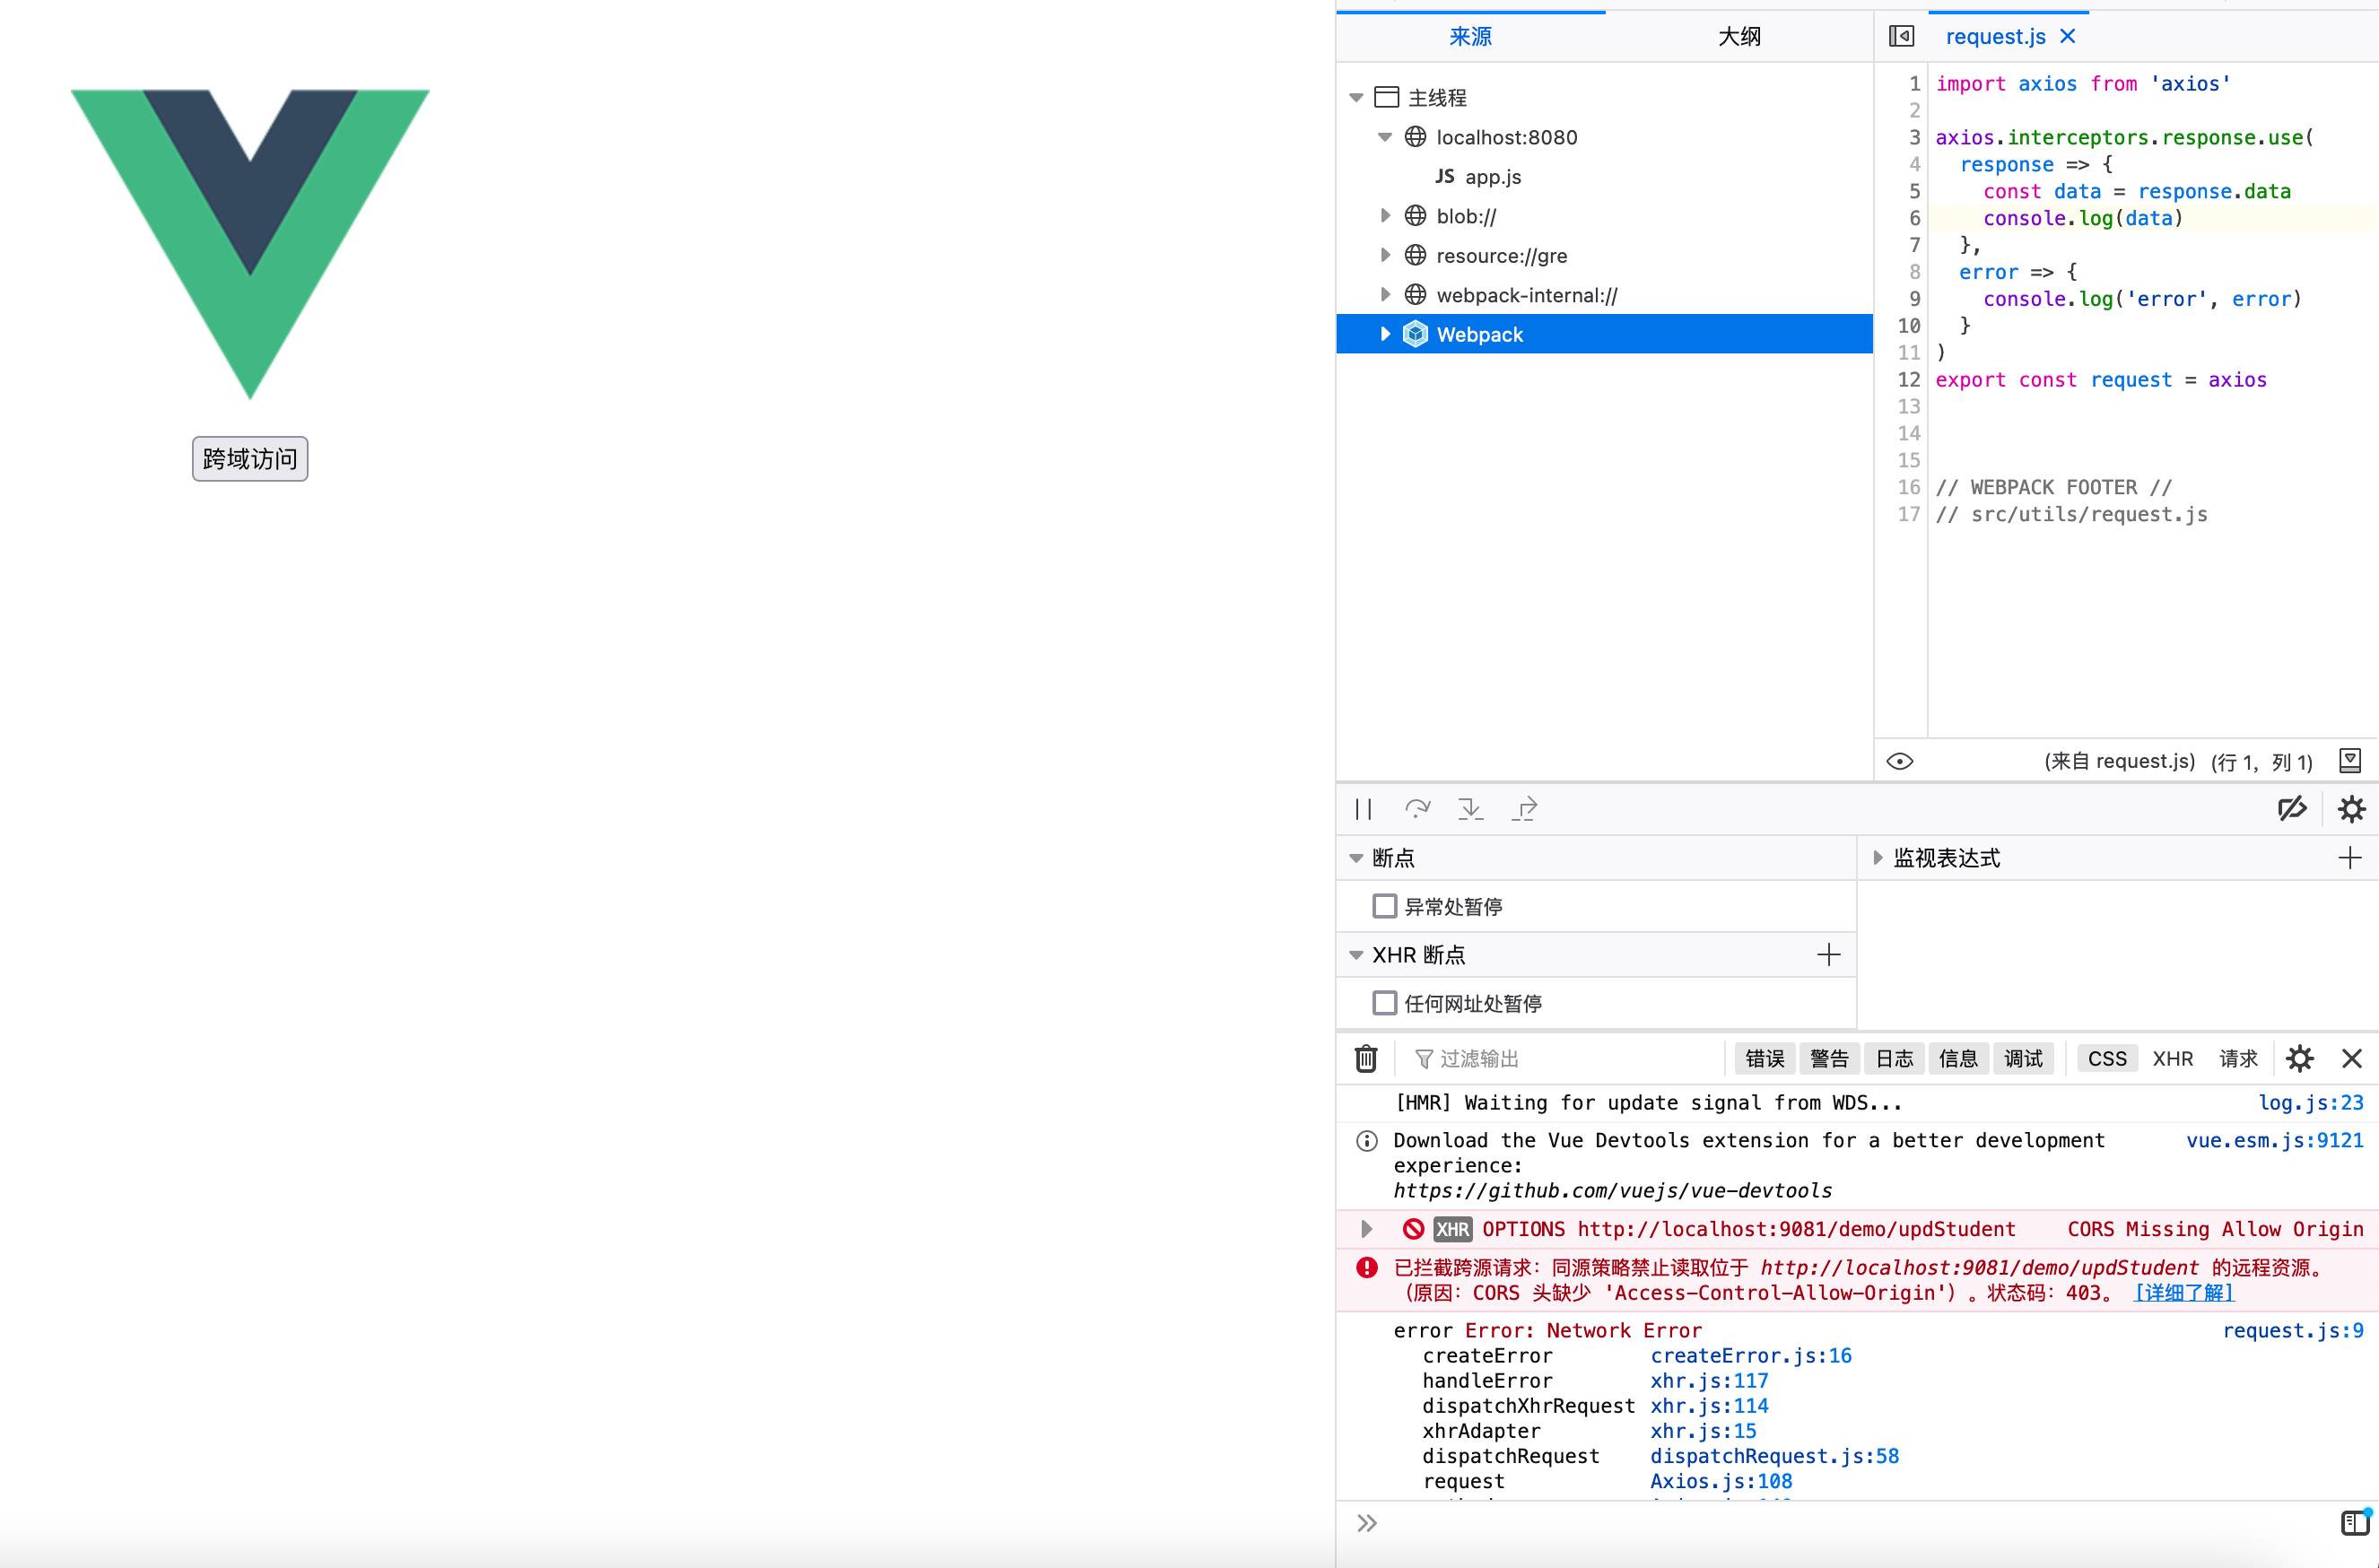
已拦截跨源请求:同源策略禁止读取位于 http://localhost:9081/demo/updStudent 的远程资源。(原因:CORS 头缺少 'Access-Control-Allow-Origin')。状态码:403。
错误的做法来了
/**
 * 系统项目名称 org.mk.demo.skypayment.config.webmvc WebMvcConfig.java
 *
 * Feb 21, 2022-10:30:19 AM 2022XX公司-版权所有
 *
 */
package org.mk.demo.config;

import java.util.ArrayList;
import java.util.Collections;
import java.util.List;

import org.springframework.beans.factory.annotation.Value;
import org.springframework.context.annotation.Bean;
import org.springframework.context.annotation.Configuration;
import org.springframework.web.cors.CorsConfiguration;
import org.springframework.web.cors.UrlBasedCorsConfigurationSource;
import org.springframework.web.filter.CorsFilter;
import org.springframework.web.servlet.config.annotation.CorsRegistry;
import org.springframework.web.servlet.config.annotation.WebMvcConfigurer;

/**
 *
 * WebMvcConfig
 *
 *
 * Feb 21, 2022 10:30:19 AM
 *
 * @version 1.0.0
 *
 */
@Configuration
public class WebMvcConfig implements WebMvcConfigurer
    /**
     * 跨域配置
     */
    @Value("$project.basePath")
    private String basePath;

    @Bean
    public CorsFilter corsFilter()
        UrlBasedCorsConfigurationSource source = new UrlBasedCorsConfigurationSource();
        CorsConfiguration config = new CorsConfiguration();
        config.setAllowCredentials(true);
        // 允许访问的客户端域名
        List<String> allowedOriginPatterns = new ArrayList<>();

        allowedOriginPatterns.add("*");

        config.setAllowedOrigins(allowedOriginPatterns);
        // 允许服务端访问的客户端请求头
        config.addAllowedHeader("*");
        // 允许访问的方法名,GET POST等
        config.addAllowedMethod("*");
        // 对接口配置跨域设置
        source.registerCorsConfiguration("/**", config);
        return new CorsFilter(source);
改完后我们再去点一下vue端的按钮,哎,请求正常进来了,好了,完事了,上生产了。
然后生产生产,定期有安全扫描,每年还有等保资质审核,等保不过,你网站也别开了就,直接到时可以找个电子厂上班了哈。
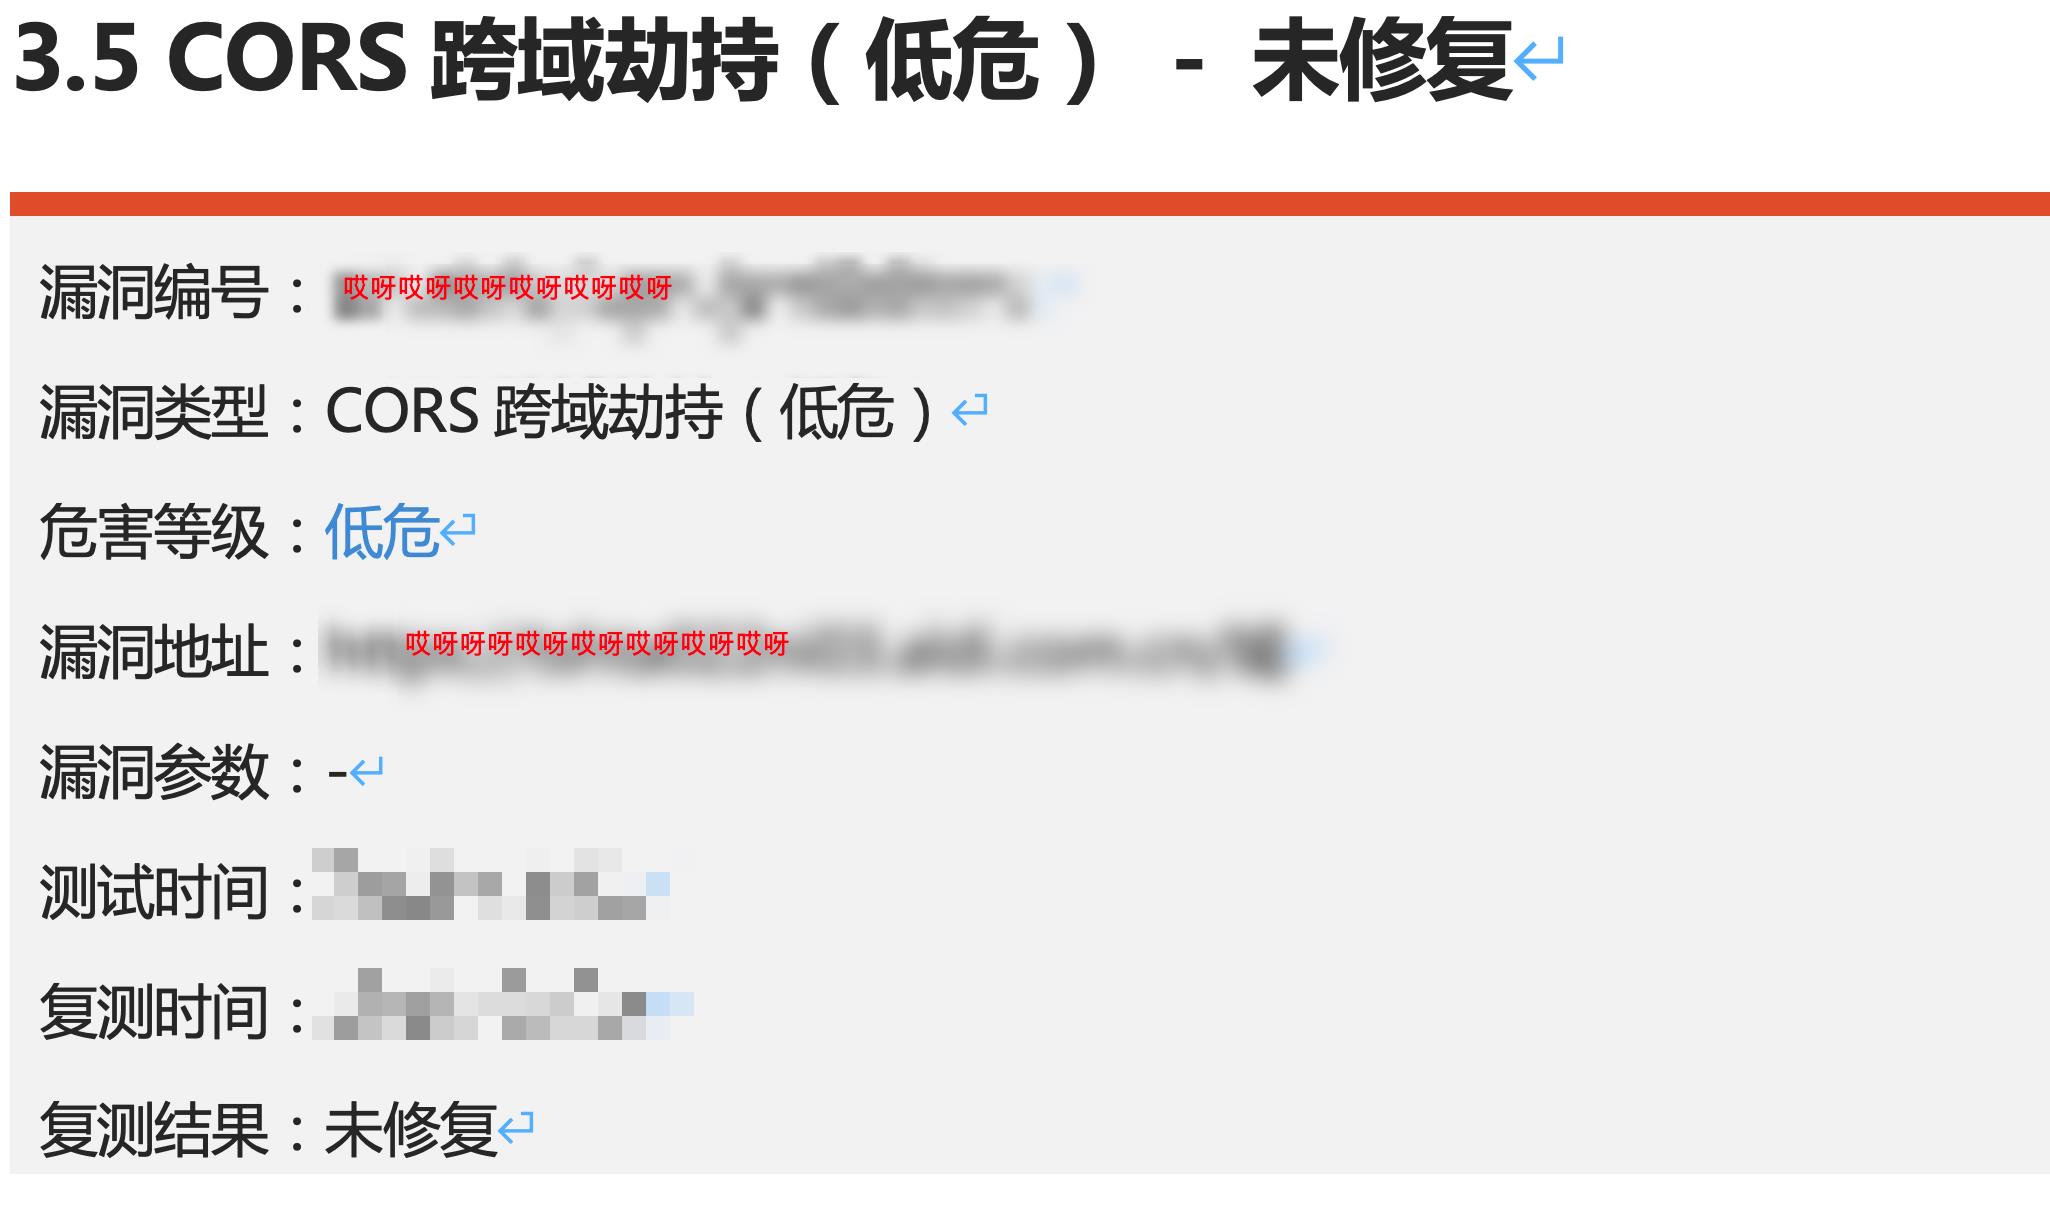
一看,哎呀。。。到处API都有这个,然后此时再一看我们的商城相关的系统已经成下面这样了
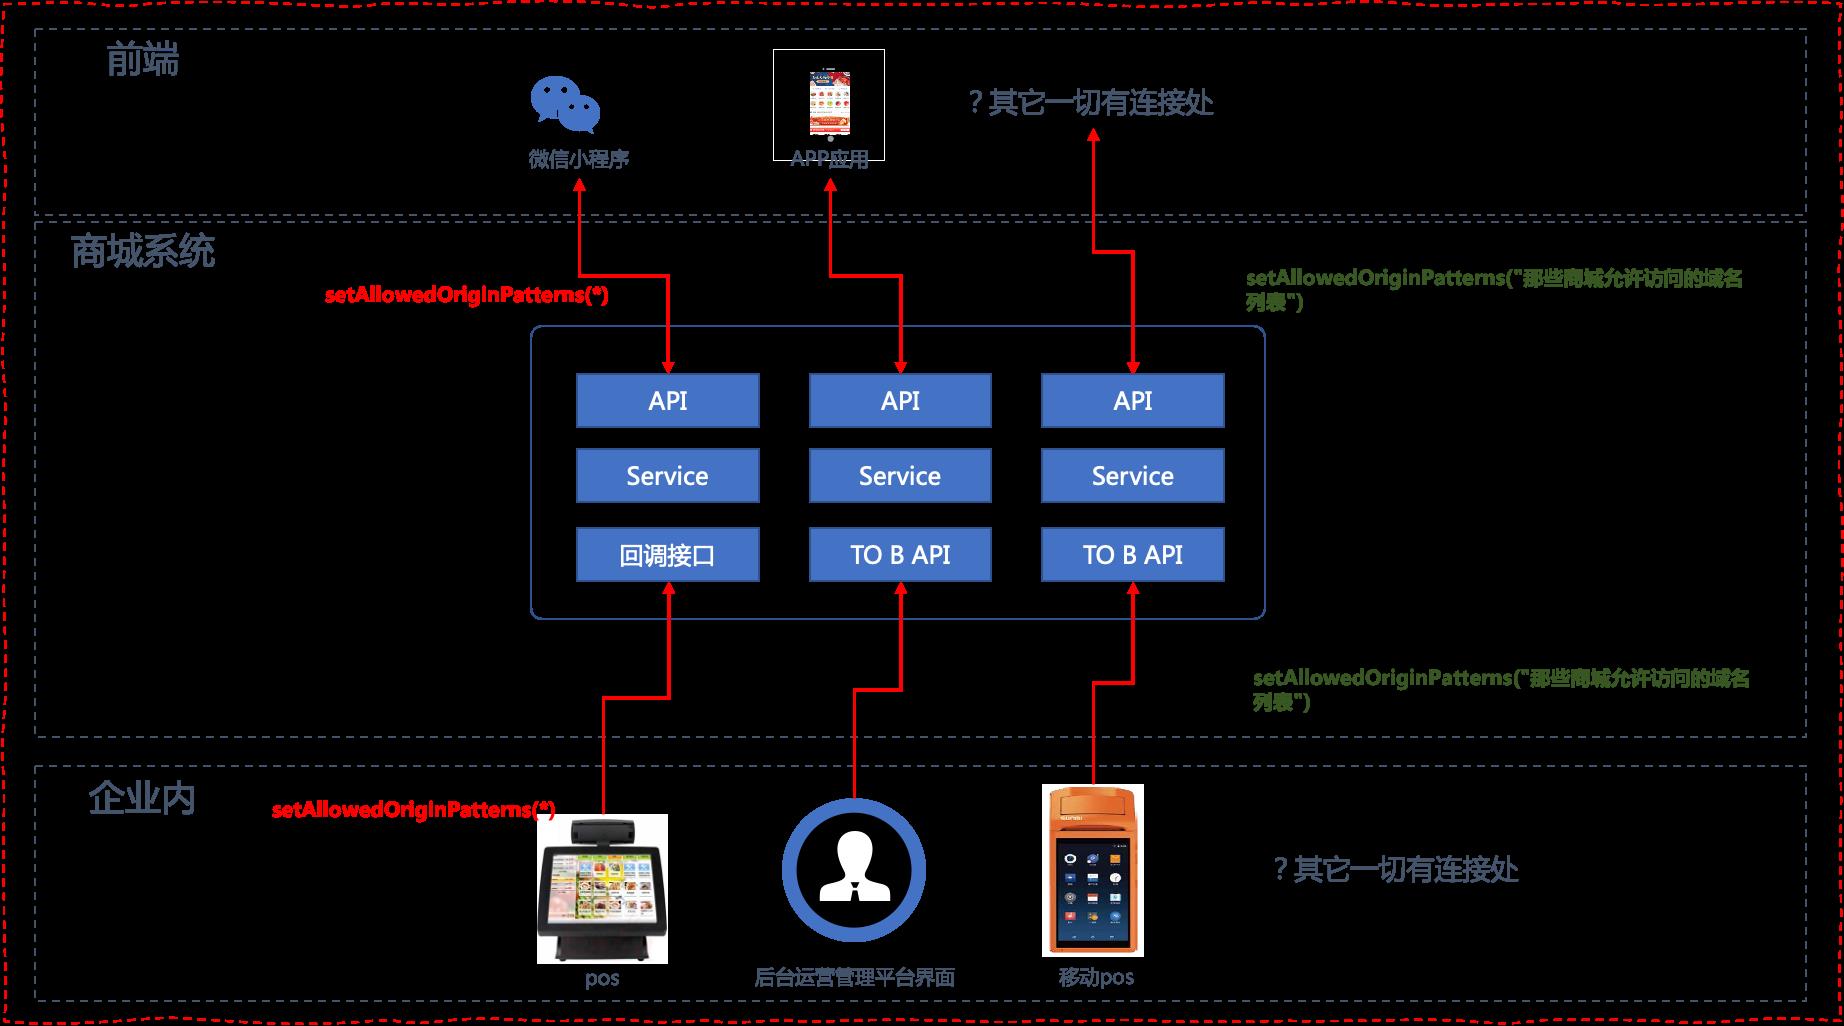
任何一根API的改动,就得来一次回归测试。。。一般来说比如说中台系统,几十个模块。。。几千个API,这个改大了。
不改吗。。。如梗在咽喉,唉。。。
正确的做法
因此,我们在一开始碰到这种问题时就需要引起注意,这边只教各位对的做法。而不是简单的什么后台来一句:allow(*),网上90%以上的教程都这种,全是错的!
/**
 * 系统项目名称 org.mk.demo.skypayment.config.webmvc WebMvcConfig.java
 *
 * Feb 21, 2022-10:30:19 AM 2022XX公司-版权所有
 *
 */
package org.mk.demo.config;

import java.util.ArrayList;
import java.util.Collections;
import java.util.List;

import org.springframework.beans.factory.annotation.Value;
import org.springframework.context.annotation.Bean;
import org.springframework.context.annotation.Configuration;
import org.springframework.web.cors.CorsConfiguration;
import org.springframework.web.cors.UrlBasedCorsConfigurationSource;
import org.springframework.web.filter.CorsFilter;
import org.springframework.web.servlet.config.annotation.CorsRegistry;
import org.springframework.web.servlet.config.annotation.WebMvcConfigurer;

/**
 *
 * WebMvcConfig
 *
 *
 * Feb 21, 2022 10:30:19 AM
 *
 * @version 1.0.0
 *
 */
@Configuration
public class WebMvcConfig implements WebMvcConfigurer
    /**
     * 跨域配置
     */

    @Bean
    public CorsFilter corsFilter()
        UrlBasedCorsConfigurationSource source = new UrlBasedCorsConfigurationSource();
        CorsConfiguration config = new CorsConfiguration();
        config.setAllowCredentials(true);
        // 允许访问的客户端域名
        List<String> allowedOriginPatterns = new ArrayList<>();
        allowedOriginPatterns.add(basePath);
        //config.setAllowedOriginPatterns(allowedOriginPatterns);
        config.setAllowedOrigins(allowedOriginPatterns);

        // 允许服务端访问的客户端请求头
        config.addAllowedHeader("*");
        // 允许访问的方法名,GET POST等
        config.addAllowedMethod("*");
        // 对接口配置跨域设置
        source.registerCorsConfiguration("/**", config);
        return new CorsFilter(source);
此处的这一句:
List<String> allowedOriginPatterns = new ArrayList<>();
这一句话就是把你允许访问后台的域名一个个加进去,而我们在设计上应该如下操作:
- 把允许的访问的域名,一个个加到以下这个List<String>中,可以用一个mongoDb的collection存所有的“被允许的域名”;
- 然后把这个List给到config.setAllowedOrigins(allowedOriginPatterns);
最后,以上代码适合spring boot 2.1~2.3,对于2.4及以后版本上述的config.setAllowedOrigins要写成“config.setAllowedOriginPatterns(allowedOriginPatterns);”
我们来看,正确设置了跨域后的访问吧。
首先,我们在.yml里配置一个允许的跨域访问(这块我为了演示因此配在.yml文件里了,各位生产上一定要按照我的核心设计来做这件事以便于应用上扩展性更好)。
server:
  port: 9081
  tomcat:
    max-http-post-size: -1
  max-http-header-size: 10240000

spring:
  application:
    name: mvc1
  servlet:
    multipart:
      max-file-size: 10MB
      max-request-size: 10MB
swagger:
  enable: false
project:
  basePath: http://localhost:8080
/**
 * 系统项目名称 org.mk.demo.skypayment.config.webmvc WebMvcConfig.java
 *
 * Feb 21, 2022-10:30:19 AM 2022XX公司-版权所有
 *
 */
package org.mk.demo.config;

import java.util.ArrayList;
import java.util.Collections;
import java.util.List;

import org.springframework.beans.factory.annotation.Value;
import org.springframework.context.annotation.Bean;
import org.springframework.context.annotation.Configuration;
import org.springframework.web.cors.CorsConfiguration;
import org.springframework.web.cors.UrlBasedCorsConfigurationSource;
import org.springframework.web.filter.CorsFilter;
import org.springframework.web.servlet.config.annotation.CorsRegistry;
import org.springframework.web.servlet.config.annotation.WebMvcConfigurer;

/**
 *
 * WebMvcConfig
 *
 *
 * Feb 21, 2022 10:30:19 AM
 *
 * @version 1.0.0
 *
 */
@Configuration
public class WebMvcConfig implements WebMvcConfigurer
    /**
     * 跨域配置
     */
    @Value("$project.basePath")
    private String basePath;

    @Bean
    public CorsFilter corsFilter()
        UrlBasedCorsConfigurationSource source = new UrlBasedCorsConfigurationSource();
        CorsConfiguration config = new CorsConfiguration();
        config.setAllowCredentials(true);
        // 允许访问的客户端域名
        List<String> allowedOriginPatterns = new ArrayList<>();
        allowedOriginPatterns.add(basePath);

        // config.setAllowedOriginPatterns(allowedOriginPatterns);
        config.setAllowedOrigins(allowedOriginPatterns);
        // config.addAllowedOrigin(serverPort);
        // 允许服务端访问的客户端请求头
        config.addAllowedHeader("*");
        // 允许访问的方法名,GET POST等
        config.addAllowedMethod("*");
        // 对接口配置跨域设置
        source.registerCorsConfiguration("/**", config);
        return new CorsFilter(source);
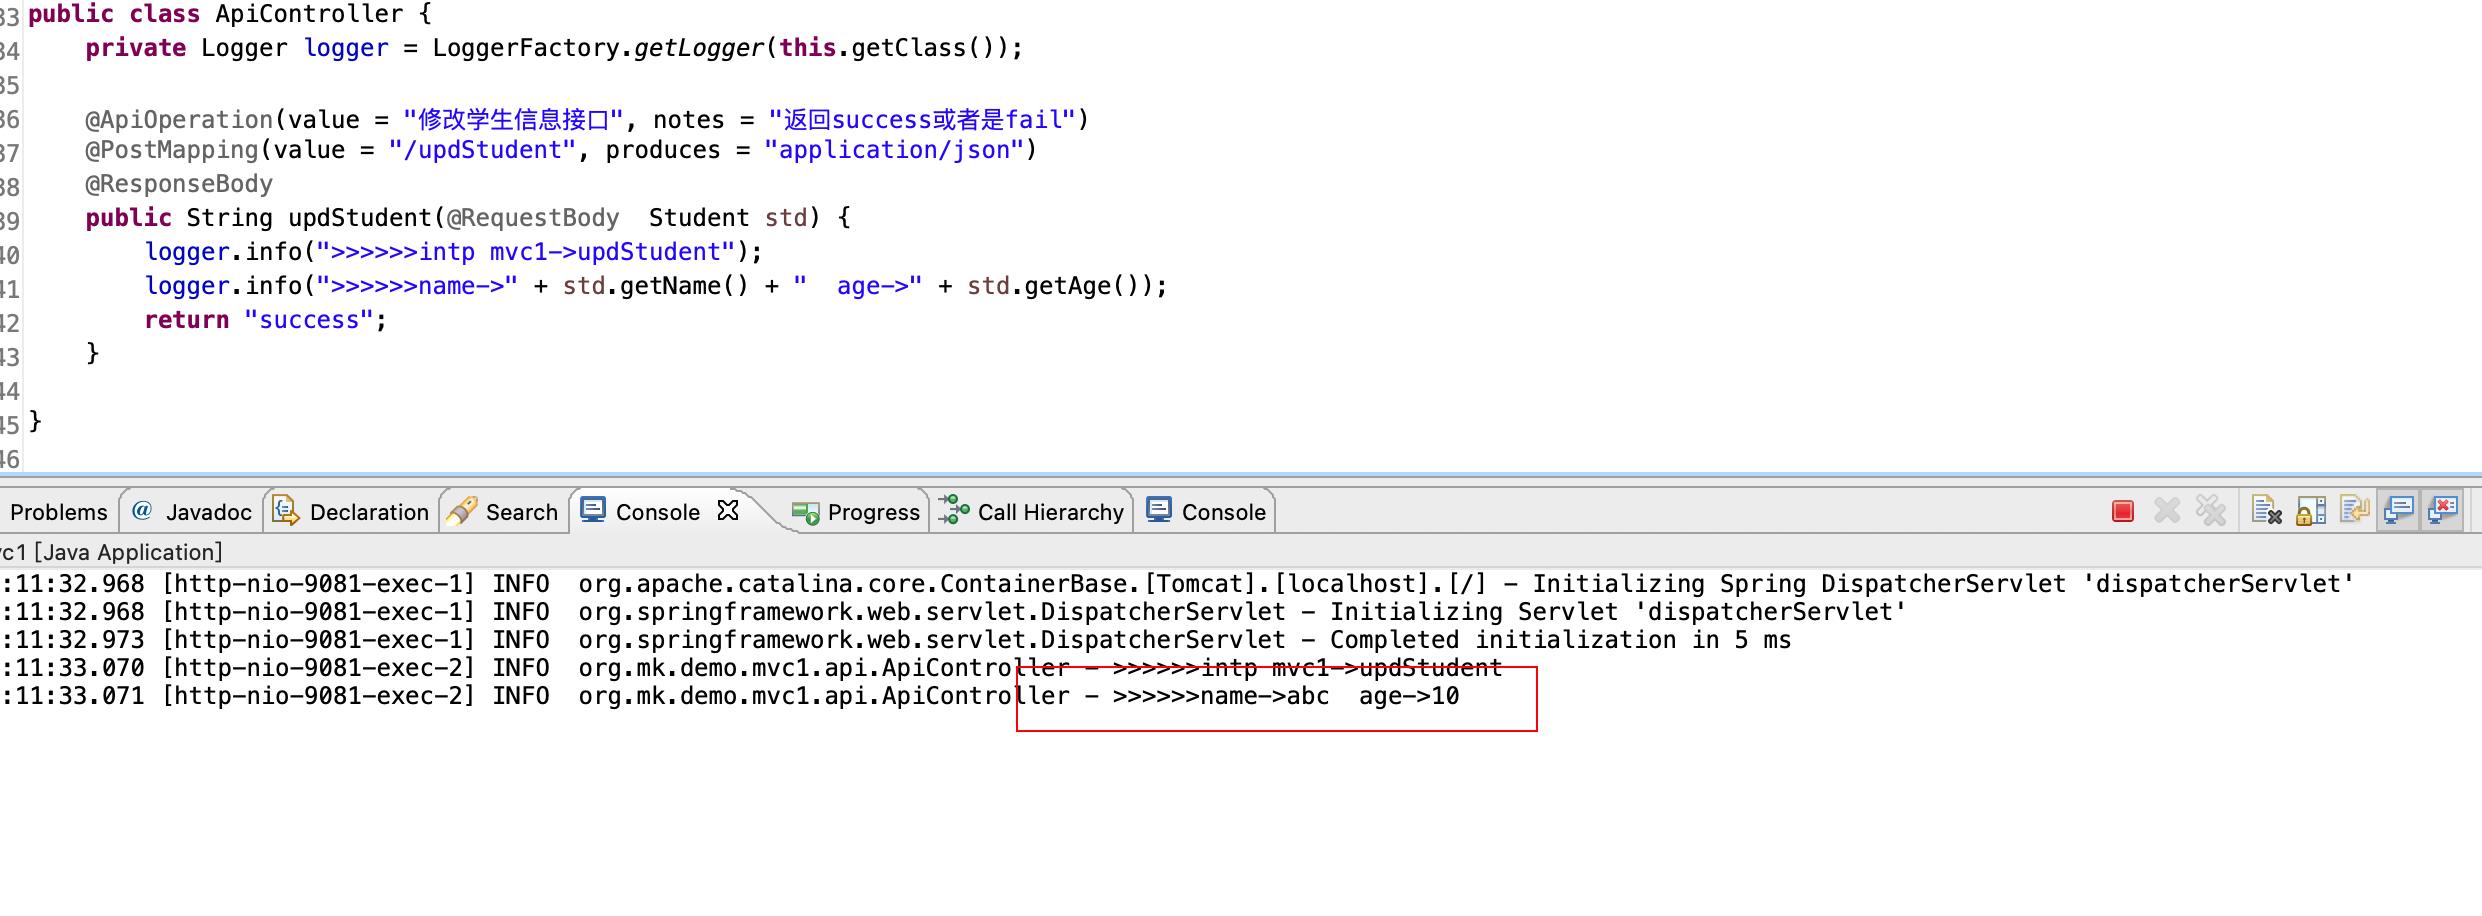
我们在vue上点一下原来这个按钮,前端什么都不需要动。
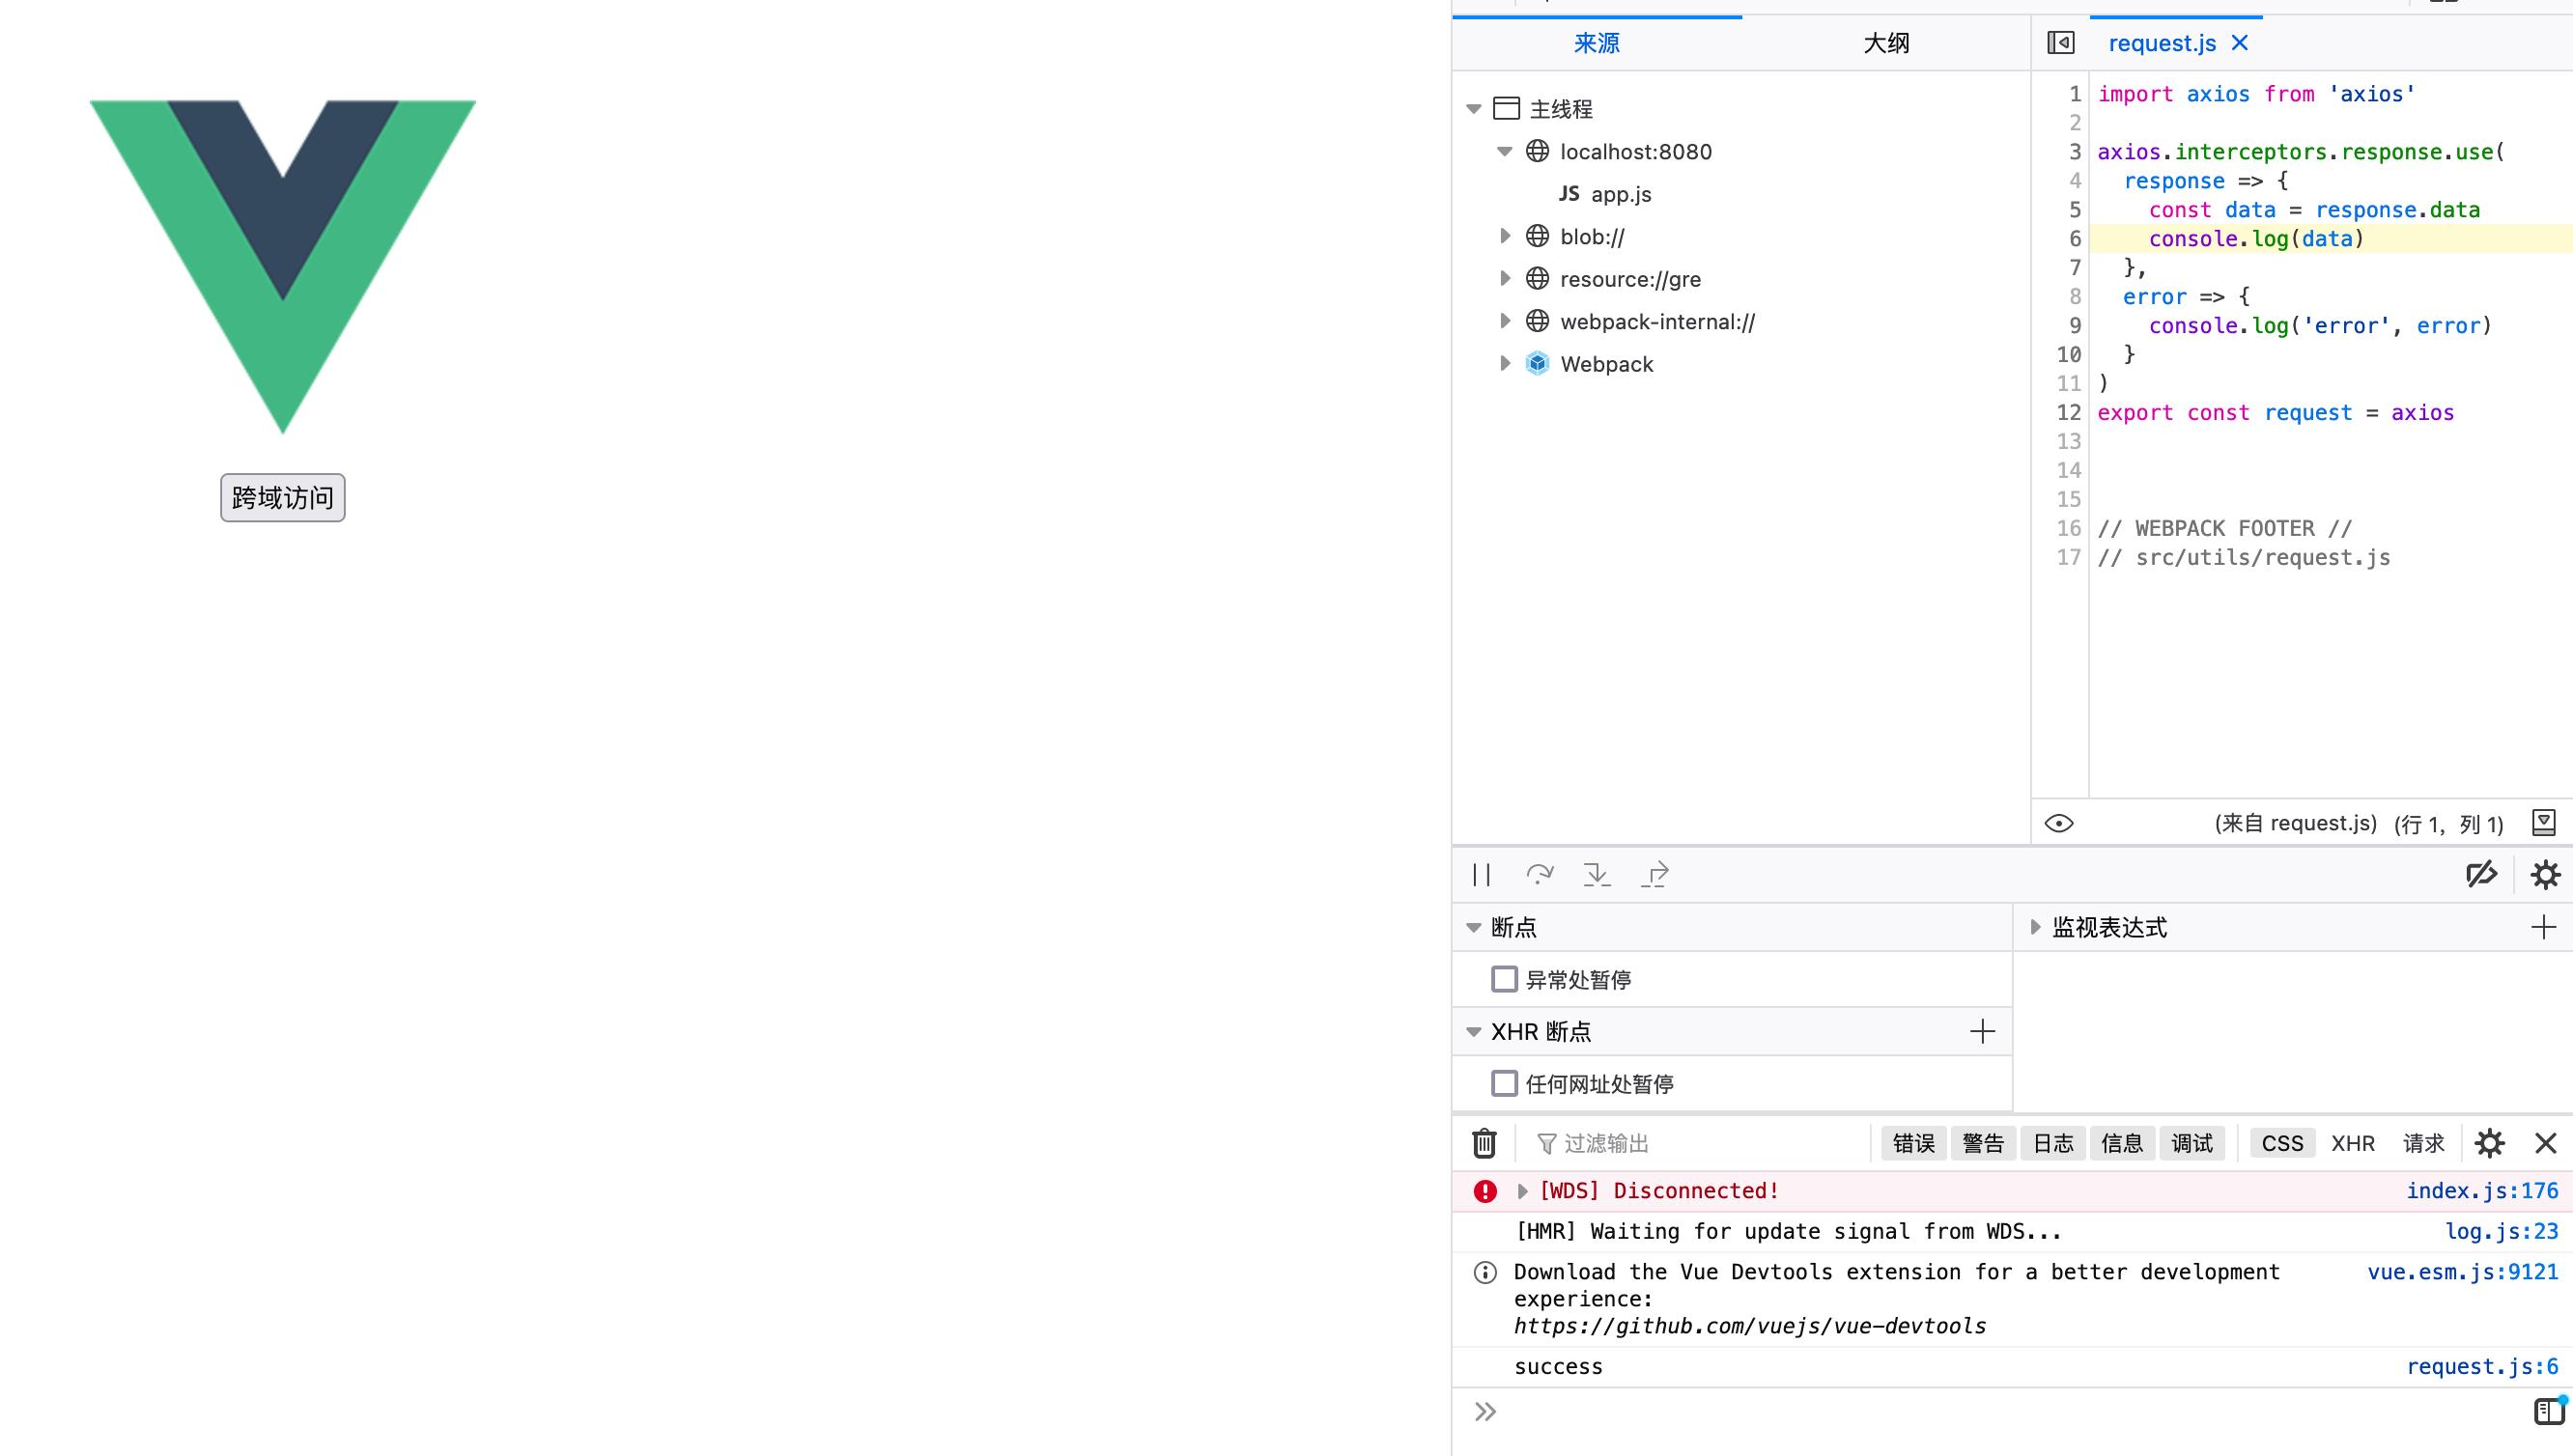
看,后台请求进来了。
以上是关于微服务设计指导-纠正目前网上近90%以上错误的对于“API跨域”问题的所谓指导的主要内容,如果未能解决你的问题,请参考以下文章