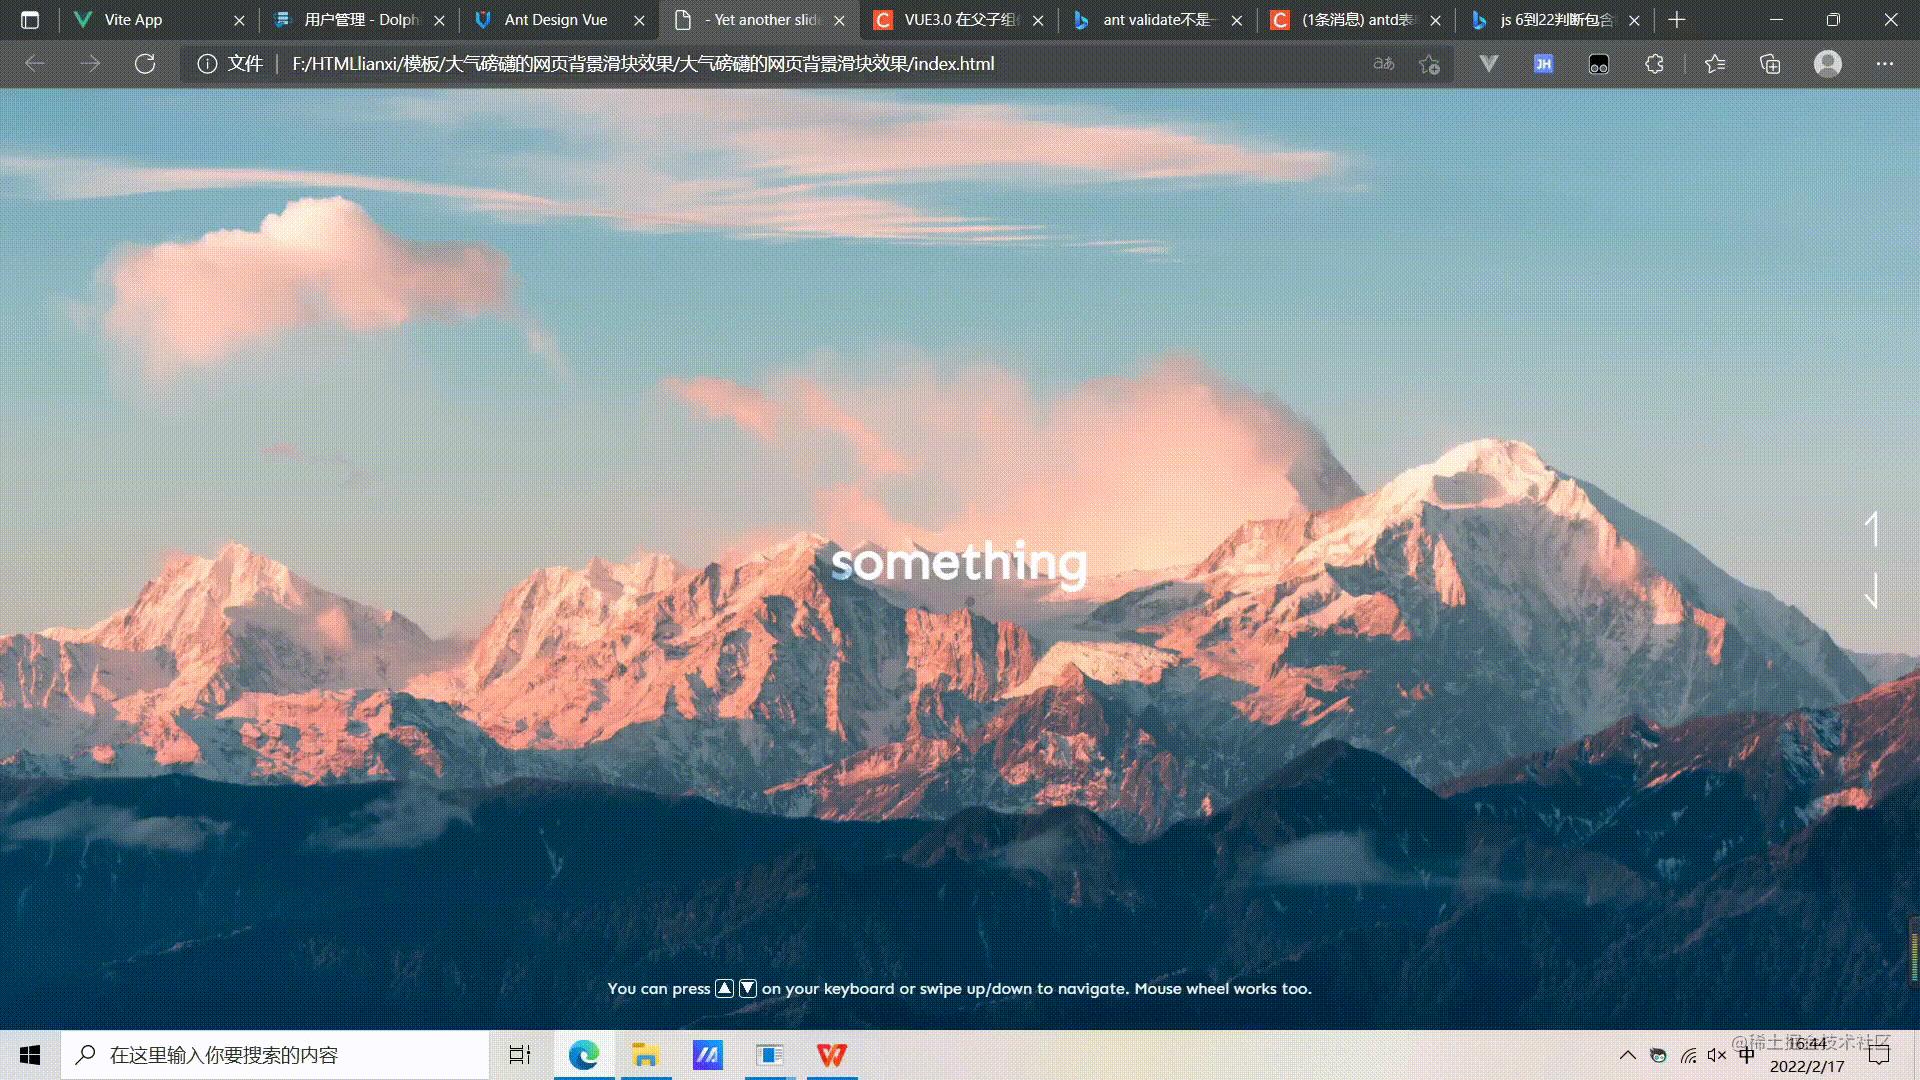
如此优秀的JS轮播图,写完老师都沉默了
Posted 前端老实人
tags:
篇首语:本文由小常识网(cha138.com)小编为大家整理,主要介绍了如此优秀的JS轮播图,写完老师都沉默了相关的知识,希望对你有一定的参考价值。
雷迪森安的乡亲们,欢迎来到老实人的前端课堂,今天我们来写个骚气磅礴的轮播图吧,内容太干,建议收藏起来慢慢看,最后我还会教大家如何免费部署上线哦~

正片
小轮播图滑动滚播,好不好看你说了算。

结构就两行
<div id="main">
    <h1>something</h1>
    <div class="content">
        <p>You can press <kbd>▲</kbd> <kbd>▼</kbd> on your keyboard or swipe up/down to navigate. Mouse wheel works too.</p>
    </div>
    <div class="buttons">
        <button class="next" onclick="go(-1)"></button>
        <button class="prev" onclick="go(1)"></button>
    </div>
</div>
样式
每张图片的位置样式此时已经预设好
html,
body
  padding: 0;
  margin: 0;
  overflow: hidden;
  font-family: "Sen";

*
  box-sizing: border-box;
  outline: none;
  -webkit-tap-highlight-color: transparent;
  cursor: none;
  user-select: none;
  -webkit-user-drag: none;

#main
  display: flex;

#main .part
  flex: 1;

#main .part .section
  width: 100%;
  height: 100vh;
  position: relative;
  overflow: hidden;

#main .part .section img
  width: 100vw;
  height: 100vh;
  object-fit: cover;
  position: absolute;
  left: var(--x);
  pointer-events: none;

.cursor
  width: var(--size);
  height: var(--size);
  border-radius: 50%;
  background: white;
  position: absolute;
  z-index: 999;
  pointer-events: none;
  mix-blend-mode: difference;

.cursor-f
  width: var(--size);
  height: var(--size);
  position: absolute;
  top: 0;
  left: 0;
  background-image: url("data:image/svg+xml,%3Csvg width='47' height='47' viewBox='0 0 47 47' fill='none' xmlns='http://www.w3.org/2000/svg'%3E%3Cpath d='M42.4202 42.4202C38.8403 46 33.3594 46 23.5 46C13.6406 46 8.15966 46 4.57983 42.4202C1 38.8403 1 33.3594 1 23.5C1 13.6406 1 8.15966 4.57983 4.57983C8.15966 1 13.6406 1 23.5 1C33.3594 1 38.8403 1 42.4202 4.57983C46 8.15966 46 13.6406 46 23.5C46 33.3594 46 38.8403 42.4202 42.4202Z' stroke='white'/%3E%3C/svg%3E%0A");
  background-size: cover;
  mix-blend-mode: difference;
  pointer-events: none;
  opacity: 0.5;

.buttons
  position: absolute;
  right: 25px;
  top: 50%;
  transform: translateY(-50%);
  z-index: 99;

.buttons button
  border: none;
  background-size: contain;
  background: url("data:image/svg+xml,%3Csvg width='10' height='29' viewBox='0 0 10 29' fill='none' xmlns='http://www.w3.org/2000/svg'%3E%3Cpath d='M9 0V27L1 17.4857' stroke='white' stroke-width='2' /%3E%3C/svg%3E%0A") no-repeat;
  background-position: center;
  width: 10px;
  height: 30px;
  display: block;
  margin: 20px 0;
  padding: 0 15px;
  transition-duration: 0.6s;

.buttons button.next
  transform: scaleY(-1);

.buttons button.prev:active
  transform: translateY(8px);

.buttons button.next:active
  transform: scaleY(-1) translateY(8px);

h1
  position: absolute;
  top: 50%;
  transform: translateY(-50%);
  left: 0;
  right: 0;
  margin: auto;
  z-index: 99;
  color: white;
  text-align: center;
  font-size: 2.6em;
  mix-blend-mode: overlay;
  pointer-events: none;

.content
  width: 90%;
  position: absolute;
  bottom: 20px;
  text-align: center;
  left: 0;
  right: 0;
  margin: auto;
  color: white;
  z-index: 99;
  font-size: 0.8em;

.content p
  margin: 0.5em auto;

.content kbd
  width: 15px;
  height: 15px;
  border: 1px solid white;
  display: inline-block;
  border-radius: 3px;
  font-size: 0.9em;
  vertical-align: text-top;

.content a
  color: rgba(227, 227, 227, 0.78);
  text-decoration: none;
  border-bottom: 1px solid currentColor;

.content a:hover
  padding-bottom: 1px;
表现
关键代码,总共没几行,让它动起来,你们直接复制拿去用就行,不懂的话再私下问我吧。
const cols = 3;
const main = document.getElementById('main');
let parts = [];

let images = [
  "https://images.unsplash.com/photo-1549880338-65ddcdfd017b?ixlib=rb-1.2.1&ixid=eyJhcHBfaWQiOjEyMDd9&auto=format&fit=crop&w=2550&q=80",
  "https://images.unsplash.com/photo-1544198365-f5d60b6d8190?ixlib=rb-1.2.1&ixid=eyJhcHBfaWQiOjEyMDd9&auto=format&fit=crop&w=2550&q=80",
  "https://images.unsplash.com/photo-1493246507139-91e8fad9978e?ixlib=rb-1.2.1&ixid=eyJhcHBfaWQiOjEyMDd9&auto=format&fit=crop&w=2700&q=80"
];
let current = 0;
let playing = false;

for (let i in images)
  new Image().src = images[i];


for (let col = 0; col < cols; col++)
  let part = document.createElement('div');
  part.className = 'part';
  let el = document.createElement('div');
  el.className = "section";
  let img = document.createElement('img');
  img.src = images[current];
  el.appendChild(img);
  part.style.setProperty('--x', -100/cols*col+'vw');
  part.appendChild(el);
  main.appendChild(part);
  parts.push(part);


let animOptions =
  duration: 2.3,
  ease: Power4.easeInOut
;

function go(dir)
  if (!playing)
    playing = true;
    if (current + dir < 0) current = images.length - 1;
    else if (current + dir >= images.length) current = 0;
    else current += dir;

    function up(part, next)
      part.appendChild(next);
      gsap.to(part, ...animOptions, y: -window.innerHeight).then(function ()
        part.children[0].remove();
        gsap.to(part, duration: 0, y: 0);
      )


    function down(part, next)
      part.prepend(next);
      gsap.to(part, duration: 0, y: -window.innerHeight);
      gsap.to(part, ...animOptions, y: 0).then(function ()
        part.children[1].remove();
        playing = false;
      )


    for (let p in parts)
      let part = parts[p];
      let next = document.createElement('div');
      next.className = 'section';
      let img = document.createElement('img');
      img.src = images[current];
      next.appendChild(img);

      if ((p - Math.max(0, dir)) % 2)
        down(part, next);
       else
        up(part, next);


window.addEventListener('keydown', function(e)
  if (['ArrowDown', 'ArrowRight'].includes(e.key))
    go(1);


  else if (['ArrowUp', 'ArrowLeft'].includes(e.key))
    go(-1);

);

function lerp(start, end, amount)
  return (1-amount)*start+amount*end


const cursor = document.createElement('div');
cursor.className = 'cursor';

const cursorF = document.createElement('div');
cursorF.className = 'cursor-f';
let cursorX = 0;
let cursorY = 0;
let pageX = 0;
let pageY = 0;
let size = 8;
let sizeF = 36;
let followSpeed = .16;

document.body.appendChild(cursor);
document.body.appendChild(cursorF);

if ('ontouchstart' in window)
  cursor.style.display = 'none';
  cursorF.style.display = 'none';


cursor.style.setProperty('--size', size+'px');
cursorF.style.setProperty('--size', sizeF+'px');

window.addEventListener('mousemove', function(e)
  pageX = e.clientX;
  pageY = e.clientY;
  cursor.style.left = e.clientX-size/2+'px';
  cursor.style.top = e.clientY-size/2+'px';
);

function loop()
  cursorX = lerp(cursorX, pageX, followSpeed);
  cursorY = lerp(cursorY, pageY, followSpeed);
  cursorF.style.top = cursorY - sizeF/2 + 'px';
  cursorF.style.left = cursorX - sizeF/2 + 'px';
  requestAnimationFrame(loop);


loop();

let startY;
let endY;
let clicked = false;

function mousedown(e)
  gsap.to(cursor, scale: 4.5);
  gsap.to(cursorF, scale: .4);

  clicked = true;
  startY = e.clientY || e.touches[0].clientY || e.targetTouches[0].clientY;

function mouseup(e)
  gsap.to(cursor, scale: 1);
  gsap.to(cursorF, scale: 1);

  endY = e.clientY || endY;
  if (clicked && startY && Math.abs(startY - endY) >= 40)
    go(!Math.min(0, startY - endY)?1:-1);
    clicked = false;
    startY = null;
    endY = null;


window.addEventListener('mousedown', mousedown, false);
window.addEventListener('touchstart', mousedown, false);
window.addEventListener('touchmove', function(e)
  if (clicked)
    endY = e.touches[0].clientY || e.targetTouches[0].clientY;

, false);
window.addEventListener('touchend', mouseup, false);
window.addEventListener('mouseup', mouseup, false);

let scrollTimeout;
function wheel(e)
  clearTimeout(scrollTimeout);
  setTimeout(function()
    if (e.deltaY < -40)
      go(-1);

    else if (e.deltaY >= 40)
      go(1);

  )

window.addEventListener('mousewheel', wheel, false);
window.addEventListener('wheel', wheel, false);
不学没思路,看完是不是感觉也不难啊?你做出来了吗?
更多实用炫酷表白代码可以在搜索公z号:前端老实人获取~
做好的网页效果,如何通过发链接给别人看?
1.1解决部署上线~> 部署上线工具(永久免费使用)
1.不需要买服务器就能部署线上,全世界都能访问你的连接啦, 这里给大家推荐一个程序员必备神器~ 简单易懂, 简直神器 ~ 需要源码或者部署神器可在公z号获取
2.就是把你的代码效果做好了以后, 部署到线上, 把链接发给别人, 就可以让对方通过你的连接点击进去, 就能看到你的网页效果啦, 电脑端和手机端都可以噢! (不然别人看你的网页都要发文件过去,体验感不太好~)
最后
博主为人老实,无偿解答问题,也会录制一些学习视频教同学们知识❤
如果对您有帮助,希望能给个👍/评论/收藏
您的三连~是对我创作最大的动力支持
关注:前端老实人👇领取源码哦~
以上是关于如此优秀的JS轮播图,写完老师都沉默了的主要内容,如果未能解决你的问题,请参考以下文章