android material design 风格组件(MaterialButton,MaterialButtonToggleGroup,Chip,ChipGroup)大汇总.
Posted android超级兵
tags:
篇首语:本文由小常识网(cha138.com)小编为大家整理,主要介绍了android material design 风格组件(MaterialButton,MaterialButtonToggleGroup,Chip,ChipGroup)大汇总.相关的知识,希望对你有一定的参考价值。
突然心血来潮,准备打算出一个系列的material design风格组件的使用系列,这是第一篇先试试水😊
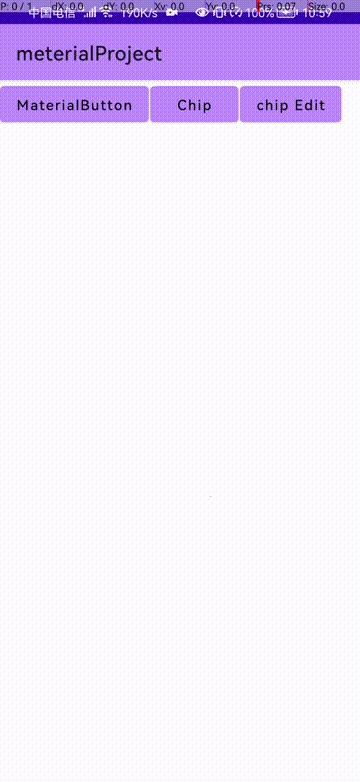
先来看看今天要完成的效果:
| MaterialButton MaterialButtonToggleGroup | Chip ChipGroup | ChipDrawable ChipsView ChipsInput |
|---|---|---|
 |  |  |
⚠️:本系列结合官方文档以及自己的理解编写,暂不涉及源码部分,全是使用!
环境
- system: macOS
- android studio: 4.1.3
- gradle:gradle-6.5-bin.zip
- project gradle:4.1.3
- kotilin:1.5.0
- ViewBinding: true
- material:1.4.0
- appcompat:1.4.0
Material环境配置
设置主题
首先需要将主题(theme)改成material风格的
 // 原来使用AppCompat风格不带ActionBar的
 <style name="MyTheme" parent="Theme.AppCompat.Light.NoActionBar">
// 与AppCompat风格不带ActionBar的对应的 material主题
<style name="MyTheme" parent="Theme.MaterialComponents.Light.NoActionBar">

// 当前material风格主题(带ActionBar)
<style name="MyTheme" parent="Theme.MaterialComponents.Light">
在xml中配置
默认不配置,看不出material风格组件的变化
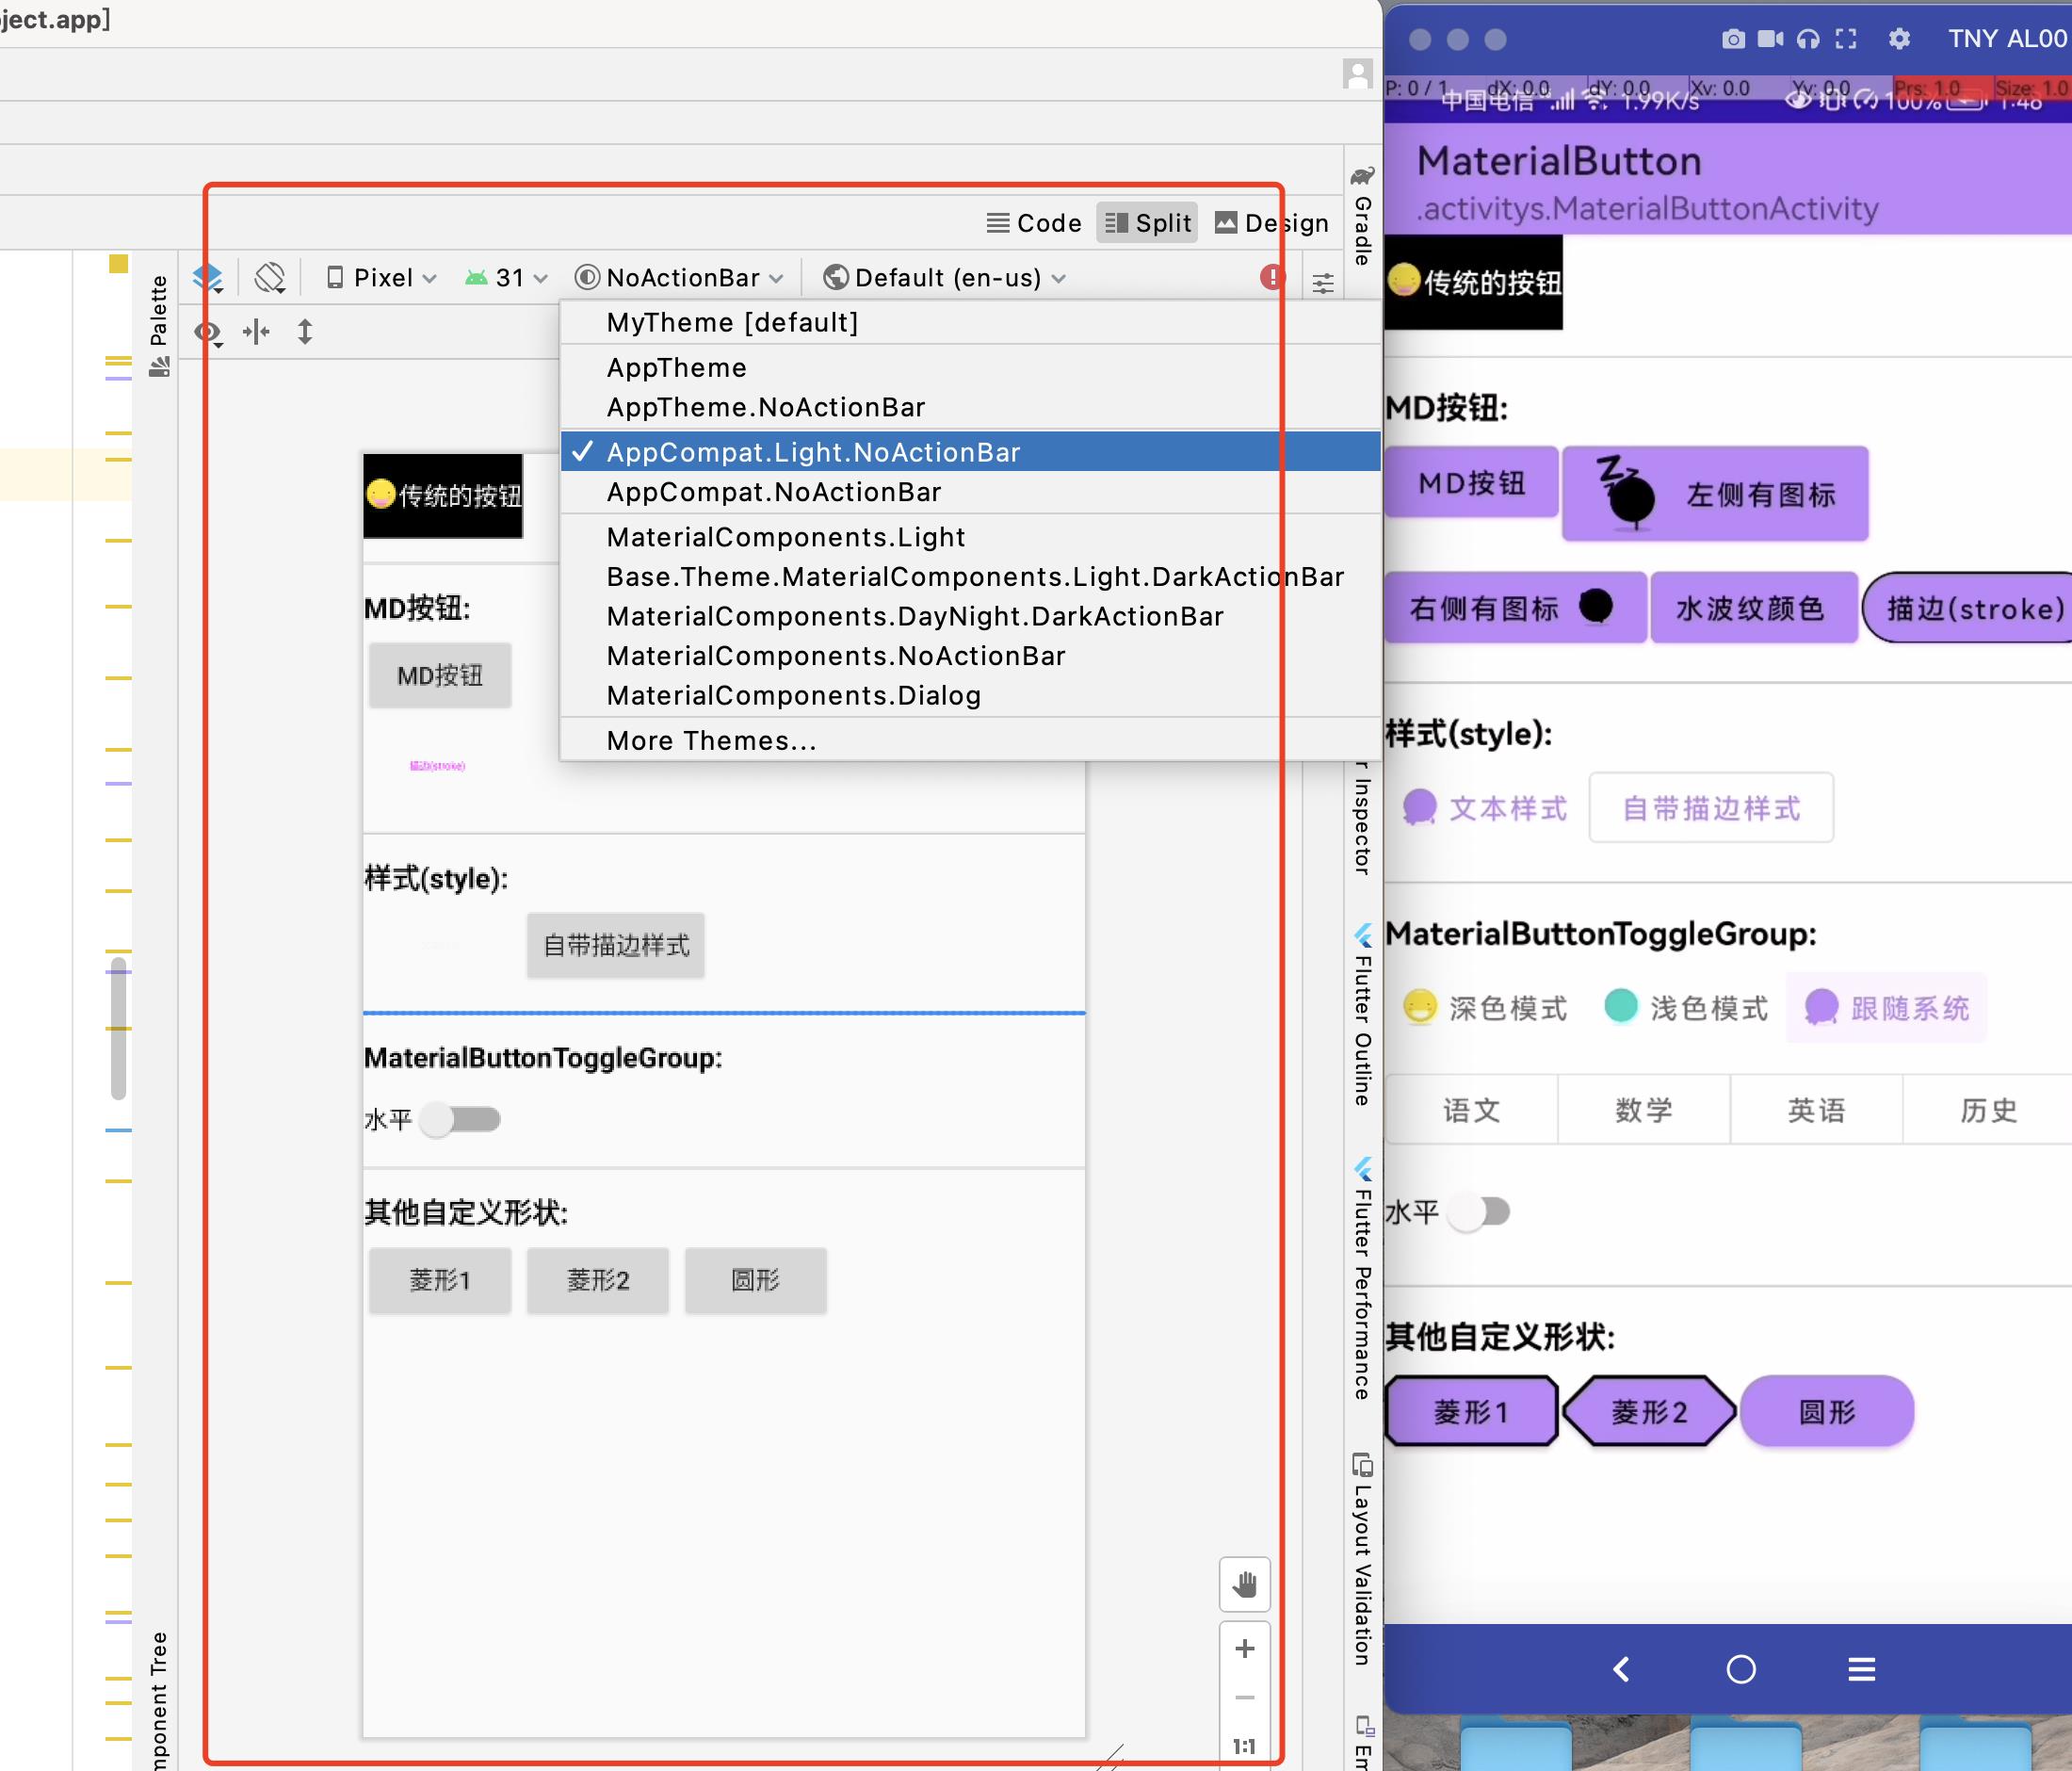
选择对应的主题,这里就可以显示出material样式了
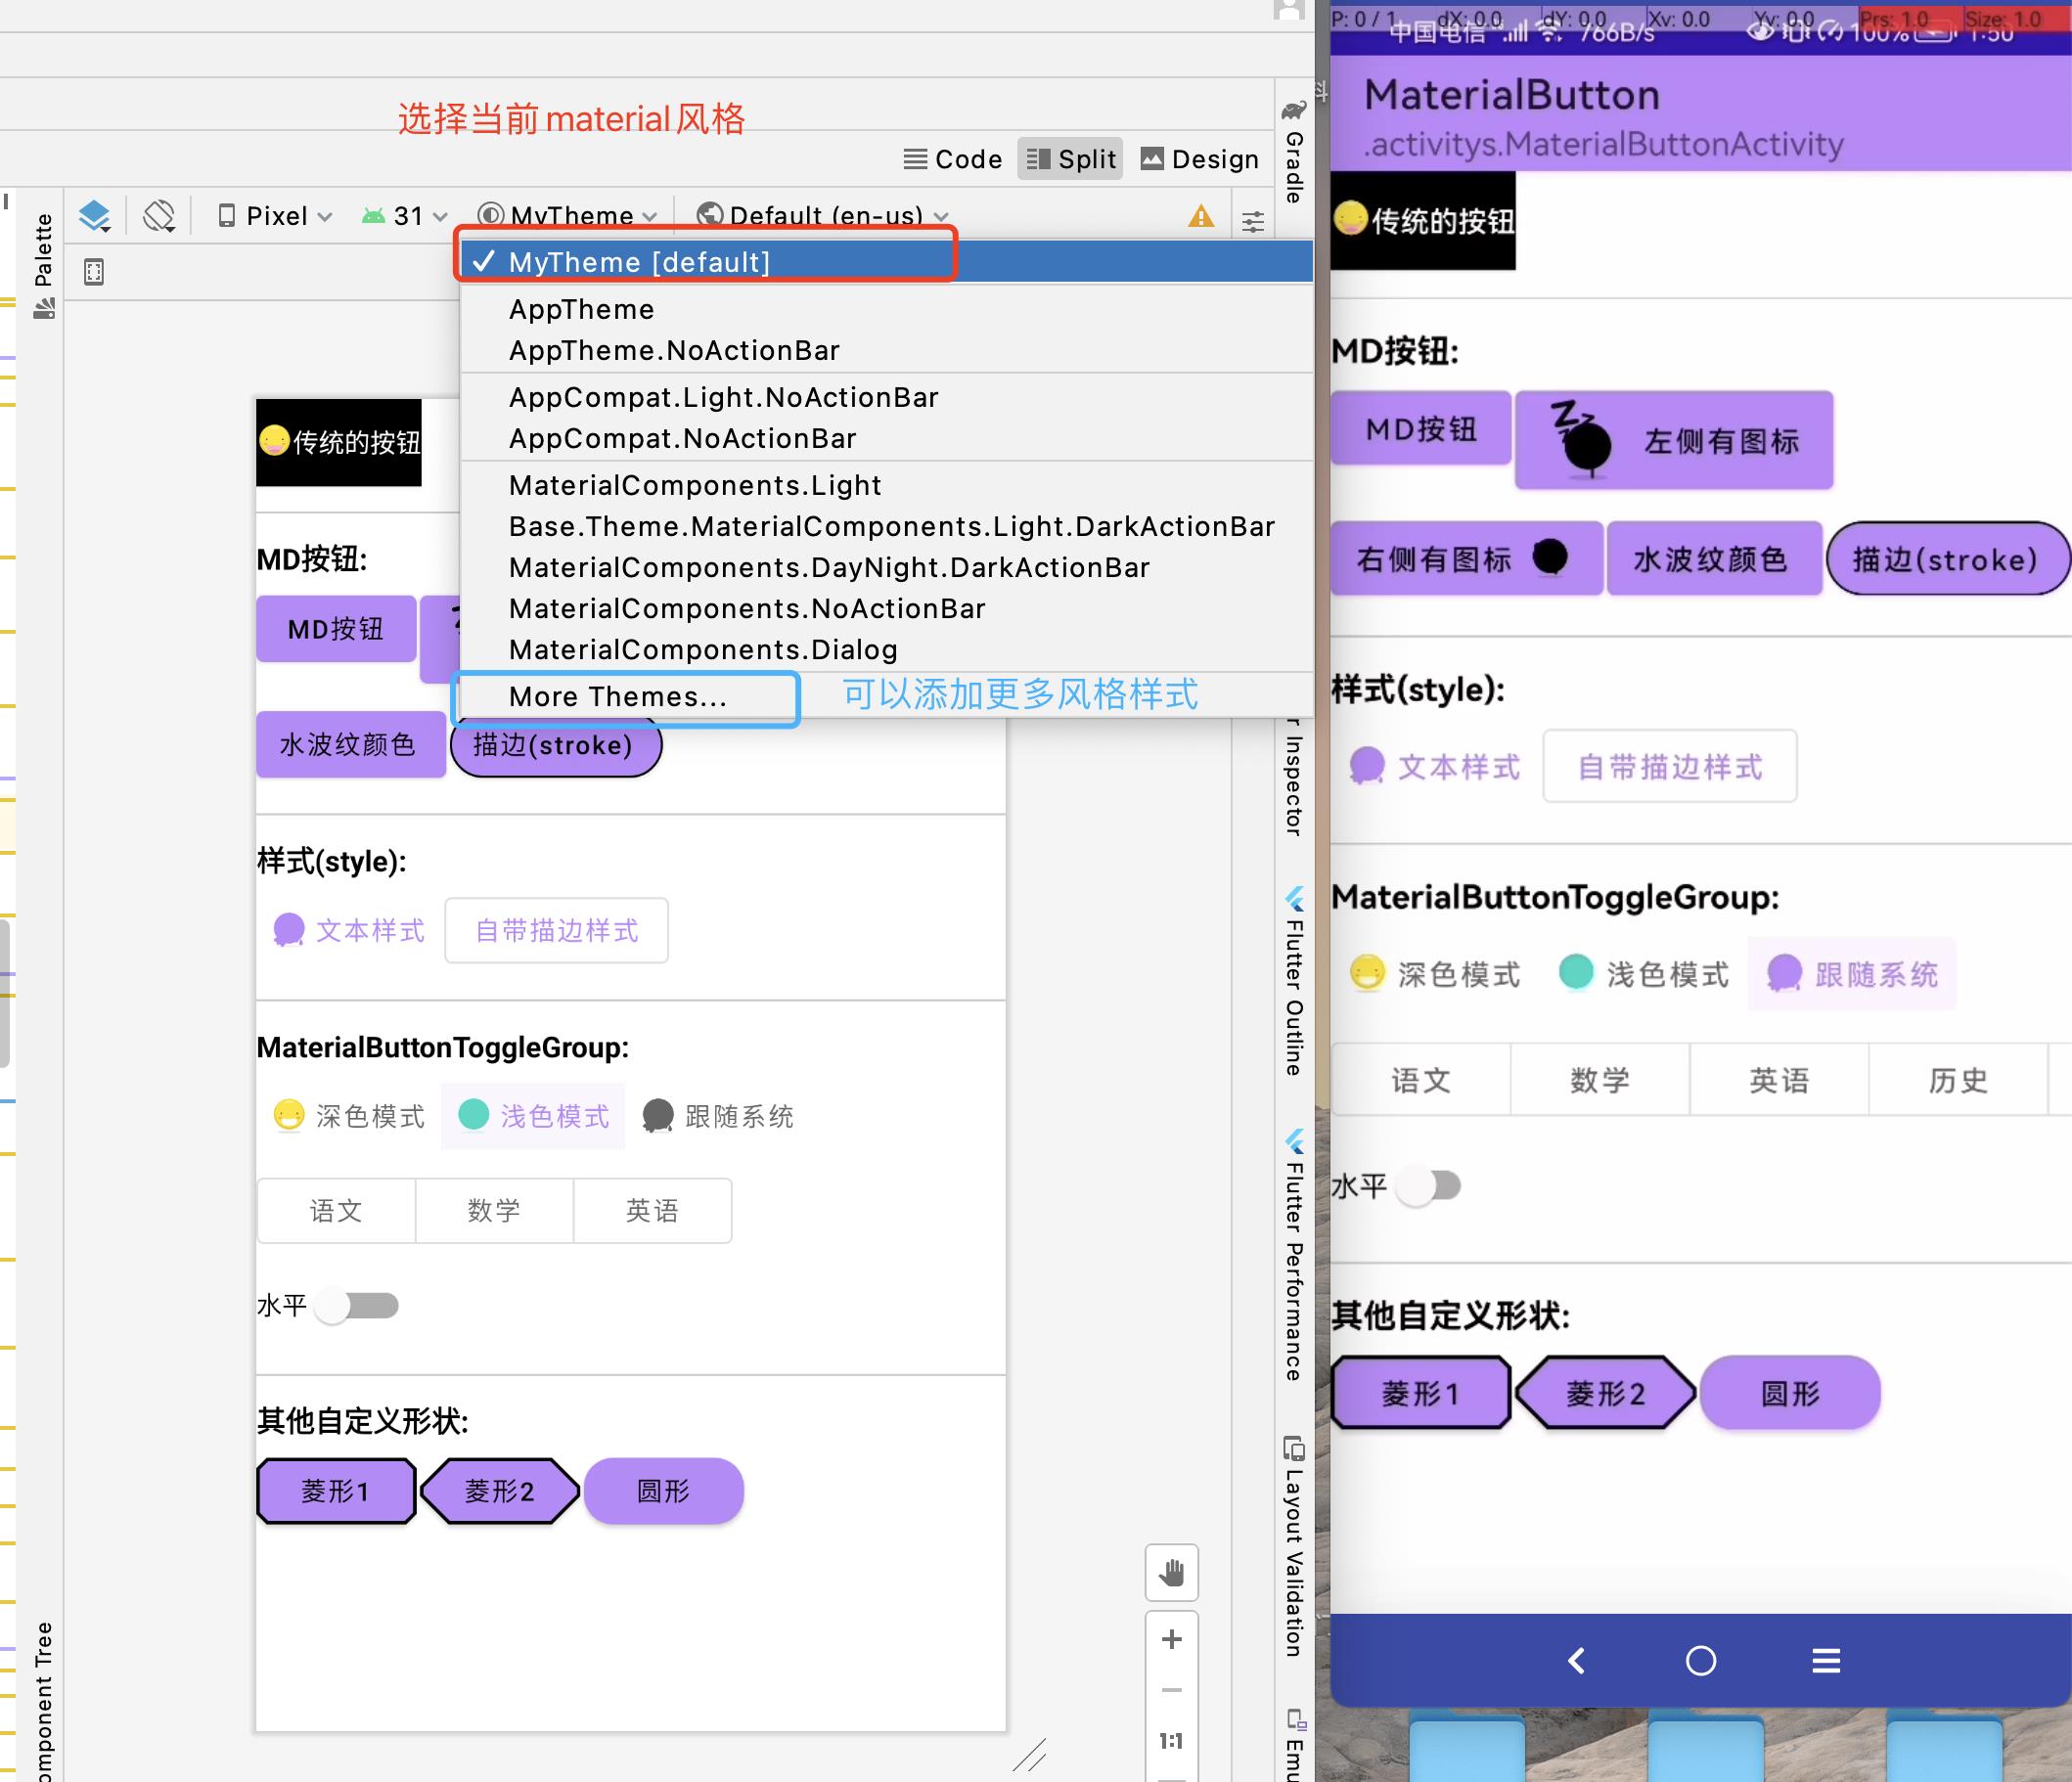
在已有的AppCompat主题中使用material主题控件
可以看到在AppCompat主题中使用material主题的空间会直接崩溃,他们之间是不兼容的…
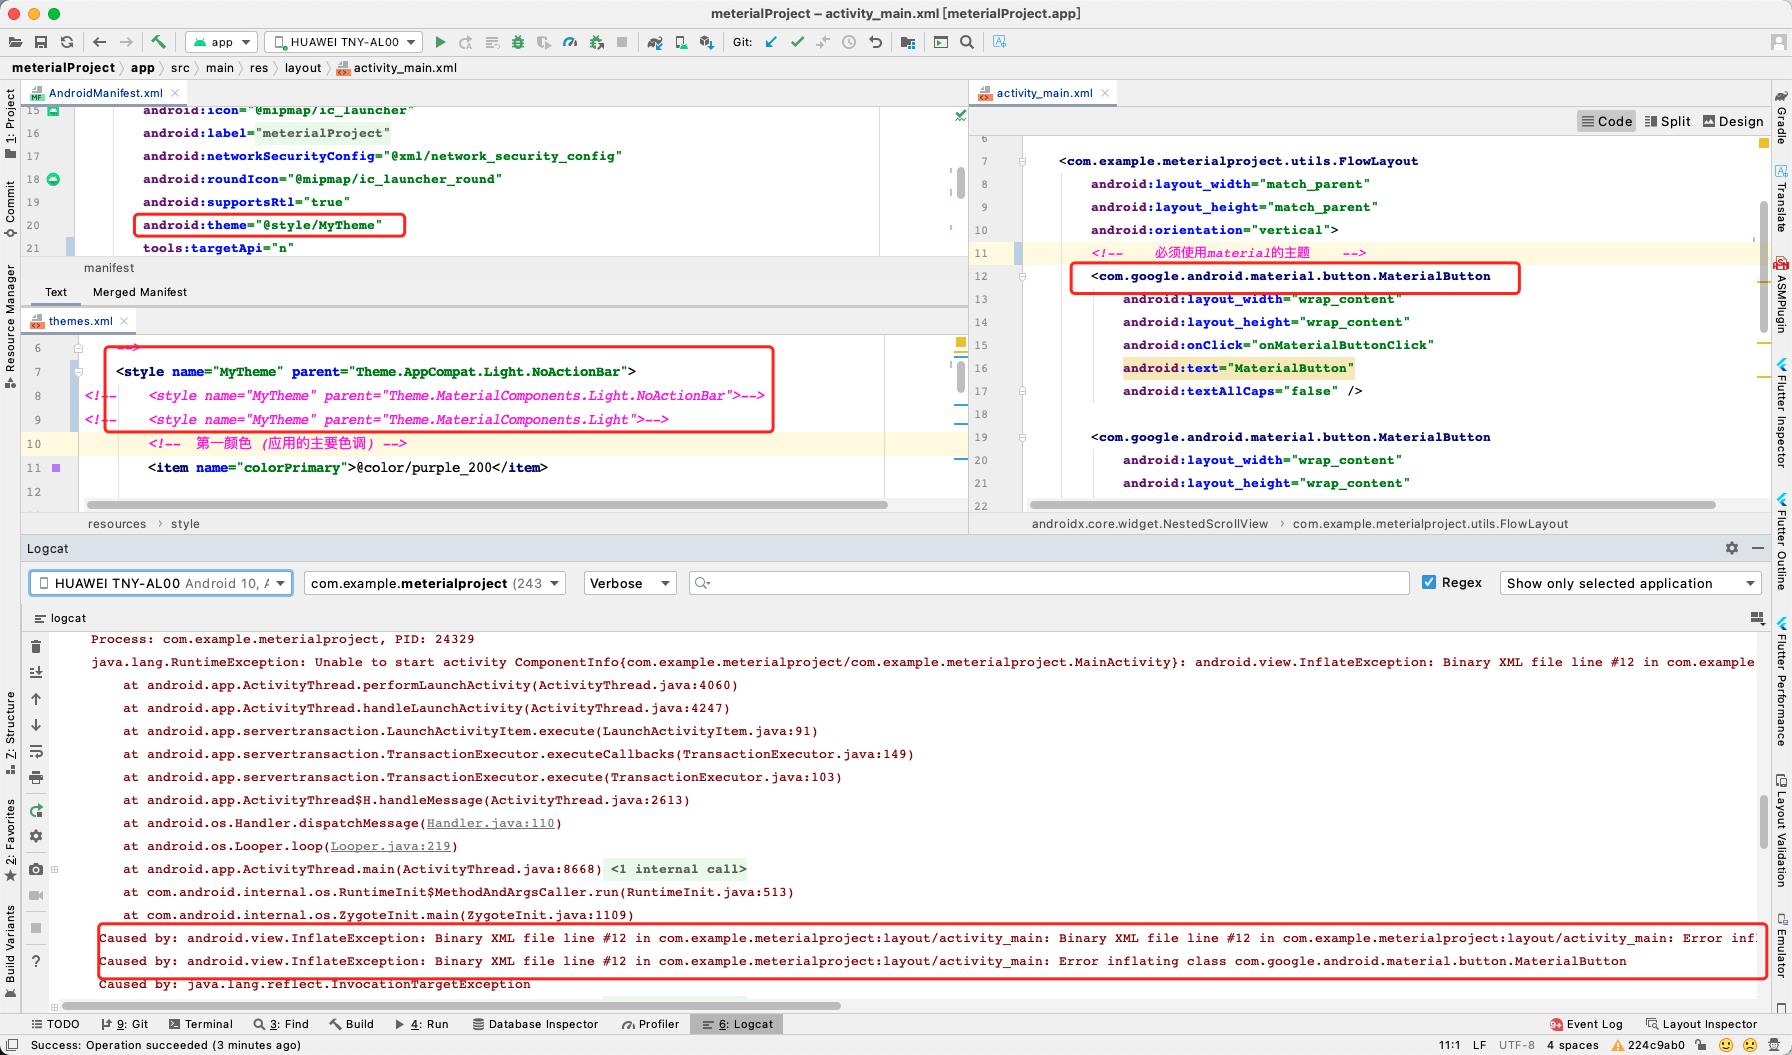
若你的项目中在<application 中设置theme主题为AppCompat,那么我认为最好的解决办法为:
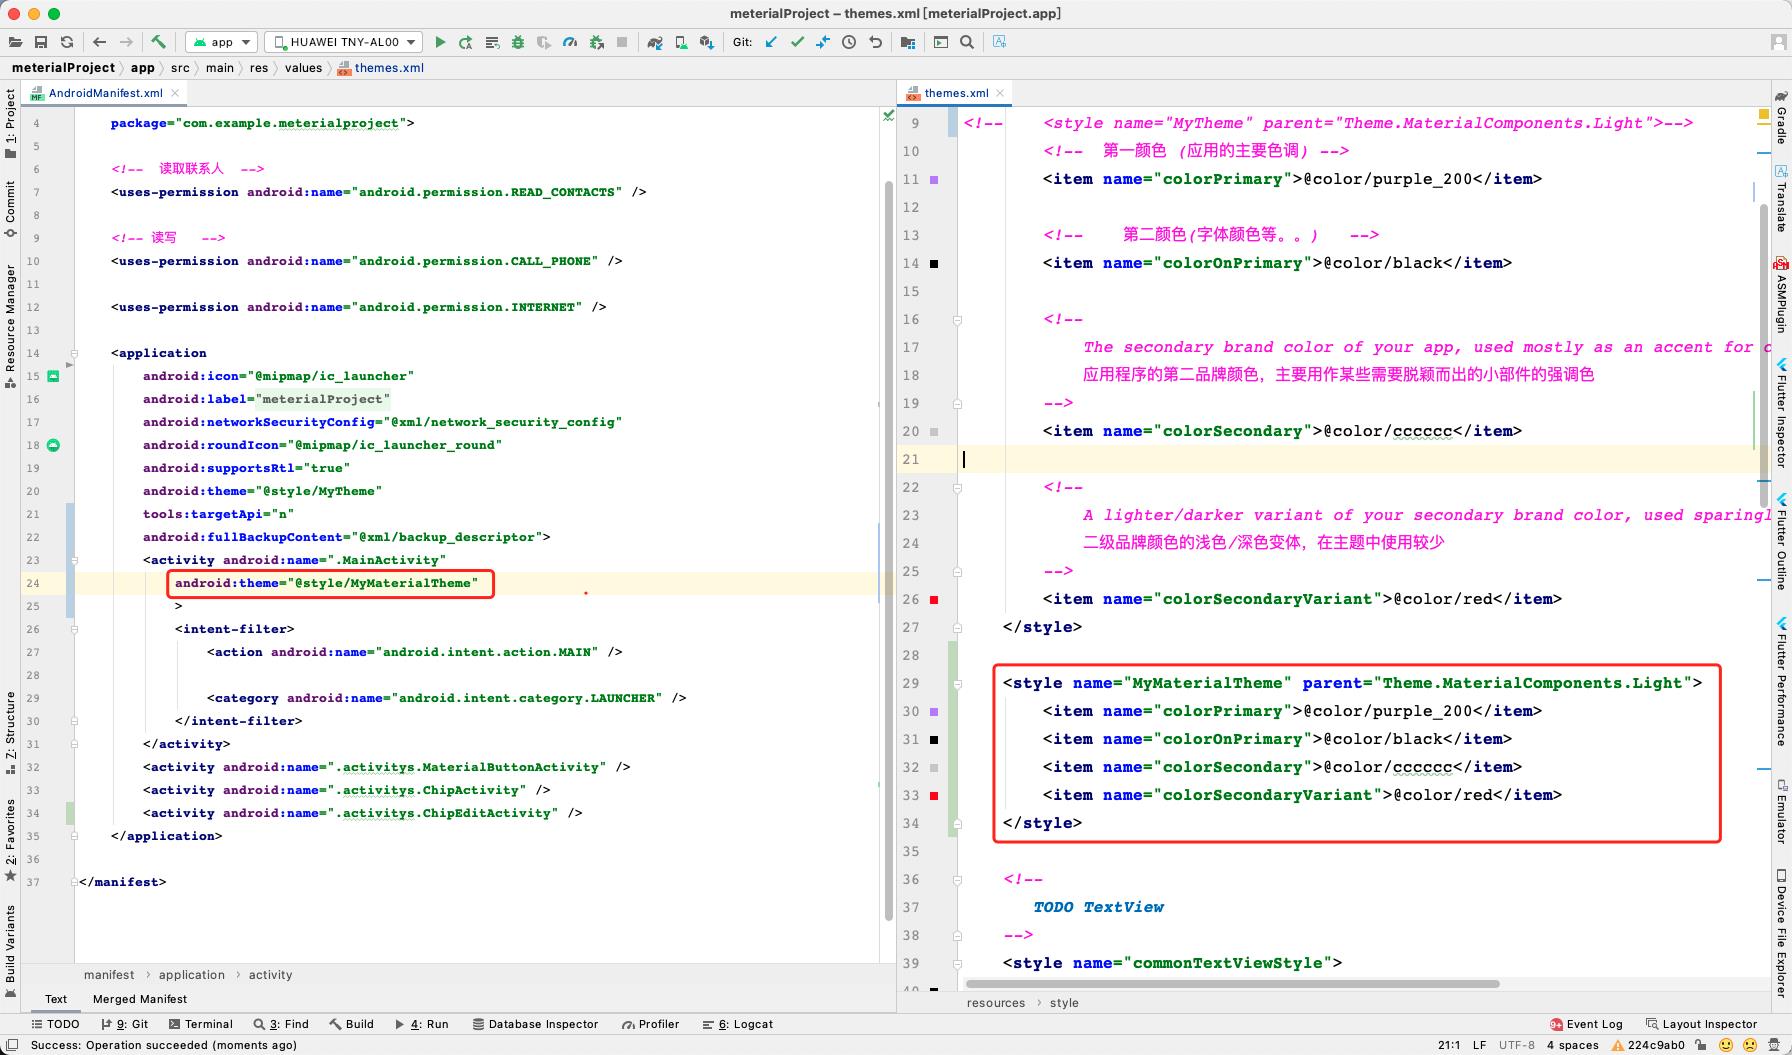
将需要用material组件的activity设置为material主题即可!
温馨提示:
material主题兼容AppCompat主题,AppCompat主题不兼容material主题
接下来就步入主题吧!
MaterialButton
最原始的按钮:
 <com.google.android.material.button.MaterialButton
        android:layout_width="wrap_content"
        android:layout_height="wrap_content"
        android:text="MD按钮" />

在文字某侧显示的materialButton:
<com.google.android.material.button.MaterialButton
      style="@style/Widget.MaterialComponents.Button.Icon"
      android:layout_width="wrap_content"
      android:layout_height="wrap_content"
      android:text="左侧有图标"
      app:icon="@drawable/ic_emoji_02"
      app:iconGravity="textStart"
      app:iconPadding="10dp"
      app:iconSize="40dp" />
- app:iconPadding=“dp” 图标和文字的距离
- app:iconSize=“dp” 图标的大小
- app:iconGravity=“” 图标的模式

其他效果:
| 参数 | 说明 | 效果 |
|---|---|---|
| 左侧 | app:iconGravity=“textStart” |  |
| 右侧 | app:iconGravity=“textEnd” |  |
| 上侧 | app:iconGravity=“textTop” |  |
可以看出,这里虽然实现了icon在文字的某一侧,但是图片为啥是黑色的??
我的原始图片长这样:
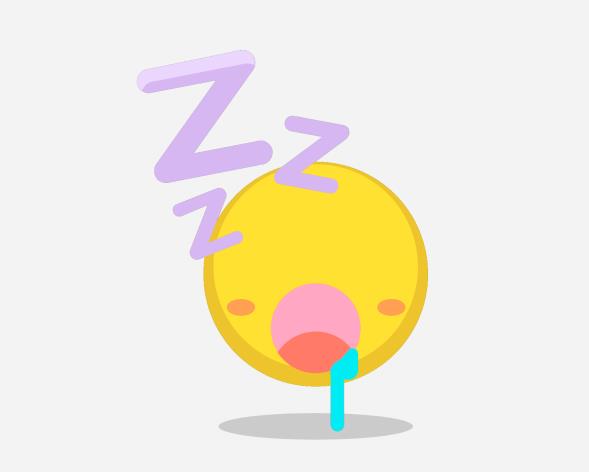
这里是需要再次设置icon的色调和色调模式:
如果需要正常显示可以这样设置:
 <com.google.android.material.button.MaterialButton
         android:layout_width="wrap_content"
         android:layout_height="wrap_content"
          ...
         app:iconTint="@color/white"
         app:iconTintMode="multiply" />
- app:iconTintMode="" 设置色调模式
- app:iconTint=“” 设置色调颜色

什么是色调颜色?比如这样:
 <com.google.android.material.button.MaterialButton
          ...
         app:iconTint="@color/red"
         app:iconTintMode="multiply" />

 <com.google.android.material.button.MaterialButton
            ..
            app:iconTint="@color/red"
            # app:iconTintMode="multiply"
            # app:iconTintMode="add"
            # app:iconTintMode="src_over"

	 />
其余色调模式展示:
| multiply | add | src_over |
|---|---|---|
 |  |  |
背景色调
 <com.google.android.material.button.MaterialButton
            ...
            android:backgroundTint="@color/red"
            android:backgroundTintMode="add" />

背景色调和上图表类似,就不多做样式
水波纹[app:rippleColor]
<com.google.android.material.button.MaterialButton
        android:layout_width="wrap_content"
        android:layout_height="wrap_content"
        android:text="水波纹颜色"
        app:rippleColor="@color/red" />
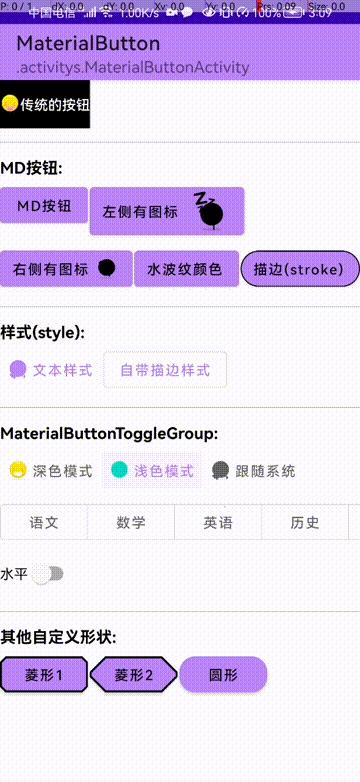
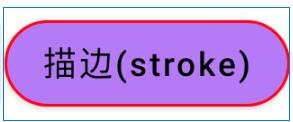
描边圆角
<com.google.android.material.button.MaterialButton
       android:layout_width="wrap_content"
       android:layout_height="wrap_content"
       android:text="描边(stroke)"
       android:textAllCaps="false"
       app:cornerRadius="30dp"
       app:strokeColor="@color/red"
       app:strokeWidth="1dp" />
常见的样式
文本样式:
 <com.google.android.material.button.MaterialButton
            style="@style/Widget.MaterialComponents.Button.TextButton"
            android:layout_width="wrap_content"
            android:layout_height="wrap_content"
            android:text="文本样式"
            android:textAllCaps="false"
            app:icon="@drawable/ic_emoji_08" />
效果图:
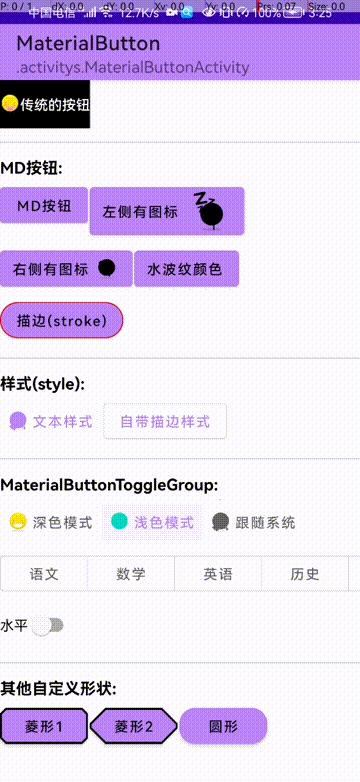
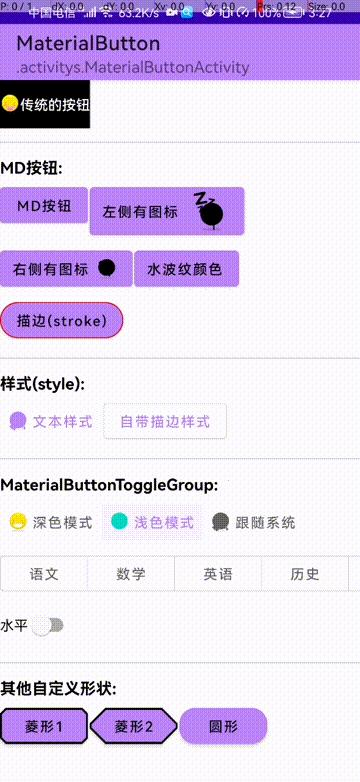
自带描边样式:
    <com.google.android.material.button.MaterialButton
            style="?attr/materialButtonOutlinedStyle"
            android:layout_width="wrap_content"
            android:layout_height="wrap_content"
            android:text="自带描边样式"
            android:textAllCaps="false" />
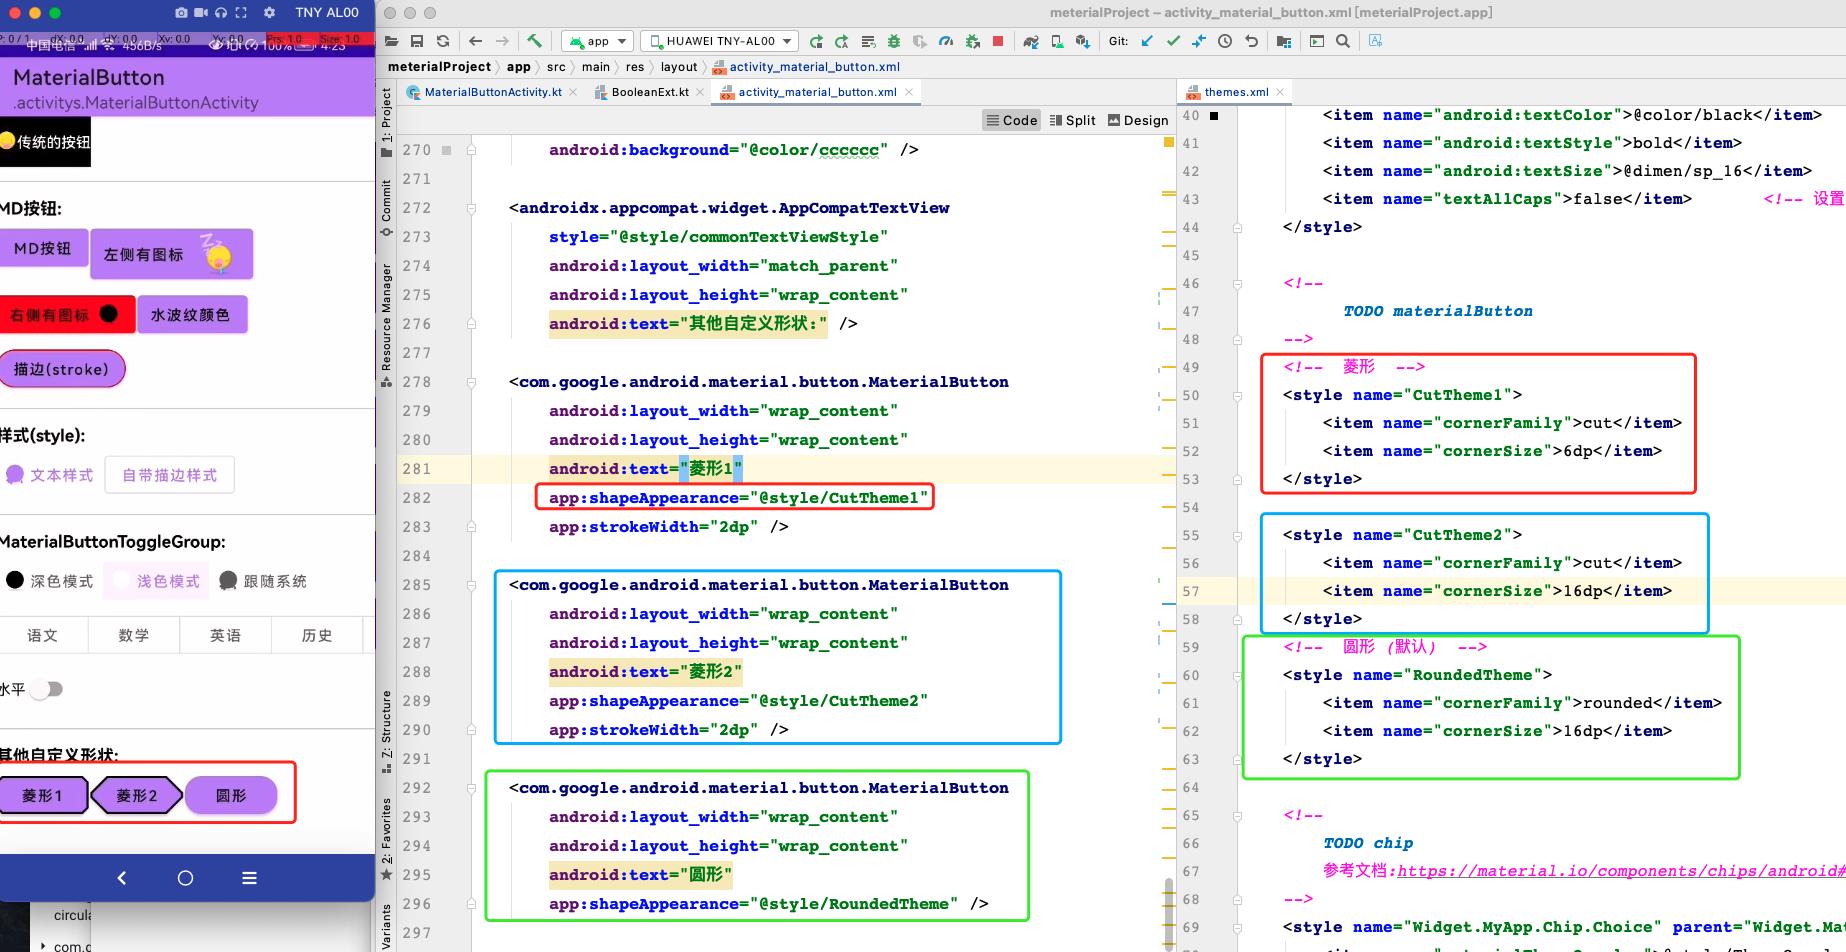
自定义属性[app:shapeAppearance]
如果你需要自定义菱形边,你可以这样做:
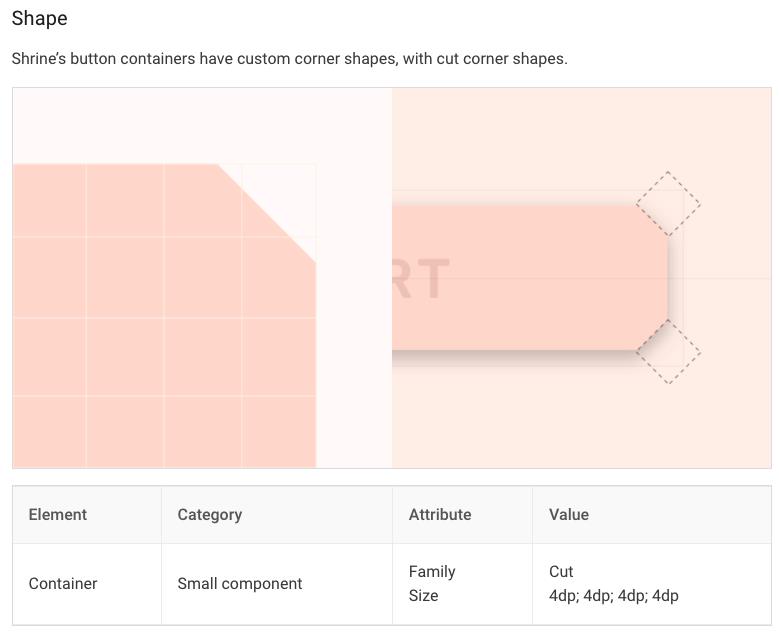
可以参考官方的一张图来理解一下:
materialButton常用属性小结:
| 参数 | 说明 |
|---|---|
| app:icon | 图标 |
| app:iconPadding | 图标和文字的距离 |
| app:iconSize | 图标的大小 |
| app:iconGravity | 图标的模式 |
| app:iconTint | 图标的色调 |
| app:iconTintMode | 图标的着色模式 |
| app:cornerRadius | 按钮圆角 |
| app:strokeColor | 按钮轮廓颜色 |
| app:strokeWidth | 按钮轮廓粗细 |
| app:rippleColor | 水波纹颜色 |
| android:backgroundTint | 背景色调 |
| android:backgroundTintMode | 背景色调模式 |
| @style/Widget.MaterialComponents.Button.TextButton | 文字样式 |
| ?attr/materialButtonOutlinedStyle | 自带描边样式 |
| app:shapeAppearance | 自定义属性(需配合cornerFamily,cornerSize使用) |
| cornerFamily | 切边模式 |
| cornerSize | 切边大小 |
MaterialButtonToggleGroup
文本样式:
<com.google.android.material.button.MaterialButtonToggleGroup
      android:id="@+id/materialButtonGroup1"
       android:layout_width="match_parent"
       android:layout_height="wrap_content"
       android:orientation="horizontal"
       app:checkedButton="@+id/bt2"
       app:singleSelection="true">
       <com.google.android.material.button.MaterialButton
           android:id="@+id/bt1"
           style="@style/Widget.MaterialComponents.Button.TextButton"
           android:text="深色模式"
           ...
           />

       <com.google.android.material.button.MaterialButton
           android:id="@+id/bt2"
           style="@style/Widget.MaterialComponents.Button.TextButton"
           android:text="浅色模式"
           ... />

       <com.google.android.material.button.MaterialButton
           android:id="@+id/bt3"
           style="@style/Widget.MaterialComponents.Button.TextButton"
           android:text="跟随系统"
           ... />

</com.google.android.material.button.MaterialButtonToggleGroup>
温馨提示:MaterialButtonToggleGroup继承自LinearLayout
MaterialButtonToggleGroup参数介绍:
- android:orientation 设置方向
- app:singleSelection 是否为单选
- app:checkedButton 默认选中
来看看效果:
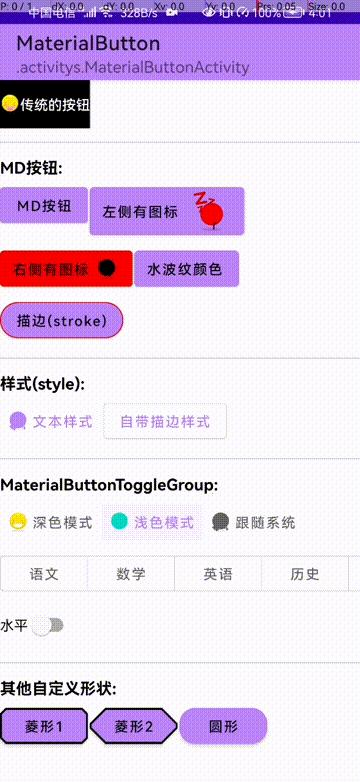
为了防止超出屏幕,常使用MaterialButtonToggleGroup时,我喜欢给他添加一个HorizontalScrollView,用来避免超出屏幕
例如这样:
<HorizontalScrollView
            android:layout_width="match_parent"
            android:layout_height="wrap_content">

    <com.google.android.material.button.MaterialButtonToggleGroup
        android:id="@+id/materialButtonGroup2"
        android:layout_width="match_parent"
        android:layout_height="wrap_content">

        <com.google.android.material.button.MaterialButton
            android:id="@+id/bt4"
            style="?attr/materialButtonOutlinedStyle"
            android:text="语文" />

        <com.google.android.material.button.MaterialButton
            android:id="@+id/bt5"
            style="?attr/materialButtonOutlinedStyle"
            android:text="数学" />

        <com.google.android.material.button.MaterialButton
            android:id="@+id/bt6"
            style="?attr/materialButtonOutlinedStyle"
            android:text="英语"
            android:textAllCaps="false" />

    </com.google.android.material.button.MaterialButtonToggleGroup>

</HorizontalScrollView>
当然,也可以通过动态代码来添加内容:
 val materialButtonList = listOf(
            MaterialButton(
                this,
                null,
                R.attr.materialButtonOutlinedStyle // 动态设置样式
            ).apply  text = "历史" ,
            MaterialButton(
                this,
                null,
                R.attr.materialButtonOutlinedStyle // 动态设置样式
            ).apply  text = "化学" ,
            MaterialButton(
                this,
                null,
                R.attr.materialButtonOutlinedStyle // 动态设置样式
            ).apply  text = "音乐" ,
            MaterialButton(
                this,
                null,
                R.attr.materialButtonOutlinedStyle // 动态设置样式
            ).apply  text = "美术" ,
        )

        // 动态添加
        materialButtonList.forEach
            binding.materialButtonGroup2.addView(it)
来看看效果:
切换状态:
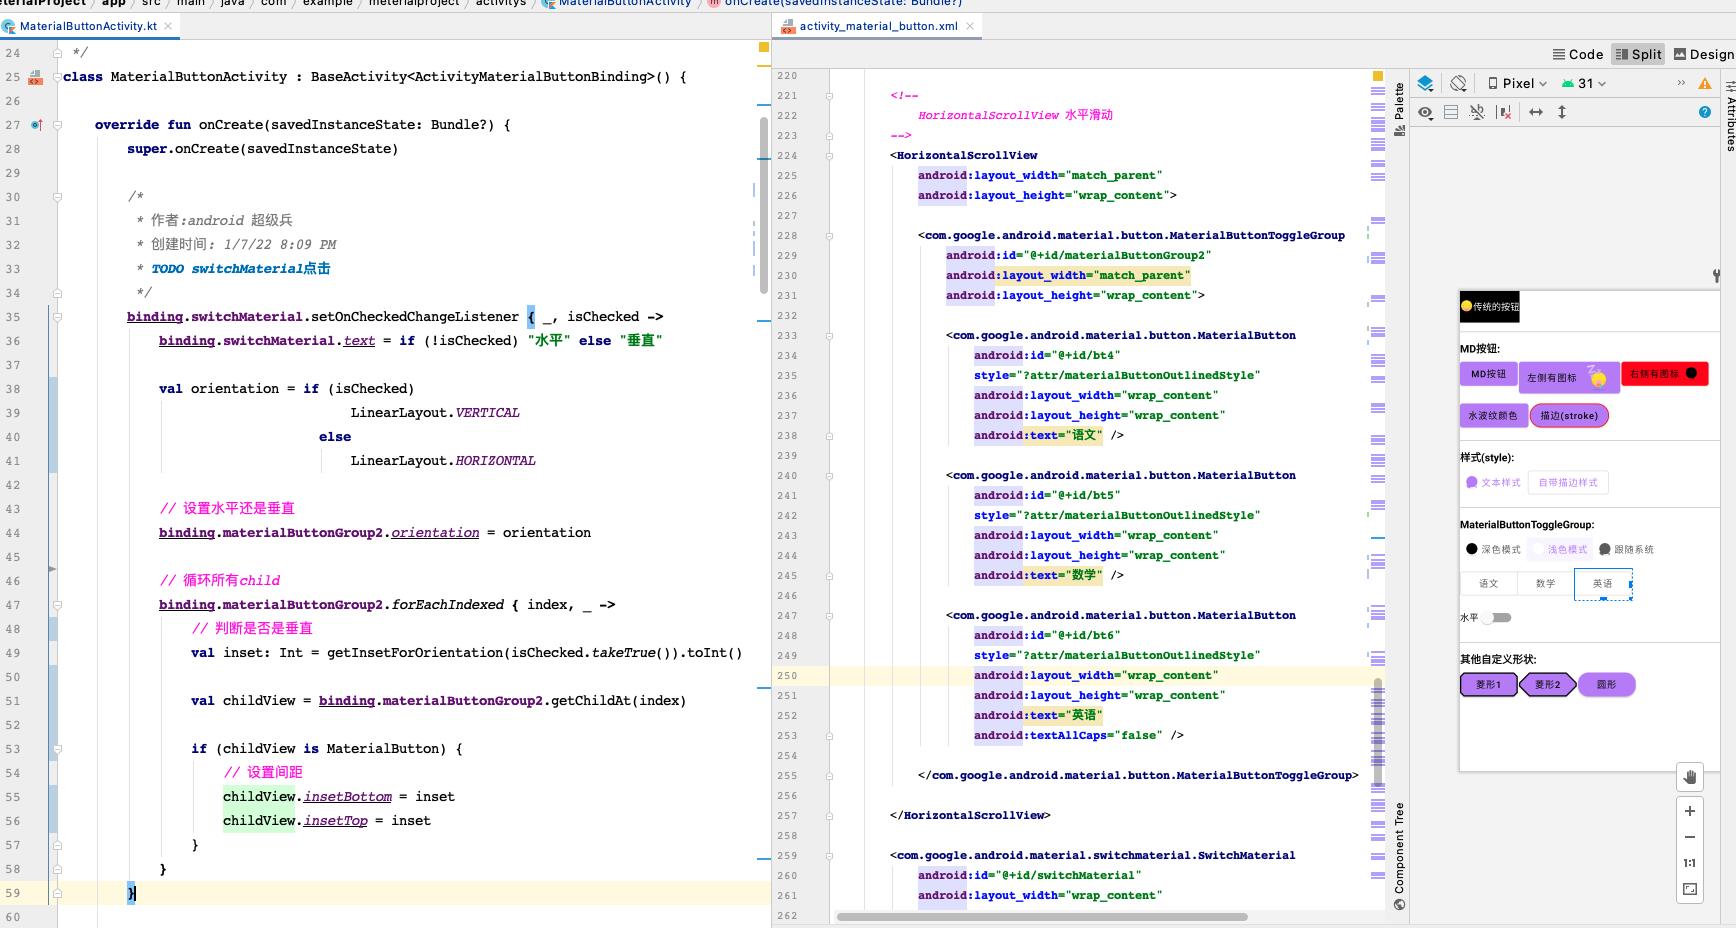
切换状态这里用到了SwitchMaterial,奔着匠人精神的原则,本篇先不讲,后续一定会讲到!
这里的逻辑应该看一遍就明白了
首先监听到switch的状态,通过他的状态来判断是否是垂直|水平,在做对应的事情
这里的takeTrue是我写的一个小扩展,非0及true
fun Boolean.takeTrue(other: Int = 1) =
    if (!this)
        0
     else
        other
Chip
最简单的chip:
 <com.google.android.material.chip.Chip
       android:layout_width="wrap_content"
       android:layout_height="wrap_content"
       android:text="最简单的chip" />
chip有一些属性和materialButton都是通用的,这里就直接全介绍了!
 <com.google.android.material.chip.Chip
         android:layout_width="wrap_content"
         android:layout_height="wrap_content"
         android:text="左侧图片"
         android:checkable=""
         android:checked=""
         app:chipIconEnabled=“”
         app:checkedIcon=“”
         app:closeIcon=“”
         app:checkedIconEnabled=“”
         app:closeIcon=“”
         app:closeIconEnabled=“”
         app:chipIcon="@drawable/ic_emoji_01" />
| 参数 | 类型 | 说明 |
|---|---|---|
| android:checkable | Boolean | true可以激活chip,为false就像一个button |
| android:checked | Boolean | 是否默认选中 |
| – | – | – |
| app:chipIcon | drawable | icon(默认在文侧) |
| app:chipIconEnabled | boolean | app:chipIcon是否激活 |
| – | – | – |
| app:checkedIcon | drawable | 左侧点击后的按钮(会覆盖chipIcon) |
| app:checkedIconEnabled | Boolean | app:checkedIcon是否激活(默认false) |
| – | – | — |
| app:closeIcon | drawable | 右侧按钮 |
| app:closeIconEnabled | Boolean | app:closeIcon按钮是否激活 |
| – | – | — |
| app:chipBackgroundColor | color | 背景颜色 |
| app:chipStrokeColor | color | 描边颜色 |
| app:chipStrokeWidth | dp | 描边宽度 |
| app:chipCornerRadius | dp | 圆角 |
| app:rippleColor | color | 水波纹颜色 |
| android:elevation | dp | 阴影颜色 |
| app:shapeAppearance | style | 自定义属性(需配合cornerFamily) |
| cornerFamily | enum | 自定义切边样式(单独使用无效) |
| cornerSize | 自定义切边大小(单独使用无效) |
效果图:
| 说明 | 效果 |
|---|---|
| icon的一些操作 |  |
| 阴影点击 | 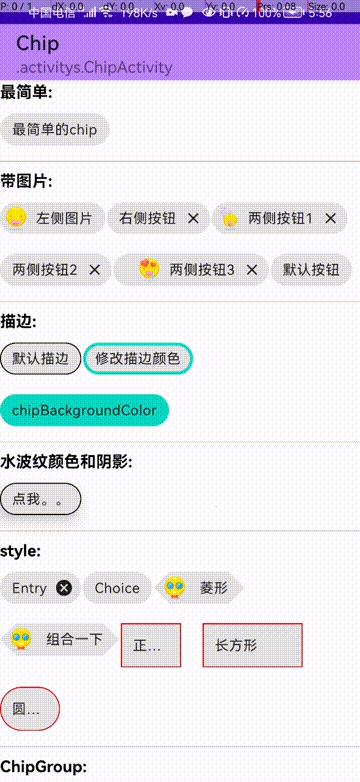 |
ChipGroup
多选
tips:ChipGroup继承自FlowLayout(可以自动换行)
先来看看最简单的使用:
<com.google.android.material.chip.ChipGroup
      android:id="@+id/chipGroup1"
       android:layout_width="match_parent"
       android:layout_height="wrap_content"
       app:checkedChip="@id/chipPython"
       app:chipSpacingVertical="5dp"
       app:chipSpacingHorizontal="@dimen/dp_40">
       <com.google.android.material.chip.Chip
           ...
           android:text="java" />

       <com.google.android.material.chip.Chip
           ...
           android:text="kotlin" />

       <com.google.android.material.chip.Chip
           ...
           android:text="c" />

       <com.google.android.material.chip.Chip
           ...
           android:text="dart" />

       <com.google.android.material.chip.Chip
           ...
           android:text="C#" />

       <com.google.android.material.chip.Chip
           ...
           android:text="python" />

       <com.google.android.material.chip.Chip
           ...
           android:text="JS" />

   </com.google.android.material.chip.ChipGroup>
- app:checkedChip 默认选中
- app:chipSpacingHorizontal 水平距离
- app:chipSpacingVertical 垂直间距
来看看效果图:
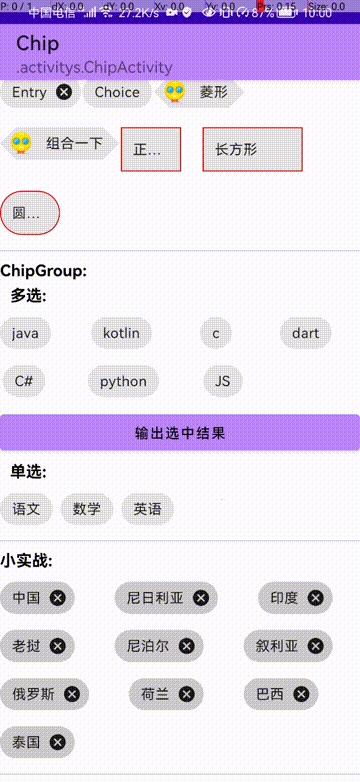
chipGroup#setOnCheckedChangeListener监听点击
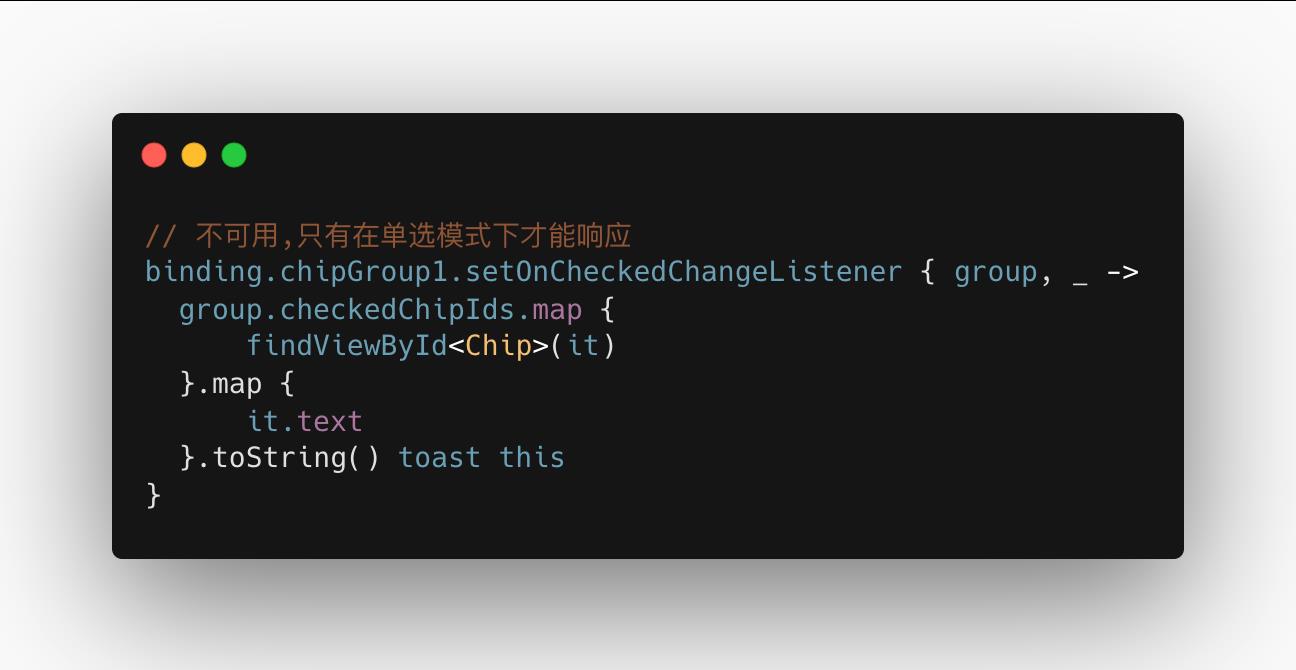
注意,这段代码是无效的!只有在单选模式下可以使用,来看看官方解释:
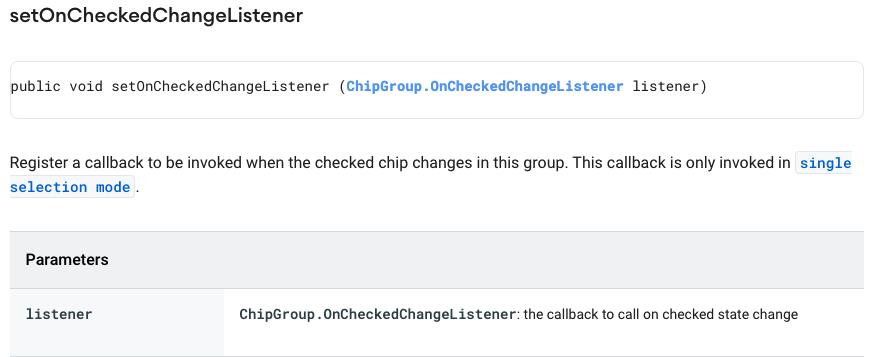
Register a callback to be invoked when the checked chip changes in this group. This callback is only invoked in single selection mode.
注册一个回调,以便在该组中检查的芯片发生更改时调用。此回调仅在单一选择模式下调用。(百度翻译)
如果你想强行点击,你可以这样做:
// 霸王硬上弓
binding.chipGroup1.forEach  childView ->
	  if (childView is Chip)
	      // 点击监听
	      childView.click
	          "$childView.text-$childView.isChecked" toast this


	      // 关闭监听
	      childView.setOnCloseIconClickListener
原理就是循环chipGroup中的每一个chip,都添加点击事件即可.
单选
<HorizontalScrollView
            android:layout_width="match_parent"
            android:layout_height="wrap_content">
<com.google.android.material.chip.ChipGroup
     android:id="@+id/chipGroup2"
     android:layout_width="match_parent"
     android:layout_height="wrap_content"
     app:checkedChip="@+id/chipChinese"
     app:singleLine="true"
     app:singleSelection以上是关于android material design 风格组件(MaterialButton,MaterialButtonToggleGroup,Chip,ChipGroup)大汇总.的主要内容,如果未能解决你的问题,请参考以下文章