MyBatis-Plus——增删查改
Posted 一心同学
tags:
篇首语:本文由小常识网(cha138.com)小编为大家整理,主要介绍了MyBatis-Plus——增删查改相关的知识,希望对你有一定的参考价值。
📢📢📢📣📣📣
哈喽!大家好,我是【一心同学】,一位上进心十足的【Java领域博主】!😜😜😜
✨【一心同学】的写作风格:喜欢用【通俗易懂】的文笔去讲解每一个知识点,而不喜欢用【高大上】的官方陈述。
✨【一心同学】博客的领域是【面向后端技术】的学习,未来会持续更新更多的【后端技术】以及【学习心得】。
✨如果有对【后端技术】感兴趣的【小可爱】,欢迎关注【一心同学】💞💞💞
❤️❤️❤️感谢各位大可爱小可爱!❤️❤️❤️
目录
开发环境
IDEA
JDK:1.8
Spring Boot:2.6.2
Maven:3.3.9
MySQL:8.0.23
数据库准备
CREATE DATABASE mybatis_plus_db;

DROP TABLE IF EXISTS person;
CREATE TABLE person(
 id BIGINT(20) NOT NULL COMMENT '主键ID',
name VARCHAR(30) NULL DEFAULT NULL COMMENT '姓名',
age INT(11) NULL DEFAULT NULL COMMENT '年龄',
email VARCHAR(50) NULL DEFAULT NULL COMMENT '邮箱',
PRIMARY KEY (id));

INSERT INTO person (id, name, age, email) VALUES
(1, 'yixin', 18, 'test1@qq.com'),
(2, 'Jack', 20, 'test2@qq.com'),
(3, 'Tom', 28, 'test3@qq.com'),
(4, 'Sandy', 21, 'test4@qq.com'),
(5, 'Billie', 24, 'test5@qq.com');
一、项目搭建
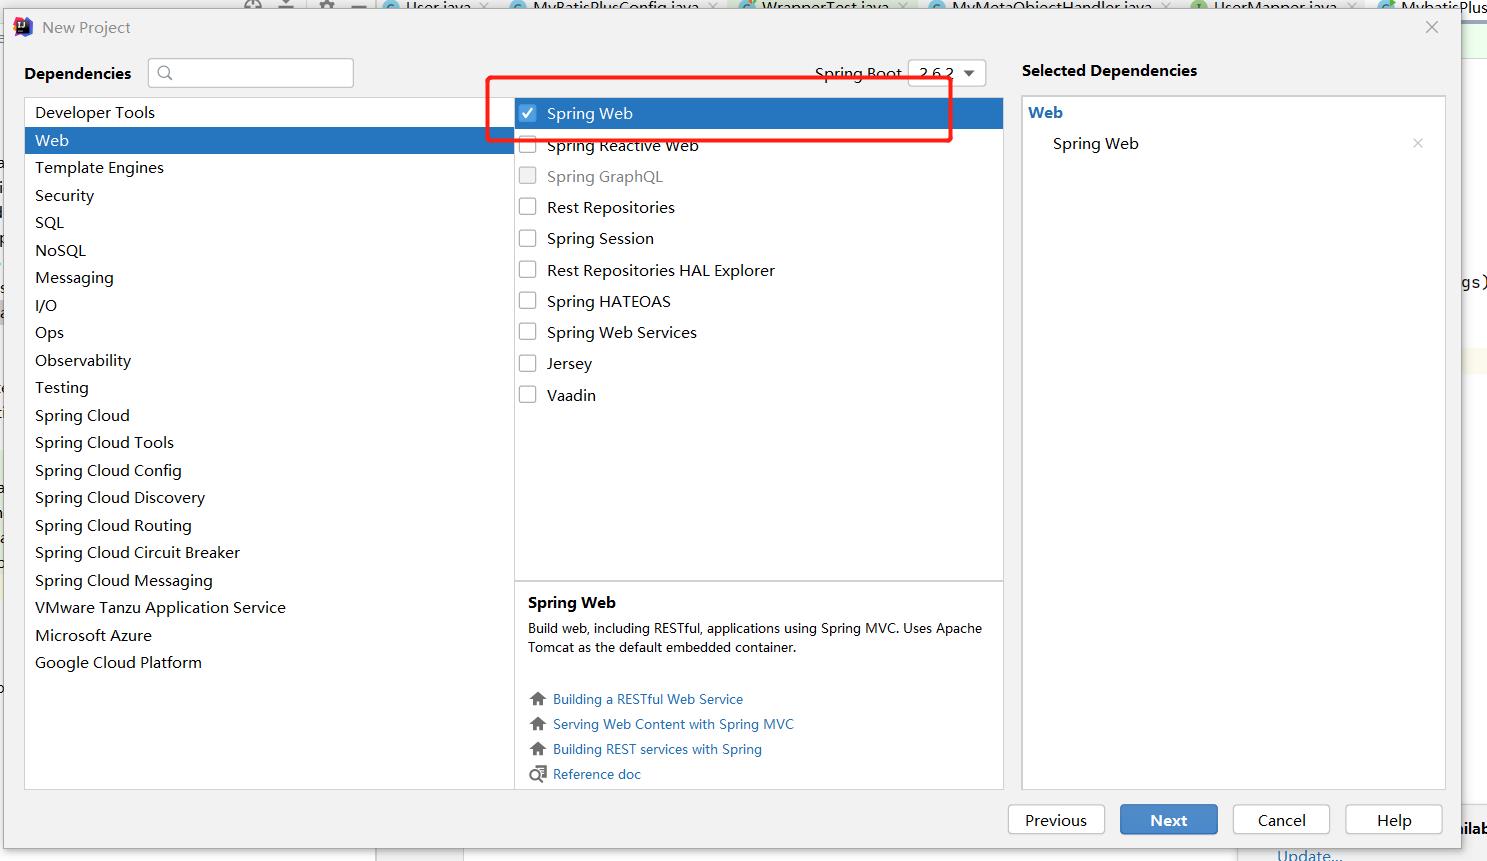
1.1 创建一个Spring Boot项目
初始化以下依赖
1.2 导入依赖
        <!-- 数据库驱动 -->
        <dependency>
            <groupId>mysql</groupId>
            <artifactId>mysql-connector-java</artifactId>
        </dependency>

        <!-- lombok -->
        <dependency>
            <groupId>org.projectlombok</groupId>
            <artifactId>lombok</artifactId>
        </dependency>

        <!-- mybatis-plus --><!-- mybatis-plus 是自己开发,并非官方的! -->
        <dependency>
            <groupId>com.baomidou</groupId>
            <artifactId>mybatis-plus-boot-starter</artifactId>
            <version>3.0.5</version>
        </dependency>
警告:引入 MyBatis-Plus 之后请不要再次引入 MyBatis 以及 MyBatis-Spring,以避免因版本差异导致的问题。
1.3 编写配置文件
application.properties:
# mysql 5 驱动不同 com.mysql.jdbc.Driver
# mysql 8 驱动不同com.mysql.cj.jdbc.Driver、需要增加时区的配置 serverTimezone=GMT%2B8
spring.datasource.username=root
spring.datasource.password=123456
spring.datasource.url=jdbc:mysql://localhost:3306/mybatis_plus_db?useUnicode=true&characterEncoding=utf-8&serverTimezone=GMT%2B8
spring.datasource.driver-class-name=com.mysql.cj.jdbc.Driver
1.4 建立目录

1.5 编写实体类
实体类Person:
package com.yixin.mybatis_plus.pojo;

import lombok.AllArgsConstructor;
import lombok.Data;
import lombok.NoArgsConstructor;

@Data
@AllArgsConstructor
@NoArgsConstructor
public class Person

    private Long id;
    private String name;
    private Integer age;
    private String email;
1.6 编写接口
PersonMapper接口:
package com.yixin.mybatis_plus.mapper;

import com.baomidou.mybatisplus.core.mapper.BaseMapper;
import com.yixin.mybatis_plus.pojo.Person;
import org.springframework.stereotype.Repository;


// 在对应的Mapper上面继承基本的类 BaseMapper
@Repository// 代表持久层
public interface PersonMapper extends BaseMapper<Person>
    // 所有的CRUD操作都已经编写完成了
    // 我们不需要像以前的配置一大堆文件了!
1.7 主启动类添加注解扫描
注意:在主启动类上去扫描我们的mapper包下的所有接口
package com.yixin.mybatis_plus;

import org.mybatis.spring.annotation.MapperScan;
import org.springframework.boot.SpringApplication;
import org.springframework.boot.autoconfigure.SpringBootApplication;

@MapperScan("com.yixin.mybatis_plus.mapper")
@SpringBootApplication
public class MybatisPlusApplication

    public static void main(String[] args)
        SpringApplication.run(MybatisPlusApplication.class, args);
1.8 测试
package com.yixin.mybatis_plus;

import com.yixin.mybatis_plus.mapper.PersonMapper;
import com.yixin.mybatis_plus.pojo.Person;
import org.junit.jupiter.api.Test;
import org.springframework.beans.factory.annotation.Autowired;
import org.springframework.boot.test.context.SpringBootTest;
import java.util.List;


@SpringBootTest
class MybatisPlusApplicationTests

    @Autowired
    private PersonMapper personMapper;

    @Test
    void contextLoads()

        List<Person> personList = personMapper.selectList(null);
        personList.forEach(System.out::println);
结果:
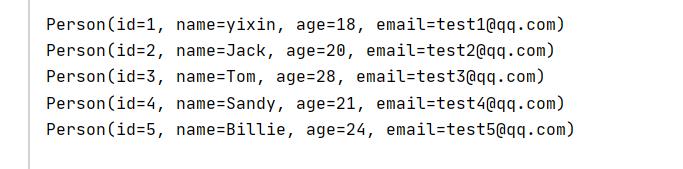
这样就搭建成功了!
配置日志
通过以上的输出,我们并不知道其sql是怎么执行的,我们为了进一步探究其执行过程,我们在配置文件中加上日志配置。
application.properties:
# 配置日志
mybatis-plus.configuration.log-impl=org.apache.ibatis.logging.stdout.StdOutImpl
我们再次输出:

通过这样的日志输出,我们就知道MyBatis-Plus到底帮我们执行了什么样操作。
二、增删查改操作
2.1 查询操作
2.1.1 selectById
需求:查询id为1的用户信息。
代码实现:
    @Test
    void test()
       Person person = personMapper.selectById(1);

        System.out.println(person);
2.1.2 selectList
需求:查询全部的用户信息。
代码实现:
    @Test
    void contextLoads()
        List<Person> personList = personMapper.selectList(null);

        personList.forEach(System.out::println);
2.1.3 selectBatchIds
需求:查询id为1和3的用户信息。
代码实现:
    @Test
    void test2()
        List<Person> personList = personMapper.selectBatchIds(Arrays.asList(1,3));

        personList.forEach(System.out::println);
2.1.4 selectByMap
需求:查询name为yixin,并且年龄为18岁的用户信息。
代码实现:
    @Test
    void test3()

        HashMap<String ,Object> map=new HashMap<>();
        map.put("name","yixin");
        map.put("age",18);
        List<Person> personList = personMapper.selectByMap(map);

        personList.forEach(System.out::println);
我们来看一下这条语句,它是如何生成的:

通过这样日志的查看,是不是就感觉马上就理解了!
2.2 增加操作
2.2.1 insert
需求:插入用户的信息如下
name:张三
age:21
email:test6@qq.com
代码实现:
    @Test
    void test4()

        // 我们没有自定义id,它会帮我们自动生成id
      Person person =new Person();
      person.setName("张三");
      person.setAge(21);
      person.setEmail("test6@qq.com");

      int result=personMapper.insert(person);

      System.out.println(result);// 受影响的行数

         System.out.println(person);//可以发现,id会自动回填
结果:

数据库插入的id的默认值为:全局的唯一id
2.2.2 自增Id
如果我们不想他每次都给我们随机生成id,而是希望通过在原有id基础上进行自增,那么我们可以这么操作。
第一步:设置数据库主键id为自增。

第二步:在实体类的id属性增加注解@TableId(type = IdType.AUTO)
package com.yixin.mybatis_plus.pojo;

import com.baomidou.mybatisplus.annotation.IdType;
import com.baomidou.mybatisplus.annotation.TableId;
import lombok.AllArgsConstructor;
import lombok.Data;
import lombok.NoArgsConstructor;

@Data
@AllArgsConstructor
@NoArgsConstructor
public class Person

    @TableId(type = IdType.AUTO)
    private Long id;
    private String name;
    private Integer age;
    private String email;
然后我们再进行多次插入,看看是否会进行自增操作。

可以发现,能够成功的进行自增操作了!
对于每一个id,大家不用担心会重复,因为其采用的是【雪花算法】生成的,可以保证id几乎全球唯一!
雪花算法
snowflake是Twitter开源的分布式ID生成算法,结果是一个long型的ID。
其核心思想是:
使用41bit作为毫秒数,
10bit作为机器的ID(5个bit是数据中心,5个bit的机器ID),
12bit作为毫秒内的流水号(意味着每个节点在每毫秒可以产生 4096 个 ID),
最后还有一个符号位,永远是0。
2.3 删除操作
2.3.1 deleteById
需求:删除id为5的用户信息。
代码实现:
    @Test
    void test6()

        int result=personMapper.deleteById(5L);

        System.out.println(result);// 受影响的行数
2.3.2 deleteByMap
需求:删除姓名为 Sandy,并且年龄为21的用户信息。
代码实现:
    @Test
    void test7()
        HashMap<String, Object> map=new HashMap<>();
        map.put("name","Sandy");
        map.put("age",21);

        int result=personMapper.deleteByMap(map);

        System.out.println(result);// 受影响的行数
2.4 更新操作
需求:将id为2的用户的姓名更改为"一心同学"
代码实现:
    @Test
    void test5()
        Person person =new Person();
        person.setId(2L);
        person.setName("一心同学");
        person.setAge(20);
        person.setEmail("test2@qq.com");

        int result=personMapper.updateById(person);

        System.out.println(result);// 受影响的行数
小结
以上就是【一心同学】对【MyBatis-Plus】基础入门【增删改查】的讲解,看到以上对CRUD的操作是不是感觉特别清爽,而【MyBatis-Plus】的功能不仅仅如此,下一篇博客【一心同学】将会对其【注解】进行讲解。
如果这篇【文章】有帮助到你,希望可以给【一心同学】点个赞👍,创作不易,相比官方的陈述,我更喜欢用【通俗易懂】的文笔去讲解每一个知识点,如果有对【后端技术】感兴趣的小可爱,也欢迎关注❤️❤️❤️ 【一心同学】❤️❤️❤️,我将会给你带来巨大的【收获与惊喜】💕💕!
以上是关于MyBatis-Plus——增删查改的主要内容,如果未能解决你的问题,请参考以下文章