使用IBM Cloud Schematics配置云资源
Posted koolincn
tags:
篇首语:本文由小常识网(cha138.com)小编为大家整理,主要介绍了使用IBM Cloud Schematics配置云资源相关的知识,希望对你有一定的参考价值。
在上一篇部署云资源中,我们讲到IBM Cloud Schematics可以进行云资源的部署,软件安装和配置,那我们接下来就讲下如何在Schematics中调用Ansible在虚拟机系统里面进行软件的安装和配置,来达到自动化的过程。
在参考本篇文章进行试验之前,建议阅读使用Schematics部署云资源一文。(https://blog.csdn.net/koolincn/article/details/121999643)
首先我们需要编写Ansible play book脚本,这里我将基于之前Schematics交付的资源,在两个虚拟机(经典基础架构下的,以及VPC环境下的)上进行相关软件包的安装,然后搭建一个简易的两层应用(WEB+DB)。由于IBM的经典架构下的虚拟机会赠送一定数量的免费外网流量,所以我们选择用经典基础架构下的虚拟机作为对外接收请求的WEB服务器,使用VPC环境下的虚拟机作为后端的数据库服务器,WEB服务器与数据库服务器的通信走IBM的内网进行,一是安全,而是没有费用产生。(在本实验中,我们WEB和DB的通信还是走公网的形式,原因是因为VPC环境下的虚拟机与经典基础架构下的虚拟机走IBM内网通信的话,需要配置交换网关[Transit Gateway],并且启用该账号的VRF功能,本账号由于是测试账号,没有开通VRF)
我们还是先来看下我们的Ansible play book脚本。

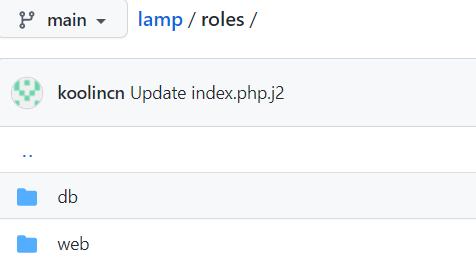
README.md,roles目录以及site.yaml,README文件给整个代码以说明,site.yaml文件里面定义了执行Ansible脚本时不同的role。roles目录下是不同角色所对应需要执行的操作。

在DB role下,我们将执行安装和配置mysql,启动mysql服务等操作,在WEB role下面我们会安装和配置http,php以及相关的package。
下面我们来看下具体的yaml文件的内容,主目录下site.yaml的内容如下:
---
# This playbook deploys the LAMP application stack in this site.

- name: deploy and configure the webservers and application
  hosts: webserver
  remote_user: root

  roles:
    - web

- name: deploy MySQL and configure the databases
  hosts: dbserver
  remote_user: root

  roles:
    - db

- name: Verify Installation
  hosts: webserver
  tasks:

    - name: Query index page for application
      uri:
        url: http://localhost/index.php
        return_content: yes
      register: Output

    - name: Display Index page content
      ansible.builtin.debug:
        var: Output
对应的role下面的task下面的main.yaml内容,我们先看DB role下面的:
roles/db/tasks/main.yml
---
  # This playbook contains common plays that will be run on all nodes.

  - name: Download MySQL Community Repo
    get_url:
      url: https://dev.mysql.com/get/mysql80-community-release-el7-3.noarch.rpm
      dest: /tmp
    tags: db

  - name: Install MySQL Community Repo
    command : /usr/bin/rpm -ivh /tmp/mysql80-community-release-el7-3.noarch.rpm
    ignore_errors: yes

  - name: Install MySQL Server
    yum:
      name: "mysql-server"
      state: present

  - name: Start MySQL Server and enable it
    service: name=mysqld state=started enabled=yes

  - name: Change mysql root password and keep track in
    shell: |
      password_match=`awk '/A temporary password is generated for/ a=$0 END print a ' /var/log/mysqld.log | awk 'print $(NF)'`
      echo $password_match
      mysql -uroot -p$password_match --connect-expired-password -e "ALTER USER 'root'@'localhost' IDENTIFIED WITH mysql_native_password BY ' upassword '; flush privileges; "
    ignore_errors: yes
    notify: restart mysql

  - name: Install Mysql package
    yum:
      name: " item "
      state: installed
    with_items:
     - MySQL-python
     - libselinux-python
     - libsemanage-python

#  - name: Configure SELinux to start mysql on any port
#    seboolean:
#      name: mysql_connect_any
#      state: true
#      persistent: yes
#    when: sestatus.rc != 0
#    ignore_errors: yes

  - name: Create Mysql configuration file
    template:
      src: my.cnf.j2
      dest: /root/.my.cnf
    notify:
    - restart mysql

  - name: Start Mysql Service
    service:
      name: mysqld
      state: started
      enabled: yes

#  - name: insert iptables rule
#    lineinfile:
#      dest: /etc/sysconfig/iptables
#      state: present
#      regexp: " mysql_port "
#      insertafter: "^:OUTPUT "
#      line: "-A INPUT -p tcp  --dport 3306 -j  ACCEPT"
#    notify: restart iptables

  - name: Create Application DB User
    mysql_user:
      name: " dbuser "
      password: " upassword "
      priv: "*.*:ALL"
      host: '%'
      state: present

  - name: Create Application Database
    mysql_db:
      name: " dbname "
      login_user: " dbuser "
      login_password: " upassword "
      state: present
这里进行了mysql包的安装,并且使用我们的my.cnf文件对数据库进行了配置,并且设置了数据库相关的用户名和密码(这些值需要在执行ansible时作为变量传入)。
相关数据库role里面还有其他两个目录,分别是handlers和templates,分别执行对数据库的操作和存放自定义的配置文件模板。内容如下:
roles/db/handlers/main.yml
---
# Handler to handle DB tier notifications

- name: restart mysql
  service:
    name: mysqld
    state: restarted

- name: restart iptables
  service:
    name: iptables
    state: restarted
用于对DB服务器上的数据库服务和防火墙服务进行重启生效。
下面则是模板中的数据库配置模板内容:
roles/db/templates/my.cnf.j2
[mysqld]
datadir=/var/lib/mysql
socket=/var/lib/mysql/mysql.sock
# Disabling symbolic-links is recommended to prevent assorted security risks
symbolic-links=0
user=root
port= mysql_port
password= upassword


[mysqld_safe]
log-error=/var/log/mysqld.log
pid-file=/var/run/mysqld/mysqld.pid


[client]
user=root
port= mysql_port
password= upassword
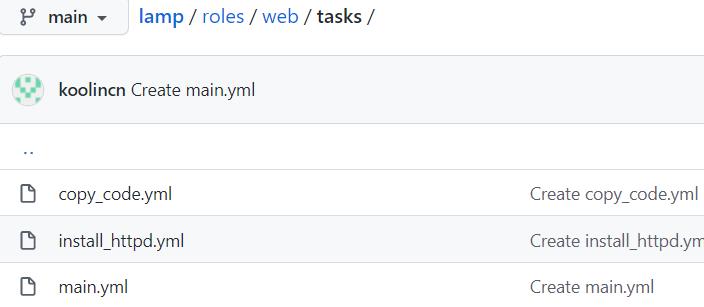
下面再看一下WEB role下面的内容,目录结构与DB role下面的一致,我们直接看下roles/web/tasks/main.yml(它将调用此目录下的其他两个yml[install_httpd.yml, copy_code.yml]文件执行)
- include: install_httpd.yml
- include: copy_code.yml
roles/web/tasks/install_httpd.yml文件内容如下:
---
# These tasks install http and the php modules.

- name: Install http and php etc
  yum:
    name: " item "
    state: present
  with_items:
   - httpd
   - php
   - php-mysql
   - git
   - libsemanage-python
   - libselinux-python
   - iptables-services

#- name: insert iptables rule for httpd
#  lineinfile:
#    dest: /etc/sysconfig/iptables
#    create: yes
#    state: present
#    regexp: " httpd_port "
#   insertafter: "^:OUTPUT "
#    line: "-A INPUT -p tcp  --dport 80 -j  ACCEPT"
#  notify: restart iptables

- name: http service state
  service:
    name: httpd
    state: started
    enabled: yes

- name: test to see if selinux is running
  command: getenforce
  register: sestatus
  changed_when: false

#- name: Configure SELinux to allow httpd to connect to remote database
#  seboolean:
#    name: httpd_can_network_connect_db
#    state: true
#    persistent: yes
#  when: sestatus.rc != 0
#  ignore_errors: yes
roles/web/tasks/copy_code.yml文件内容如下:
---
# These tasks are responsible for copying the latest dev/production code from
# the version control system.

- name: Copy the code from repository
  git:
    repo: https://github.com/koolincn/html-app
    dest: /var/www/html/

- name: Creates the index.php file
  template:
    src: index.php.j2
    dest: /var/www/html/index.php
roles/web/handlers/main.yml文件内容如下,用于对web服务器上的防火墙服务进行重启:
---
# Handler for the webtier: handlers are called by other plays.
# See http://docs.ansible.com/playbooks_intro.html for more information about handlers.

- name: restart iptables
  service:
    name: iptables
    state: restarted
再看一下WEB角色下的templates目录下文件的内容,
roles/web/templates/index.php.j2
<html>
 <head>
  <title>Ansible Application</title>
 </head>
 <body>
 </br>
  <a href=http:// ansible_default_ipv4.address /index.html>Homepage</a>
 </br>
 </br>
  <a href=http:// ansible_default_ipv4.address /about.html>About Us</a>
 </br>
<?php
 Print "Hello, World! I am a web server configured using Ansible and I am : ";
 echo exec('hostname');
 Print  "</BR>";
?>
</body>
</html>
准备好Ansible脚本之后,我们就可以进入到IBM Cloud Schematics的Actions里面,加载脚本到Schematics里面。

输入完action名称之后,就可以点击创建。

点击此处的铅笔按钮进行编辑,加载Ansible脚本:

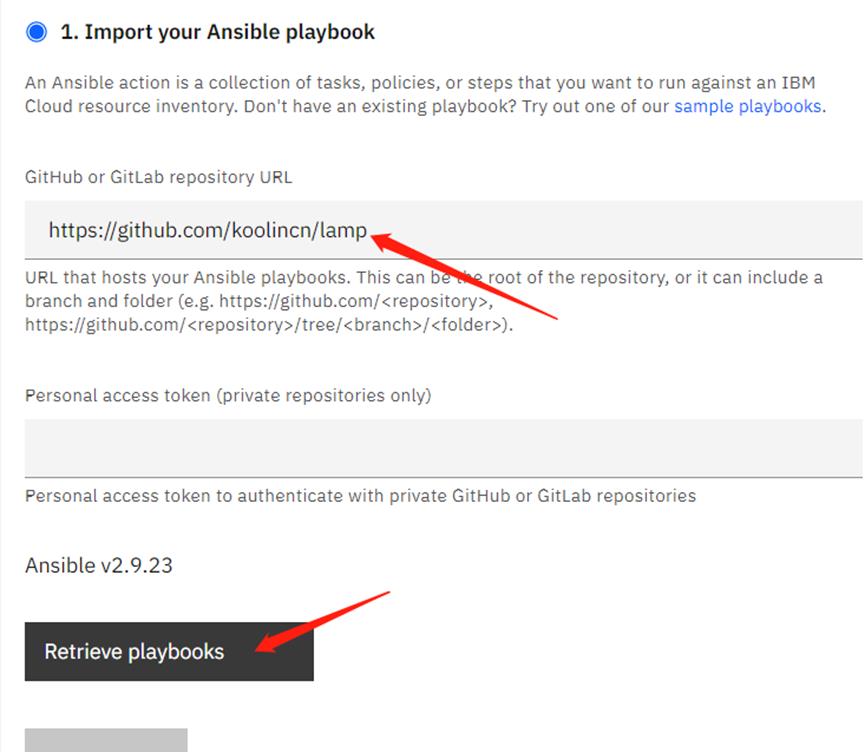
填入ansible脚本库的url地址后,点击获取。
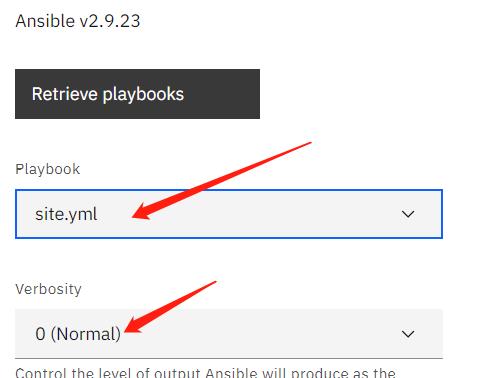
系统会检测到我们的yml文件,选择site.yml主文件。
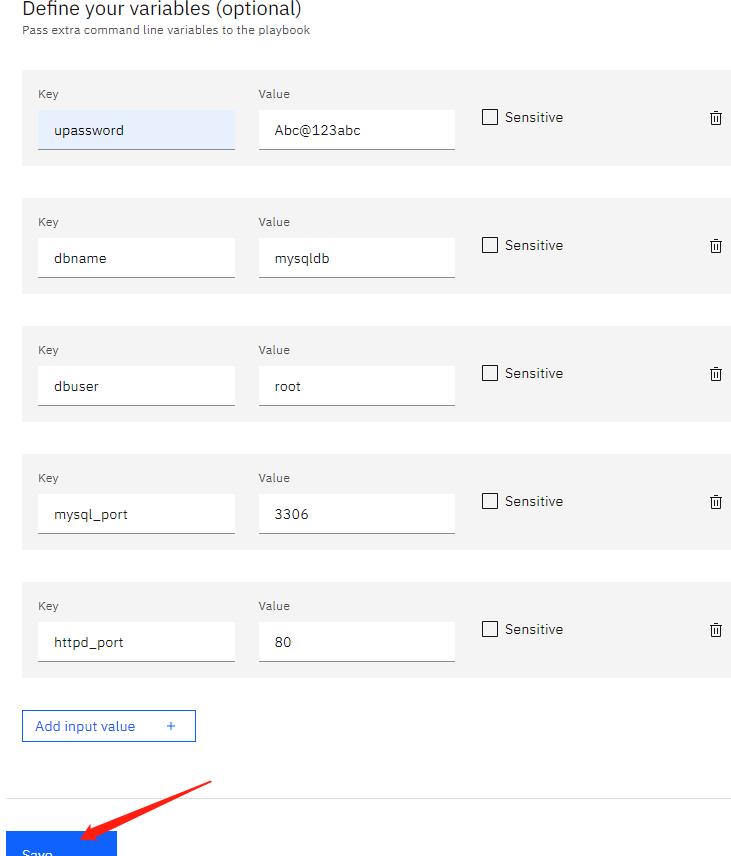
选择完playbook脚本后,在下面的高级选项处输入我们配置数据库时需要的变量值:

输入完后的参数如下,然后点击保存。
接下来再去编辑inventory,说明这些ansible需要在那些机器上执行,给对应的机器分别指定相关的role,以便让ansiable使用不同的role下的脚本在不同的机器上执行不同的操作,点击下面的“IBM Cloud resource Inventory”右侧的铅笔进入编辑模式。

点击创建仓库
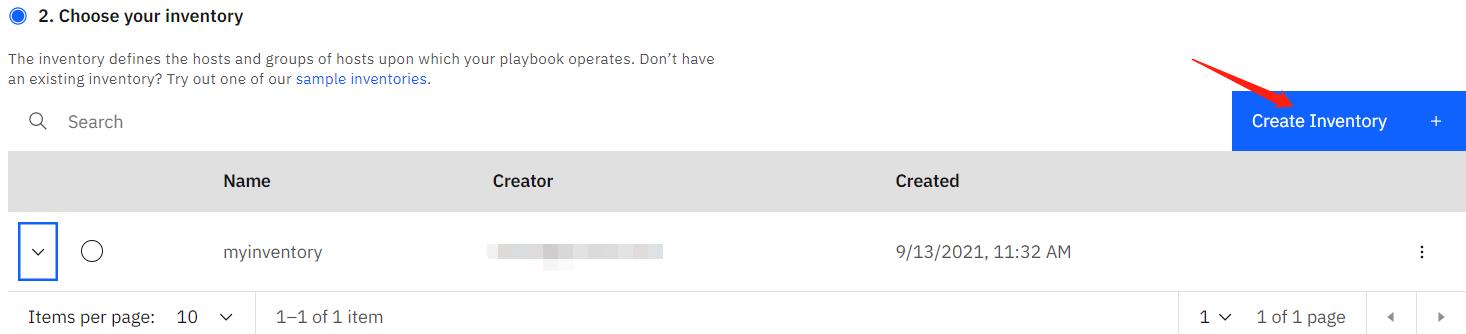
如果已有自己的仓库,也可直接选择之前创建好的。
我们这里选择创建新的仓库,然后输入仓库名,选择手动定义,输入不同角色的机器。

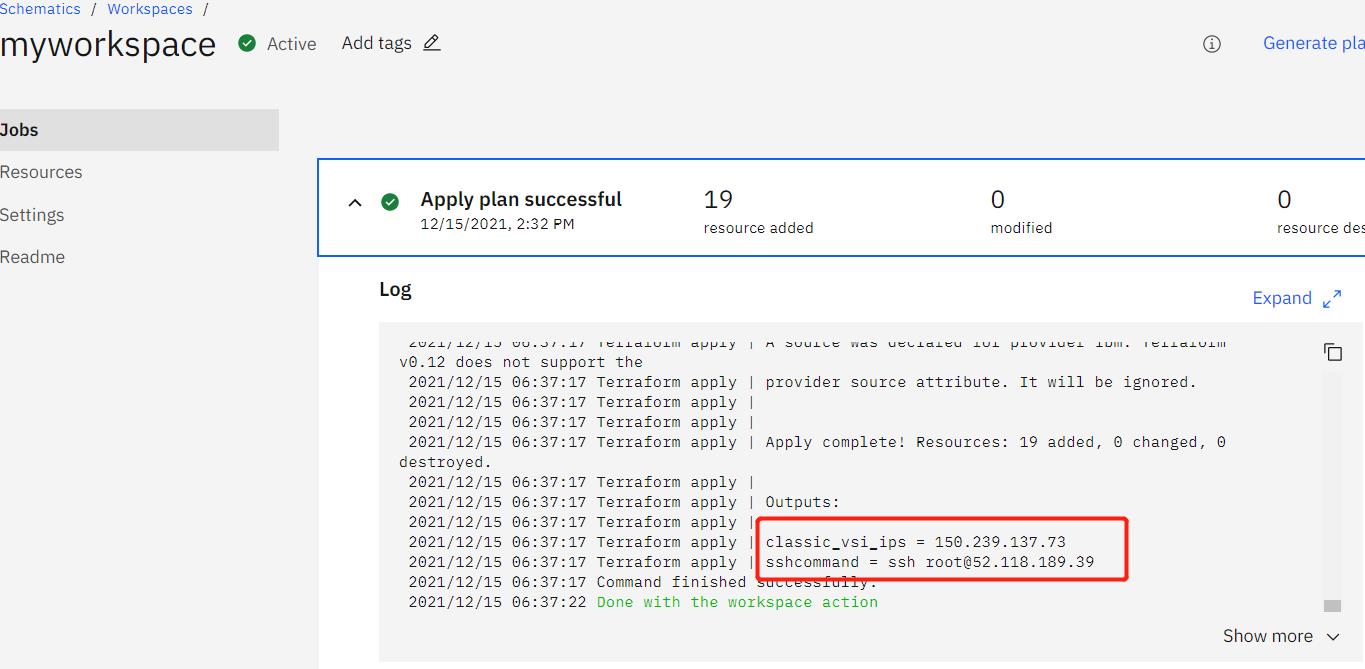
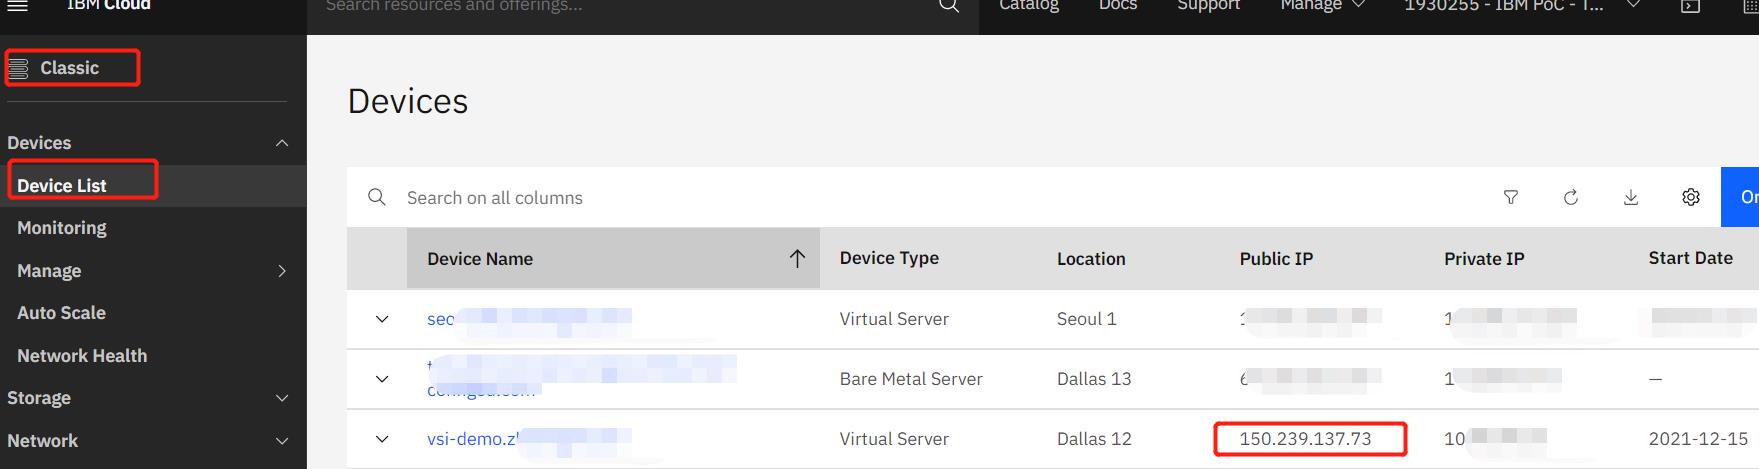
这里的机器对应IP地址,我们可以在之前的Workspace的日志里面看到,当然也可以到对应的资源中去查找,比如,经典基础架构下的虚拟机,VPC环境下的虚拟机等等。

再输入能够登录这两个机器的私有密钥(之前配置ssh的时候使用的公钥,这里需要输入私钥),方能ansible登录进系统进行相关软件包的安装和配置操作。

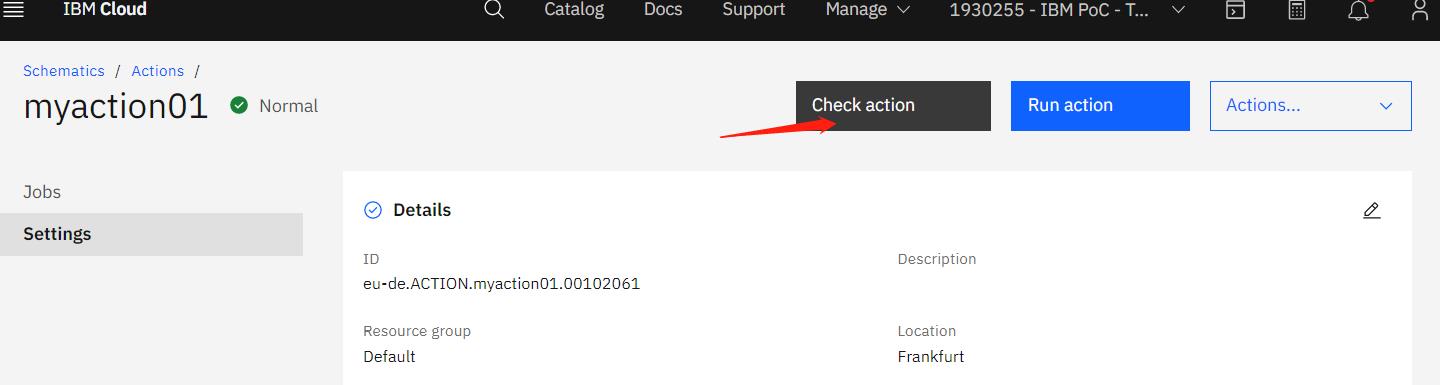
保存之后,可以现在右上方的检查按钮进行Ansible脚本的语法和预执行。
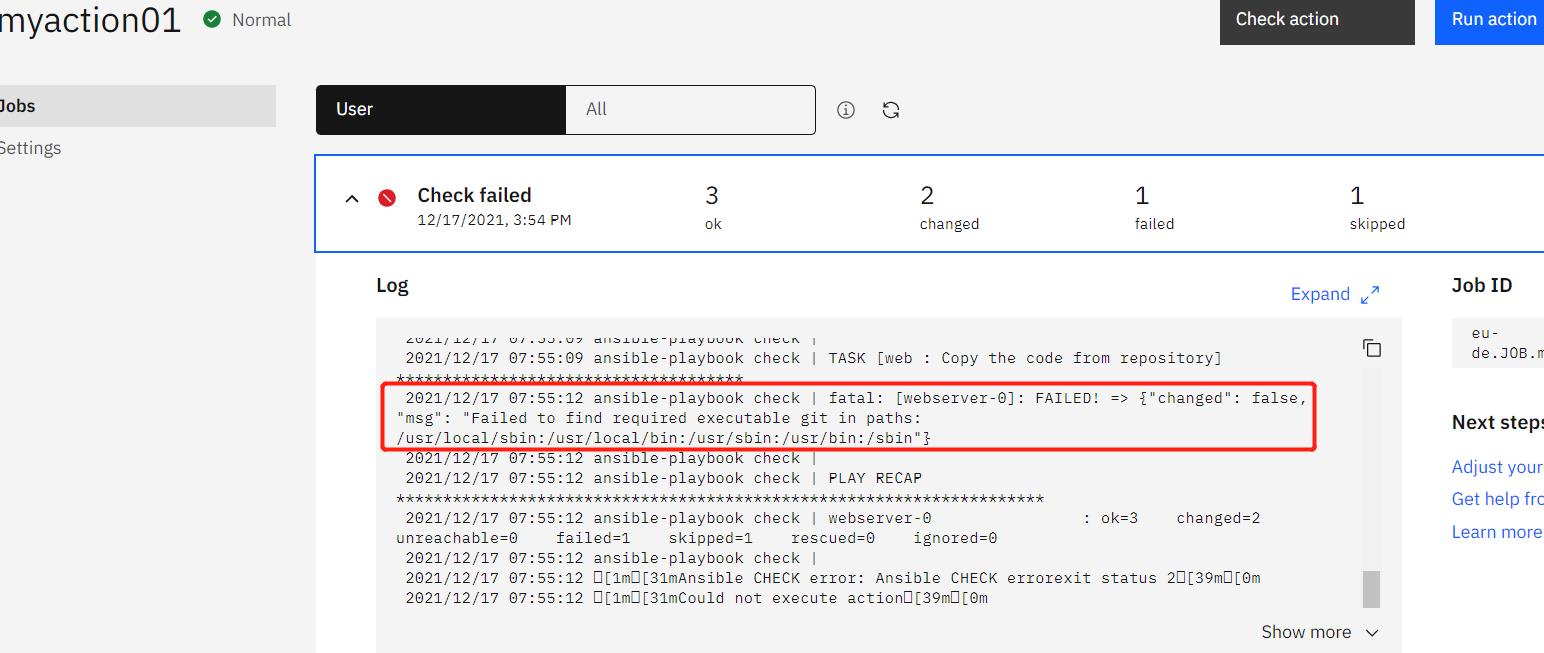
检查脚本时会有下面错误,可以忽略。
接下来点击运行任务,约十几分钟后查看执行结果如下,说明一切运行没有任何问题。
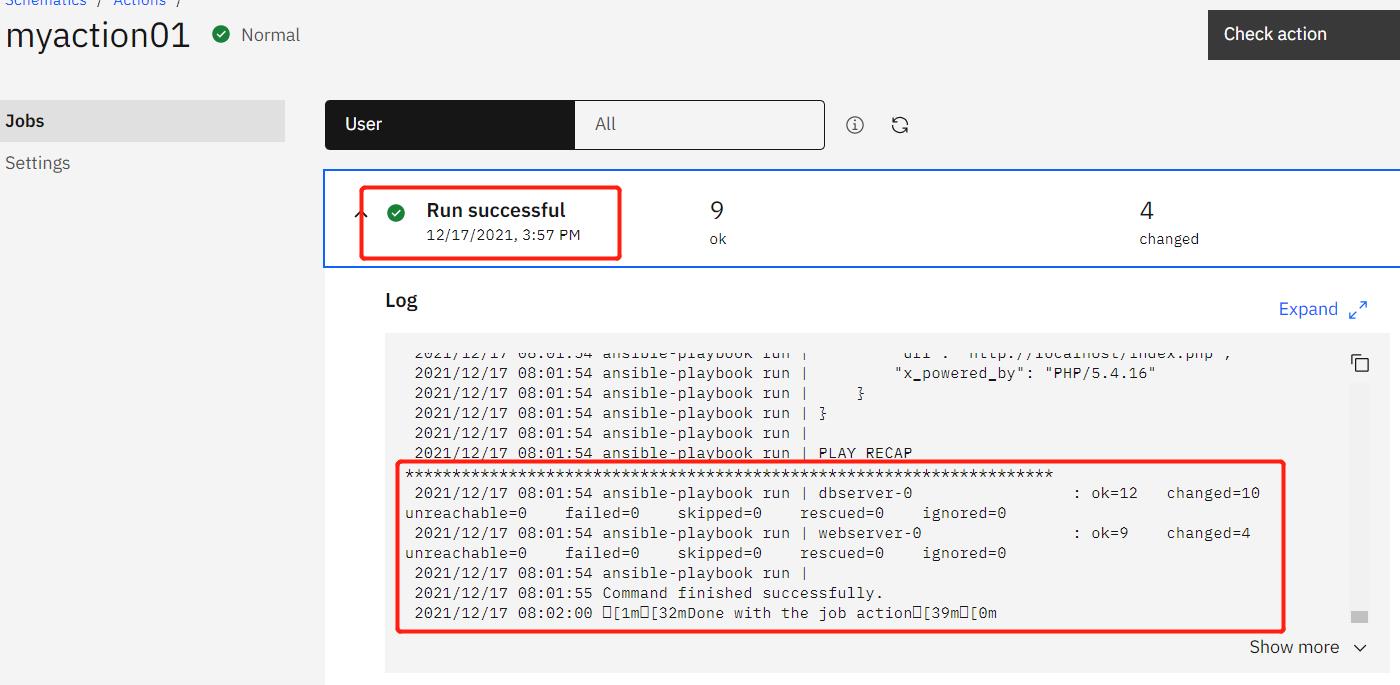
然后打开浏览器新窗口,输入classic的虚拟机ip地址(我们的webserver)。
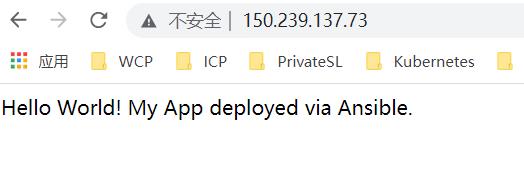
任务成功!!!
本篇文章没有对仓库如何配置HOST GROUP做更多的介绍,有兴趣的小伙伴们可以研究下,这个是可以将不同的workspace下的机器,自动加入到主机仓库,分配角色,然后执行Ansible脚本。再次感谢同学的阅读,希望各位提供宝贵意见。
以上是关于使用IBM Cloud Schematics配置云资源的主要内容,如果未能解决你的问题,请参考以下文章