从hbase到hive,以及sqoop转到mysql解析
Posted pursue330
tags:
篇首语:本文由小常识网(cha138.com)小编为大家整理,主要介绍了从hbase到hive,以及sqoop转到mysql解析相关的知识,希望对你有一定的参考价值。
https://blog.csdn.net/qq_33689414/article/details/80328665 hive关联hbase的配置文件
hive和hbase同步
https://cwiki.apache.org/confluence/display/Hive
https://cwiki.apache.org/confluence/display/Hive/HBaseIntegration
1、在hive的配置文件增加属性:hive-site.xml
<property>
<name>hbase.zookeeper.quorum</name>
<value>master:2181,node1:2181,node2:2181</value>
</property>
<property>
<name>hbase.zookeeper.quorum</name>
<value>master,node1,node2</value>
</property>
1.1.2 修改hive-env.sh文件
添加一个环境变量
export HIVE_CLASSPATH=$HIVE_CLASSPATH:/hadoop/hbase/lib/*
2、在hive中创建临时表
一、
CREATE TABLE hbasetbl(key int, value string)
STORED BY \'org.apache.hadoop.hive.hbase.HBaseStorageHandler\'/存储格式的jar包
WITH SERDEPROPERTIES ("hbase.columns.mapping" = ":key,cf1:val")//serdeproperties 属性 一一对应
TBLPROPERTIES ("hbase.table.name" = "xyz", "hbase.mapred.output.outputtable" = "xyz");//输出表名
二、
put \'xyz\',\'1111\',\'cf1:name\',\'zhangsan\'
put \'xyz\',\'1111\',\'cf1:val\',\'lisi\'
三、
set hive.exec.mode.local.auto=true; //设置为本地模式
insert into hbasetbl values(222,\'wangwu\');
查看hdfs
hbase> flush \'xyz\' //执行刷新后,hdfs才会同步
3.
一、
CREATE EXTERNAL TABLE tmp_order
(key string, id string, user_id string)
STORED BY \'org.apache.hadoop.hive.hbase.HBaseStorageHandler\'
WITH SERDEPROPERTIES ("hbase.columns.mapping" = ":key,order:order_id,order:user_id")
TBLPROPERTIES ("hbase.table.name" = "t_order");
外部表必须先在hbase建立表(在hive删除这个表会有什么影响?)
二、
create \'t_order\',\'order\'
在执行
CREATE EXTERNAL TABLE tmp_order
(key string, id string, user_id string)
STORED BY \'org.apache.hadoop.hive.hbase.HBaseStorageHandler\'
WITH SERDEPROPERTIES ("hbase.columns.mapping" = ":key,order:order_id,order:user_id")
TBLPROPERTIES ("hbase.table.name" = "t_order");
put \'t_order\',\'1\',\'order:order_id\',\'1\'
put \'t_order\',\'1\',\'order:user_id\',\'1\'
select * from tmp_order;
hive
insert into tmp_order values(2,2,2);
一、两个角度
1.用户
2.会话
二、mysql数据表
stats_view_depth
CREATE TABLE `stats_view_depth` (
`platform_dimension_id` bigint ,
`data_dimension_id` bigint ,
`kpi_dimension_id` bigint ,
`pv1` bigint ,
`pv2` bigint ,
`pv3` bigint ,
`pv4` bigint ,
`pv5_10` bigint ,
`pv10_30` bigint ,
`pv30_60` bigint ,
`pv60_plus` bigint ,
`created` string
) row format delimited fields terminated by \'\\t\';
三、数据
1.用户ID
2.时间
3.URL
4.PV
四、HIVE和HBASE对应关系
set hive.exec.mode.local.auto=true;
1.在hive中创建hbase的event_log对应表
CREATE EXTERNAL TABLE event_logs(
key string, pl string, en string, s_time bigint, p_url string, u_ud string, u_sd string
) ROW FORMAT SERDE \'org.apache.hadoop.hive.hbase.HBaseSerDe\'
STORED BY \'org.apache.hadoop.hive.hbase.HBaseStorageHandler\'
with serdeproperties(\'hbase.columns.mapping\'=\':key,log:pl,log:en,log:s_time,log:p_url,log:u_ud,log:u_sd\')
tblproperties(\'hbase.table.name\'=\'eventlog\');
分组条件
UUID
PL
count(url):1,2,3,4.... (hive_case_when)
3.hive创建临时表:把hql分析之后的中间结果存放到当前的临时表。
CREATE TABLE `stats_view_depth_tmp`(`pl` string, `date` string, `col` string, `ct` bigint);
然后先看第七步的操作SQL,再回头看udf
-- 4. 编写UDF(platformdimension & datedimension)
package com.yjsj.transformer.hive;


import com.yjsj.common.DateEnum;
import com.yjsj.transformer.model.dim.base.DateDimension;
import com.yjsj.transformer.model.dim.base.PlatformDimension;
import com.yjsj.transformer.service.IDimensionConverter;
import com.yjsj.transformer.service.impl.DimensionConverterImpl;
import com.yjsj.util.TimeUtil;
import org.apache.hadoop.hive.ql.exec.UDF;
import org.apache.hadoop.io.IntWritable;
import org.apache.hadoop.io.Text;

import java.io.IOException;

/**
 * 操作日期dimension 相关的udf
 *
 * @author root
 *
 */
public class PlatformDimensionUDF extends UDF {
    private IDimensionConverter converter = new DimensionConverterImpl();


    /**
     * 根据给定的日期(格式为:yyyy-MM-dd)至返回id
     *
     * @param pl
     * @return
     */
    public IntWritable evaluate(Text pl) {
        PlatformDimension dimension = new PlatformDimension(pl.toString());
        try {
            int id = this.converter.getDimensionIdByValue(dimension);
            return new IntWritable(id);
        } catch (IOException e) {
            throw new RuntimeException("获取id异常");
        }
    }
}
package com.yjsj.transformer.hive;


import java.io.IOException;

import org.apache.hadoop.hive.ql.exec.UDF;
import org.apache.hadoop.io.IntWritable;
import org.apache.hadoop.io.Text;

import com.yjsj.common.DateEnum;
import com.yjsj.transformer.model.dim.base.DateDimension;
import com.yjsj.transformer.service.IDimensionConverter;
import com.yjsj.transformer.service.impl.DimensionConverterImpl;
import com.yjsj.util.TimeUtil;

/**
 * 操作日期dimension 相关的udf
 *
 * @author root
 *
 */
public class DateDimensionUDF extends UDF {
    private IDimensionConverter converter = new DimensionConverterImpl();


    /**
     * 根据给定的日期(格式为:yyyy-MM-dd)至返回id
     *
     * @param day
     * @return
     */
    public IntWritable evaluate(Text day) {
        DateDimension dimension = DateDimension.buildDate(TimeUtil.parseString2Long(day.toString()), DateEnum.DAY);
        try {
            int id = this.converter.getDimensionIdByValue(dimension);
            return new IntWritable(id);
        } catch (IOException e) {
            throw new RuntimeException("获取id异常");
        }
    }
}
底层dimension在项目内
-- 5. 上传transformer.jar到hdfs的/yjsj/transformer文件夹中
文件夹放到虚拟机上之后要执行
zip -d wc.jar \'META-INF/.SF\' \'META-INF/.RSA\' \'META-INF/*SF\'
hadoop fs -mkdir -p /yjsj/transformer
hadoop fs -put transformer.jar /yjsj/transformer/
-- 6. 创建hive的function
#create function platform_convert as \'com.yjsj.transformer.hive.PlatformDimensionUDF\' using jar \'hdfs://master:9000/yjsj/transformer/transformer.jar\';
create function date_convert as \'com.yjsj.transformer.hive.DateDimensionUDF\' using jar \'hdfs://master:9000/yjsj/transformer/transformer.jar\';
create function platform_convert as \'com.yjsj.transformer.hive.PlatformDimensionUDF\' using jar \'hdfs://master:9000/yjsj/transformer/BIG_DATA_SXT_3.jar\';
create function date_convert as \'com.yjsj.transformer.hive.DateDimensionUDF\' using jar \'hdfs://master:9000/yjsj/transformer/BIG_DATA_SXT_3.jar\';
上面的端口号9000要写上,在之前的hive文档里并没有写,如下,是因为默认是8020,而我们修改为9000

7. hql编写(统计用户角度的浏览深度)<注意:时间为外部给定>
select
pl, from_unixtime(cast(s_time/1000 as bigint),\'yyyy-MM-dd\') as day, u_ud
from event_logs
where
en=\'e_pv\'
and p_url is not null
and pl is not null
and s_time >= unix_timestamp(\'2019-04-08\',\'yyyy-MM-dd\')*1000
and s_time < unix_timestamp(\'2019-04-09\',\'yyyy-MM-dd\')*1000;
下面是上句生成结果(为方便后续综合代码理解,才写的这行SQL语句)
website 2019-04-08 11423967 pv2
website 2019-04-08 11923441 pv1
website 2019-04-08 13117709 pv3
website 2019-04-08 18876987 pv1
website 2019-04-08 22132974 pv5_10
website 2019-04-08 32338628 pv3
website 2019-04-08 32462024 pv1
website 2019-04-08 37100298 pv2
website 2019-04-08 40258369 pv1
website 2019-04-08 43316735 pv4
website 2019-04-08 43367799 pv3
website 2019-04-08 46712177 pv2
website 2019-04-08 48200918 pv2
website 2019-04-08 55242998 pv1
website 2019-04-08 61014907 pv3
website 2019-04-08 66425387 pv2
website 2019-04-08 66752576 pv1
website 2019-04-08 69279477 pv2
website 2019-04-08 69831907 pv2
website 2019-04-08 70509784 pv2
website 2019-04-08 76613477 pv2
website 2019-04-08 76999358 pv4
website 2019-04-08 80101579 pv1
website 2019-04-08 83607412 pv1
website 2019-04-08 87265754 pv2
website 2019-04-08 92096261 pv1
website 2019-04-08 95144920 pv3
from (
select
pl, from_unixtime(cast(s_time/1000 as bigint),\'yyyy-MM-dd\') as day, u_ud,
(case when count(p_url) = 1 then "pv1"
when count(p_url) = 2 then "pv2"
when count(p_url) = 3 then "pv3"
when count(p_url) = 4 then "pv4"
when count(p_url) >= 5 and count(p_url) <10 then "pv5_10"
when count(p_url) >= 10 and count(p_url) <30 then "pv10_30"
when count(p_url) >=30 and count(p_url) <60 then "pv30_60"
else \'pv60_plus\' end) as pv
from event_logs
where
en=\'e_pv\'
and p_url is not null
and pl is not null
and s_time >= unix_timestamp(\'2019-04-08\',\'yyyy-MM-dd\')*1000
and s_time < unix_timestamp(\'2019-04-09\',\'yyyy-MM-dd\')*1000
group by
pl, from_unixtime(cast(s_time/1000 as bigint),\'yyyy-MM-dd\'), u_ud
) as tmp
insert overwrite table stats_view_depth_tmp
select pl,day,pv,count(u_ud) as ct where u_ud is not null group by pl,day,pv;
select * from stats_view_depth_tmp;
结果如下
website 2019-04-08 pv1 9
website 2019-04-08 pv2 10
website 2019-04-08 pv3 5
website 2019-04-08 pv4 2
website 2019-04-08 pv5_10 1
因为我们需要的内容格式如下

所以之后进行行转列
--把临时表的多行数据,转换一行
UNION 内部的每个 SELECT 语句必须拥有相同数量的列。列也必须拥有相似的数据类型。同时,每个 SELECT 语句中的列的顺序必须相同。
根据where语句筛选要合并的内容项
https://www.runoob.com/sql/sql-union.html
with tmp as
(
select pl,`date` as date1,ct as pv1,0 as pv2,0 as pv3,0 as pv4,0 as pv5_10,0 as pv10_30,0 as pv30_60,0 as pv60_plus from stats_view_depth_tmp where col=\'pv1\' union all
select pl,`date` as date1,0 as pv1,ct as pv2,0 as pv3,0 as pv4,0 as pv5_10,0 as pv10_30,0 as pv30_60,0 as pv60_plus from stats_view_depth_tmp where col=\'pv2\' union all
select pl,`date` as date1,0 as pv1,0 as pv2,ct as pv3,0 as pv4,0 as pv5_10,0 as pv10_30,0 as pv30_60,0 as pv60_plus from stats_view_depth_tmp where col=\'pv3\' union all
select pl,`date` as date1,0 as pv1,0 as pv2,0 as pv3,ct as pv4,0 as pv5_10,0 as pv10_30,0 as pv30_60,0 as pv60_plus from stats_view_depth_tmp where col=\'pv4\' union all
select pl,`date` as date1,0 as pv1,0 as pv2,0 as pv3,0 as pv4,ct as pv5_10,0 as pv10_30,0 as pv30_60,0 as pv60_plus from stats_view_depth_tmp where col=\'pv5_10\' union all
select pl,`date` as date1,0 as pv1,0 as pv2,0 as pv3,0 as pv4,0 as pv5_10,ct as pv10_30,0 as pv30_60,0 as pv60_plus from stats_view_depth_tmp where col=\'pv10_30\' union all
select pl,`date` as date1,0 as pv1,0 as pv2,0 as pv3,0 as pv4,0 as pv5_10,0 as pv10_30,ct as pv30_60,0 as pv60_plus from stats_view_depth_tmp where col=\'pv30_60\' union all
select pl,`date` as date1,0 as pv1,0 as pv2,0 as pv3,0 as pv4,0 as pv5_10,0 as pv10_30,0 as pv30_60,ct as pv60_plus from stats_view_depth_tmp where col=\'pv60_plus\' union all
select \'all\' as pl,`date` as date1,ct as pv1,0 as pv2,0 as pv3,0 as pv4,0 as pv5_10,0 as pv10_30,0 as pv30_60,0 as pv60_plus from stats_view_depth_tmp where col=\'pv1\' union all
select \'all\' as pl,`date` as date1,0 as pv1,ct as pv2,0 as pv3,0 as pv4,0 as pv5_10,0 as pv10_30,0 as pv30_60,0 as pv60_plus from stats_view_depth_tmp where col=\'pv2\' union all
select \'all\' as pl,`date` as date1,0 as pv1,0 as pv2,ct as pv3,0 as pv4,0 as pv5_10,0 as pv10_30,0 as pv30_60,0 as pv60_plus from stats_view_depth_tmp where col=\'pv3\' union all
select \'all\' as pl,`date` as date1,0 as pv1,0 as pv2,0 as pv3,ct as pv4,0 as pv5_10,0 as pv10_30,0 as pv30_60,0 as pv60_plus from stats_view_depth_tmp where col=\'pv4\' union all
select \'all\' as pl,`date` as date1,0 as pv1,0 as pv2,0 as pv3,0 as pv4,ct as pv5_10,0 as pv10_30,0 as pv30_60,0 as pv60_plus from stats_view_depth_tmp where col=\'pv5_10\' union all
select \'all\' as pl,`date` as date1,0 as pv1,0 as pv2,0 as pv3,0 as pv4,0 as pv5_10,ct as pv10_30,0 as pv30_60,0 as pv60_plus from stats_view_depth_tmp where col=\'pv10_30\' union all
select \'all\' as pl,`date` as date1,0 as pv1,0 as pv2,0 as pv3,0 as pv4,0 as pv5_10,0 as pv10_30,ct as pv30_60,0 as pv60_plus from stats_view_depth_tmp where col=\'pv30_60\' union all
select \'all\' as pl,`date` as date1,0 as pv1,0 as pv2,0 as pv3,0 as pv4,0 as pv5_10,0 as pv10_30,0 as pv30_60,ct as pv60_plus from stats_view_depth_tmp where col=\'pv60_plus\'
)
from tmp
insert overwrite table stats_view_depth
select platform_convert(pl),date_convert(date1),6,sum(pv1),sum(pv2),sum(pv3),sum(pv4),sum(pv5_10),sum(pv10_30),sum(pv30_60),sum(pv60_plus),\'2019-04-08\' group by pl,date1;
下面则是没有定义UDF时候把下面的select 语句替换掉上面的
select 2,1,6,sum(pv1),sum(pv2),sum(pv3),sum(pv4),sum(pv5_10),sum(pv10_30),sum(pv30_60),sum(pv60_plus),\'2019-04-08\' group by pl,date1;
select platform_convert(pl),date_convert(date1),6,sum(pv1),sum(pv2),sum(pv3),sum(pv4),sum(pv5_10),sum(pv10_30),sum(pv30_60),sum(pv60_plus),\'2019-04-08\' group by pl,date1;
select 2,1,6,sum(pv1),sum(pv2),sum(pv3),sum(pv4),sum(pv5_10),sum(pv10_30),sum(pv30_60),sum(pv60_plus),\'2019-04-08\' group by pl,date1;
select 2,date_convert(date1),6,sum(pv1),sum(pv2),sum(pv3),sum(pv4),sum(pv5_10),sum(pv10_30),sum(pv30_60),sum(pv60_plus),\'2019-04-08\' group by pl,date1;
查询结果
select * from stats_view_depth;
//上面的前三项
platform_convert(pl),date_convert(date1),6,分别是平台维度id,日期维度id,kpi维度id
而前两项,即平台和日期维度,是通过前面四定义的udf函数来转换的,底层是写的java语句,
(1)继承 org.apache.hadoop.hive.ql.UDF
(2)需要实现 evaluate 函数;evaluate 函数支持重载;
(3)在 hive 的命令行窗口创建函数
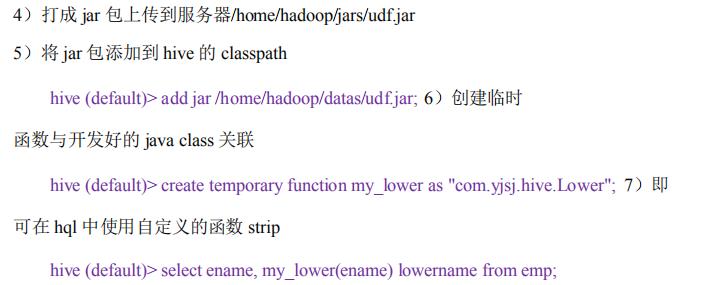
a)添加 jar
add jar linux_jar_path b)创
建 function,
create [temporary] function [dbname.]function_name AS class_name;
(4)在 hive 的命令行窗口删除函数
Drop [temporary] function [if exists] [dbname.]function_name; 6)注
意事项
(1)UDF 必须要有返回类型,可以返回 null,但是返回类型不能为 void
sqoop --options-file sqoop_option
-- 7. sqoop脚步编写(统计用户角度)
sqoop export --connect jdbc:mysql://master:3306/result_db --username root --password root --m 1 --columns platform_dimension_id,date_dimension_id,kpi_dimension_id,pv1,pv2,pv3,pv4,pv5_10,pv10_30,pv30_60,pv60_plus,created --export-dir /user/hive/warehouse/stats_view_depth --table stats_view_depth --input-fields-terminated-by \'\\t\'
下面是另外一个维度,方法流程是一样的
-- 8. hql编写(统计会话角度的浏览深度)<注意:时间为外部给定>
from (
select pl, from_unixtime(cast(s_time/1000 as bigint),\'yyyy-MM-dd\') as day, u_sd,
(case when count(p_url) = 1 then "pv1"
when count(p_url) = 2 then "pv2"
when count(p_url) = 3 then "pv3"
when count(p_url) = 4 then "pv4"
when count(p_url) >= 5 and count(p_url) <10 then "pv5_10"
when count(p_url) >= 10 and count(p_url) <30 then "pv10_30"
when count(p_url) >=30 and count(p_url) <60 then "pv30_60"
else \'pv60_plus\' end) as pv
from event_logs
where en=\'e_pv\' and p_url is not null and pl is not null and s_time >= unix_timestamp(\'2019-04-08\',\'yyyy-MM-dd\')*1000 and s_time < unix_timestamp(\'2019-04-09\',\'yyyy-MM-dd\')*1000
group by pl, from_unixtime(cast(s_time/1000 as bigint),\'yyyy-MM-dd\'), u_sd
) as tmp
insert overwrite table stats_view_depth_tmp
select pl,day,pv,count(distinct u_sd) as ct where u_sd is not null group by pl,day,pv;
with tmp as
(
select pl,date,ct as pv1,0 as pv2,0 as pv3,0 as pv4,0 as pv5_10,0 as pv10_30,0 as pv30_60,0 as pv60_plus from stats_view_depth_tmp where col=\'pv1\' union all
select pl,date,0 as pv1,ct as pv2,0 as pv3,0 as pv4,0 as pv5_10,0 as pv10_30,0 as pv30_60,0 as pv60_plus from stats_view_depth_tmp where col=\'pv2\' union all
select pl,date,0 as pv1,0 as pv2,ct as pv3,0 as pv4,0 as pv5_10,0 as pv10_30,0 as pv30_60,0 as pv60_plus from stats_view_depth_tmp where col=\'pv3\' union all
select pl,date,0 as pv1,0 as pv2,0 as pv3,ct as pv4,0 as pv5_10,0 as pv10_30,0 as pv30_60,0 as pv60_plus from stats_view_depth_tmp where col=\'pv4\' union all
select pl,date,0 as pv1,0 as pv2,0 as pv3,0 as pv4,ct as pv5_10,0 as pv10_30,0 as pv30_60,0 as pv60_plus from stats_view_depth_tmp where col=\'pv5_10\' union all
select pl,date,0 as pv1,0 as pv2,0 as pv3,0 as pv4,0 as pv5_10,ct as pv10_30,0 as pv30_60,0 as pv60_plus from stats_view_depth_tmp where col=\'pv10_30\' union all
select pl,date,0 as pv1,0 as pv2,0 as pv3,0 as pv4,0 as pv5_10,0 as pv10_30,ct as pv30_60,0 as pv60_plus from stats_view_depth_tmp where col=\'pv30_60\' union all
select pl,date,0 as pv1,0 as pv2,0 as pv3,0 as pv4,0 as pv5_10,0 as pv10_30,0 as pv30_60,ct as pv60_plus from stats_view_depth_tmp where col=\'pv60_plus\' union all
select \'all\' as pl,date,ct as pv1,0 as pv2,0 as pv3,0 as pv4,0 as pv5_10,0 as pv10_30,0 as pv30_60,0 as pv60_plus from stats_view_depth_tmp where col=\'pv1\' union all
select \'all\' as pl,date,0 as pv1,ct as pv2,0 as pv3,0 as pv4,0 as pv5_10,0 as pv10_30,0 as pv30_60,0 as pv60_plus from stats_view_depth_tmp where col=\'pv2\' union all
select \'all\' as pl,date,0 as pv1,0 as pv2,ct as pv3,0 as pv4,0 as pv5_10,0 as pv10_30,0 as pv30_60,0 as pv60_plus from stats_view_depth_tmp where col=\'pv3\' union all
select \'all\' as pl,date,0 as pv1,0 as pv2,0 as pv3,ct as pv4,0 as pv5_10,0 as pv10_30,0 as pv30_60,0 as pv60_plus from stats_view_depth_tmp where col=\'pv4\' union all
select \'all\' as pl,date,0 as pv1,0 as pv2,0 as pv3,0 as pv4,ct as pv5_10,0 as pv10_30,0 as pv30_60,0 as pv60_plus from stats_view_depth_tmp where col=\'pv5_10\' union all
select \'all\' as pl,date,0 as pv1,0 as pv2,0 as pv3,0 as pv4,0 as pv5_10,ct as pv10_30,0 as pv30_60,0 as pv60_plus from stats_view_depth_tmp where col=\'pv10_30\' union all
select \'all\' as pl,date,0 as pv1,0 as pv2,0 as pv3,0 as pv4,0 as pv5_10,0 as pv10_30,ct as pv30_60,0 as pv60_plus from stats_view_depth_tmp where col=\'pv30_60\' union all
select \'all\' as pl,date,0 as pv1,0 as pv2,0 as pv3,0 as pv4,0 as pv5_10,0 as pv10_30,0 as pv30_60,ct as pv60_plus from stats_view_depth_tmp where col=\'pv60_plus\'
)
from tmp
insert overwrite table stats_view_depth select platform_convert(pl),date_convert(date),6,sum(pv1),sum(pv2),sum(pv3),sum(pv4),sum(pv5_10),sum(pv10_30),sum(pv30_60),sum(pv60_plus),\'2019-04-08\' group by pl,date;
-- 9. sqoop脚步编写(统计会话角度)
sqoop export --connect jdbc:mysql://master:3306/report --username root --password 111111 --table stats_view_depth --export-dir /user/hive/warehouse/stats_view_depth/* --input-fields-terminated-by "\\\\01" --update-mode allowinsert --update-key platform_dimension_id,data_dimension_id,kpi_dimension_id
-- 10. shell脚步编写
以上是关于从hbase到hive,以及sqoop转到mysql解析的主要内容,如果未能解决你的问题,请参考以下文章