linux 安装mysql
Posted 生心无住
tags:
篇首语:本文由小常识网(cha138.com)小编为大家整理,主要介绍了linux 安装mysql相关的知识,希望对你有一定的参考价值。
环境 centos 7 + mysql-5.7.23-linux-glibc2.12-x86_64.tar.gz
0.卸载centos 自带mysql
rpm -qa | grep -i mariadb |xargs yum -y remove
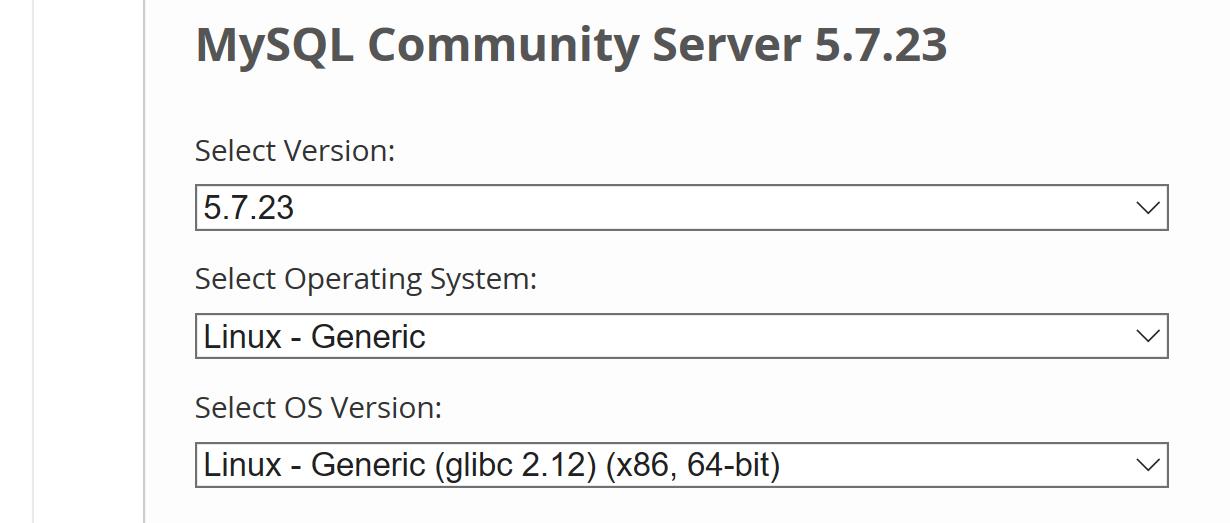
1.mysql 下载
下载版本如下:

2.创建mysql用户
groupadd mysql
useradd -d /home/mysql -g mysql mysql
3.安装mysql
1)将mysql-5.7.23-linux-glibc2.12-x86_64.tar.gz移动到 /usr/loca目录下并解压
tar -zxvf mysql-5.7.23-linux-glibc2.12-x86_64.tar.gz
2)修改权限
chown -R mysql:mysql mysql-5.7.23-linux-glibc2.12-x86_64
3)创建mysql data名录
mkdir /home/mysql/data
4)在etc新建配置文件 my.cnf ,内容如下
[mysql]
# 设置mysql客户端默认字符集
default-character-set=utf8
[mysqld]
skip-name-resolve
#设置3306端口
port = 3306
# 设置mysql的安装目录
basedir=/usr/local/mysql-5.7.23-linux-glibc2.12-x86_64
# 设置mysql数据库的数据的存放目录
datadir=/home/mysql/data
# 允许最大连接数
max_connections=200
# 服务端使用的字符集默认为8比特编码的latin1字符集
character-set-server=utf8
# 创建新表时将使用的默认存储引擎
default-storage-engine=INNODB
#是用来配置数据库名和表名的大小写的。1表示不区分大小写,0表示区分大小写
lower_case_table_names=1
#server接受的数据包的大小
max_allowed_packet=16M
5)安装和初始化
[mysql@ns1 bin]$ ./mysql_install_db --user=mysql --basedir=/usr/local/mysql-5.7.23-linux-glibc2.12-x86_64 --datadir=/home/mysql/data/
2018-09-09 22:38:25 [WARNING] mysql_install_db is deprecated. Please consider switching to mysqld --initialize
2018-09-09 22:38:27 [WARNING] The bootstrap log isn\'t empty:
2018-09-09 22:38:27 [WARNING] 2018-09-09T14:38:25.160941Z 0 [Warning] --bootstrap is deprecated. Please consider using --initialize instead
2018-09-09T14:38:25.161688Z 0 [Warning] Changed limits: max_open_files: 1024 (requested 5000)
2018-09-09T14:38:25.161703Z 0 [Warning] Changed limits: table_open_cache: 407 (requested 2000)
[root@ns1 mysql-5.7.23-linux-glibc2.12-x86_64]# cp ./support-files/mysql.server /etc/init.d/mysqld
[root@ns1 mysql-5.7.23-linux-glibc2.12-x86_64]# chmod +x /etc/init.d/mysqld
启动
/etc/init.d/mysqld start
6)获取初始密码
[mysql@ns1 ~]$ cd /home/mysql/
[mysql@ns1 ~]$ ls -a
.   .bash_history  .bash_profile  .cache   data      .mysql_secret
..  .bash_logout   .bashrc        .config  .mozilla  .viminfo
[mysql@ns1 ~]$ vim .mysql_secret
7)登入mysql root 用户
./mysql -hlocalhost -uroot -p
Enter password:
Welcome to the MySQL monitor. Commands end with ; or \\g.
Your MySQL connection id is 13
Server version: 5.7.23
Welcome to the MySQL monitor. Commands end with ; or \\g.
Your MySQL connection id is 13
Server version: 5.7.23
Copyright (c) 2000, 2018, Oracle and/or its affiliates. All rights reserved.
Oracle is a registered trademark of Oracle Corporation and/or its
affiliates. Other names may be trademarks of their respective
owners.
affiliates. Other names may be trademarks of their respective
owners.
Type \'help;\' or \'\\h\' for help. Type \'\\c\' to clear the current input statement.
mysql> set password = password(\'111111\');
Query OK, 0 rows affected, 1 warning (0.00 sec)
Query OK, 0 rows affected, 1 warning (0.00 sec)
8)创建可以从任何机器登录mysql server的用户名 和密码
create user \'jason\'@\'%\' identified by \'123\';
在其他服务器使用如下命令即可登录
mysql -hns1 -ujason -p
mysql 安装成功
以上是关于linux 安装mysql的主要内容,如果未能解决你的问题,请参考以下文章